6 Beginner Mistakes and How to Fix Them
Just getting started with photography and feel like your pictures are missing something? You’re not alone. Nearly every beginner photographer makes a few common mistakes, from crooked horizons to poor composition. In this article, we’ll show you how to avoid these beginner mistakes, improve your composition and editing, and sharpen your photography technique.
There are countless ways to enhance your photos, and professionals use many of them to get the best possible results. But the basics are still what matter most. If you can master them, you’re halfway there.
To demonstrate this, I’ll use the same scene repeatedly, correcting common mistakes step by step. You’ll see how the image gradually transforms from a beginner shot to one that looks like it was taken by a more experienced photographer. We’ll go through how to fix these six beginner mistakes:
- Tilted horizon
- Shooting from the wrong distance
- Distractions around the main subject
- Shooting from the wrong height
- Poor composition
- Lack of editing
Camera equipment doesn’t matter for any of these issues. While my camera is decent, I limited myself to a 28mm focal length and f/8 aperture, roughly equivalent to the main lens on the average smartphone. My images have less noise, but in the middle of the day, that doesn’t make much of a difference.
What it looks like at the start
Let’s say you want to photograph the Janáček Theater in Brno, Czechia. A quick snapshot taken without much thought might look something like this:

Of course, there are many ways to approach a subject like this, depending on how the photo will be used. In the following steps, I’ll demonstrate what I would change.
Tilted horizon
A crooked horizon is one of the clearest signs of an amateur photo. It’s not that the professionals have a perfectly trained hand, they just straighten the image later in post-production.
It’s very helpful if your device can display an electronic level while shooting. I use mine almost all the time.
Here’s how the image looks after fixing the horizon:

Wrong shooting distance
This one depends on the particular shot. Sometimes you want to include the surroundings, but often they’re full of distractions that don’t add much.
Moving in closer or zooming in lets you focus more on your main subject and eliminate areas that might otherwise contain distractions.
In this case, I kept the 28mm focal length and simply moved closer to the building.

Distractions around the subject
We’re closer now, but still have to pay attention to the sides of the image. In this photo, the red poster is distracting, and the patches of lawn that randomly cut into the frame don’t help either.
I tried moving to a different spot where these elements wouldn’t be visible. Sometimes a bit of greenery can be useful, but in this case, I gave it up for a more precise composition. Symmetry, achieved by shooting exactly along the axis of the architecture, is often effective and worth trying. But watch the details. Sometimes even standing one tile over can ruin the effect. On the other hand, paths aren’t perfectly paved or something else doesn’t fit and you never achieve perfect symmetry.

Shooting from eye level
Here’s the tricky thing: Tourist photos tend to look like they were taken by tourists, mostly because they’re shot from eye level. But if you simply squat down, you get a different, more interesting perspective.
In this case, we’re in an open space, so the difference is subtle, but still noticeable.

Centered subject
Another common beginner mistake. Yes, putting your subject in the middle of the frame helps viewers find it, but it doesn’t give them much else to look at.
It’s more engaging to move your subject to the side and use the empty space for a “secondary subject.” In this case, the paving stones act as leading lines that guide the eye to the theater. You can also include flowers, a fountain, a pedestrian, benches, or other objects.

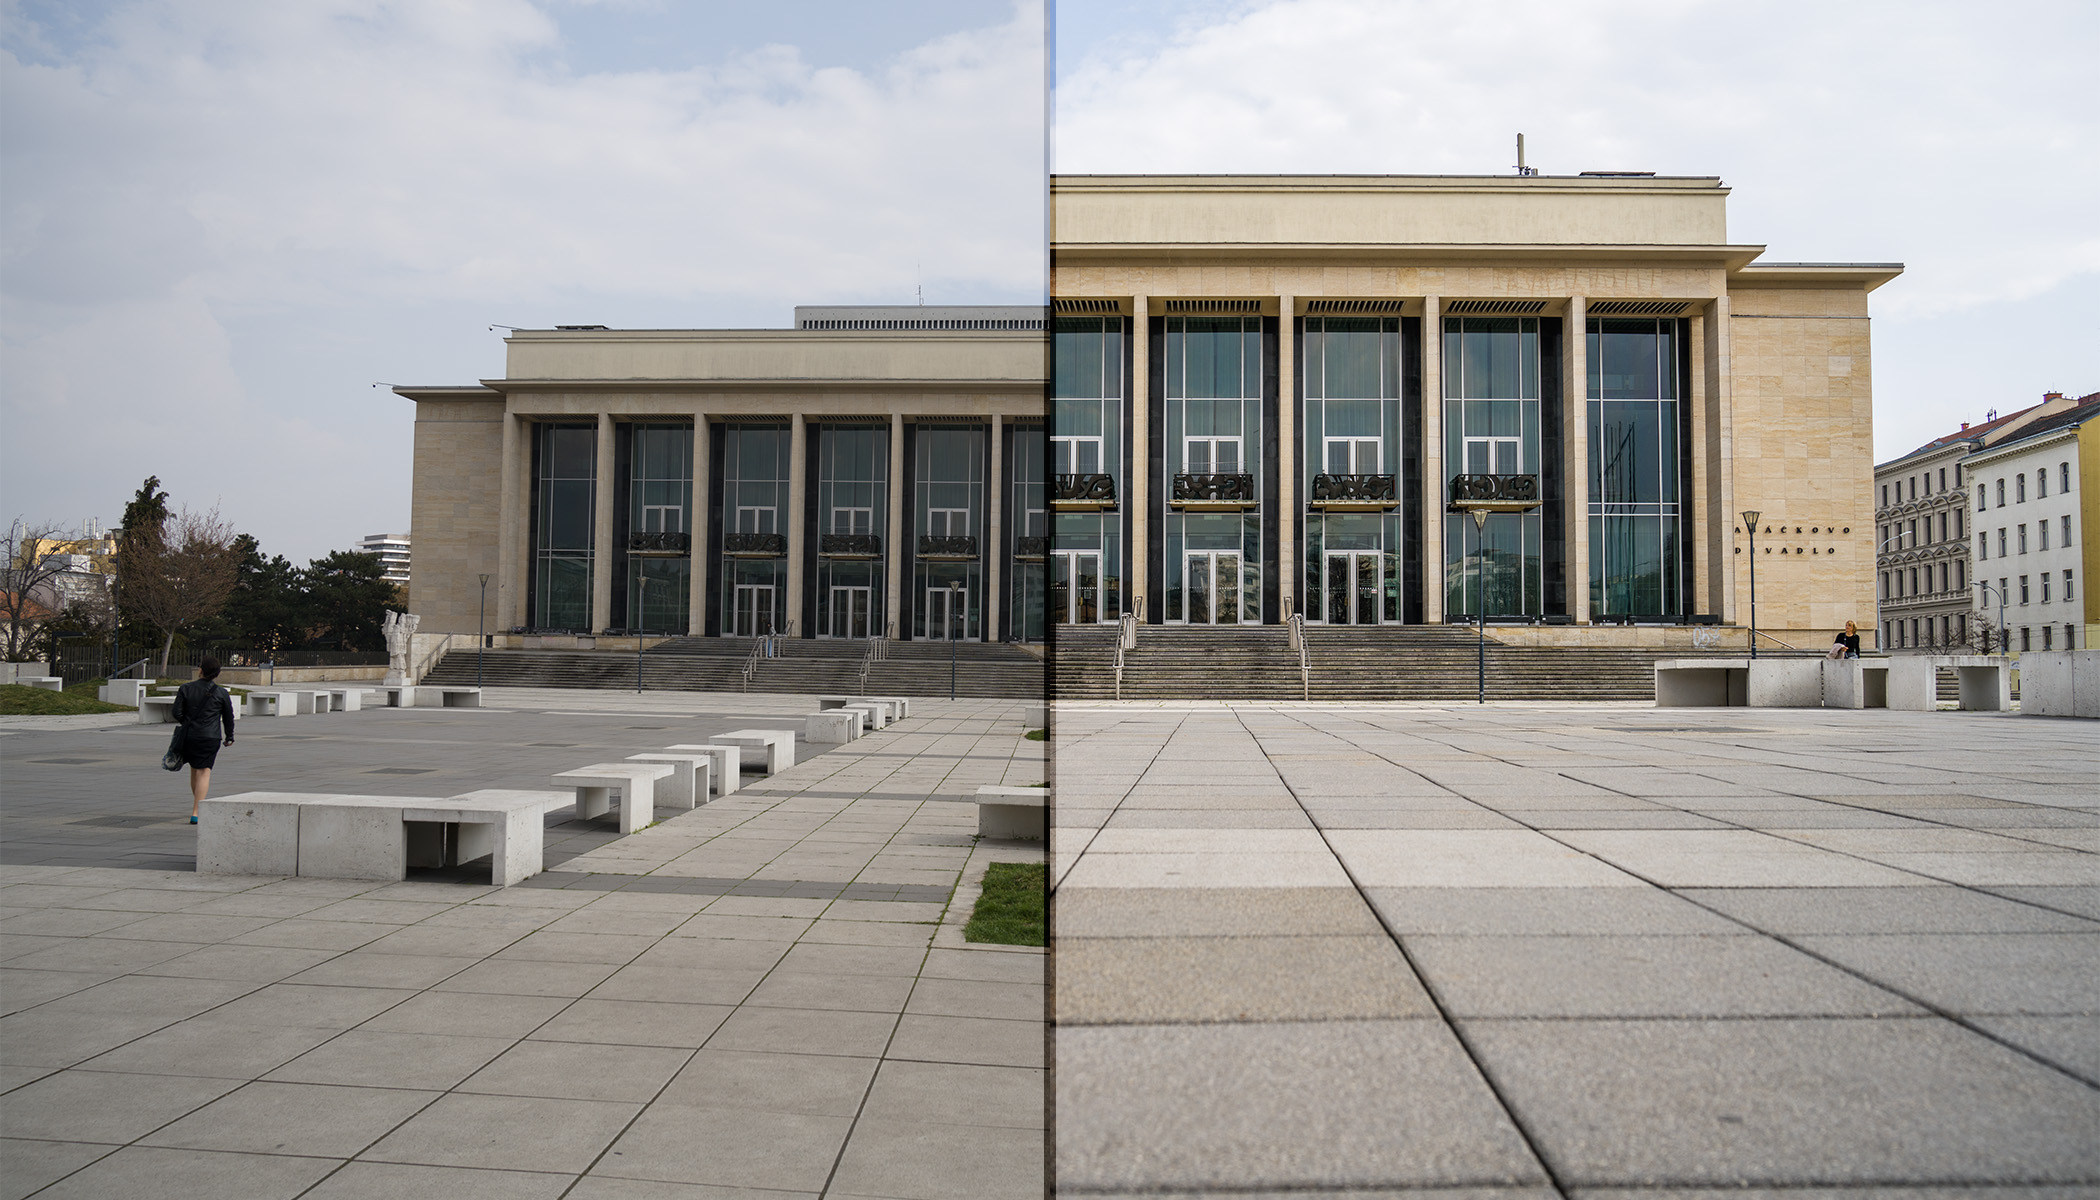
No editing
I already mentioned fixing the tilted horizon, a basic but important adjustment.
There are many other post-production adjustments that can make a big impact. For example, in Zoner Studio, you can make meaningful changes in seconds using a few sliders.
The most important pair is Exposure and Contrast, followed by Lights and Shadows.
Exposure lets you quickly fix photos that are too dark or too bright. Contrast is often underrated, but increasing it can make your image much more dynamic. If it’s suddenly too dark or light after adjusting Contrast, there are Lights and Shadows sliders that allow you to darken only the very bright or brighten the very dark areas. This way, the image still has higher contrast, but isn’t covered in darkness.

There are plenty of other options for playing around. Just for fun, here’s a version where I also corrected lens distortion and perspective distortion, removed tourists, darkened the sky, and added vignetting.

Nothing too complicated
While there are more things you can do, it’s interesting to see how far you can get just by following these three simple rules: Get close, lower your perspective, and keep your horizon straight. Other corrections matter too, but if you’re just starting out, start with these.
Questions and answers
Is editing worth it?
Yes. Even small adjustments to exposure, contrast, highlights, and shadows can dramatically improve your photos.
How can I recognize a beginner photo
By its tilted horizon, poor composition, wrong shooting height, and lack of editing.
Why is a tilted horizon bad?
It’s distracting and looks unprofessional. Use an electronic level or straighten it during editing.
Why should I get closer to my subject?
It helps emphasize the main subject and cuts distractions in the background.
How can I remove distractions?
Change your position or camera angle.
Why not always shoot from eye level?
A lower perspective is more interesting and less “touristy.”
Where should I place my main subject?
Not always in the center. Try moving it around using the surrounding elements to lead the viewer’s eye.