Monitor Calibration Using Hardware
Don’t let the title scare you, there’s no need to purchase expensive equipment. You can create your own display profile using calibration hardware that can be easily rented. Whether it’s for the internet or for printing, calibration hardware can help you get more accurate colors in your photos in the future.
The first article in this series covered the terminology related to calibration and answered questions about how everything works. If you haven’t read it yet, it’s a good idea to read through it so you know the differences between calibration and profiling, and the differences between the two main types of calibration hardware.
If you already have calibration hardware, or you are debating whether to rent or purchase it, read on to see how it’s used.
Calibration and profiling
Even though you can use universal software like ArgyllCMS with the user interface DisplayCAL, it’s not the best option for beginners due to the large number of options and controls. A much more straightforward option is to use software from calibration hardware manufacturers. There are several of these which vary depending on your operating system, so I won’t describe each software’s process step-by-step. Nevertheless, the software is made to be user-friendly, so the process is very similar:
- Let your monitor warm up to operating temperature, about 30 minutes. For the optimal calibration, you should not have the monitor in direct sunlight. Ideally, there should be stable, controlled ambient lighting. However, this is probably only possible for those in a studio or basement.
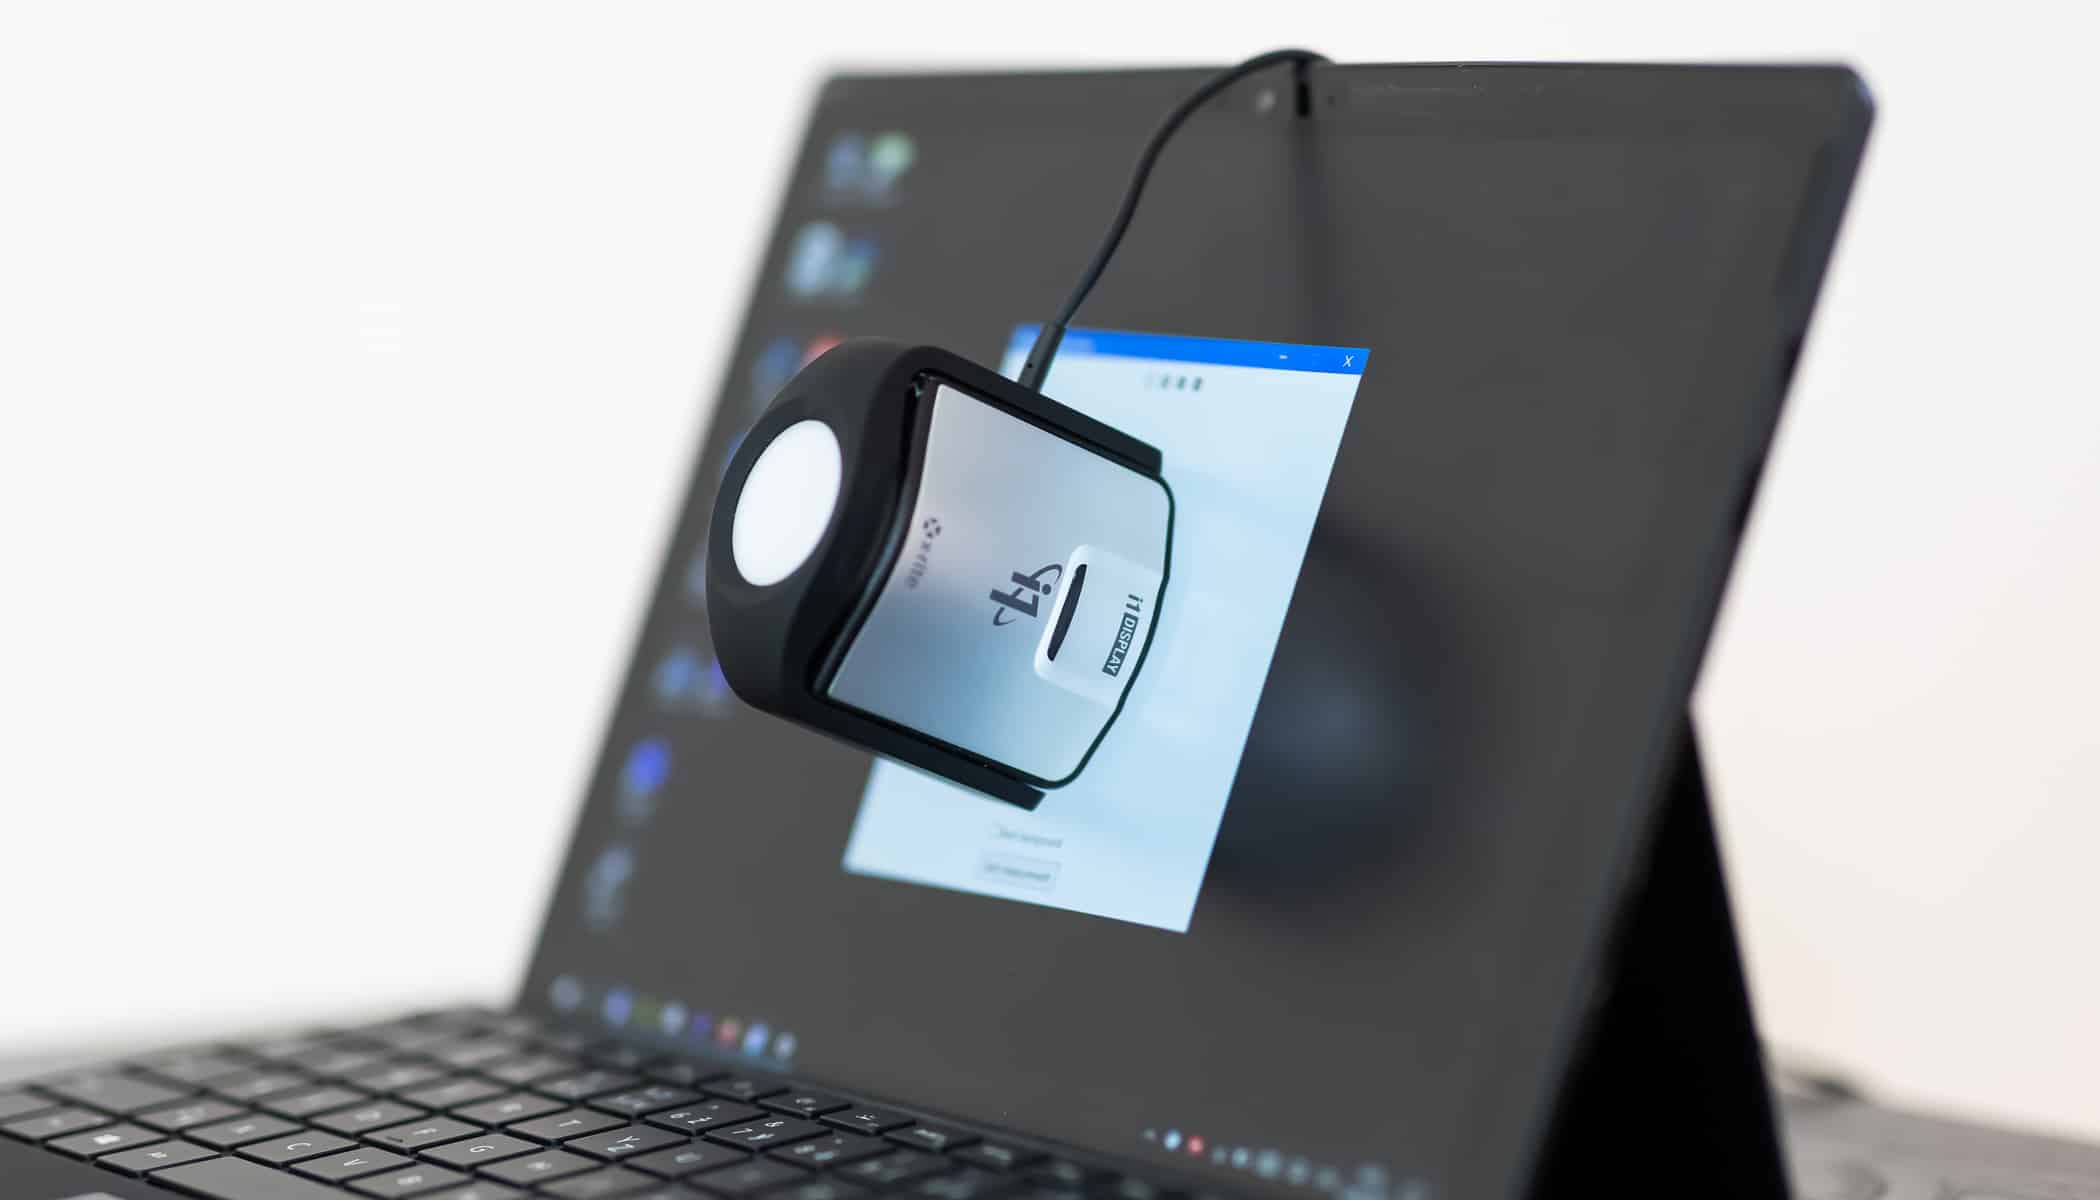
- Connect the hardware to the USB port and run the software.
- The software will direct you to select the monitor type and the target you want to achieve. The safest target setting is gamma 2.2 and a color temperature of 6500K. However, since your eyes quickly adjust to different color temperatures, it’s a good idea to choose “Native.” That is, a color temperature that is native to the monitor instead of a specific color temperature. Standard monitor luminance is 120 cd/m2, but it highly depends on ambient light. In some cases, it may be better to aim for higher values, but you may see an unexpectedly dark output when printing.
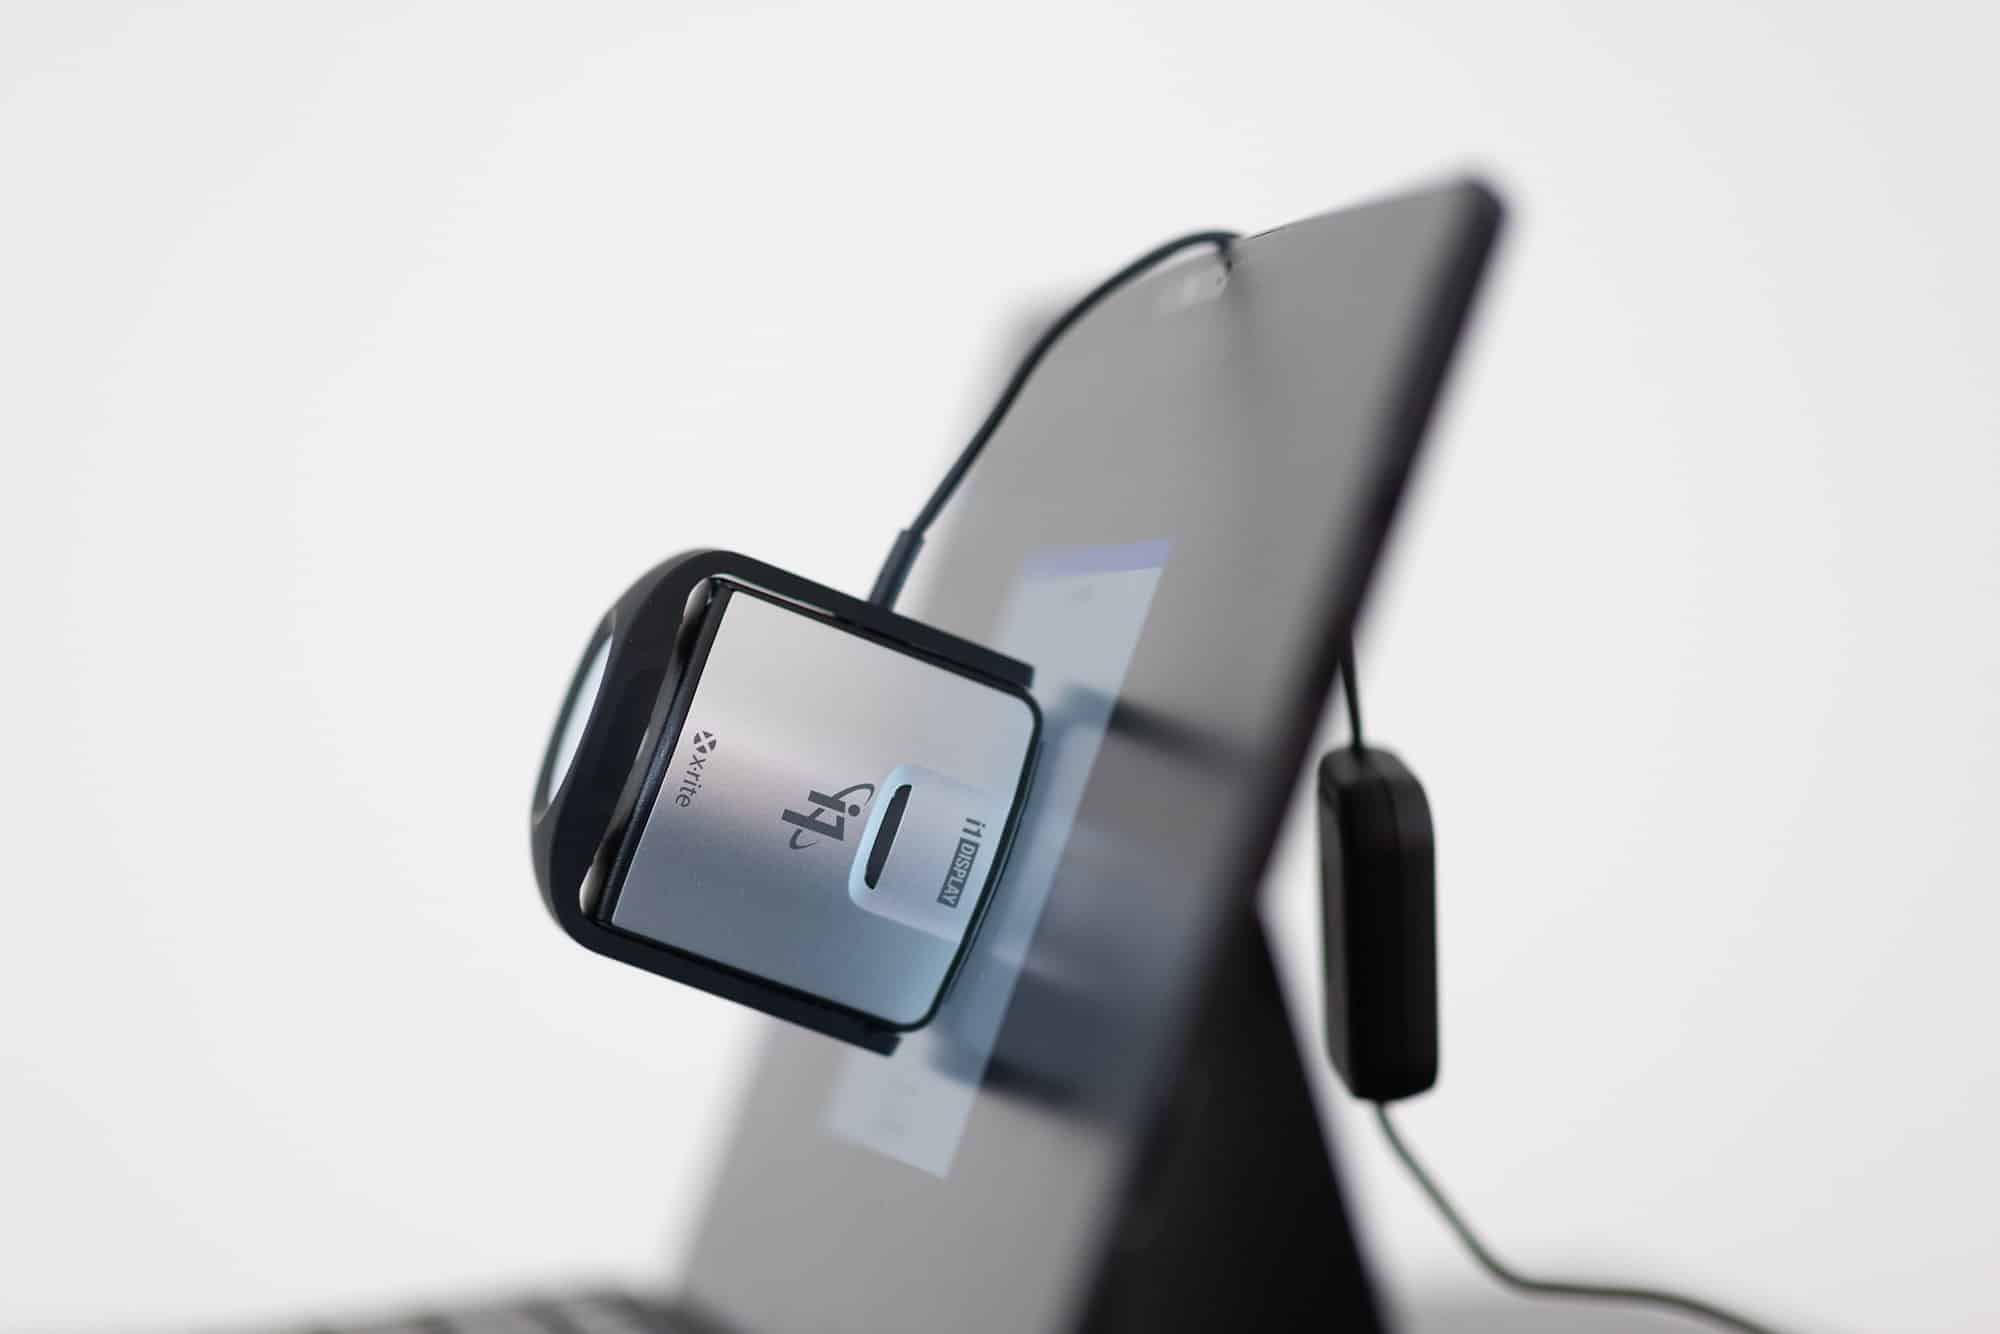
- After starting the actual measurement process, you will be prompted to fasten the device to a designated location on your screen.
- The first stage is manual calibration. Here the device will help you adjust the monitor’s controls to get the image as close as possible to it. This step is about as easy as playing a simple computer game. As you press buttons, the device periodically measures the area on the screen and tells you if it’s too blue or not enough blue and you adjust accordingly.
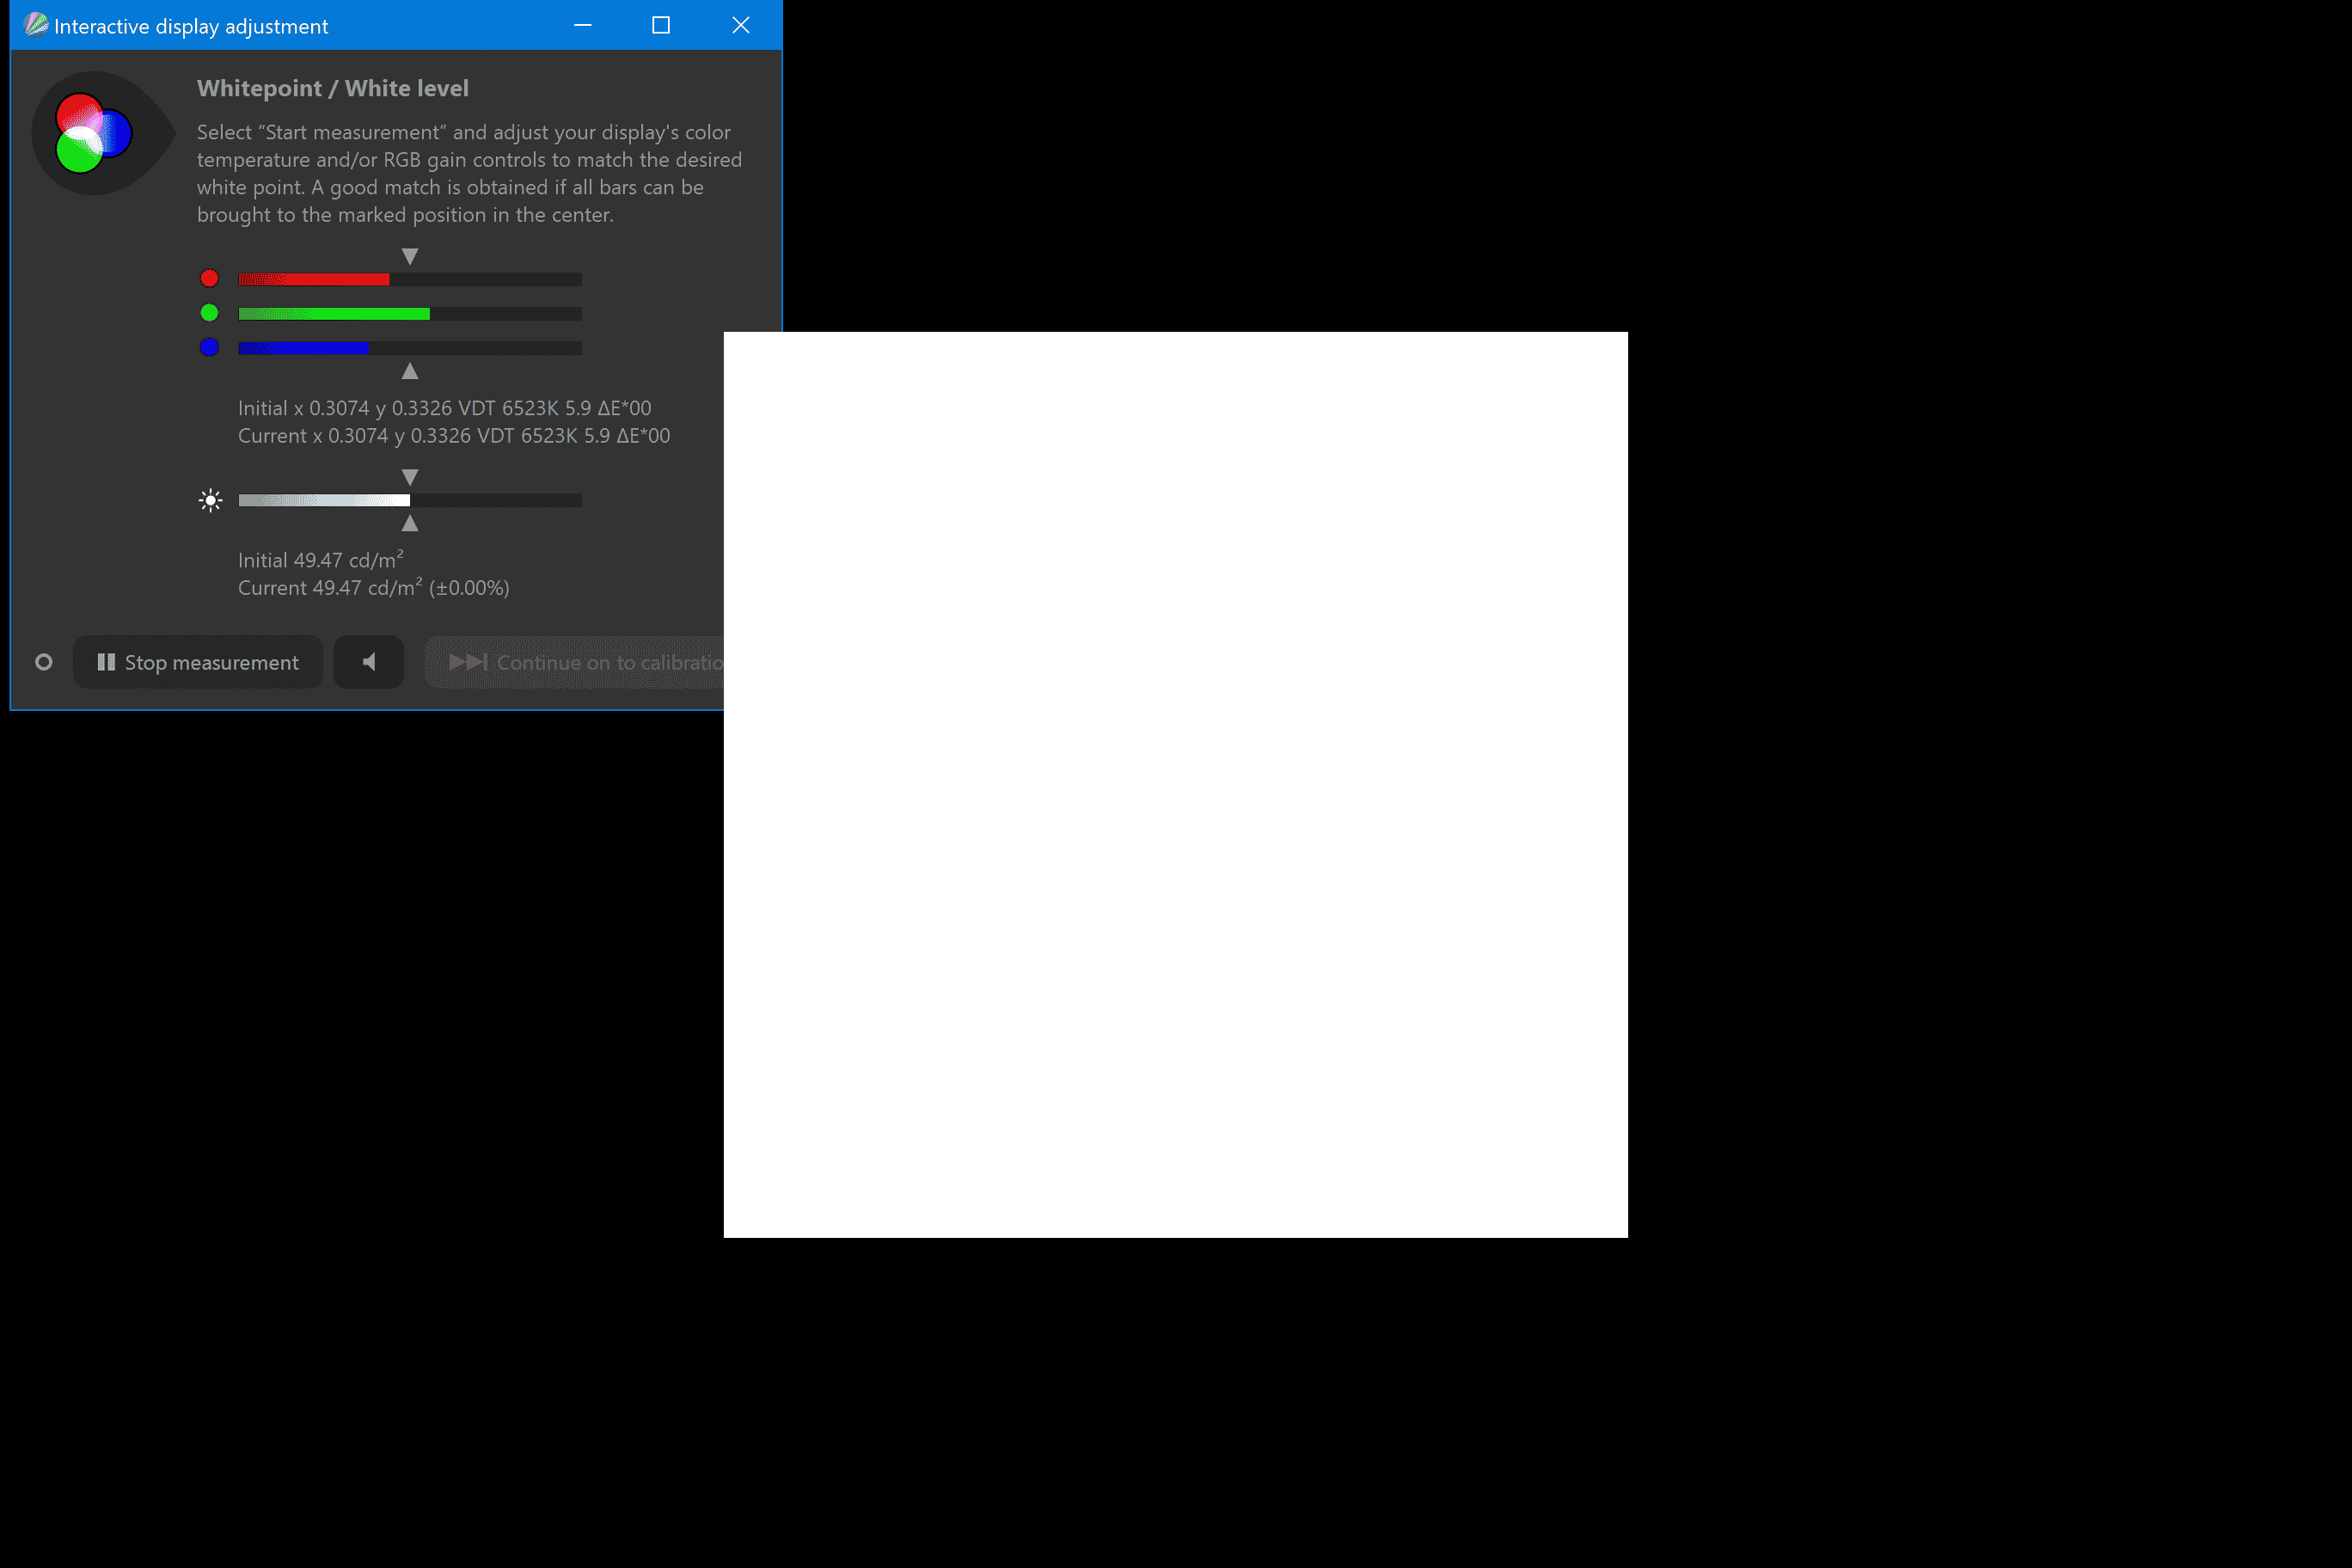
Manual calibration, when the device continually measures the white space in the middle and guides you to the accurate correction - Once you’re happy, confirm the current settings and you will go to the next stage automatically.
- While the colors below the device are changing, you have about 5-10 free minutes while the program automatically measures and calculates.
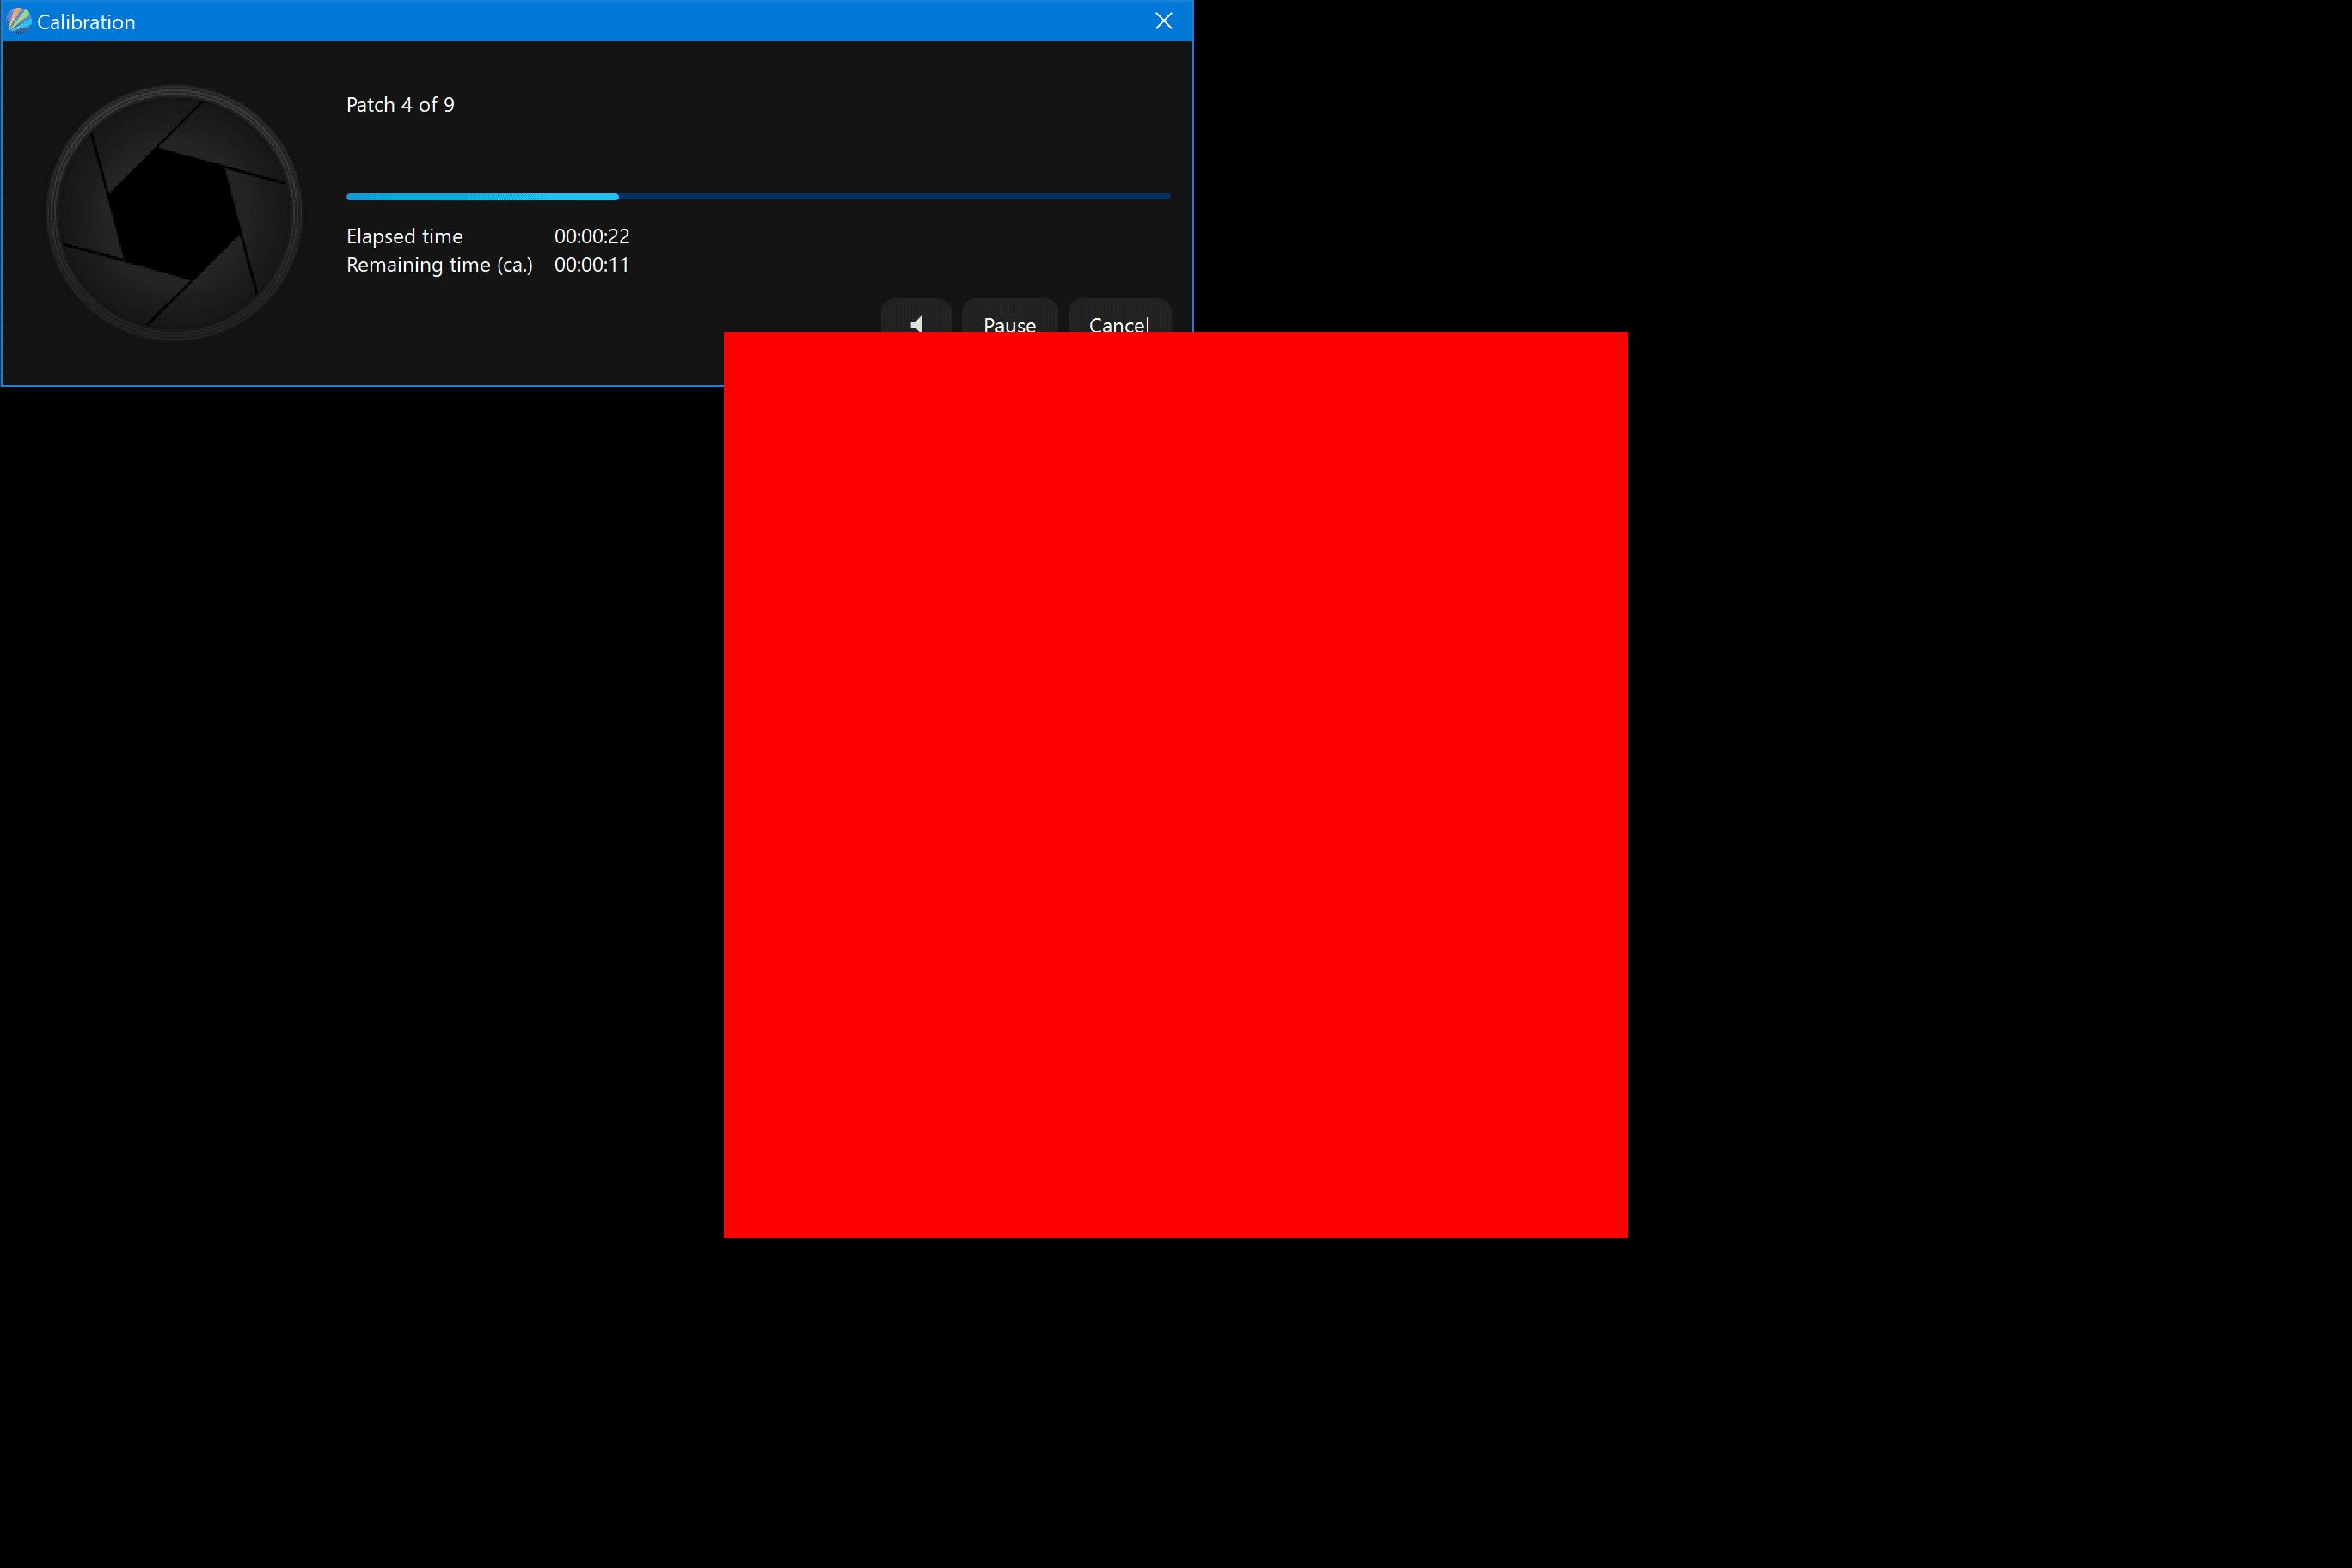
- Once complete, a color calibration file or ICC (International Color Consortium) profile is created. This file can make minor corrections to the monitor using a LUT and also tells the applications which colors to expect from the monitor.
From this moment on, you should not make any changes to the display settings in order for the ICC profile to match reality. Also, don’t touch the color settings in the graphics card drivers and so on. - The device manufacturer’s software should automatically assign the display profile to the monitor. The same can be manually done in Windows when you open the old control panel and choose color calibration (it does not have an equivalent in newer control panels).
Be careful, the profile is not used automatically
Unfortunately, for reasons that go far back, Windows doesn’t modify program colors to match the display profile. It’s up to each application to request a display profile from the system, use it to modify the colors, and then display the modified colors. It’s best to have the monitor and computer using the profile.
There are a large number of programs that do not perform these steps at all and display the wrong picture. Nevertheless, calibration will still take effect because the monitor settings apply, but that’s only half the solution. Fortunately, more advanced photo editing software, including Zoner Photo Studio, doesn’t have this issue and uses the display profile automatically. You just usually need to restart after profiling. For other applications, you need to make sure they support ICC profiles (they aren’t common at all in video players). Also, make sure that ICC profiles aren’t disabled (for example the picture viewer XnView allows it to be enabled, but for faster speed, it is disabled by default).
It is possible to encounter even stranger issues such as when switching to or from full screen mode while playing certain computer games. The system clears the monitor‘s LUT table, completely changing the colors. This hopefully doesn’t happen much anymore, but if it does, there is a useful program called Color Profile Keeper that keeps the correct LUT in these situations.
Calibrating your printer
Advanced users might consider calibrating their printers, but that’s an entirely different topic that would require a separate article. A simple colorimeter is no longer sufficient for this purpose. Instead, a spectrophotometer must be used. The tricky part is that the calibration is tailored not only to the printer itself (and its system drivers), but also to the specific brand and type of paper. This means more work and a new calibration tool appearing each time you decide to use a new medium.
Calibration and profiling are worth the trouble
In recent years, higher quality monitors are much better than they used to be. But, they are still not perfect, and with most monitors, you have no guarantee. For peace of mind, it’s better to calibrate and profile so you have greater control over the photo editing results.
As an aside, after using the calibration hardware, the software usually displays a changeable “before” and “after” image. What you see may surprise you.
There are no comments yet.