

Fire Photography: 3 Spectacular Techniques for Safe, Eye-Catching Shots
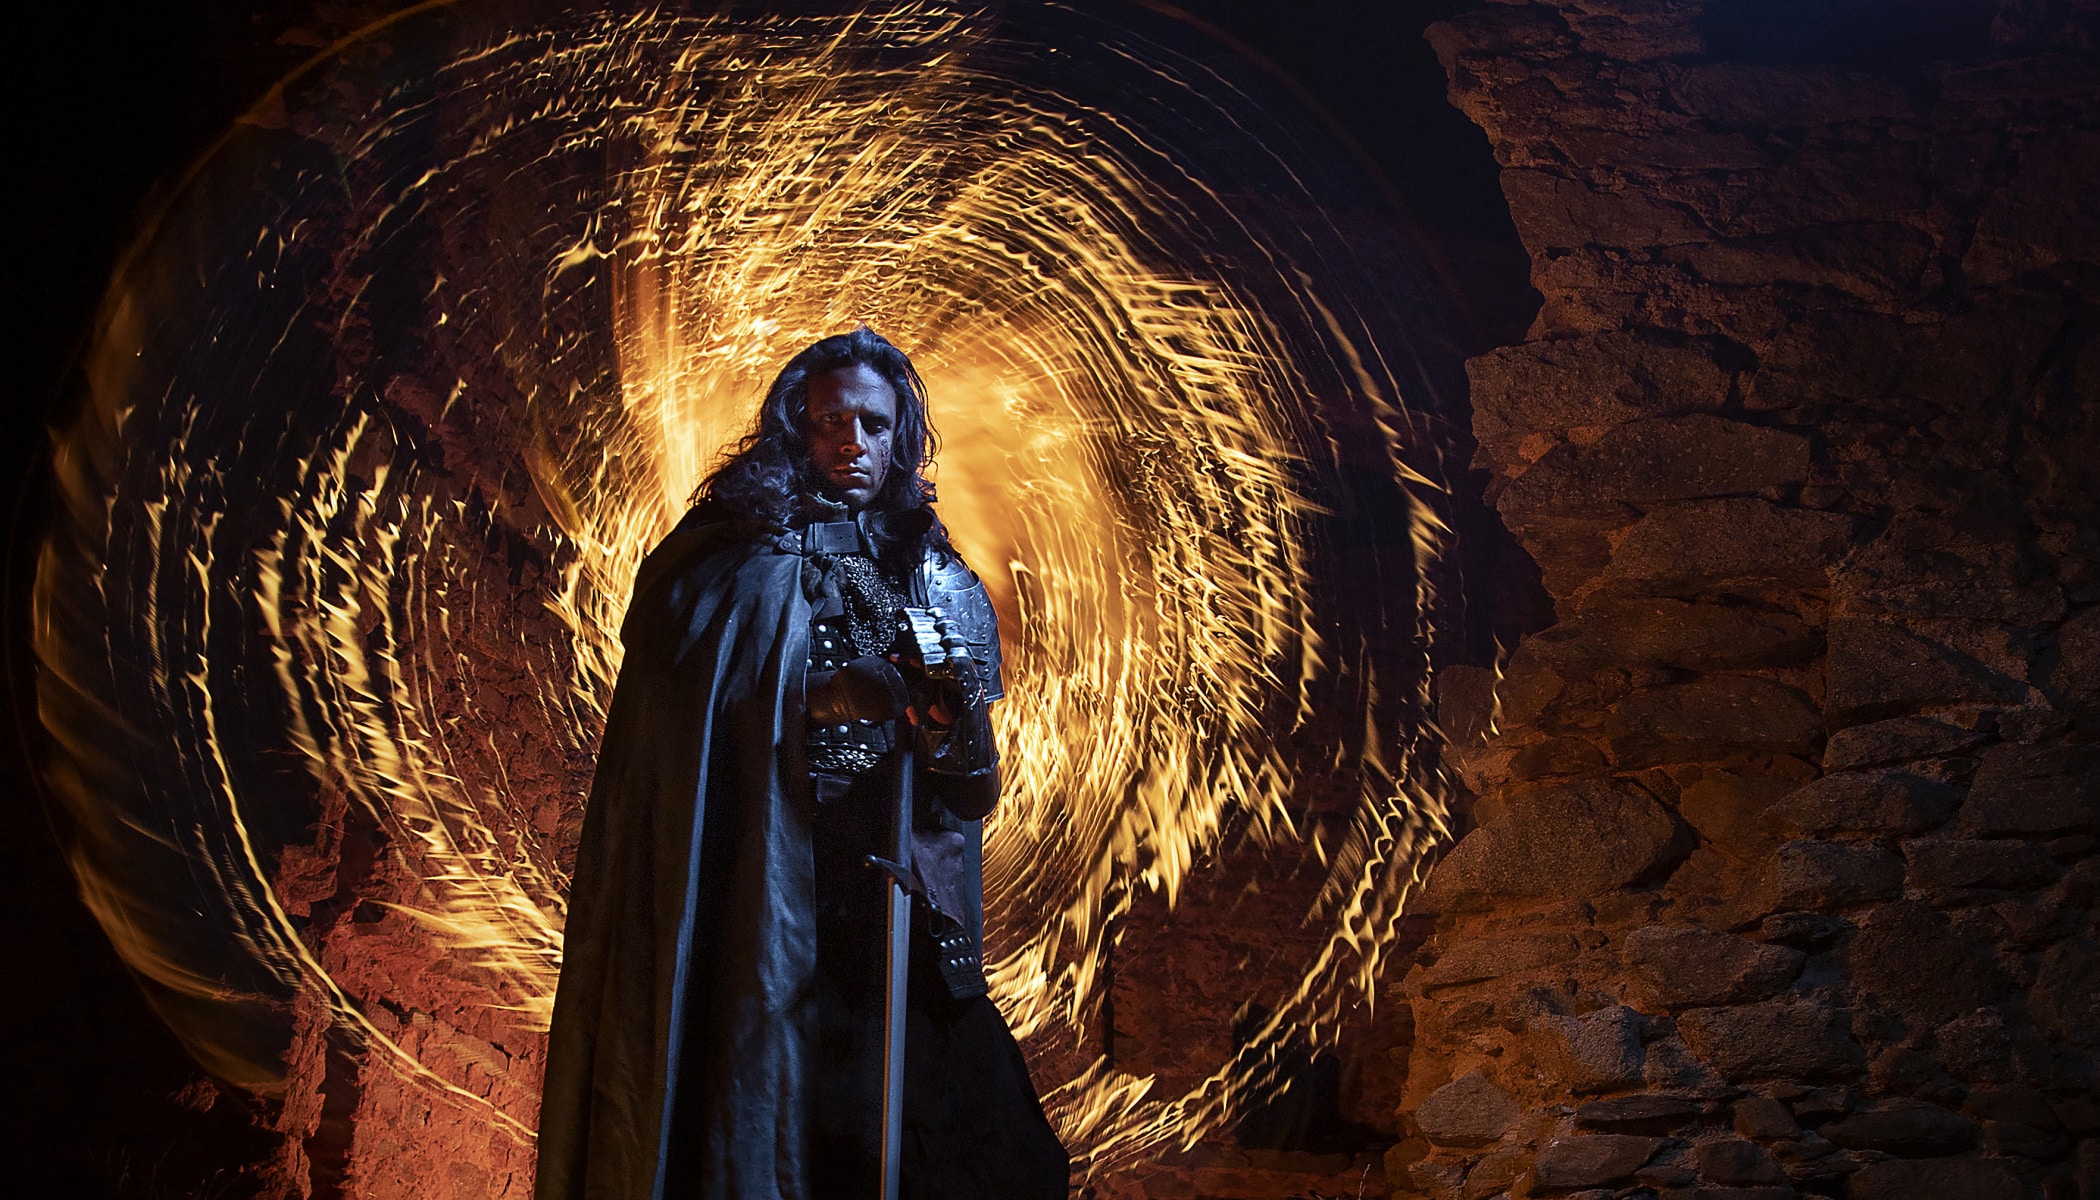
Fire is one of the most dramatic subjects you can photograph. From fireballs to flames dancing in your hands and long-exposure images created with a fire staff, these techniques can produce unforgettable photos. In this article, I show you how to capture fire safely, choose the right camera settings, and get the most out of each shot.
In this article, you’ll learn how to:
- Set up your camera for fire photography.
- Capture explosions and fireballs.
- Create striking fire effects even without photographing a fire show.
- Safely photograph flames in your hands.
- Use a fire staff for long exposures.
- Stay safe when working with fire.
Fire is something that catches your eye and makes a strong impact in photographs. Fire has been important to people since ancient times. It has provided warmth and was used for cooking, metalworking, and glassmaking. At the same time, it represents danger, making many associate it with hell, passion, and raw energy.
These qualities naturally carry over to photography that features fire, making fire photography an exciting technique worth exploring. In this article, I walk you through the basic approaches, safety precautions, and camera settings you need. Plus, one more tip— fire looks just as impressive on video as it does in still photographs. Record a few short video clips—you can easily turn them into a striking social media reel later.
How to capture fireballs
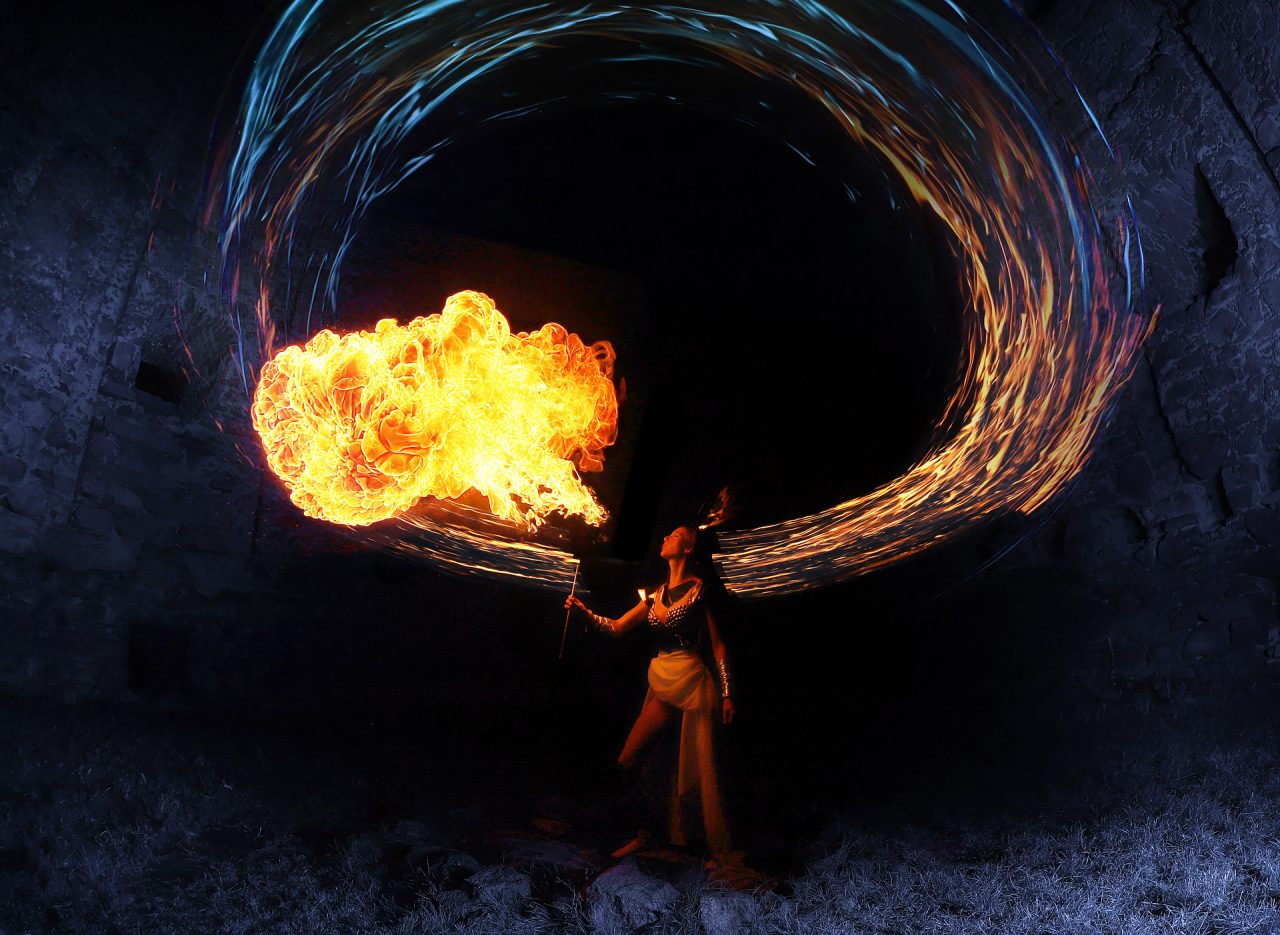
Fire is intense, dynamic, and unpredictable. If you’re photographing a fireball or other type of explosion, you often need shutter speeds as fast as 1/8000 s to capture the texture.
Set up your camera before lighting the fire, since autofocus often struggles in dim light or in the dark. Focus on your subject first, then switch to manual focus. To be on the safe side, choose a greater depth of field, around f/8. It’s best to use ultra-fast burst mode and choose the most impressive shot afterward.
Creating fireballs for photography
Large fire effects occur when flames ignite in a fine mist of flammable liquid suspended in the air. During professional fire shows, the performer spits a fine mist of flammable liquid over a torch, producing that familiar burst of flame. The resulting fireball can be surprisingly large, so leave plenty of room around it when composing your shot.
If you’re photographing a product in the studio, you can create a similar effect yourself using the same basic principle. Hide a lit candle behind the subject and use lamp oil (which is less odorous than gasoline), deodorant, or nail polish remover poured into a spray bottle as fuel for your fire. Mount your camera on a tripod, focus, turn off autofocus, use a remote shutter release, and the moment you spray the fuel over the candle, begin shooting in burst mode.

Lighting a scene with a fireball
Fire is a powerful enough light source that in most cases it’s enough to illuminate the entire scene. However, if you want to enrich the image and balance the warm orange tones with cooler tones, your options are limited. At extremely fast shutter speeds over 1/250s, a conventional flash doesn’t make much of a difference. On the other hand, continuous lighting like LEDs or RGB lights isn’t powerful enough to be visible during extremely short exposures.
You can use powerful tactical flashlights (around 2,000 lumens), which stand a chance of showing up in the photo. However, keep in mind that this is a harsh, spotlight-type light, and avoid aiming it straight at your subject from the front. The second option is to shoot in daylight—ideally on a cloudy day with soft light. The soft ambient light preserves detail throughout the scene. You can fine-tune the colors during post-processing.


TIP: Whenever possible, work with fire outdoors. If you need to shoot indoors, be as careful as possible. Remove all flammable materials within at least one meter of the setup—no curtains, fabric modifiers, or paper or plastic backdrops. Before you start shooting, have a bucket of water and wet towel ready. Hopefully, you won’t need either of them—but it’s always better to be prepared.
How to photograph flames in your hands
Want to add real flames to a portrait without relying on photo editing software? This technique makes your model appear to hold fire in the palm of their hands. It looks dramatic, and if done correctly, is safer than it might seem.
Start by making a solution of water and dish soap, which produces sturdier bubbles. Next, introduce a flammable gas, typically butane from a light refill or aerosol products. Mix the soap in a bowl of water, submerge the gas source in it, and carefully release the gas so that bubbles form on the surface. The larger the bubbles, the larger the flame.
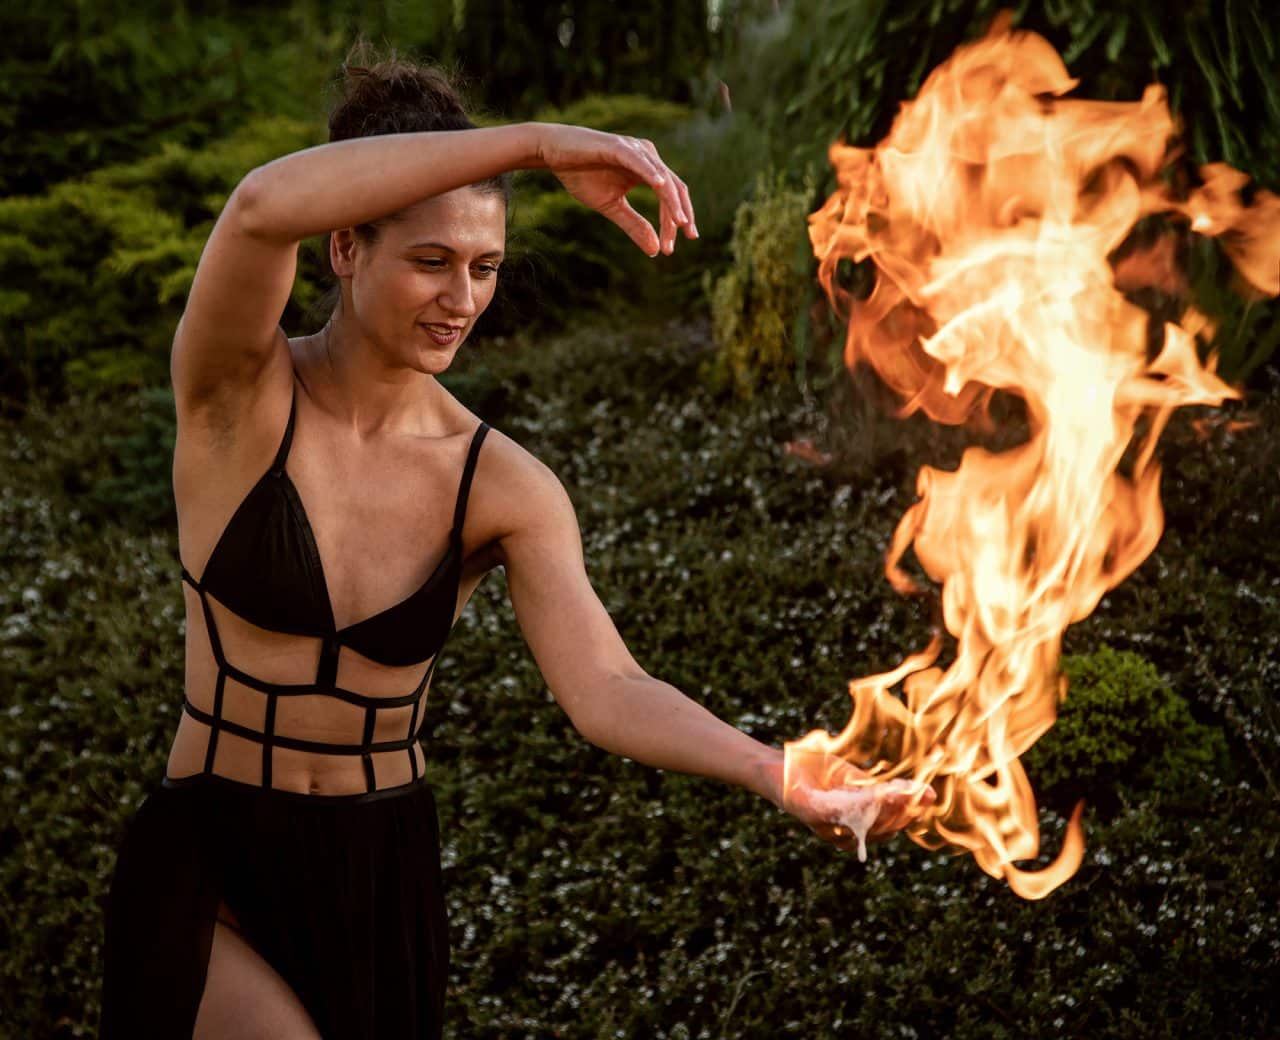
Before lighting the bubbles, the model should wet their hands. Then, they scoop up a handful of bubbles and hold their palms out in front of them, while you ignite the bubbles. The fire burns for about 2–8 seconds, which is enough time to not overheat the skin. As soon as the heat becomes uncomfortable, the model shakes off the soapy solution.

Safety always comes first. Tie long hair back, avoid loose clothing, and choose garments made from thicker materials with short sleeves. Also, if your model is wearing false eyelashes, remember they can be damaged by the heat. Again, have a wet towel ready in case you need to extinguish the fire immediately.
Fire staff photography
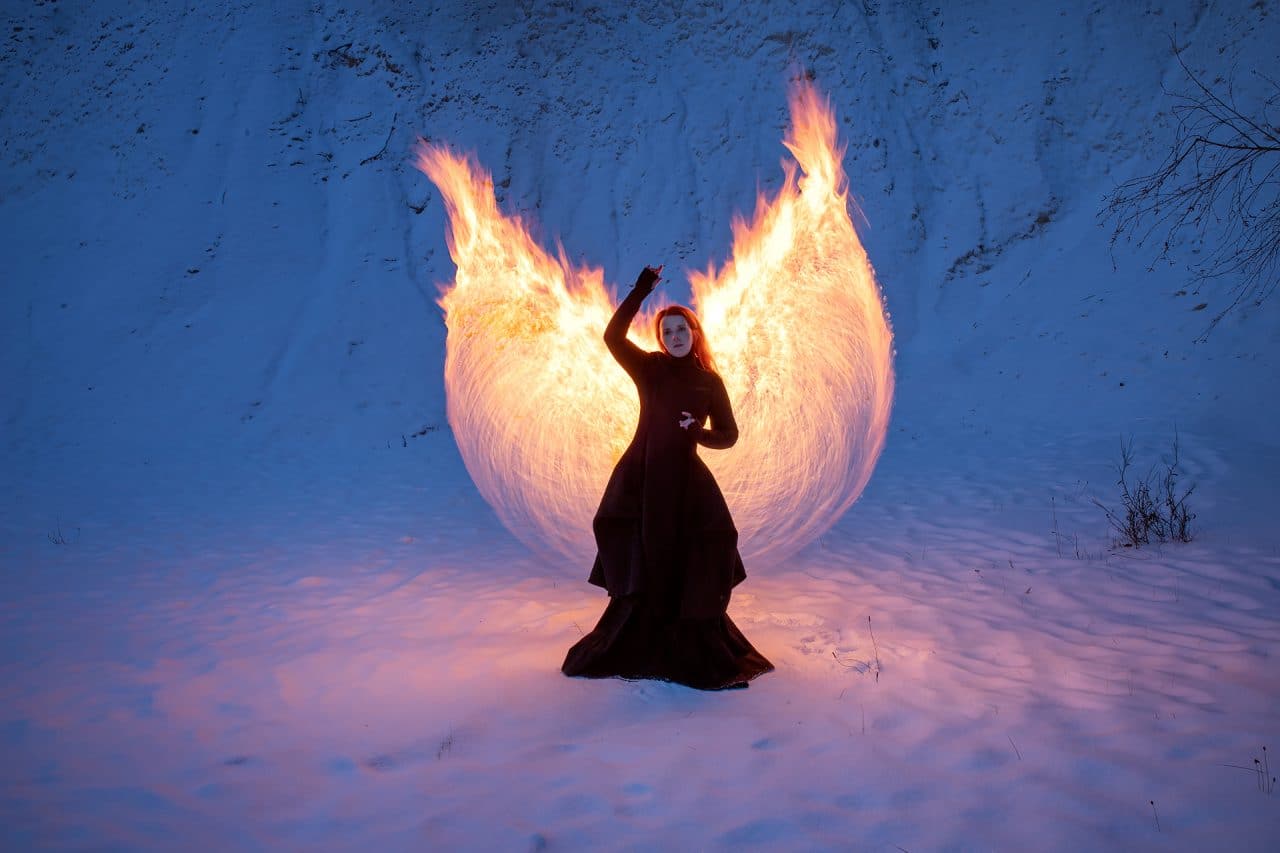
This is a tool for truly daring pyromaniacs. A fire staff creates a large open fire that blazes and burns that you can use to draw and manipulate. Spin it, draw circles around your subject, paint fiery patterns. It’s a very powerful light source, so keep in mind that any additional light you use to illuminate the scene must be powerful enough not to be overshadowed by the fire.

The fire staff should be made of metal, ideally aluminum—it’s lightweight and easy to work with. You can find hollow aluminum tubing at fire shot supply stores or hobby shops. In my experience, lengths from 75 to 150 centimeters work best.
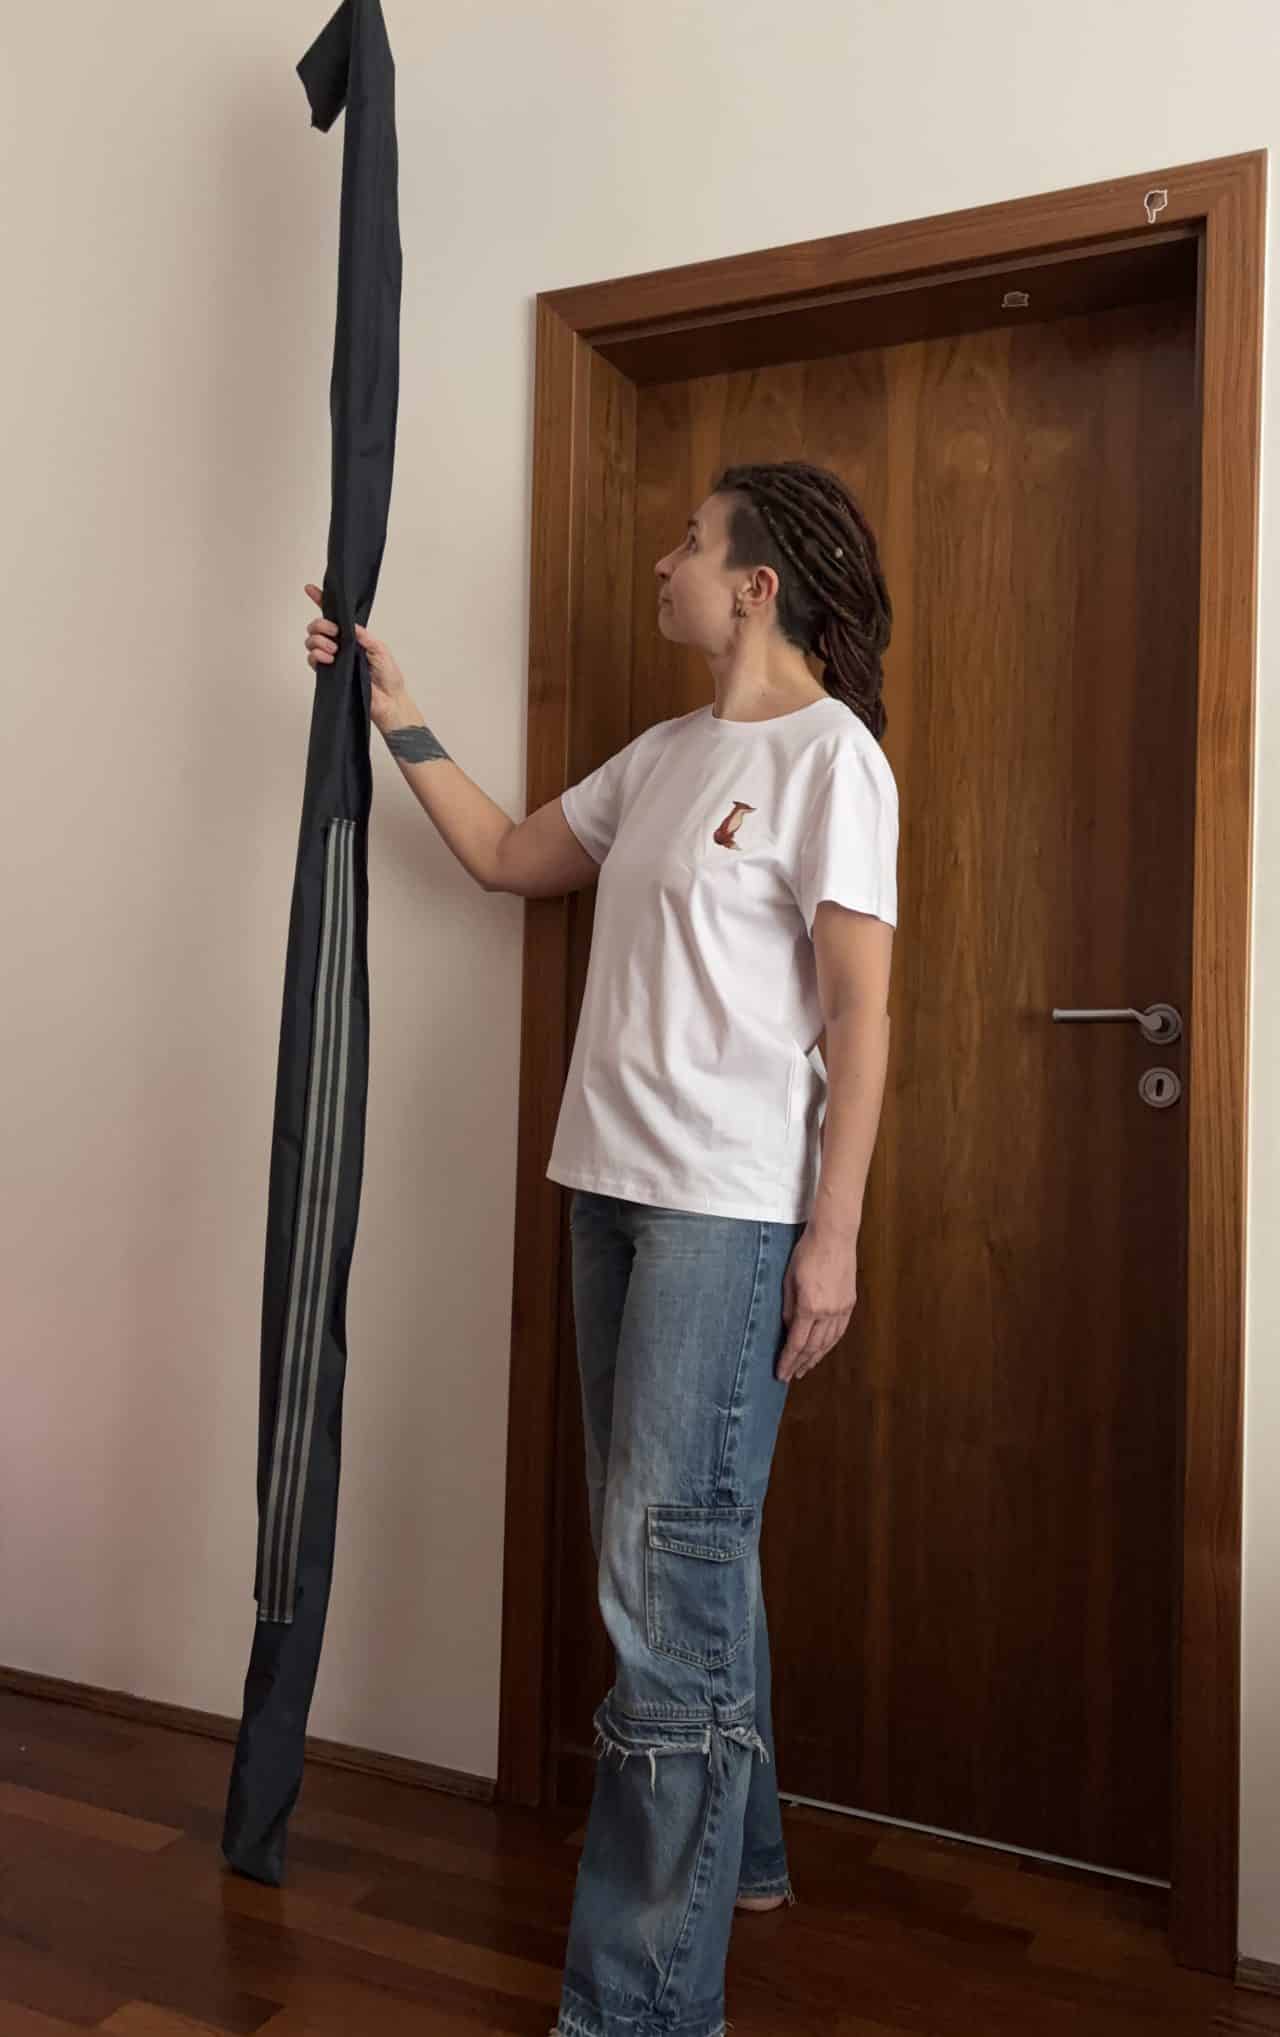
The second key component is Kevlar. This heat-resistant material is commonly used in protective clothing and works perfectly as a burning surface to wrap around the rod. Kevlar absorbs the flammable liquid (kerosene or lamp oil) so it can burn without being damaged. Once the flames go out, it’s ready to use again.
Compared to materials such as paper or natural fabrics, Kevlar is much safer. It doesn’t fall apart, so there are no burning pieces flying through the air. If you’re using Kevlar webbing, wrap it tightly around the staff and stitch the edges together with Kevlar thread. Kevlar sleeves stretch over the tubing, but make sure they’re securely fastened so they stay in place.
Camera settings for fire photography
Fire photography requires somewhat different camera settings than most other types of photography because you’re working with an exceptionally strong light source. Use an aperture between f/11 and f/16. Set your white balance to “incandescent” so the photo doesn’t have a strong orange cast. If you’re using a flash to light your model, don’t forget to attach a warm filter to it. Otherwise, the colors can look unnaturally cool compared to the flames.
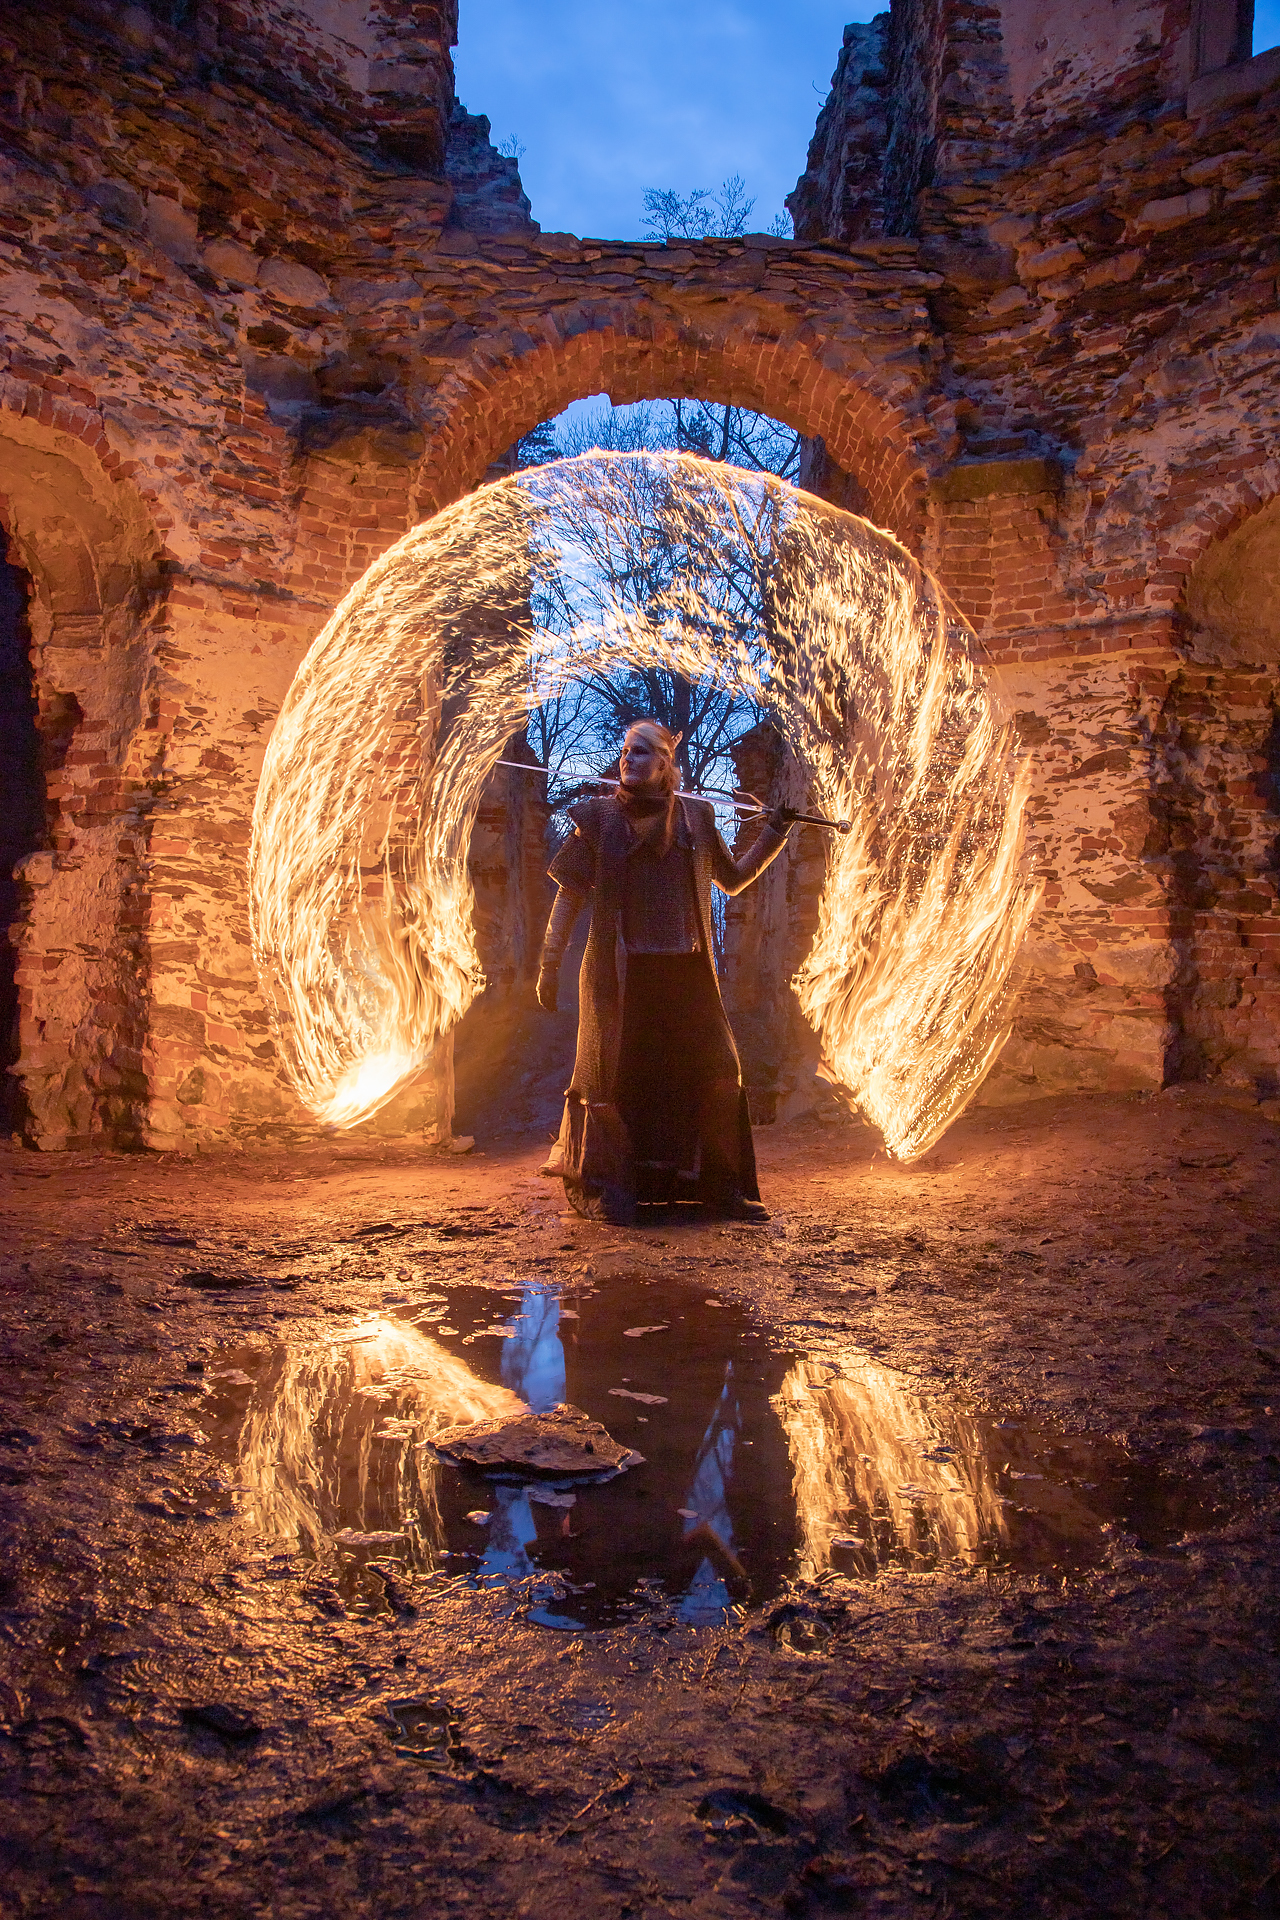
When photographing people, keep an eye on their movement. Even if you “freeze” their movement using flash, the light from the fire continues to illuminate them throughout the exposure, so any movement will show up in the photo.
TIP: To avoid burning your hands when working with a fire staff, invest in a pair of Kevlar gloves. Be careful not to get any flammable liquid on them.
FAQs
What camera settings should I use for fire photography?
Use a very fast shutter speed—around 1/8000 s—and an aperture around f/8. Focus on your subject before lighting the fire and turn off autofocus, as it tends to be unreliable in the dark or in dim light. Shoot using ultra-fast burst mode for the best results.
How can I create a fireball without photographing a fire show?
Hide a lit candle behind your subject and use a flammable liquid, such as lamp oil or nail polish remover applied with a spray bottle, as fuel. Mount your camera on a tripod, focus in advance, and begin shooting in burst mode the moment you spray the fuel over the flame.
Is it safe to photograph flames in your hands?
Yes, provided you follow the proper safety precautions. Flames created from soapy bubbles filled with flammable gas burn for only 2–8 seconds, which isn’t long enough to overheat the skin. Even so, always tie back long hair, wear appropriate clothing, and keep a wet towel handy in case of emergency.
What is a fire staff for long exposure photography made of?
A fire staff typically consists of a lightweight aluminum tube 75 to 150 cm long, wrapped in heat-resistant Kevlar. The Kevlar absorbs flammable liquids, such as kerosene or lamp oil. Once lit, it burns safely without being damaged.
How can I photograph fire safely?
Prevention is key—handle fire outdoors whenever possible, remove flammable materials within a one-meter radius, and always have water and a wet towel on hand. Make sure your model is wearing appropriate clothing and tie back long hair.


There are no comments yet.