

Focal Length Blending: Combine Two Focal Lengths into a Single Photo
A wide-angle lens gives you a beautiful shot with great depth but those distant mountains turn into tiny bumps on the horizon. The solution is a technique called focal length blending—combining two or more photos taken at different focal lengths into a single image that looks natural, even though it couldn’t be captured in a single frame. In this article, I’ll show you how to take the photos, where to place the transition, and how to avoid the most common blending mistakes.
In this article, you’ll learn:
- When and why it’s worth combining photos taken at different focal lengths.
- How to properly shoot for focal length blending.
- Where to place the transition between photos in the frame and what to avoid.
- How to create a transition between shots using transition masks.
- How the technique works for complex scenes with three different focal lengths.
Focal length blending is a specialized technique you don’t hear about often. It isn’t complicated and lets you pull off the nearly impossible. All it takes is a bit of creativity and quick work with masks.
The method described here can transform your landscape photography when you want to add depth by including something in the foreground. Normally, using a wide-angle lens makes the background look much smaller in perspective, turning a majestic mountain into just a tiny bump on the horizon. Focal length blending solves this problem.
Blending focal lengths
The idea is simple: take two shots at different focal lengths and combine them.
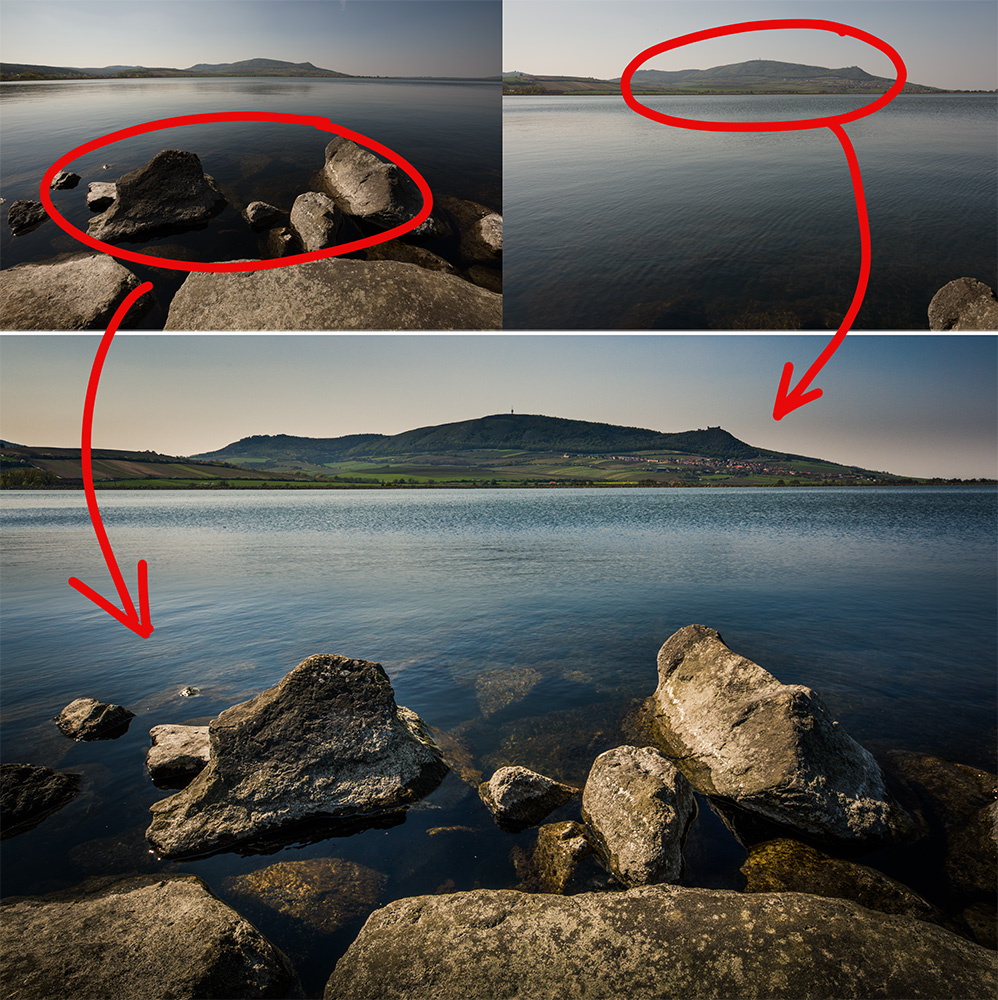
It might sound like a tedious task, but the entire process is surprisingly quick, and the shooting is straightforward. Because the perspective changes significantly between the two photos, you don’t even need a tripod. You can simply shoot both photos handheld. If you usually travel with a zoom lens, it just takes a moment to take a wide shot and then quickly zoom in for the second. That’s probably why this method used to be called zoom stacking. However, focal length blending is the more widely accepted term today.
How it’s done
The trick is to have a sufficiently large, neutral background, where the transition between the two images can be placed. In the photo above, it’s the water.
When combining layers, create a mask for one of the images that smoothly transitions from white to black in this exact area. Determining how sharp the transition should be and where to place it takes a bit of trial and error.
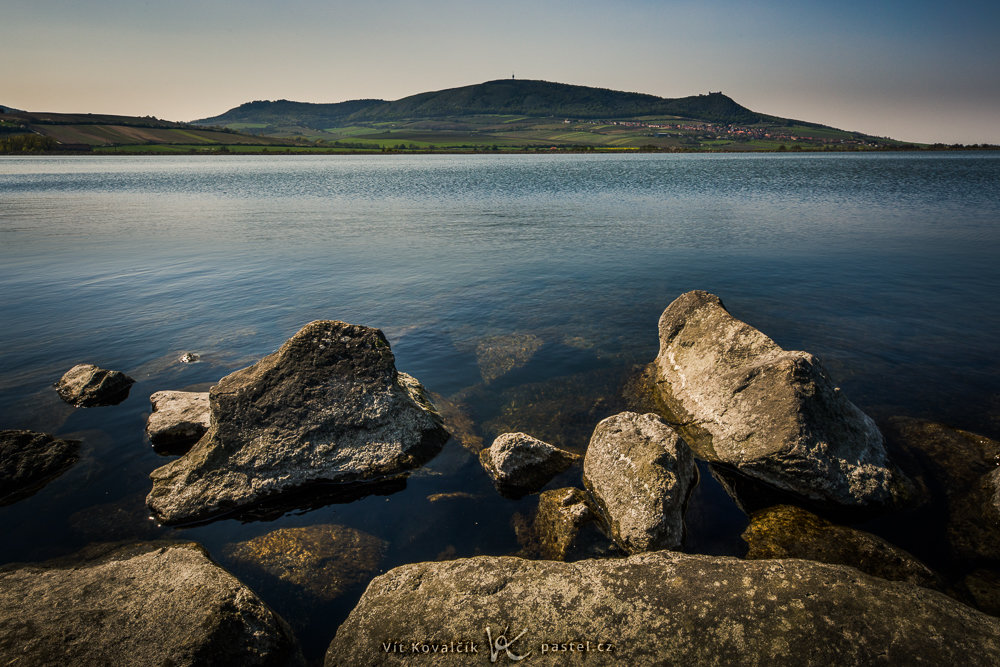

Final photo and mask showing where the top and bottom images meet.
Theoretically, the transition doesn’t have to be perfectly smooth. Even a sharp transition can work, like a zoomed-in landscape is hidden behind a rocky overhang. But in most cases, this means a greater need for precision, and as a result, longer processing time.
There could also be a completely different landscape in the background. If you try this, make sure the lighting matches. It’s fine to shoot a little to the left or right, but if you rotate 90° for one of the shots, the viewer will notice that something is off.
Choosing the right transition areas
Between the first and second shots, not only does the perspective shift, but you also sacrifice part of the frame to create a smooth transition. Parts of the shot may be unsuitable for the transition, and the viewer might notice one or the other. This applies to geometric shapes, like buildings, railroad tracks, vineyards, or lines of trees.
Water, on the other hand, works very well. You can also use other natural textures like sand, dry clay, or even forest. The key is “uniform randomness.” A dense forest canopy works well, but individual trees scattered across bare ground pose a major problem.
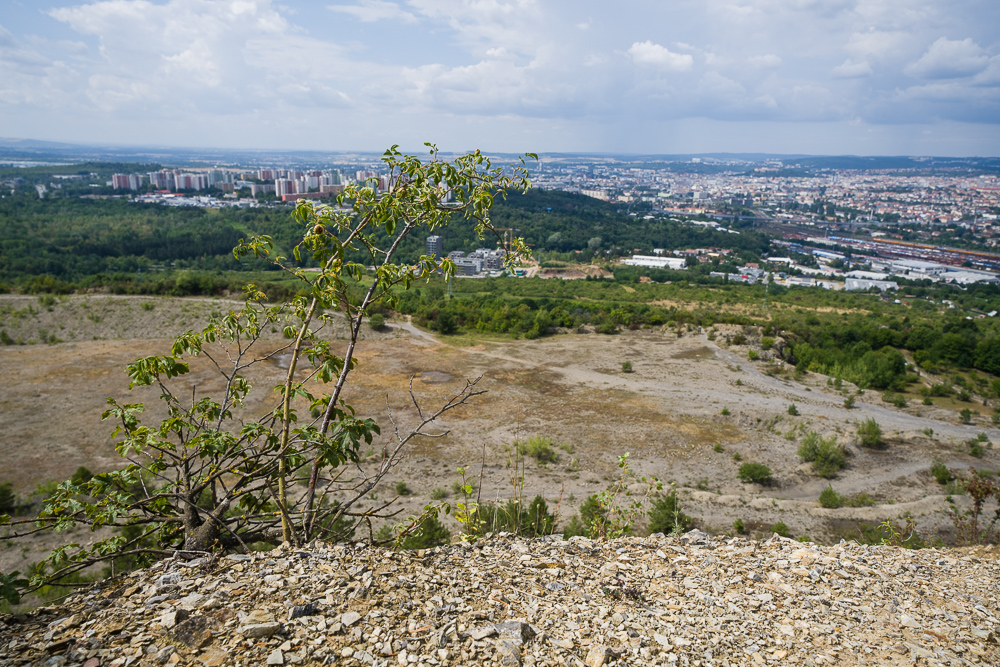
There’s another issue related to trees: even if it seems like you’ve found the perfect shot with “no man’s land” in the middle, you should check to make sure there aren’t any trees or taller shrubs growing close to you. It’s easy for one of them to visually intrude into areas where you’d like to have a seamless transition in the mask. It’s much easier to take a few steps to the side and avoid these trees.
Watch out for moving clouds
Another common trap is clouds over the landscape casting shadows. These move surprisingly quickly, so you need to focus on the transition area to avoid having one frame end with a shadow and the next begin with sunlight. This effect can be fixed by locally brightening or darkening one of the layers, but it’s easier to avoid altogether.
Preparing and editing your photos
Before blending, make sure your photos are as uniform as possible. Set the white balance to the same value and try to match the brightness at the transition point as closely as possible.
The actual blending of photos isn’t complicated. Open the Editor module of Zoner Studio and insert both photos as two layers in a single image. Assign a mask to the top layer and select Linear Gradient (Shift+B) to draw a black-to-white gradient. You’ll see the effect immediately, so you can quickly and easily fine-tune the mask.
For more complex scenes, use the Brush (B) tool to manually fine-tune problem areas. The transition doesn’t have to be perfectly straight or equally sharp.
An advanced example
Creating a transition over a body of water is straightforward, so let’s look at something more challenging—blending three separate shots over dry land and with two transitions.
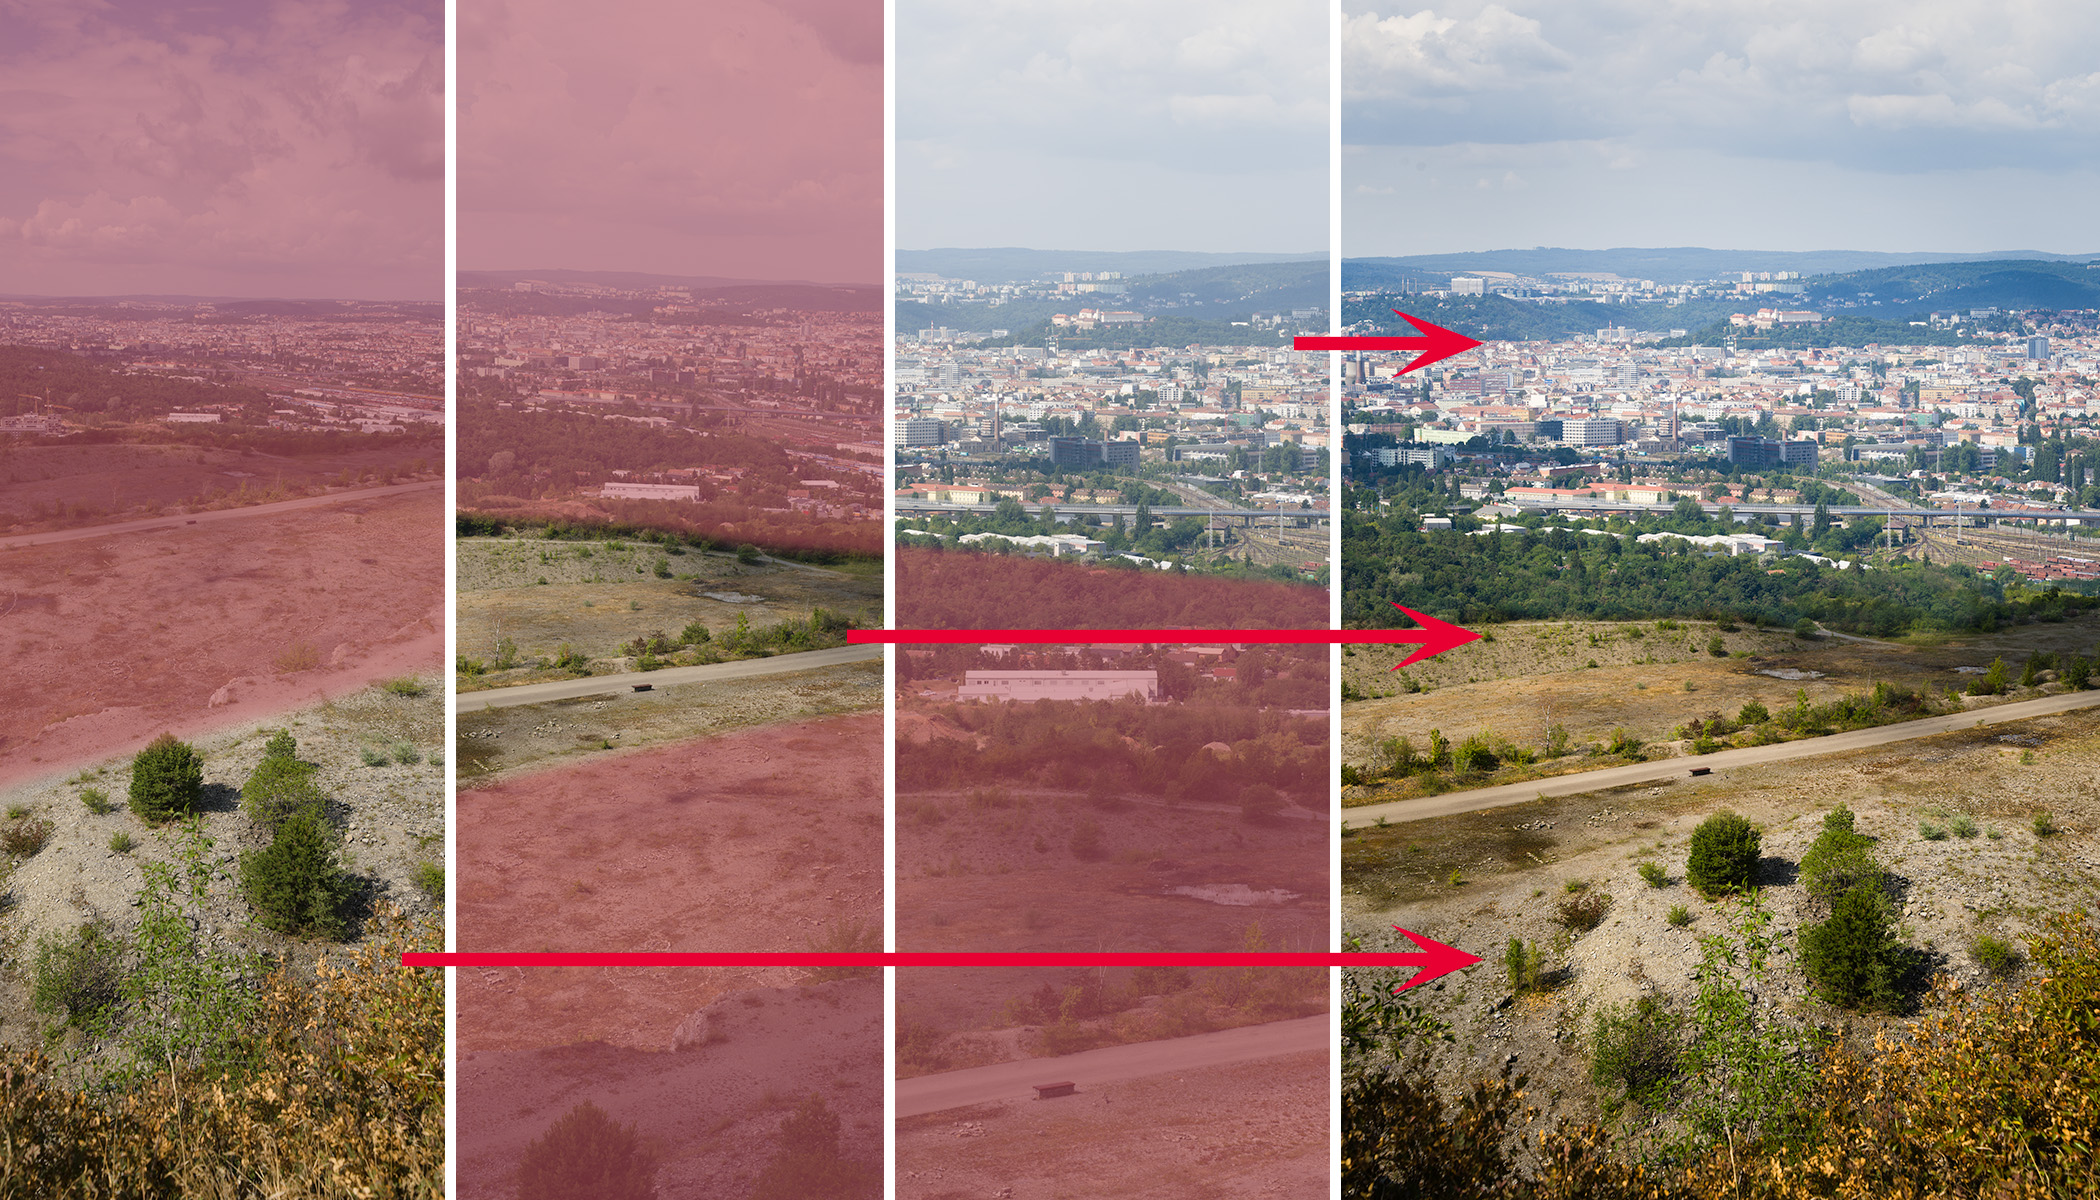
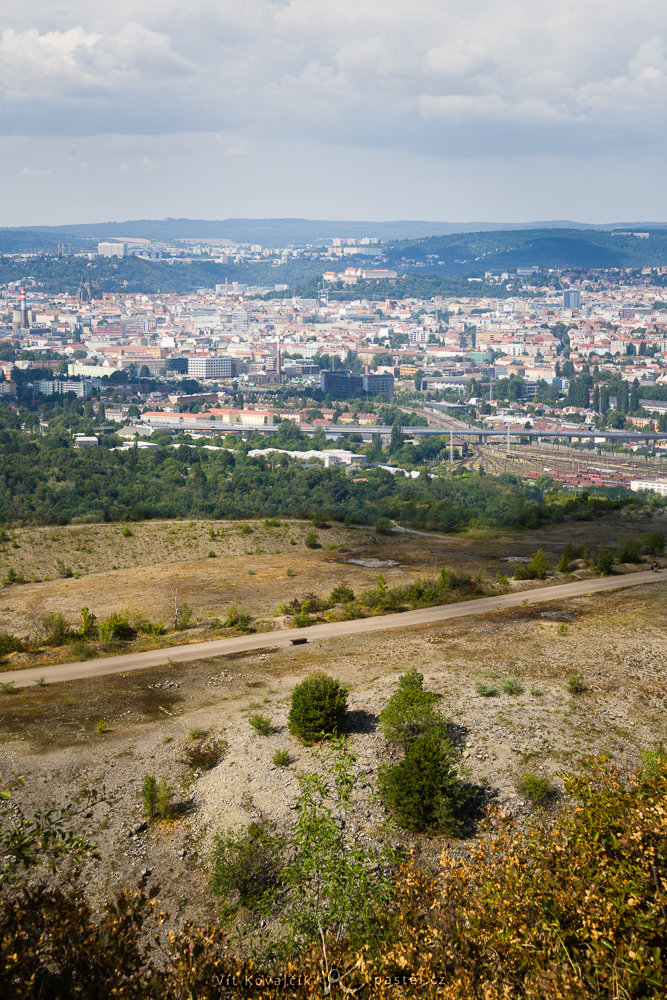
This example is from the Hády Quarry in Brno. The upper rim offers a sweeping view of the city and part of the quarry below. However, the quarry in the foreground is so large that a wide-angle lens only captures a vast empty plain with a tiny city in the background. A telephoto lens captures the city but fails to capture the nearby trees directly below the observer.
I took three shots at 24mm, 44mm, and 90mm, respectively.
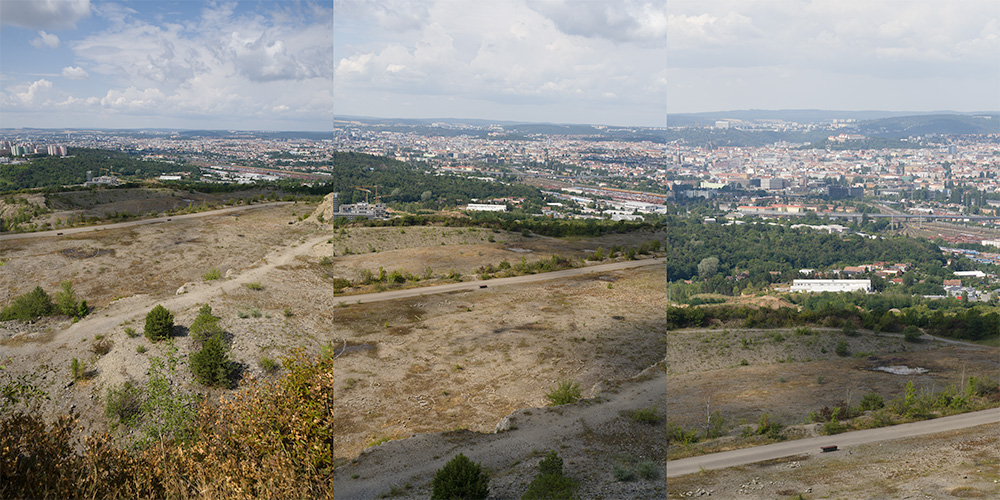
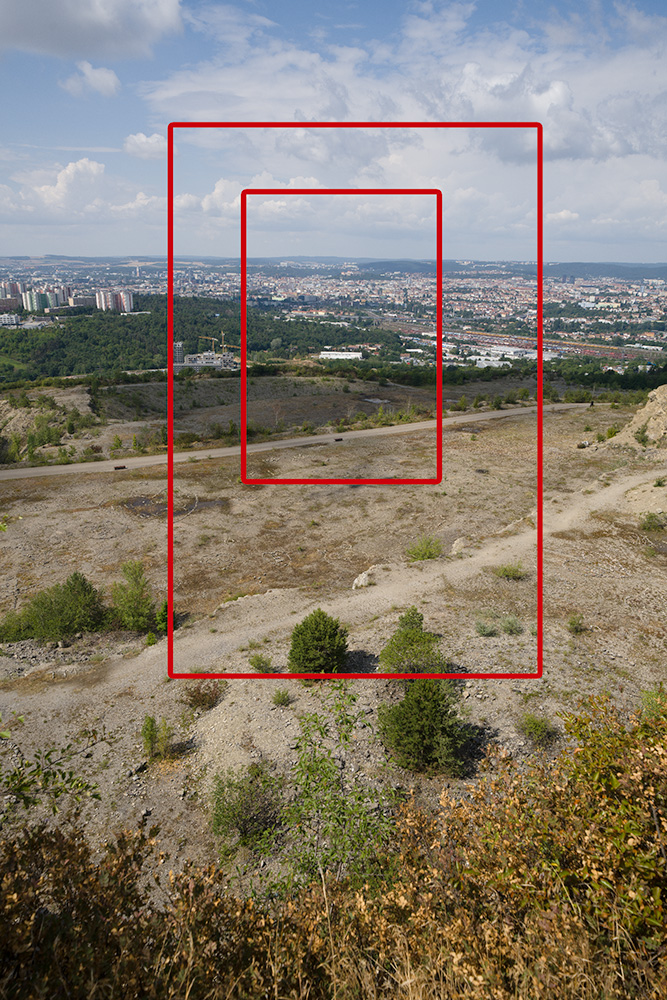
To emphasize the significance of 4x magnification of the last shot, here are all three shots superimposed onto one image.
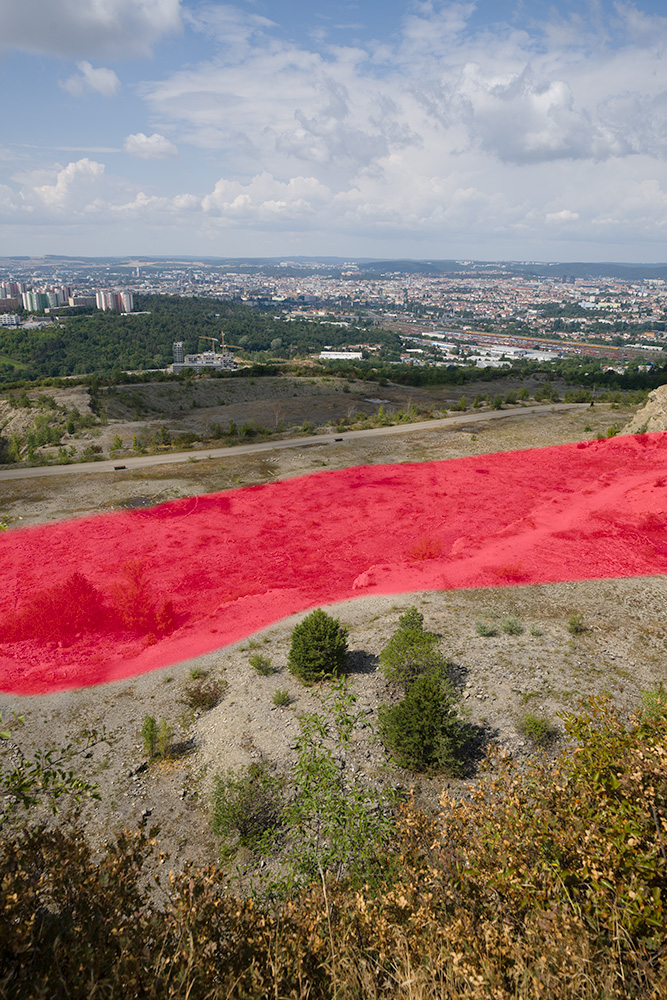
For the transitions, I chose the plain in the foreground. However, I deleted it almost entirely from the widest shot in the end, including the trees on the left and the small rocky ledge that runs from left to right. So the first shot ends just behind the three trees at the bottom, while the next one doesn’t begin until the path.
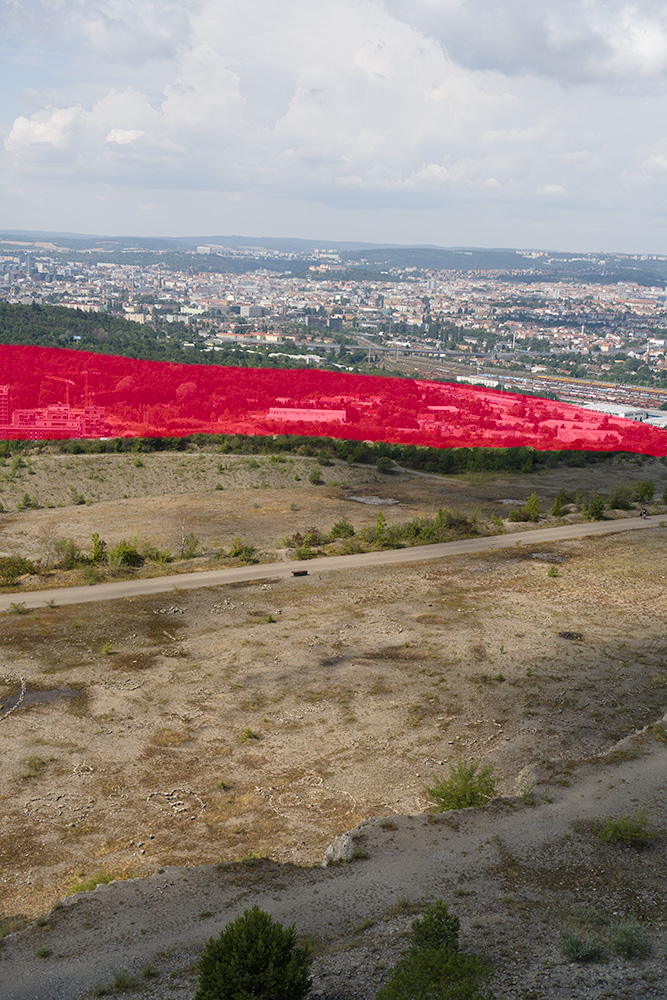
The transition between the second and third image is hidden among the trees, and I used a trick here as well: I basically combined two different forests, removing several buildings in between, especially the very bright industrial complex in the middle, which was too distracting (my apologies to hot-air balloon manufacturers).
The result is an image that looks normal, and the vast majority of local residents wouldn’t notice anything suspicious about it.
A useful tool for specific situations
You certainly won’t use focal length blending every day. But it allows you to capture perspectives that capture the true character of a location, even if they aren’t optically realistic. While the human eye adapts, focuses, and perceives context and depth, a photograph is limited. Focal length blending helps bridge that gap.
FAQs
What is focal length blending?
It’s a technique for combining two or more photos taken at the same location at different focal lengths into a single image. It allows you to capture a close foreground with a wide-angle lens and the distant subject zoomed in with a telephoto lens, without the background appearing compressed in perspective.
Do you need a tripod for focal length blending?
No. Because the perspective shifts drastically between focal lengths, you can shoot handheld. All you need is a standard zoom lens. Take a wider shot and a close-up in succession.
Where should you place the transition between photos?
Use a neutral area without prominent geometric lines, like water, sand, dry clay, or a dense forest. Avoid buildings, railroad tracks, vineyards, or isolated trees on the bare ground.
How do you create the transition between two photos?
Add both photos as layers into a single image, assign a mask to the top layer, and draw a linear gradient from black to white within the mask where the images blend together. In more complex areas, you can fine-tune the mask manually using the brush.
What should you watch out for when doing focal length blending?
In addition to choosing a suitable transition area, keep an eye on moving clouds and their shadows so that one photo at the transition point doesn’t end up in the shade and the next one doesn’t start in the sun. It’s also a good idea to adjust the white balance and brightness of the photos to match beforehand.


There are no comments yet.