How to Add a Bokeh Overlay to Your Photography

You don’t always have to get bokeh (a blurred background) in your photo during the actual shoot. Bokeh can be added to photos where there was none previously. Read on to learn how to create your own bokeh and add it to your photography. All you need is your camera, a string of lights, and Zoner Photo Studio X.
You may notice that your photography needs that extra something. This is when an overlay comes in handy. An overlay is an effect made in Zoner Photo Studio X that is added to your photo in the form of another JPEG or PNG image. One example of this effect is artificial bokeh. But how do we create such an image without having to steal it from somewhere or paying for it? A bokeh overlay shot with Christmas lights is a simple method for shooting bokeh at home.
How to create bokeh
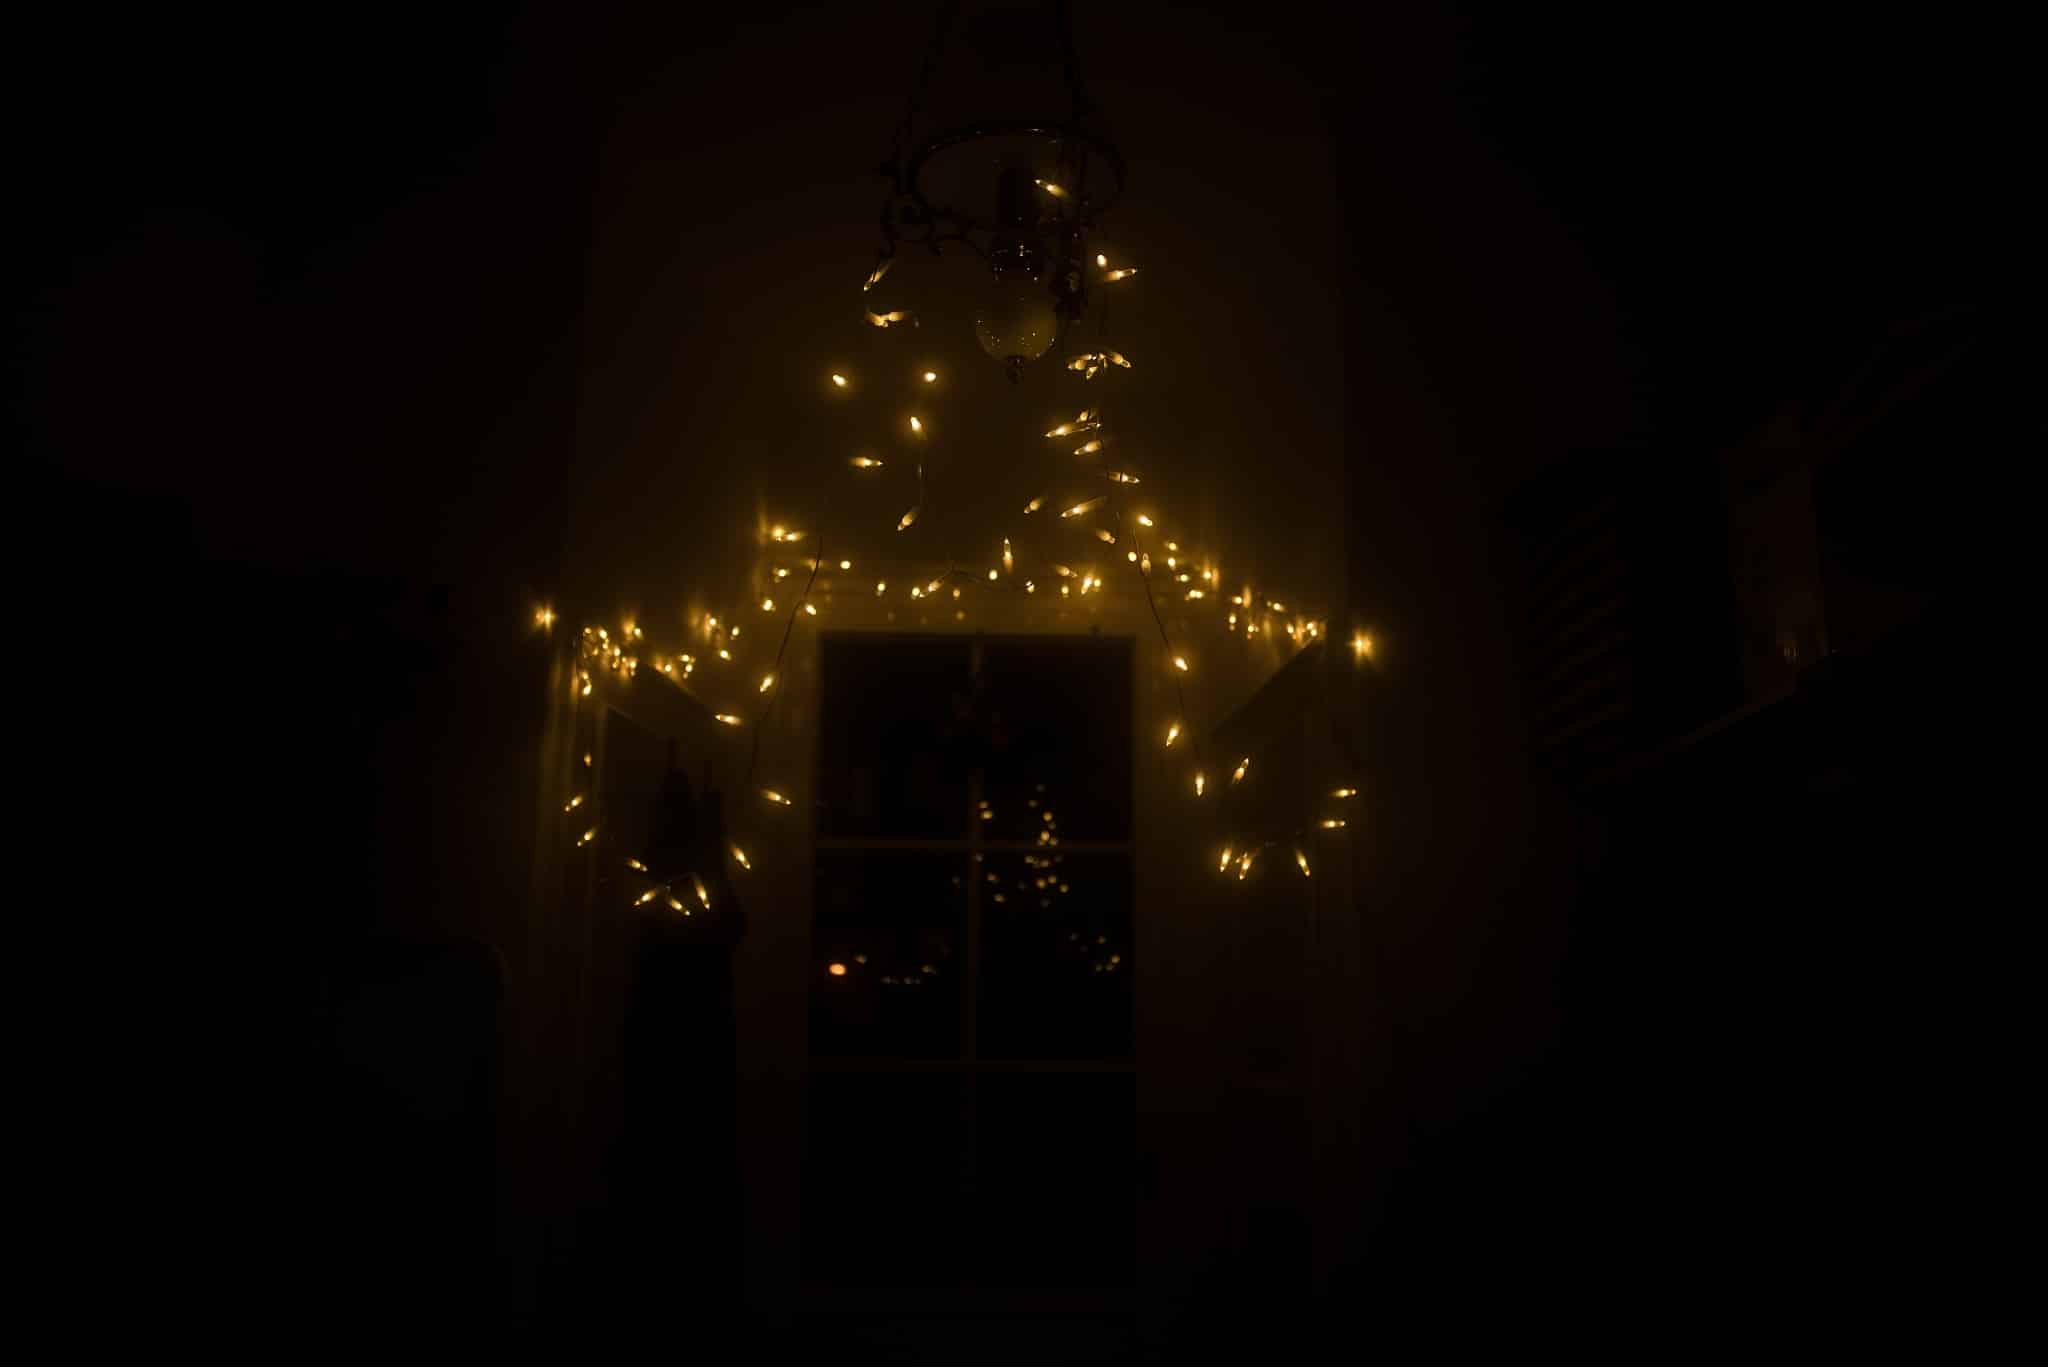
The entire process is quite simple. All you need is any kind of string of lights. Christmas lights work great. A bokeh overlay like this is best shot at Christmastime. But you can pull the lights out any time of year, hang them up, and shoot your custom bokeh. This type of photo must be taken in the dark, with the string of lights being the only source of light.
- We recommend using a lens that is 18-105mm, or longer if you take a few steps back. Set your camera to manual mode. You want a very blurred photograph.
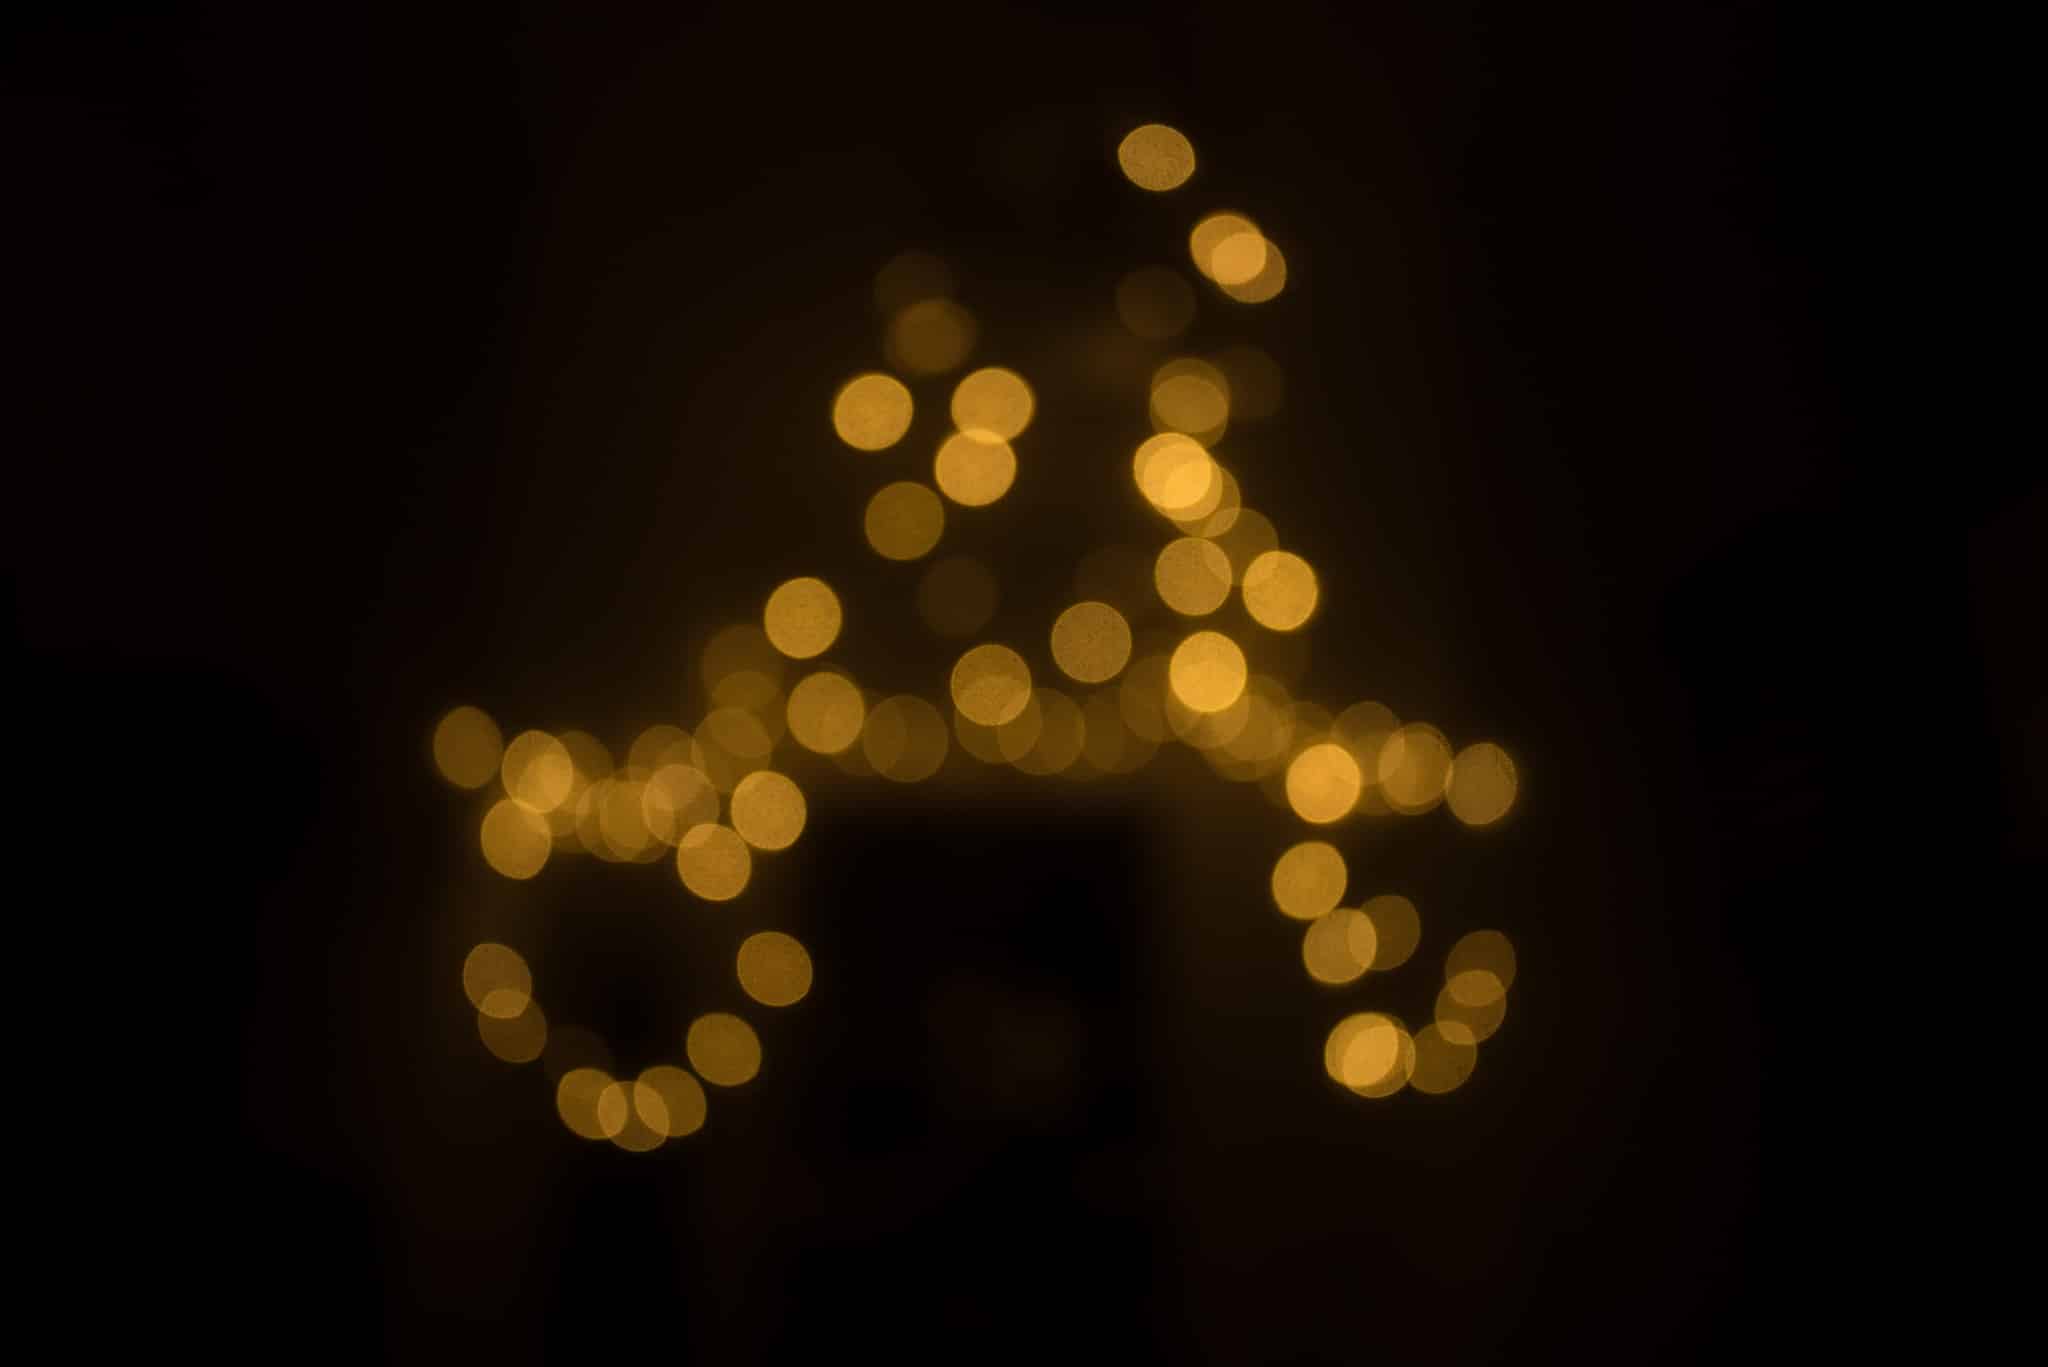
- Point the camera at the lights, make it intentionally out-of-focus until the lights become giant specks
- Take several shots to choose from later
You can get photos of blurred lights like these at home using a string of lights, or venture outdoors. Nighttime cityscapes offer plenty of colorful lights, especially at Christmastime.
Add the bokeh to the photograph
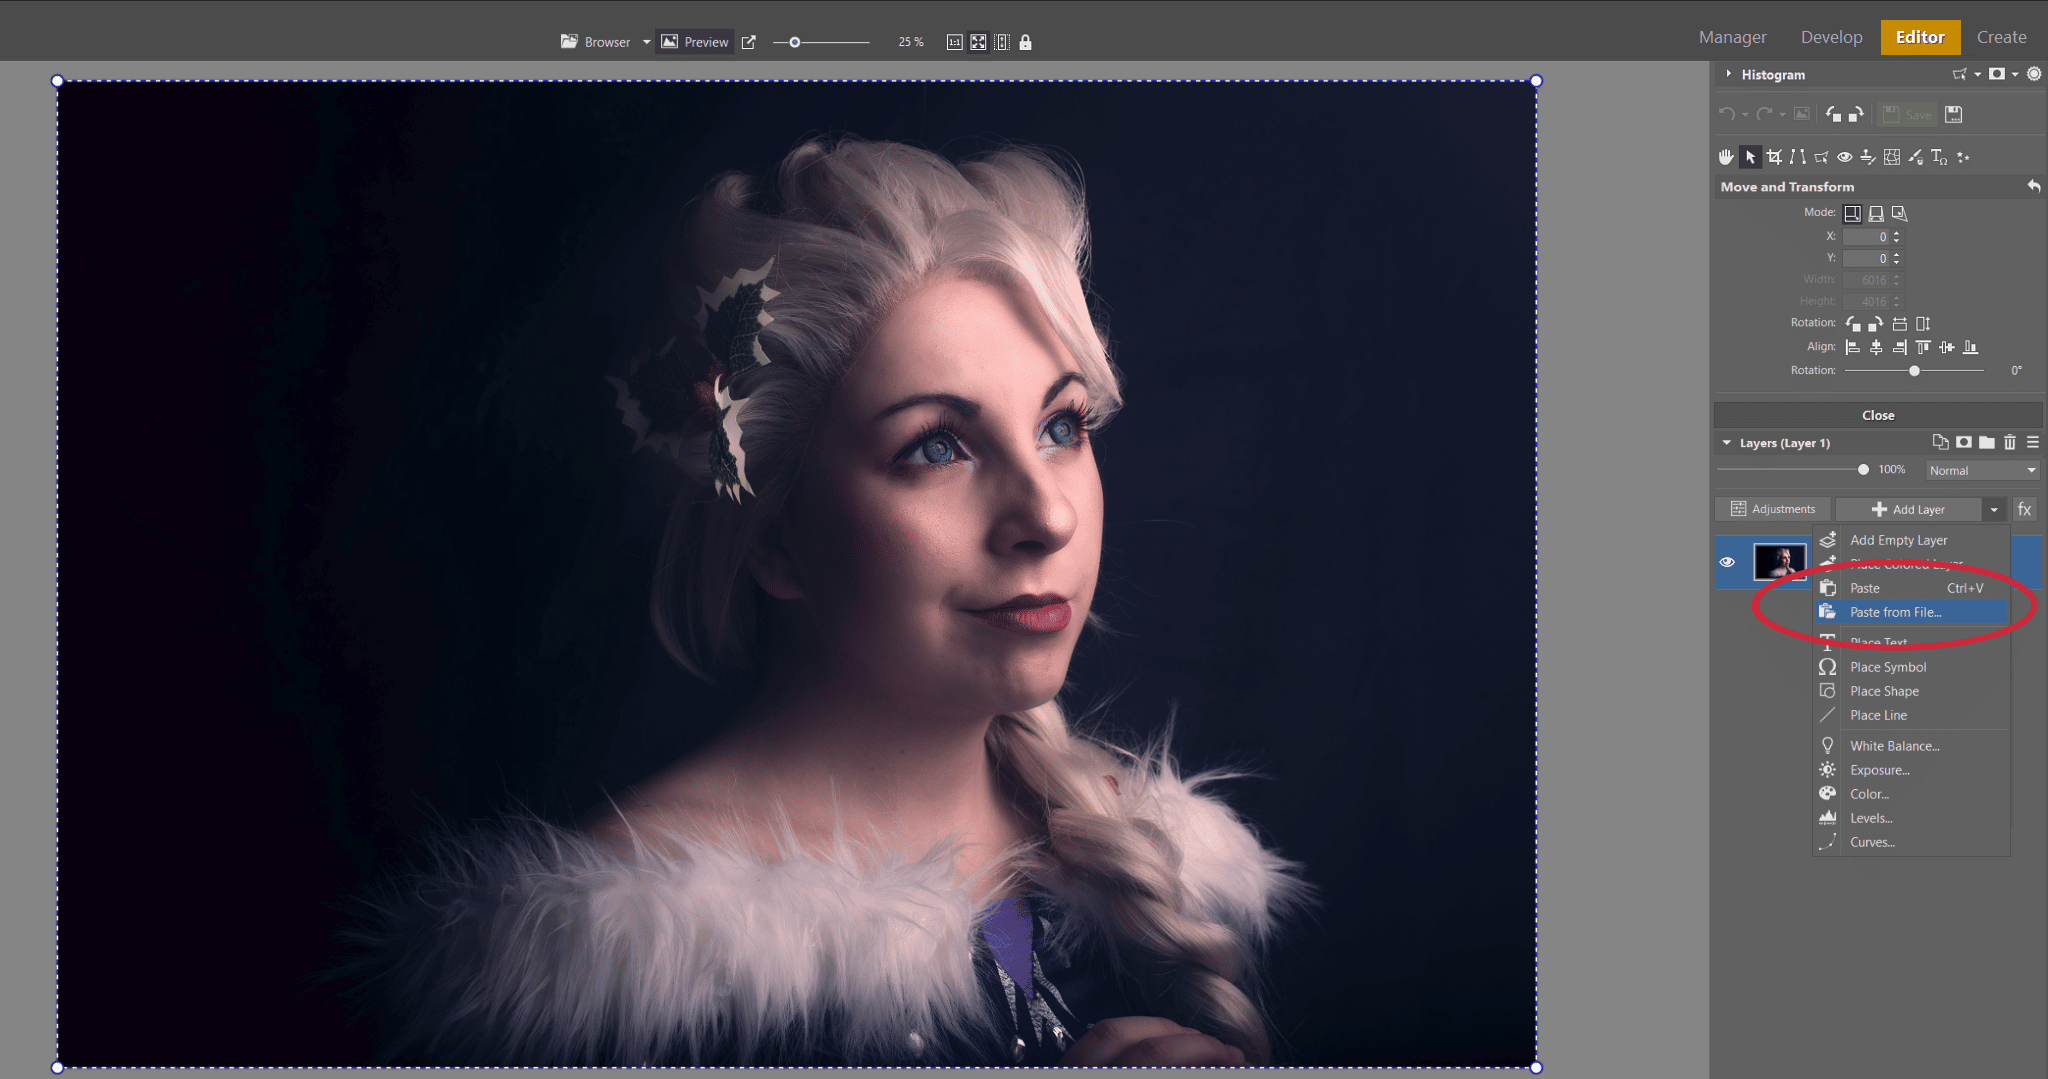
Choose the photograph that you want to add the lights to and open it in the Editor module. Your bokeh overlay image should be in *.png or *.jpg format. Be prepared to play around with layers.
First, use the Layers settings group to place the overlay. Click +Add Layer -> Paste from File and choose your bokeh overlay image.
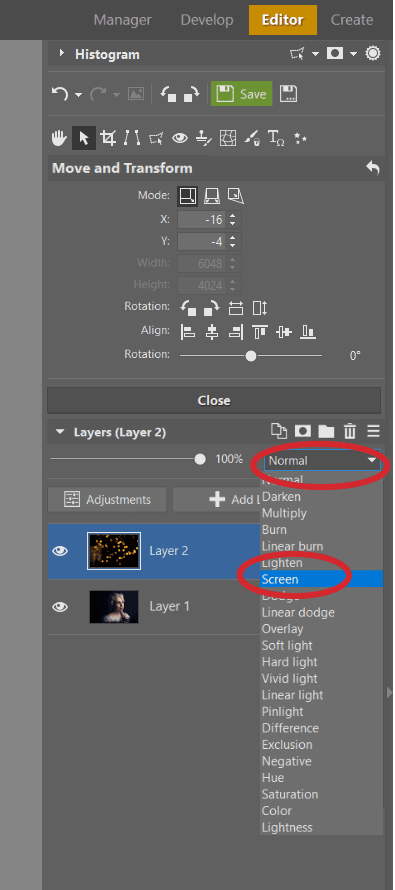
In the next step, you must set the Layer Blending Mode to Screen. This makes the photo transparent and only the light areas, i.e. the lights, remain. This is the reason why it’s critical to take the picture in the dark.
Choose where to place the bokeh
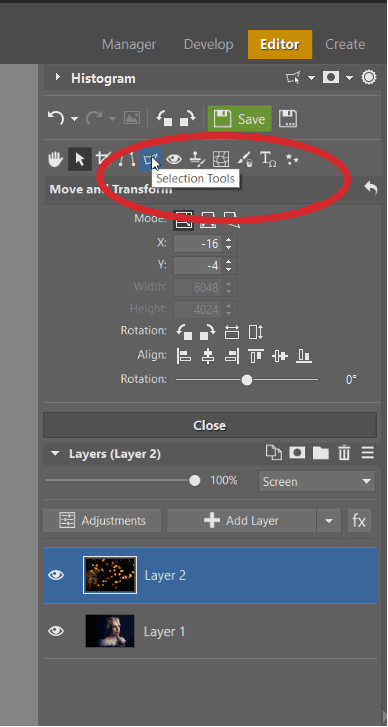
We’ve added the lights, but certainly don’t want them in front of our model, so the next step is to work with Selection Tools. We use Magnetic Lasso (A) under Selection Tools, but you can choose other selection tools based on your preferences. Magnetic Lasso works best for the purposes of our demonstration.
You will now work in the layer that contains the model. Make sure that you have the right layer selected in the Layers list (by clicking it). Also, be sure the layer containing the model is below the lights layer. Select the area where you don’t want the lights (in this case, the face).
TIP: If the lights layer is in your way, you can make it invisible by clicking the small eye icon next to the layer. Make the layer visible by once again clicking the eye icon.
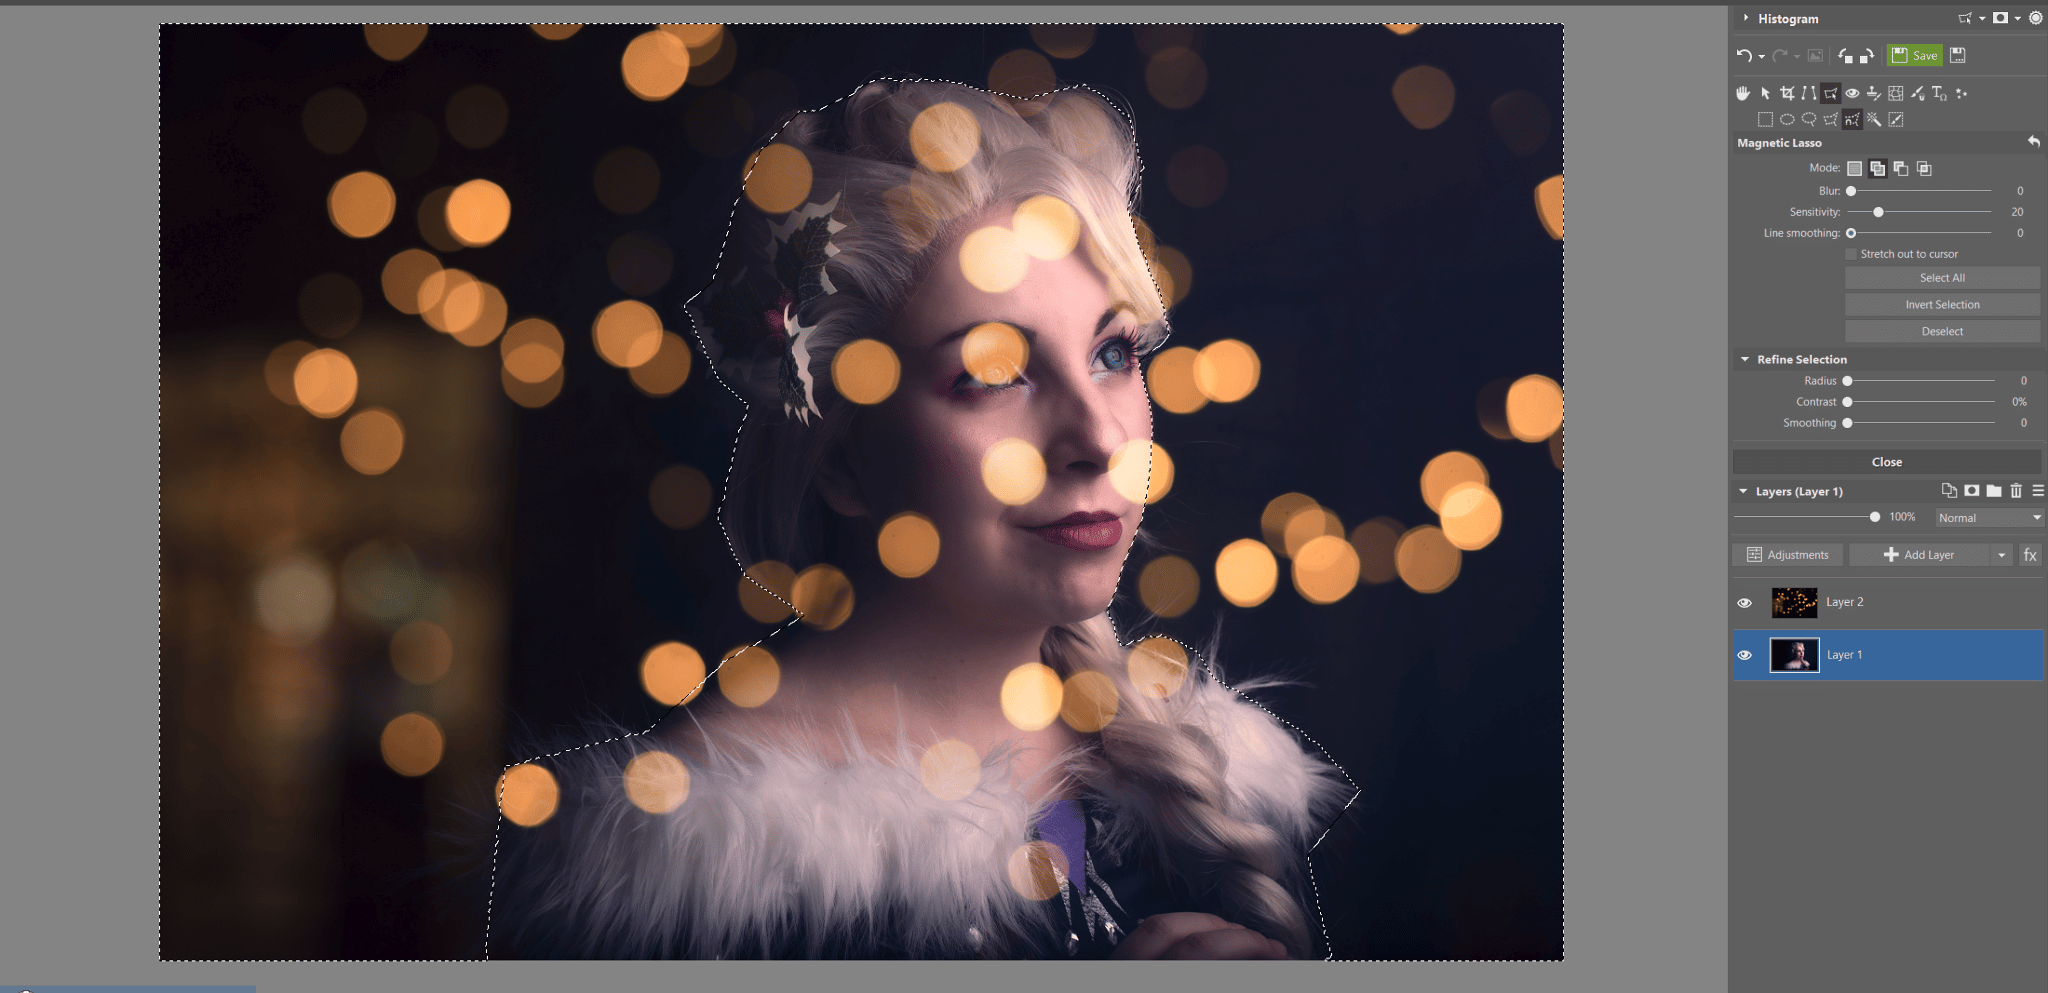
We now have the area where we do not want the lights selected
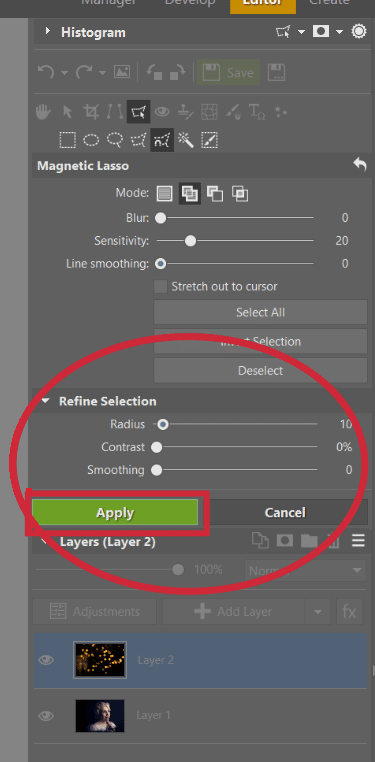
You can refine your selection using the Refine Selection settings group and adjust the Radius slider by a few values. Don’t forget to click the green Apply button to apply changes.
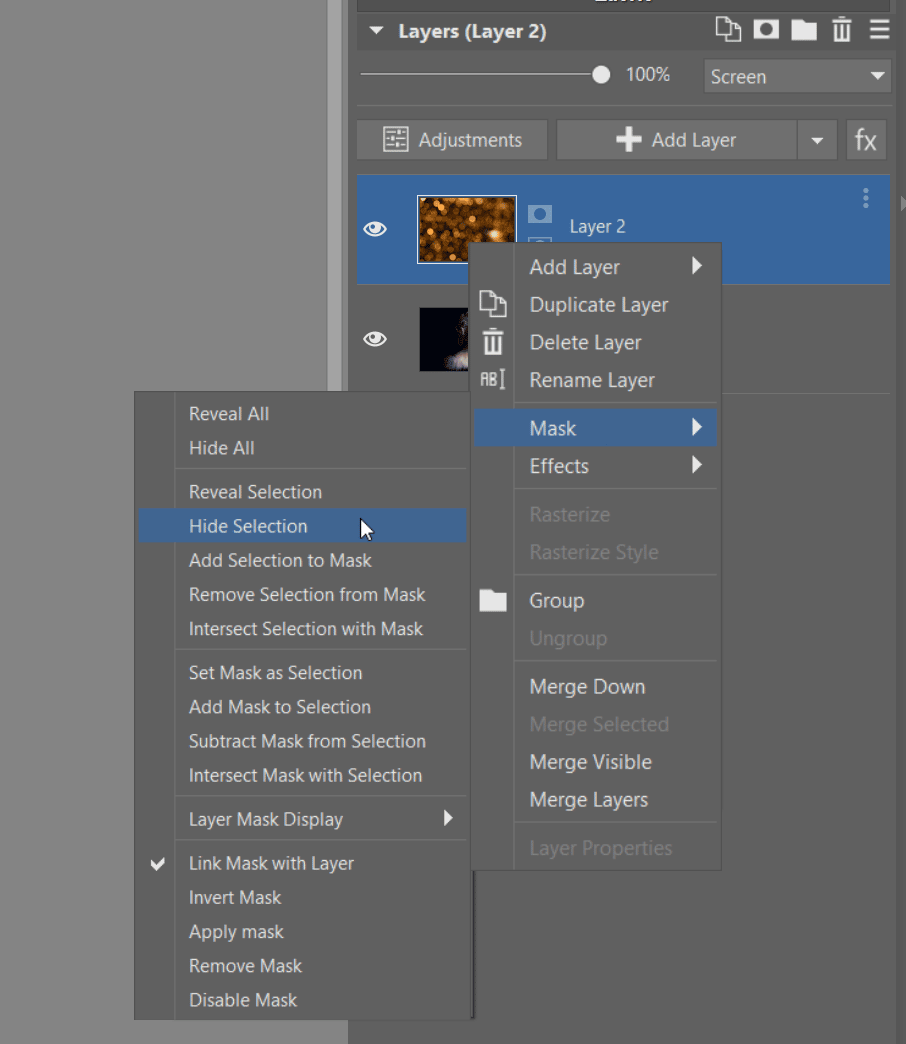
Add a mask
Now that you have your selection, right click the layer with the lights and select Mask and Hide Selection. Finally, press the Esc key to exit selection mode.
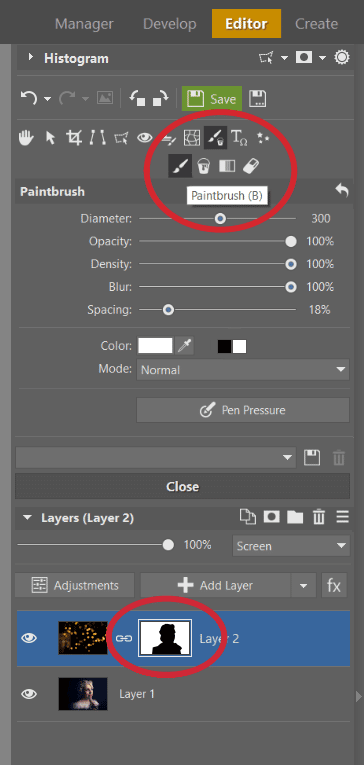
The foundation of your bokeh overlay is complete! Now, you can fine-tune the selection according to your needs. You can draw on the mask you’ve created as needed with the brush. If you select the mask in the layers list (again, by clicking it), then the Brush (B) tool will have two color options – black and white.
White is used to add to the mask in certain places, while black will subtract from the mask. For example, you can leave a few of the lights in front of the model, or tweak the area around the hair that wasn’t perfectly selected.
Don’t forget to save your photo as a *.jpg or in *.zps format if you plan to continue working with layers.
And you’re done
You can save the bokeh overlays you’ve shot for later use whenever you feel like spicing up your photography. You can also shoot other fun effects in the dark for your photography. How about fire or trying your hand at light painting? The possibilities are endless. Don’t be afraid to experiment and most importantly, have fun!
There are no comments yet.