How to Run Zoner Studio on Mac
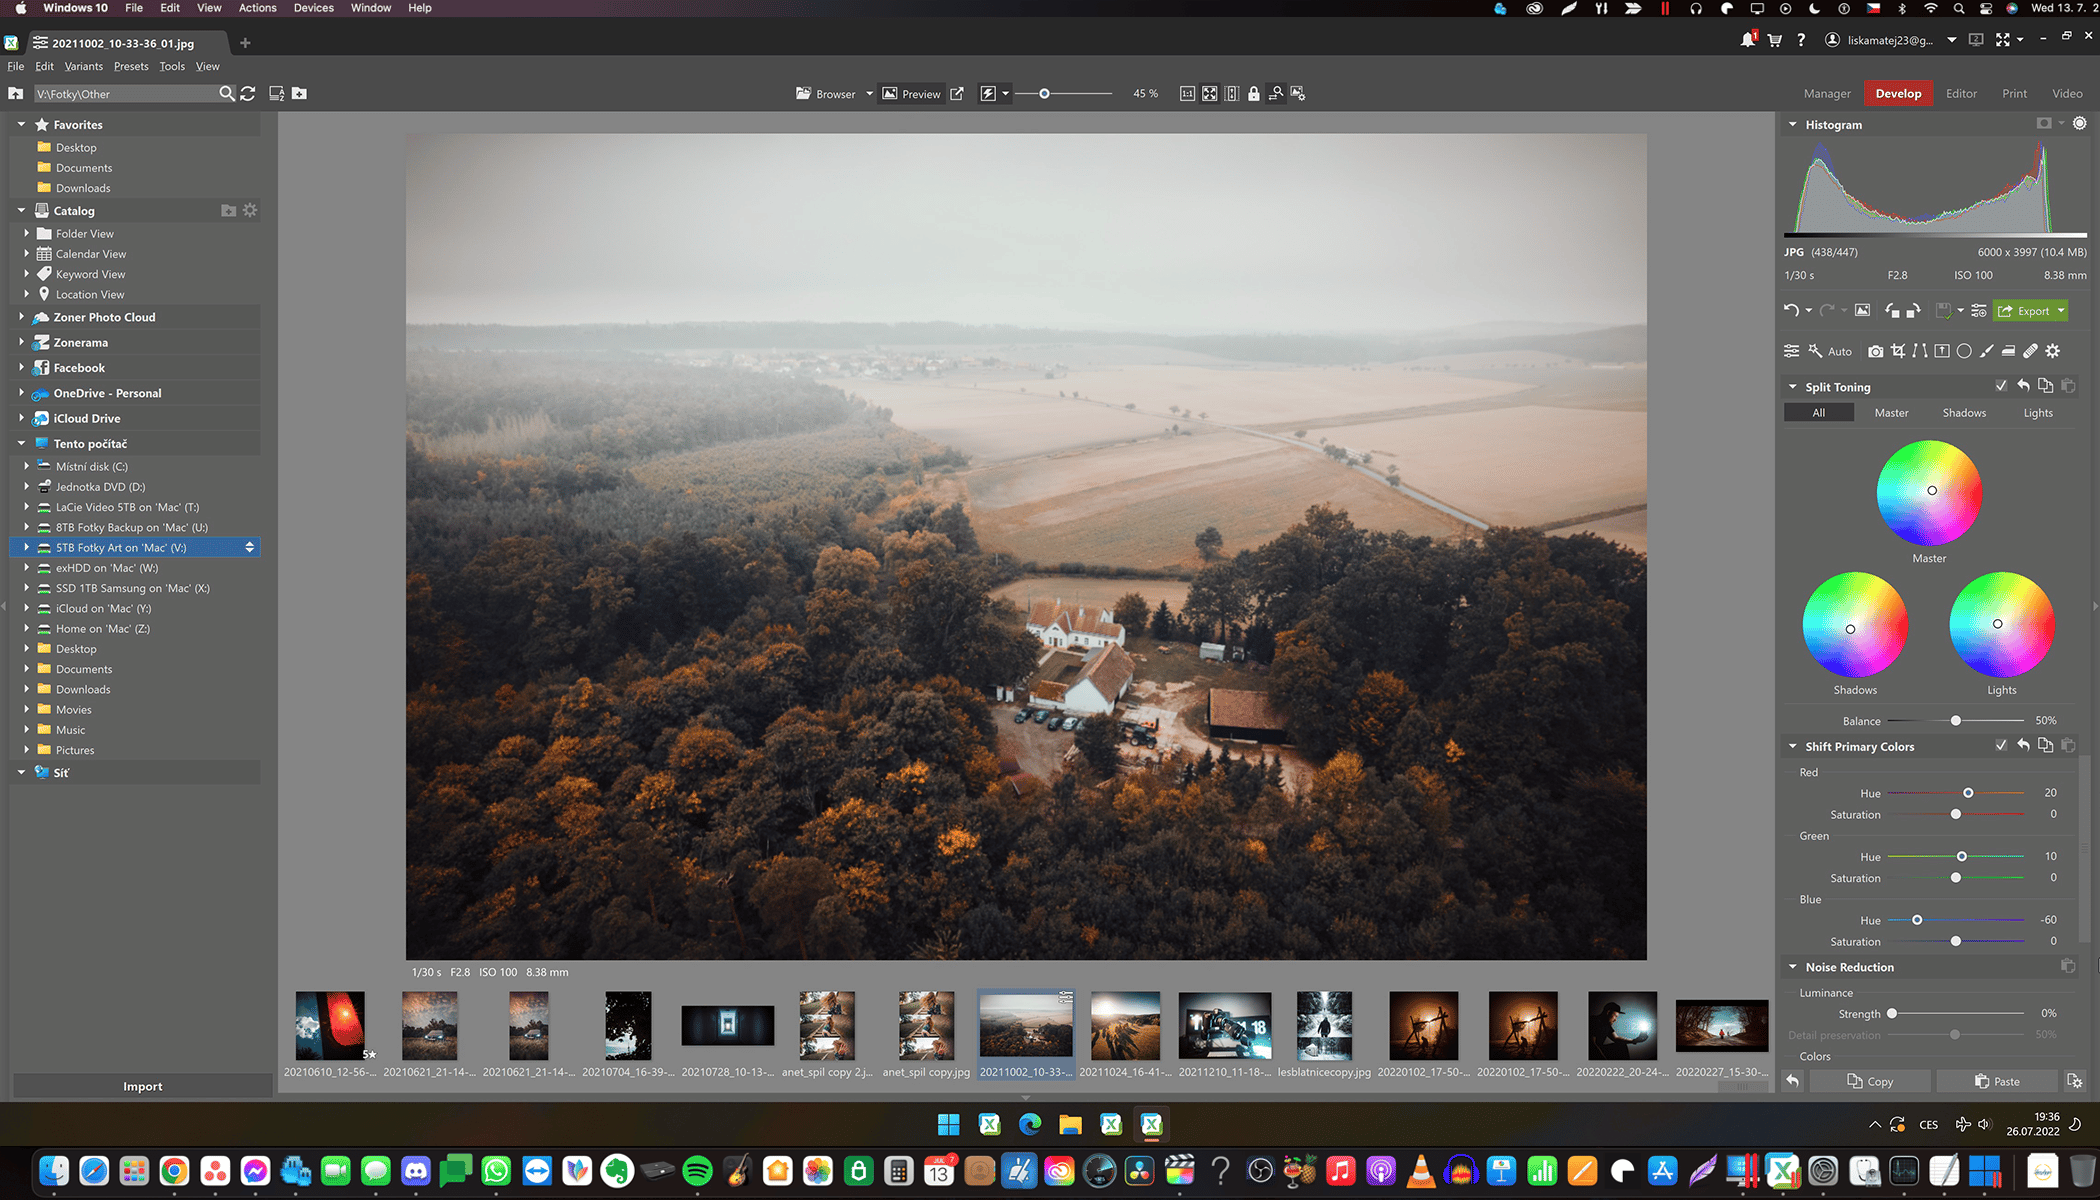
Zoner Studio is developed for the Windows operating system only. However, from time to time, users ask if we are developing a version for macOS. The answer to this question is: not yet. However, there are a few options for using Zoner Studio on Apple computers.
Apple computers are extremely popular with photographers. I myself am a MacBook owner and macOS works well for me. Since I also enjoy Zoner Studio, I’ve researched several options for installing Zoner Studio on Mac.
I‘ve tried four different methods. Please note that this is not an official guide from Zoner, but my own personal recommendations that may not work on every device.
Choose a virtualization program
1. Parallels Desktop (the only option for M1)
If you have a Mac with the M1 chip, using the Parallels Desktop program is currently your only option. This is likely the most sophisticated solution available to date. Parallels Desktop installs Windows and you can enter a mode that allows you to add Windows programs directly to the Dock. You don’t even know you’re using programs for Windows aside from the fact that there’s a Parallels Desktop symbol on their icon. This program is not free and costs more than Zoner Studio.
If you have an M1 chip, there’s no need to read any further. Installing Parallels Desktop is simple. The program does all the settings, folder synchronization, etc. for you.
If you have an older Mac with an Intel processor, the following options are for you:
2. Wine
Wine is a program that is mainly used with Linux (but also works on macOS) and allows you to install and run .exe applications without needing to install Windows.
Unfortunately, I was only able to use it to run older versions of Zoner Studio, not Zoner Studio and the compatibility was quite poor. Some features didn’t even work. Without some form of Windows, it most likely won’t work to its full potential.
3. Bootcamp
Another very simple solution is Bootcamp. It’s a program that is directly installed on macOS and is used to create an installation CD or USB to install Windows.
Unfortunately, with this method, you install Windows as a secondary operating system. When you start the computer up, you choose if you want to work on macOS or Windows. Since I want to use macOS and Zoner Studio simultaneously, this solution didn’t work for me. However, it may work for others.
4. VirtualBox
I was very happy when I discovered VirtualBox. This solution is like Parallels Desktop. You simply have the entire Windows system open in a window. The only thing that is missing is the ability to open .exe applications as if they were macOS applications. However, if you open the application full screen, it basically has the same result. I found it most effective to set the same resolution as my screen and put VirtualBox on a separate desktop space. I use Zoner Studio on one desktop space and the rest of macOS on other desktop spaces.
Let’s go through a complete 5-step guide for this program:
Download Windows and VirtualBox
We recommend you have at least 32GB of space. I tested it with 15GB of space. It works, but it’s a worst-case scenario solution.
Download the ISO Windows file from the Microsoft website. In this case, I tried Windows 10 64-bit.
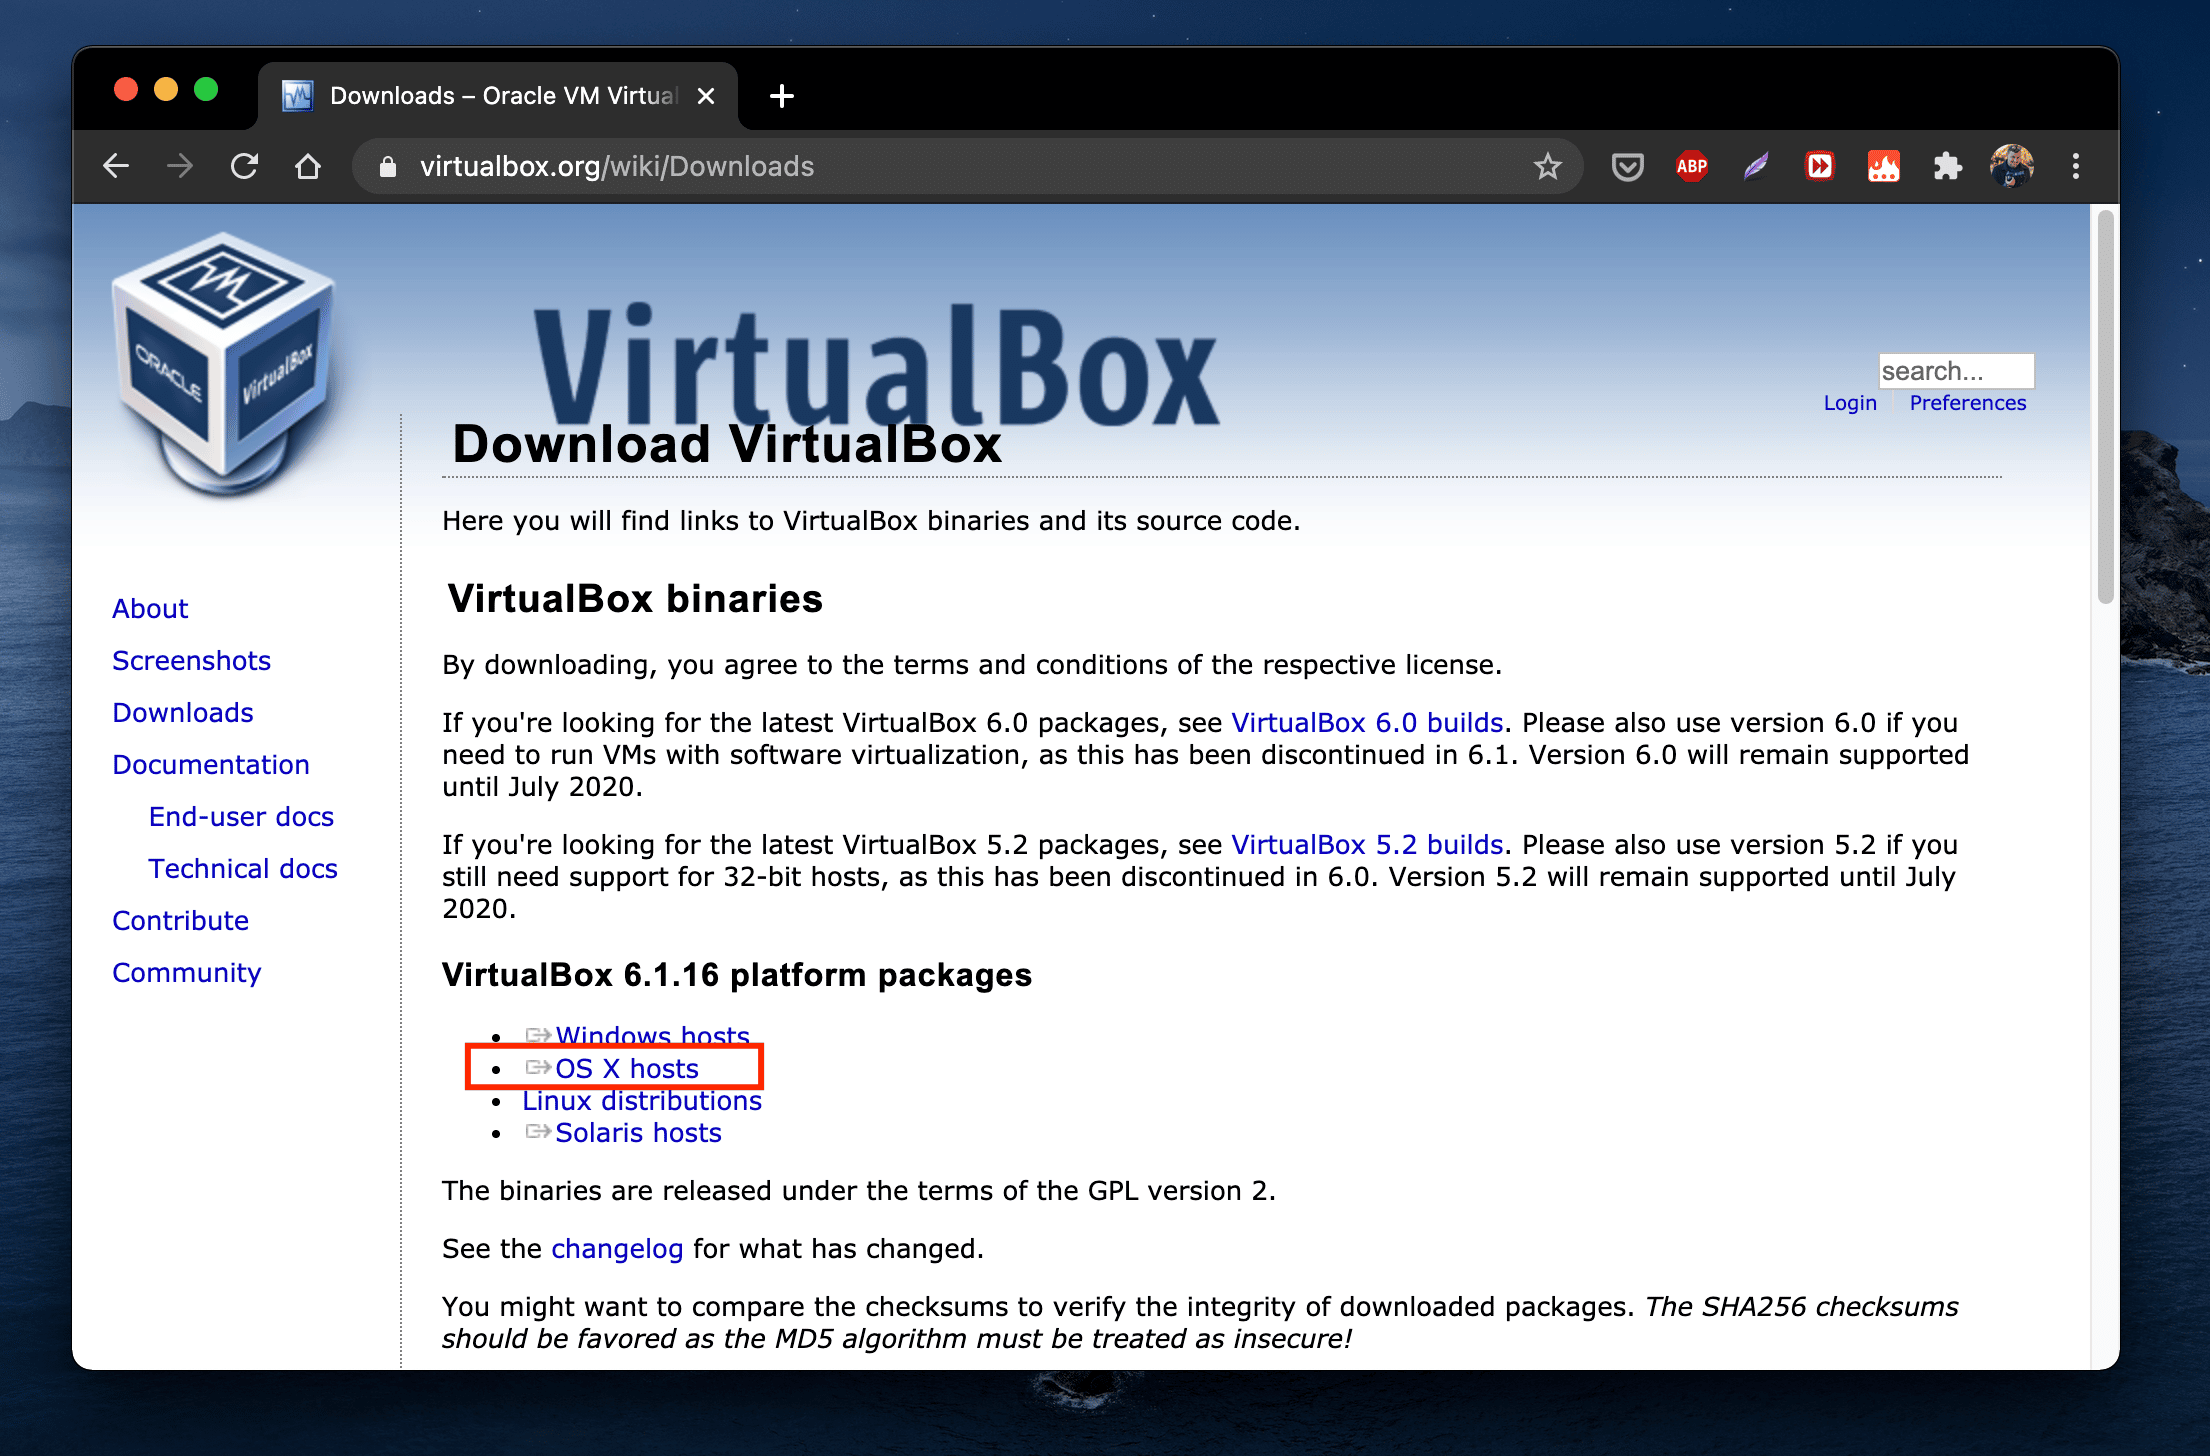
Next, you need the VirtualBox program.
Install VirtualBox
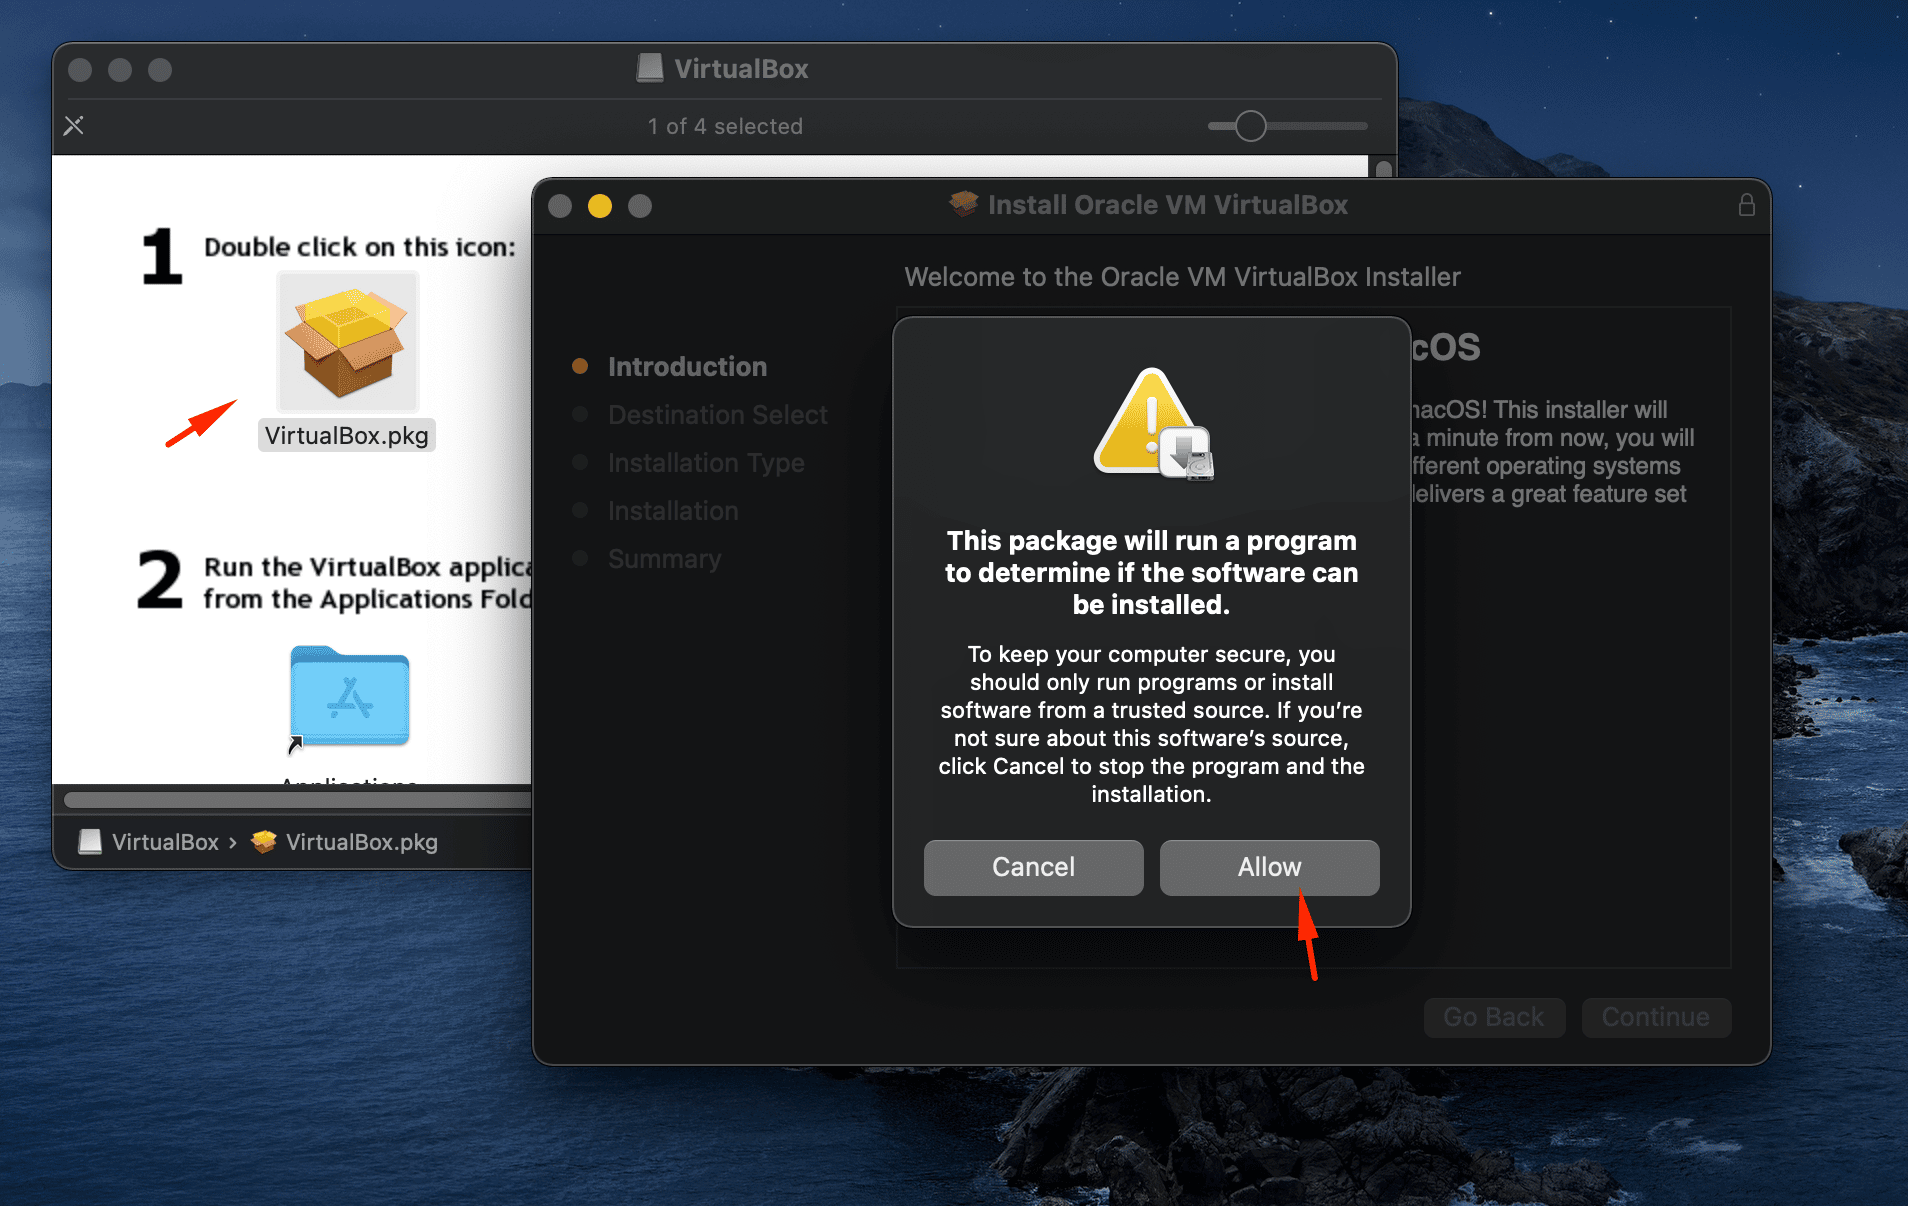
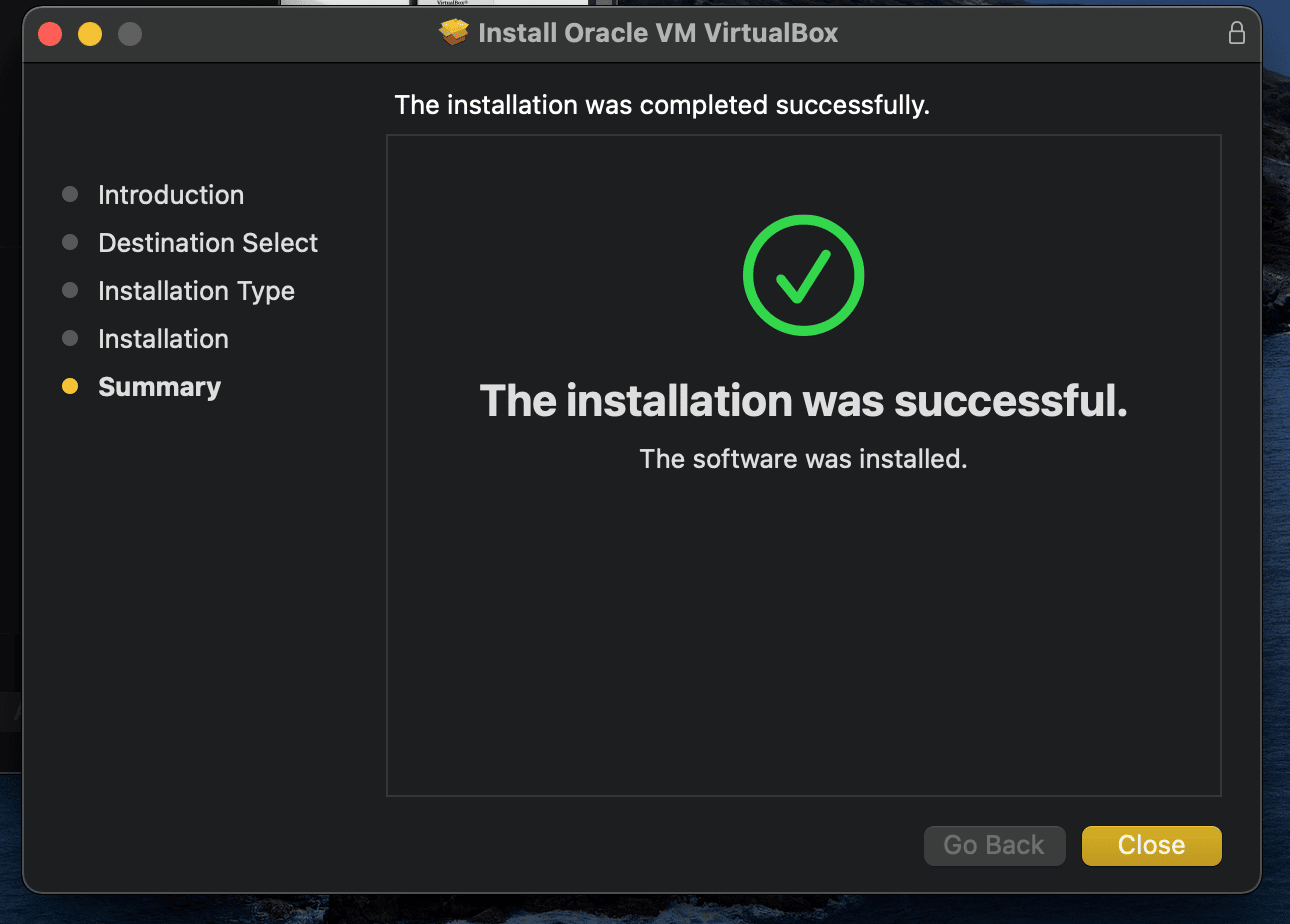
After downloading VirtualBox, open the installation file and install the program.
Close the window after installation. In the meantime, before you install VirtualBox, download the ISO Windows file.
Create a new virtual disk in VirtualBox
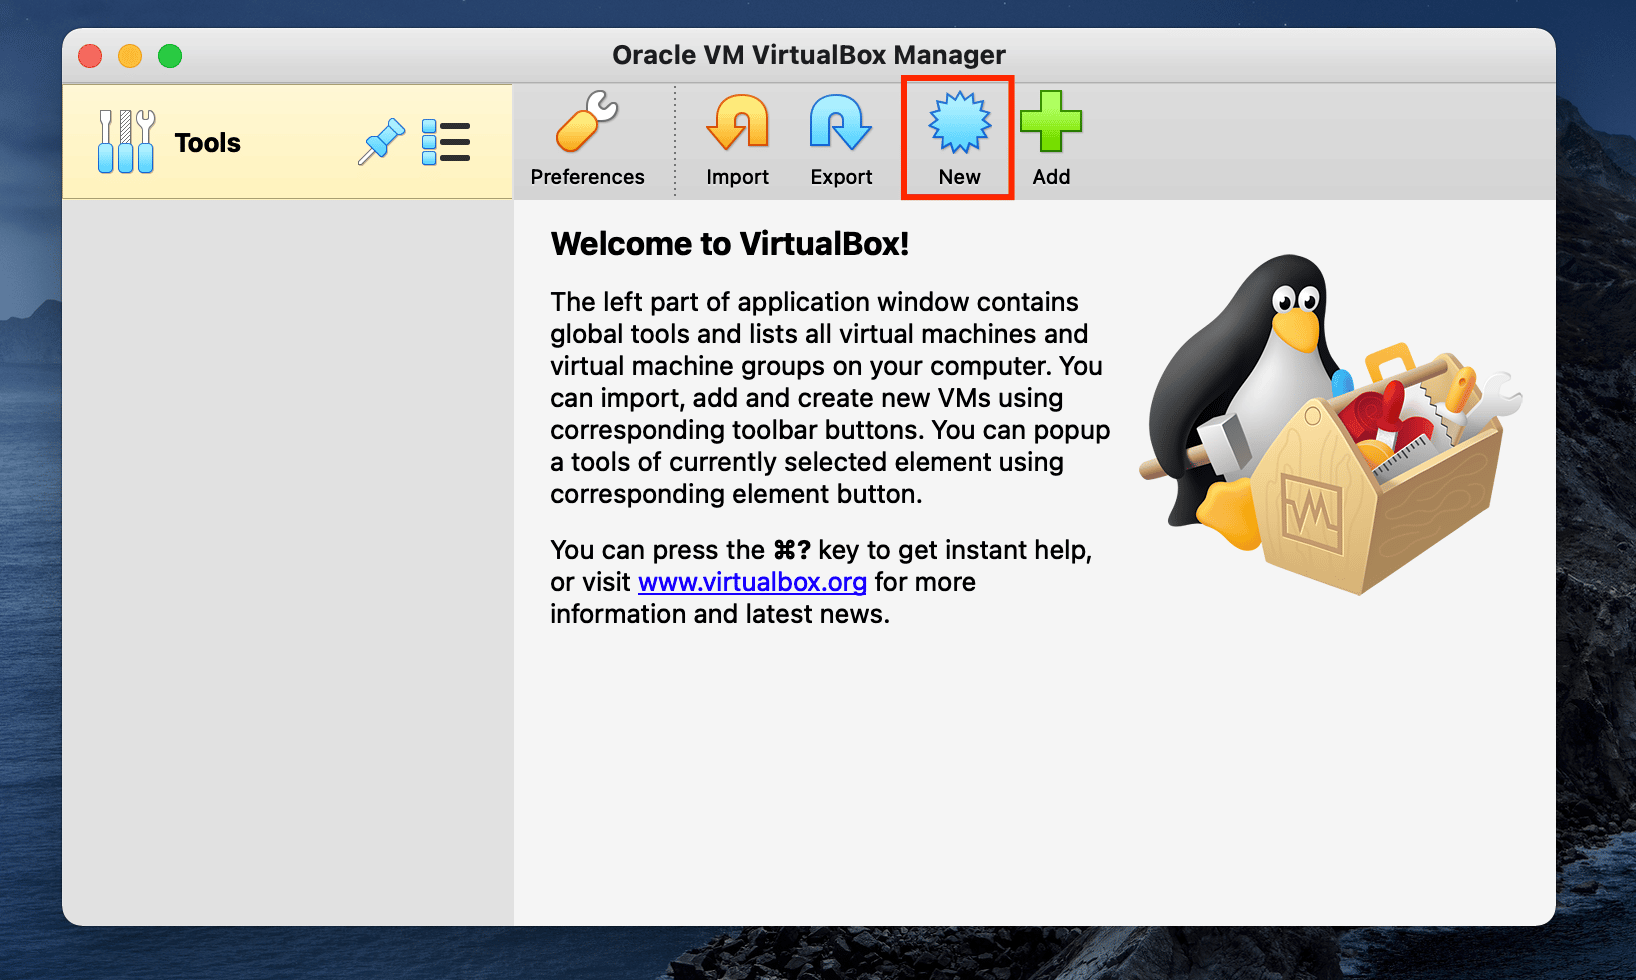
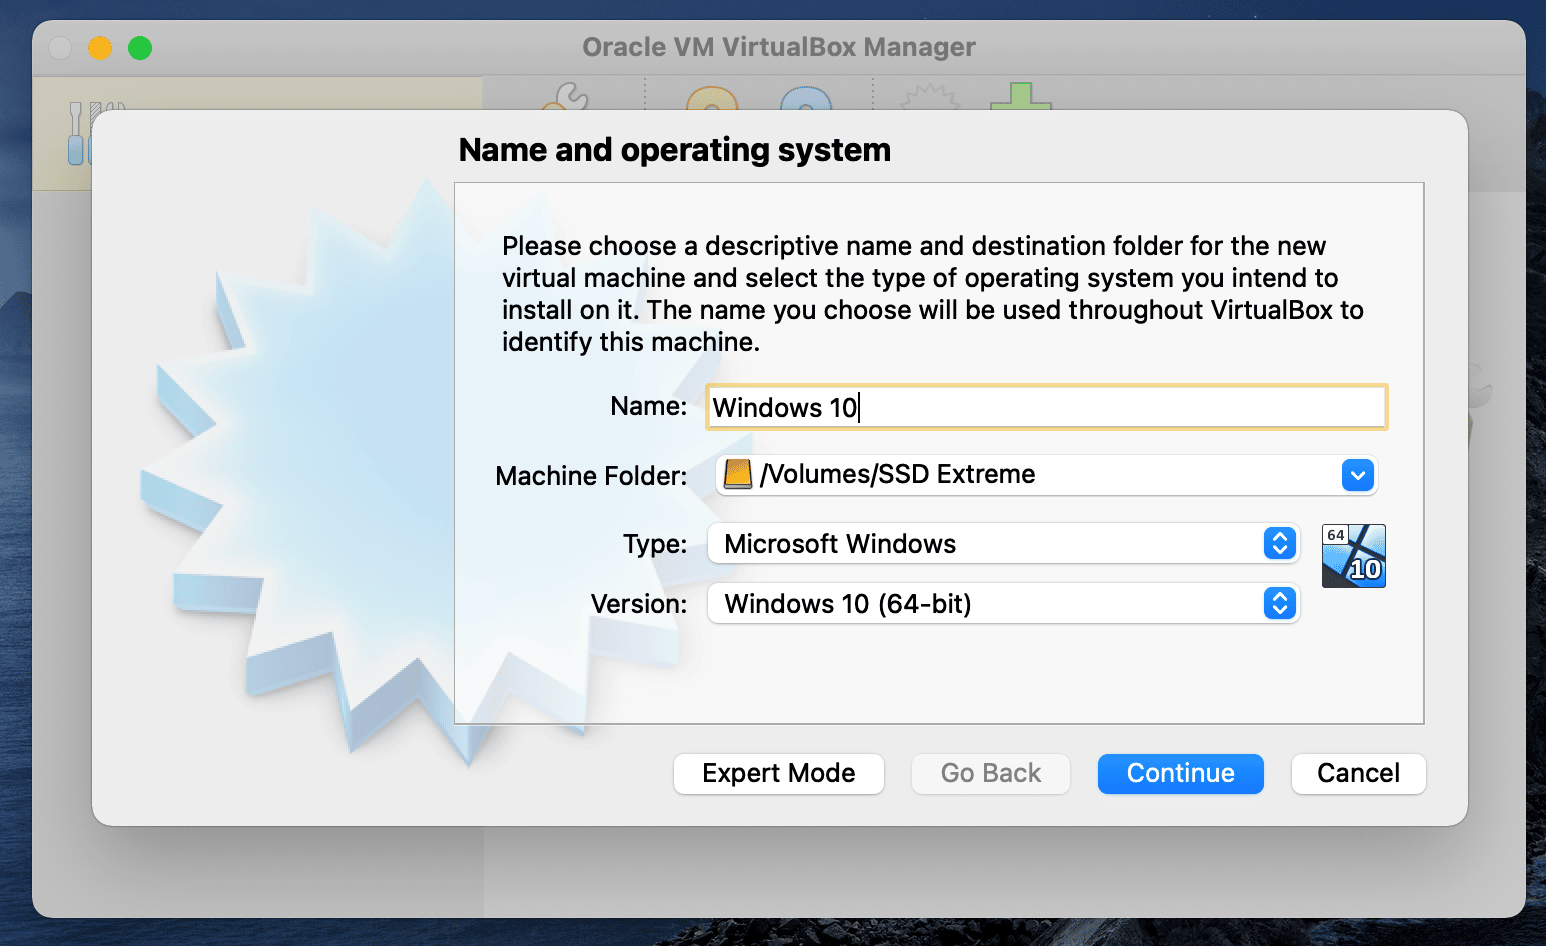
Open the VirtualBox application and click New.
I chose Windows 10 as the name of the operating system. You can choose any name you want. Continue to the next step.
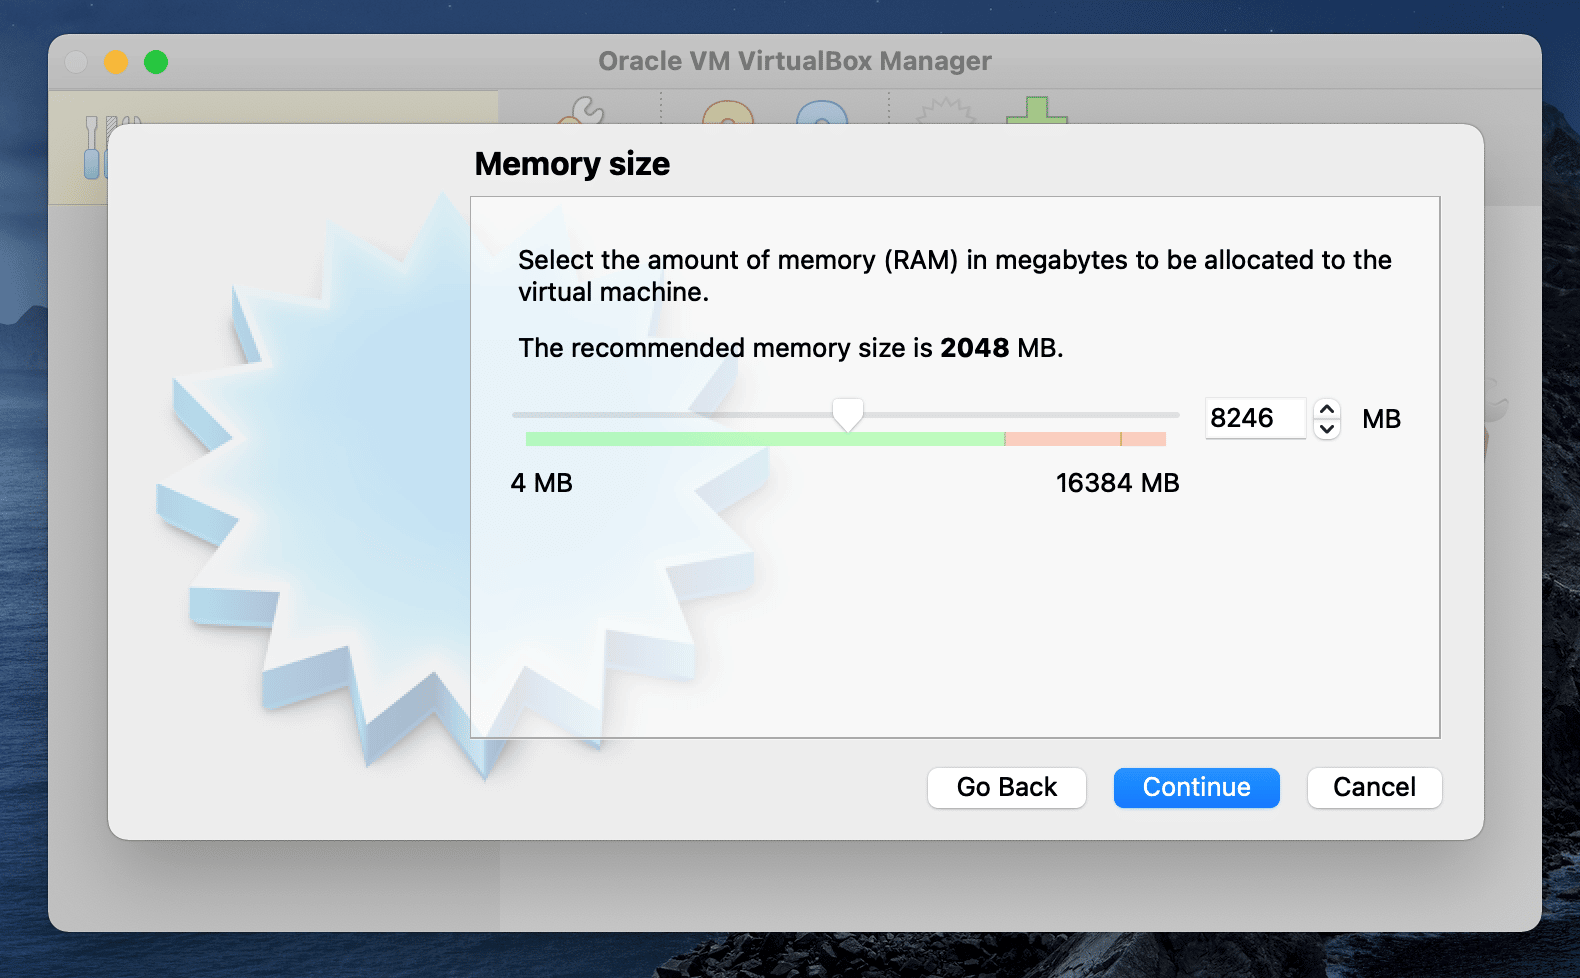
The guide will recommend operating memory requirements, but this can also be adjusted.
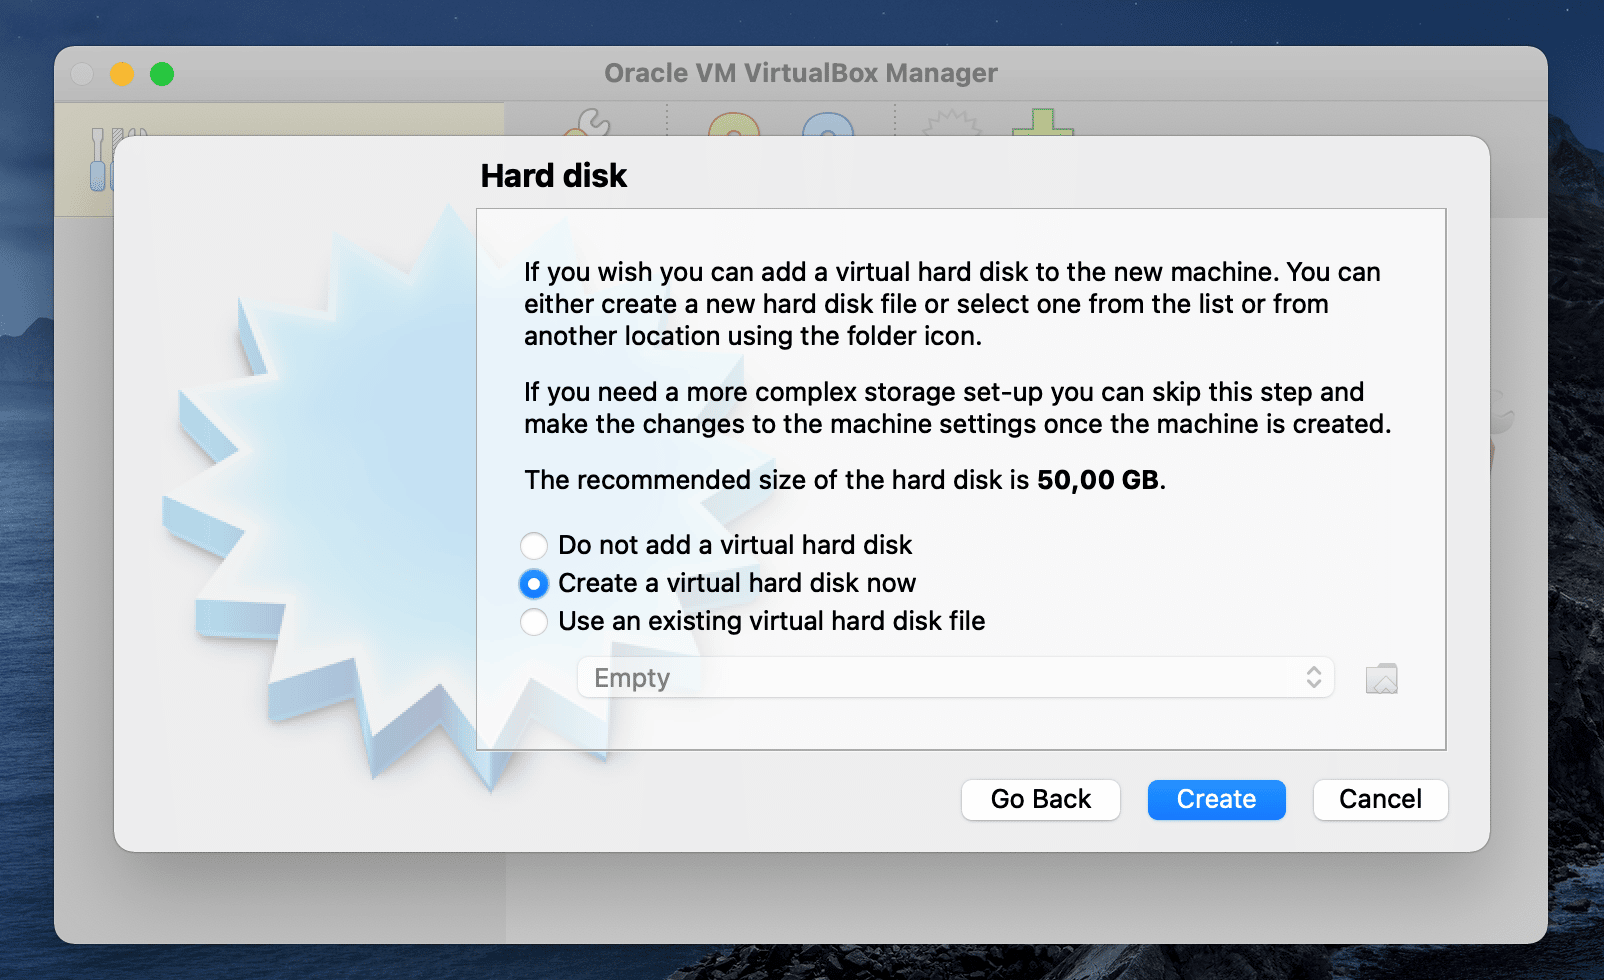
In the next step, choose the Create a virtual hard disk now option and click Create.
Next, it’s generally recommended to choose VDI (VirtualBox Disk Image).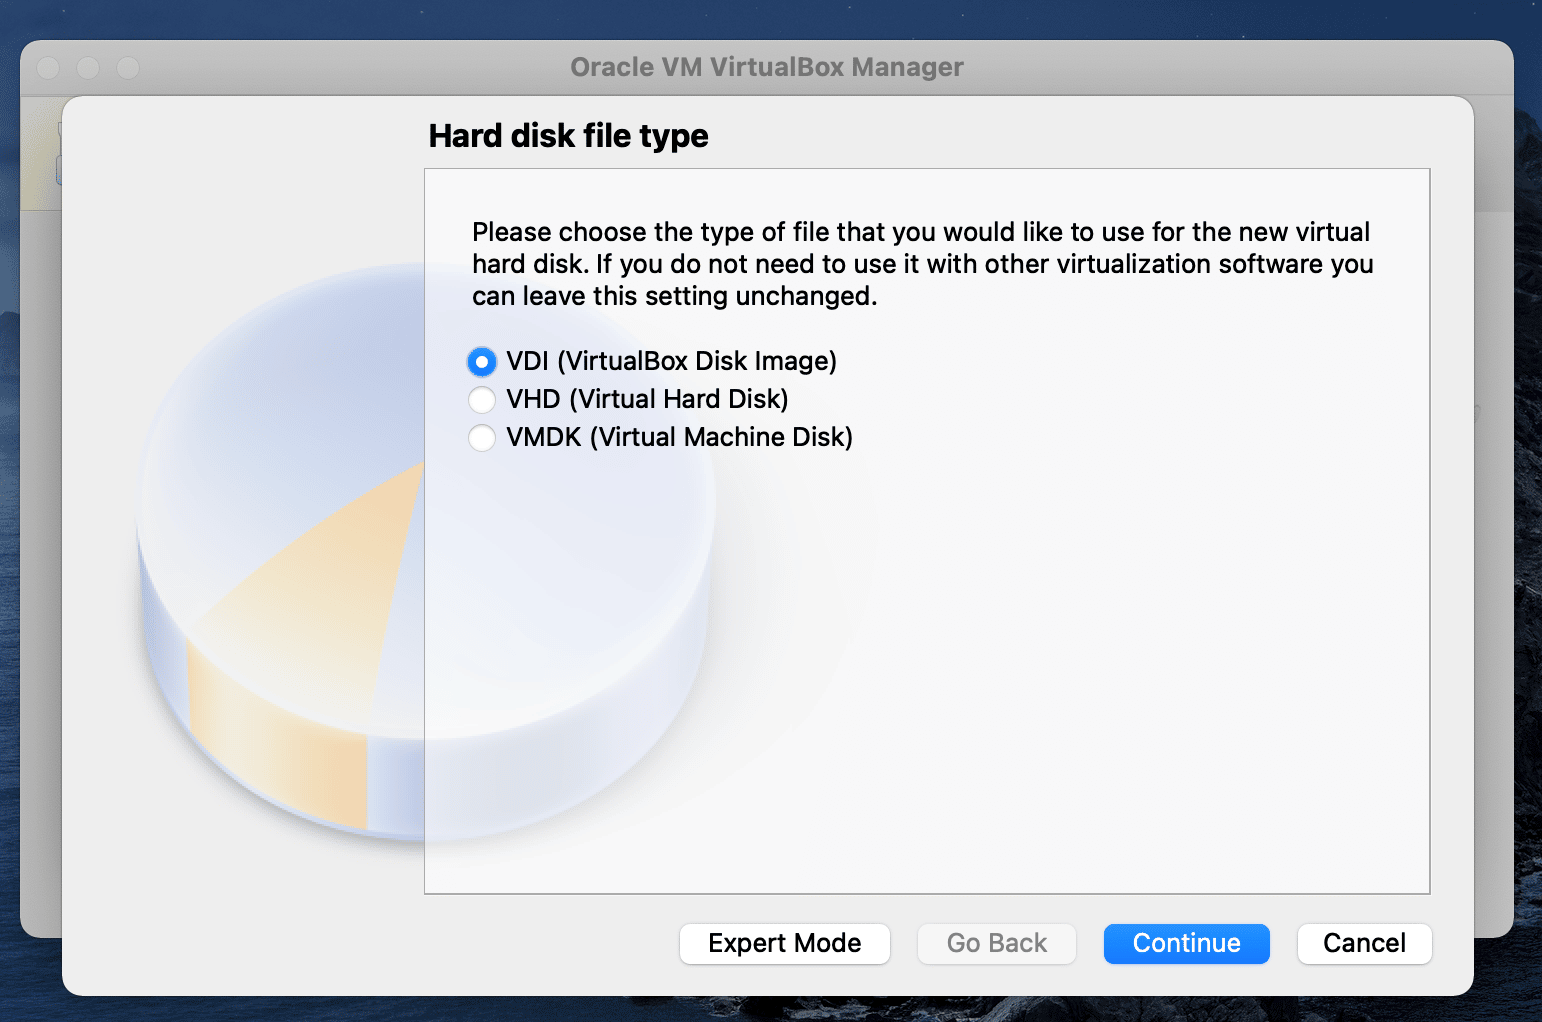
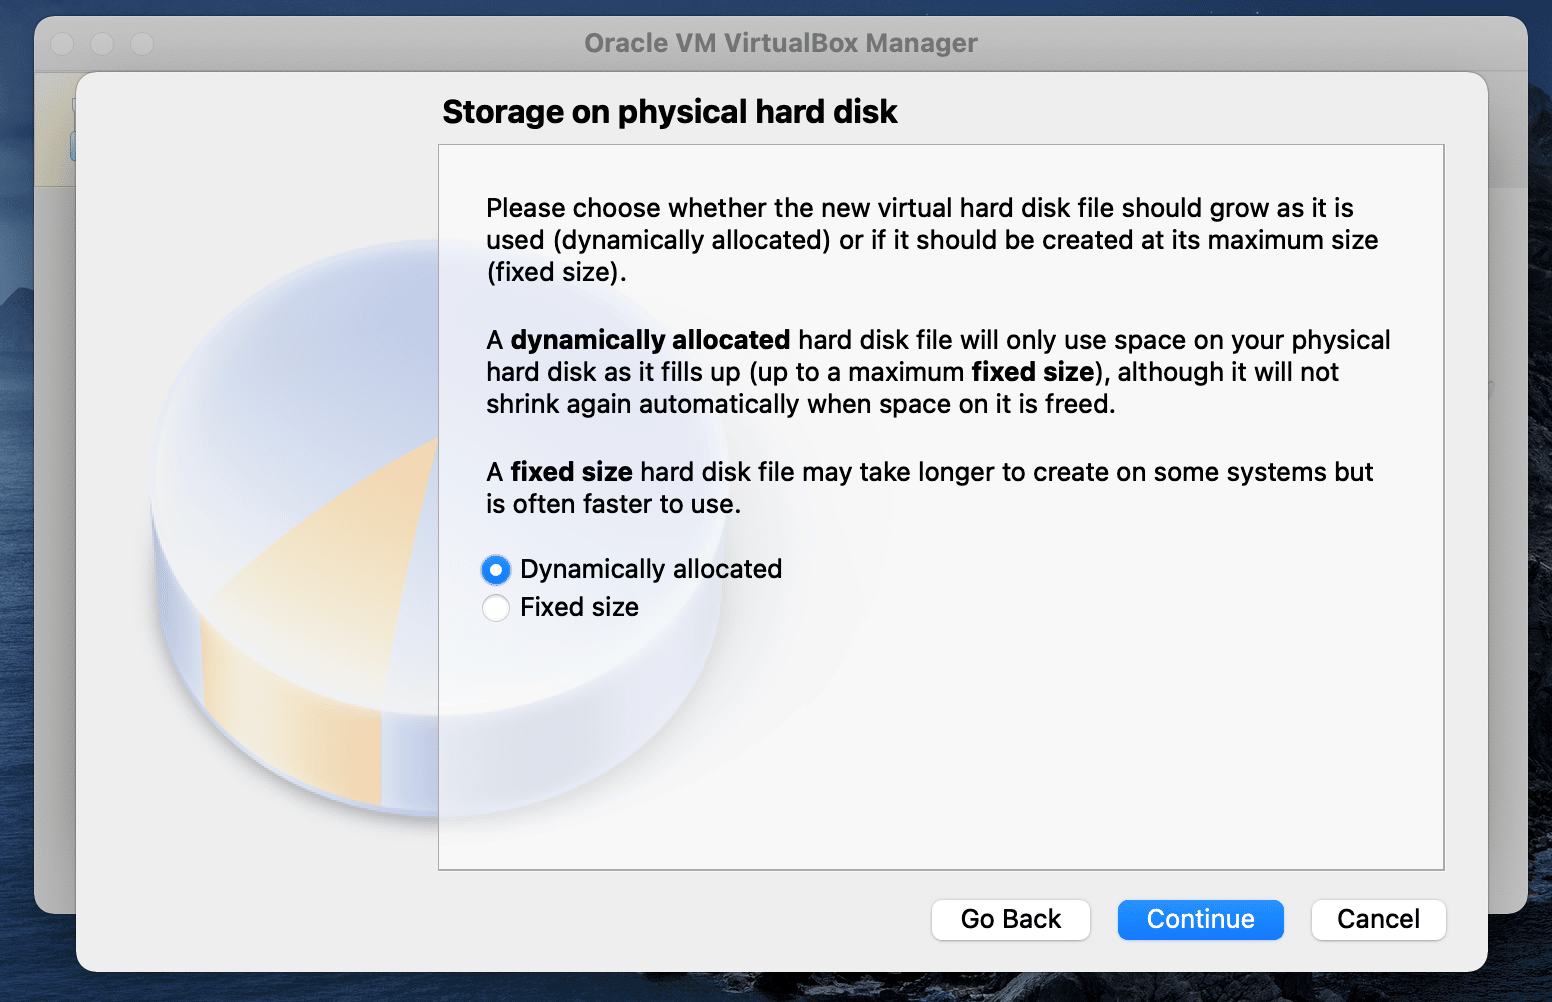
Choose if you want the disk size to be fixed or dynamic. Fixed is faster, but risks getting filled up. The pros and cons are described in the instructions. I chose the Dynamically allocated option.
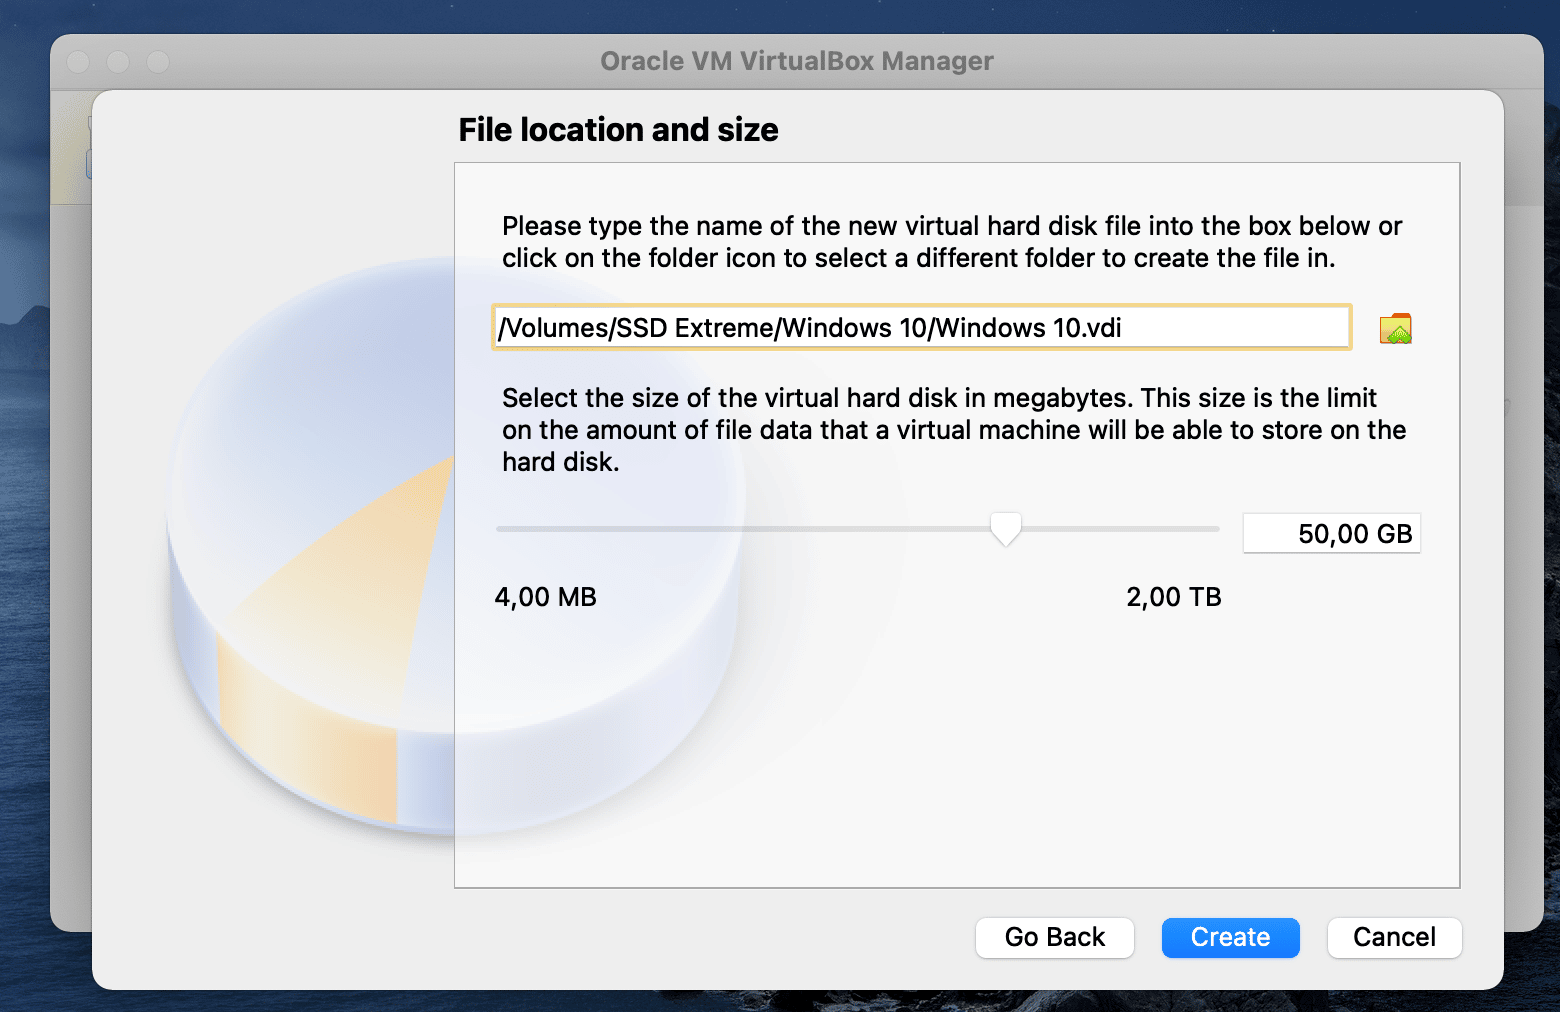
Finally, choose how much space you want the virtual disk to take up on your hard drive and click Create. It depends if you’re going to use virtual Windows only for Zoner Studio or for other programs. Don’t worry about the size of your photos. They remain on the original hard drive.
Install Windows in VirtualBox
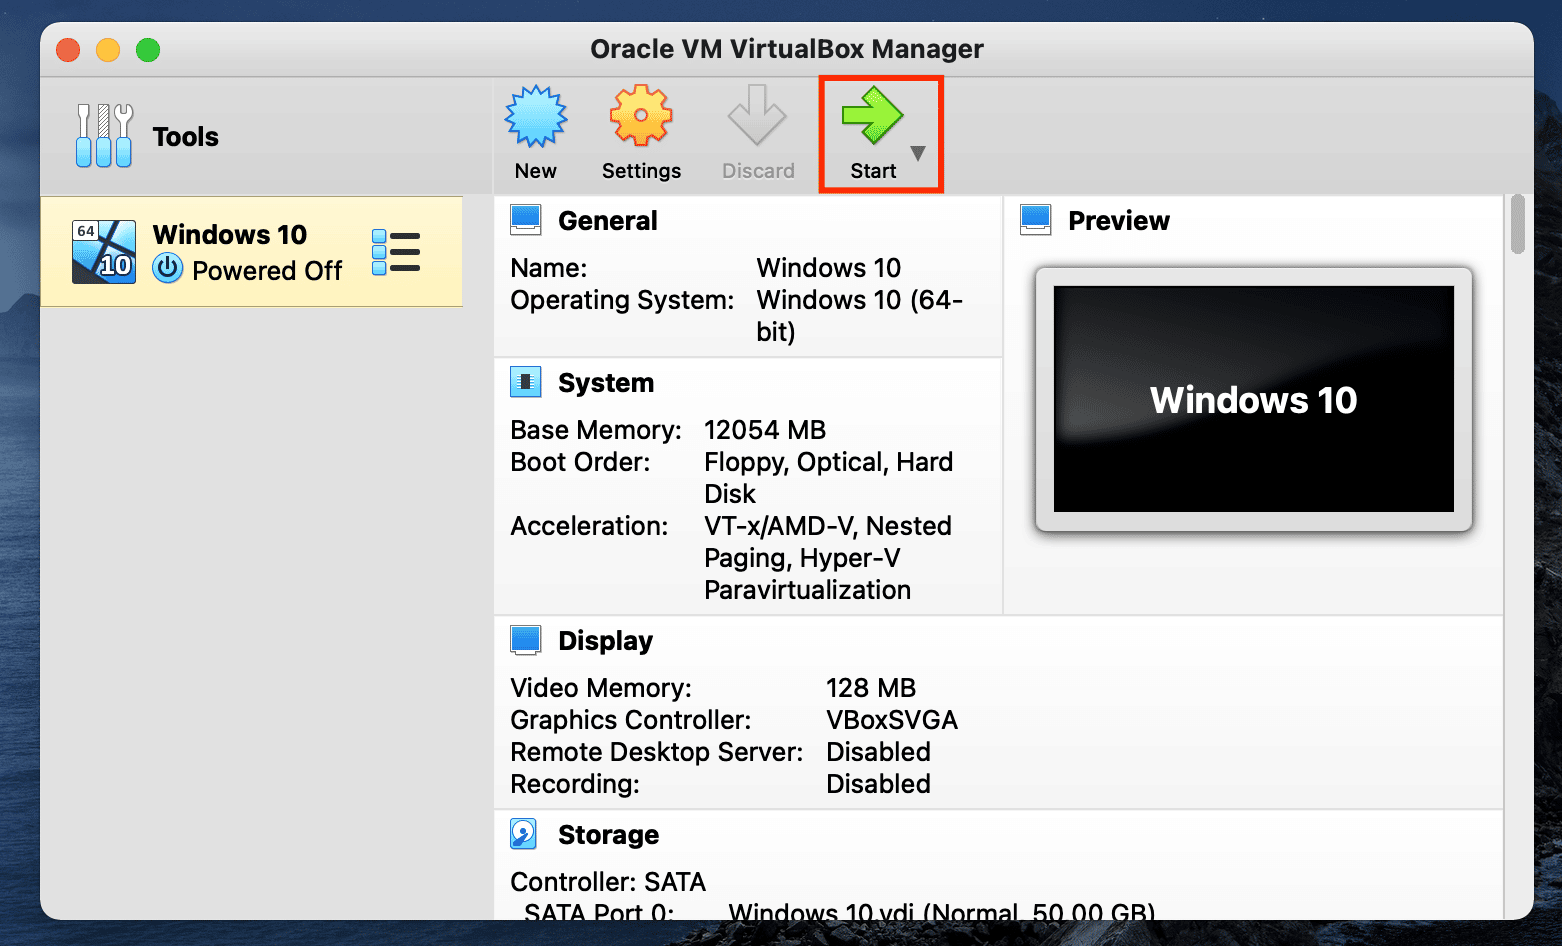
If the ISO file was downloaded or if you have your own installation file, you can start installing Windows. Still in VirtualBox, click Start.
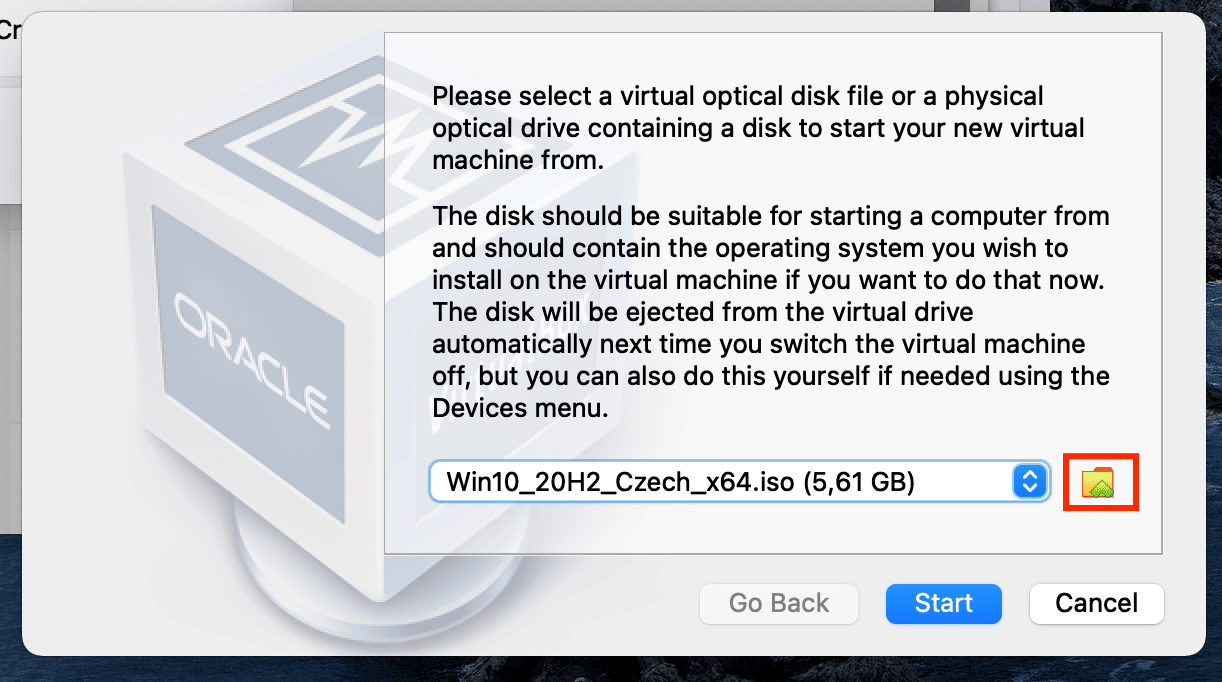
In the window that opens, click the folder icon to choose virtual Windows and find the ISO Windows file on your hard drive. It is most likely in your downloads.
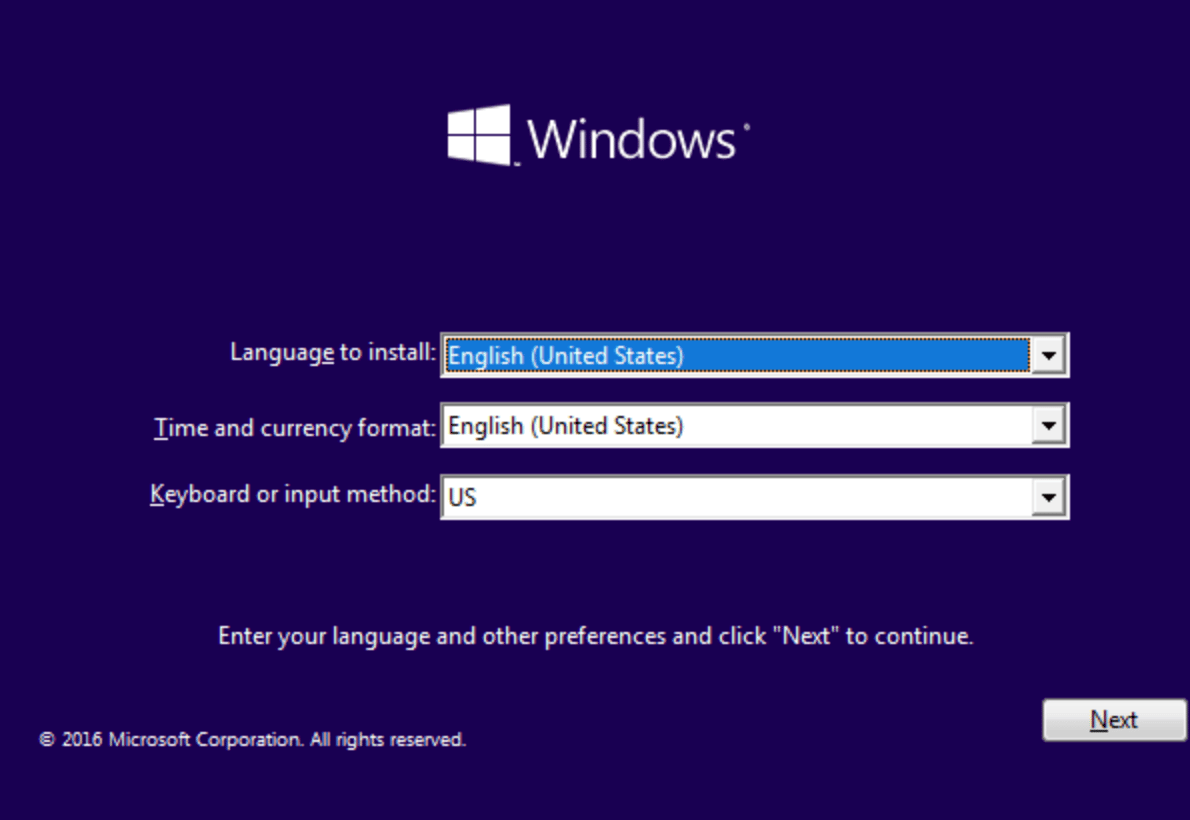
Click the Start button to start classic Windows installation.
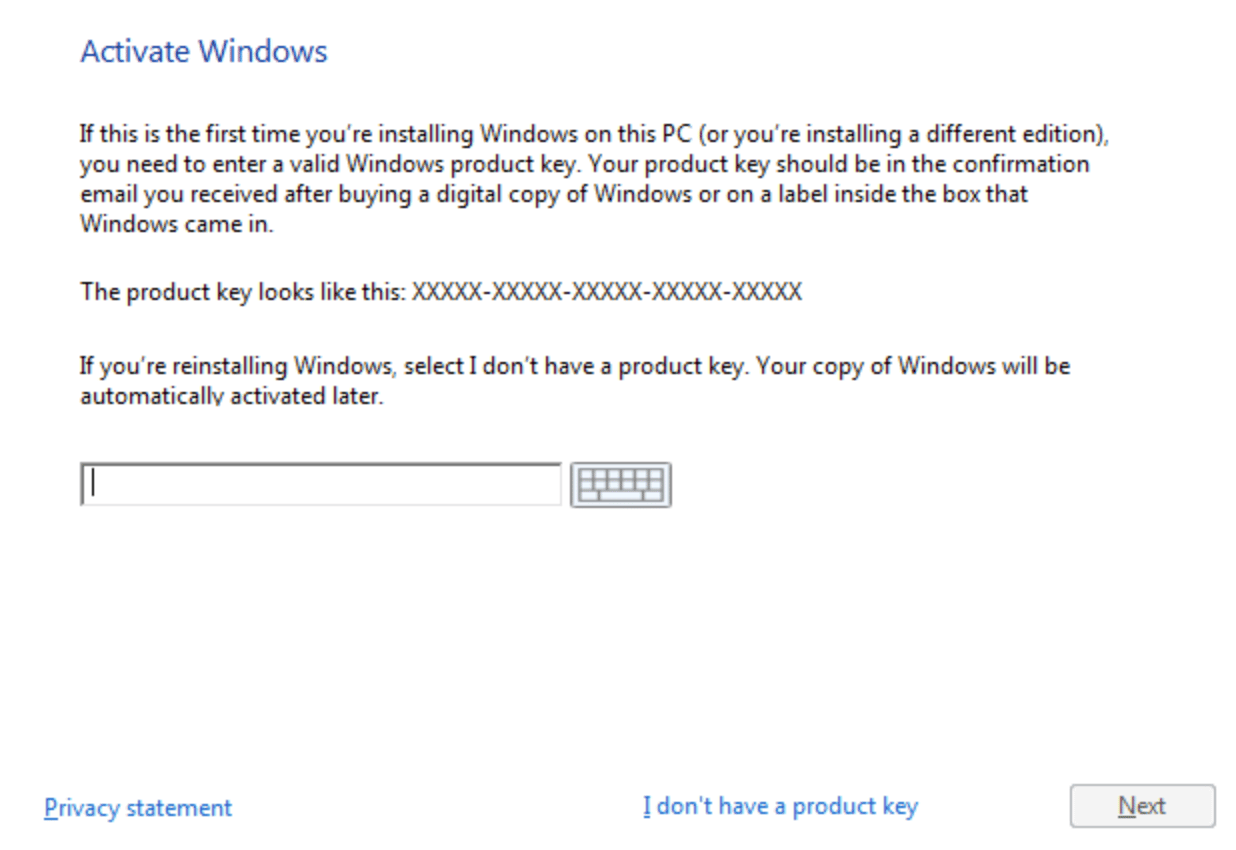
If you don’t have Windows purchased yet, click I don’t have a Product Key. Windows will function normally; just know that your license will last only three months.
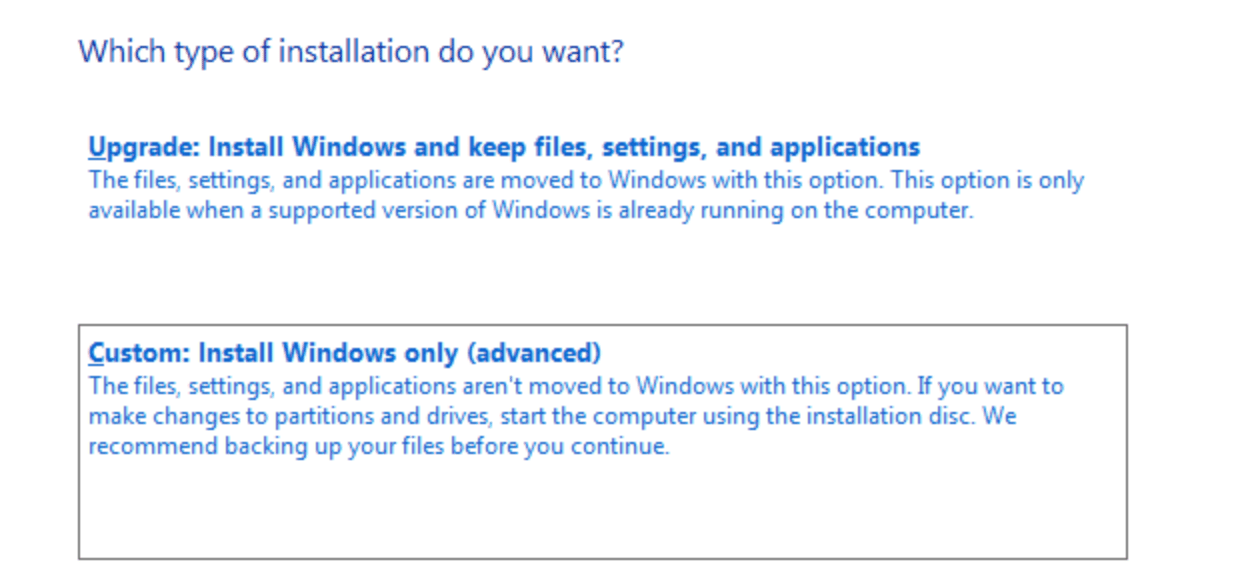
When installing, choose Custom: Install Windows only.
Then, wait for Windows to be installed.
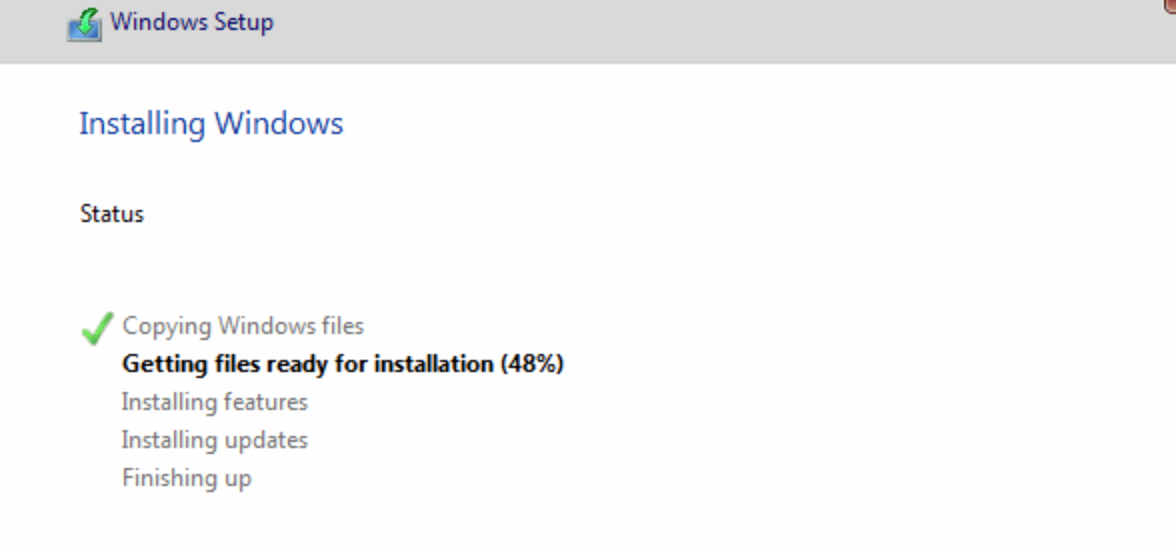
After installation, click Use express settings and you’re done – you have virtual Windows.
Adjust Windows and VirtualBox settings
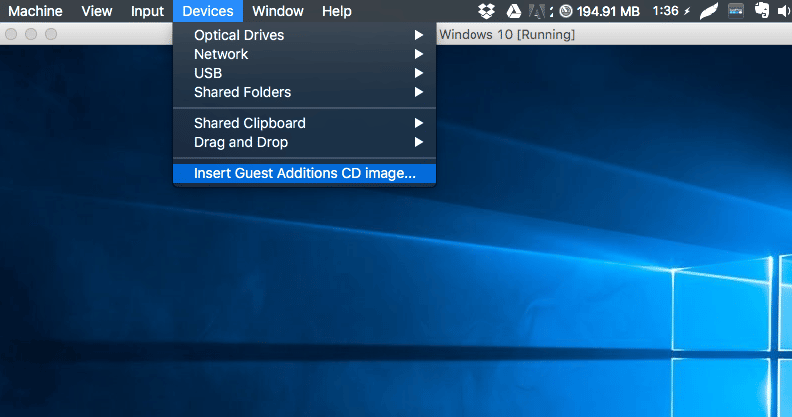
You now have Windows, but you need to make a few important adjustments to the settings. Your first step should be to install the Guest Additions CD image. This tool is handy for changing resolution and overall compatibility. Complete the remaining steps of the installer without any changes to settings and restart Windows.
Display resolution
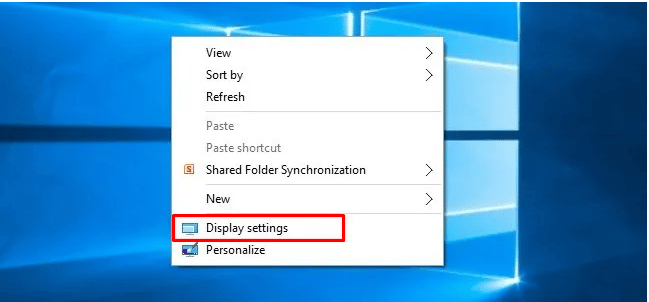
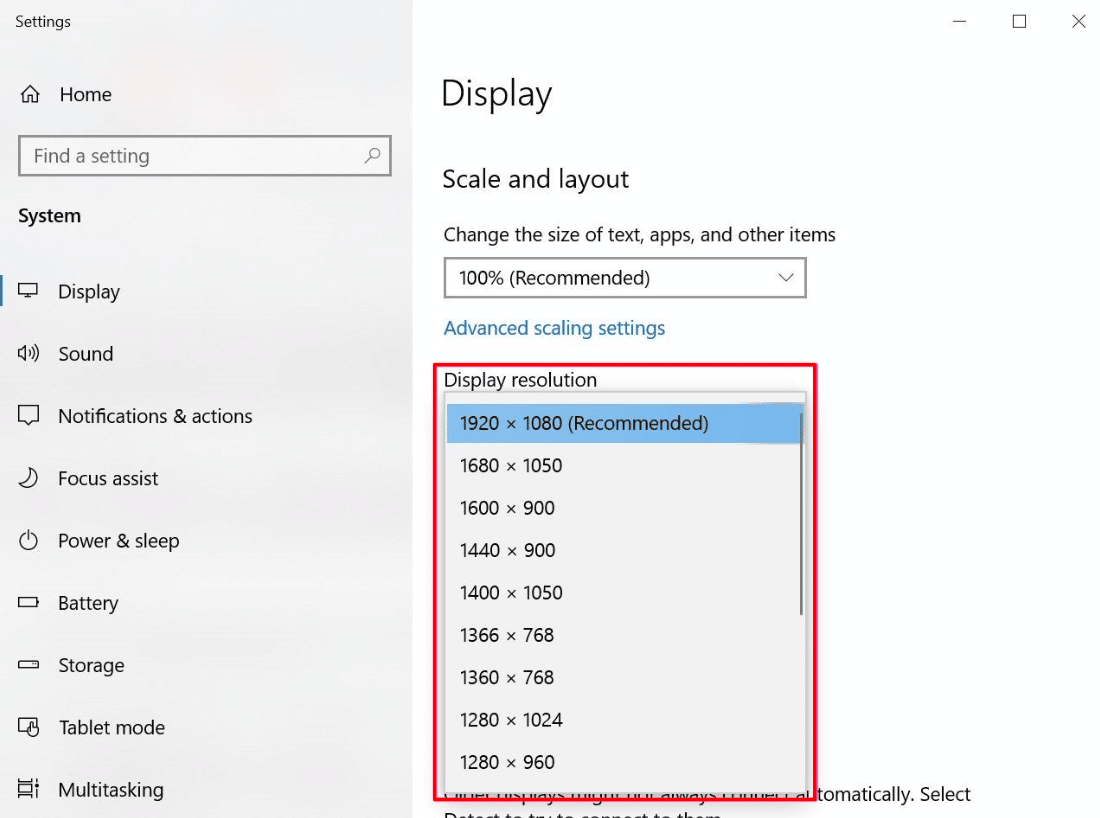
Next, you need to tweak the resolution. I have a resolution of 1080×800 pixels on my MacBook. I will use Windows across the entire screen on its own desktop space, so I choose the same resolution for Windows.
You can get to resolution settings by clicking the Windows icon in the bottom left corner and typing “display resolution.”
Download Zoner Studio and sync files
Next, you can install Zoner Studio. Open your browser to download and install the installation file (in Windows) from the official Zoner website.
After logging in, you can use Zoner Studio, but you most likely won’t have any photos to edit. Your photos are saved to your hard drive and you don’t have access to them from Windows. You need to set up the File sync.
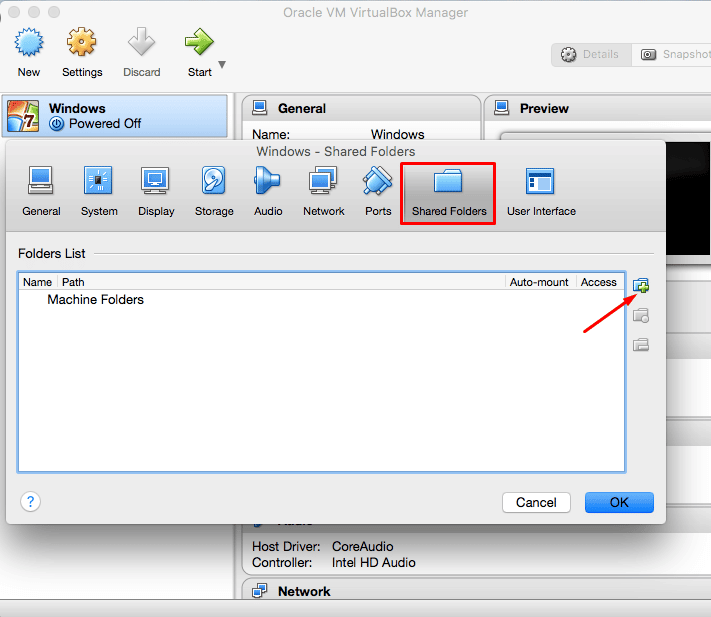
Go back to VirtualBox and open Settings and the Shared Folders tab.
After clicking the folder icon with the + symbol, choose the location where you have all your photos. It is possible to select multiple folders if you don’t have all your photos in one place.
Next, find this folder directly in Zoner Studio. It will be in Network under the VBOXSVR subfolder. It’s useful to add this folder to the Catalog or to your Favorites for quicker access.
That’s all.
You can now use Zoner Studio on macOS.
Is it worth it?
If you ask me, the MacBook is an excellent computer for photographers and I prefer it over Windows. However, I haven’t found an alternative to Zoner Studio for macOS. It’s up to each individual user to decide what works best for them.
