The Histogram in Practice: Using the Histogram for Landscape Photography
The histogram is such a powerful tool that I use it for every landscape shot I take. If you’re not already a fan of the histogram, this article shows you why you should learn how to use it and how it can help improve your photos.
In this article, you’ll learn:
• Why you shouldn’t rely solely on your camera’s display when shooting landscapes.
• How to use the histogram to identify overexposed and underexposed areas.
• Why it’s often beneficial to expose as far to the right as possible (ETTR).
• When the histogram can be misleading.
• When you shouldn’t rely on the histogram at all.
Zoner Studio displays the histogram by default when you’re editing photos—that’s how important it is. Likewise, most cameras also have a histogram, which can be helpful in the field.
What is the histogram?
Simply put, the histogram is a graph that shows the distribution of brightness levels in an image. It looks something like this:
The right side of the histogram shows increasingly brighter areas and as you move upward, you can see their frequency. On the left side of the histogram, there are areas that are completely black, and on the right, areas that are 100% white. Ideally, you want to avoid both extremes as much as possible.
Where to find the histogram
You can access the histogram in several places on your camera. In most cases, it can be displayed alongside the image preview after taking a shot. Depending on the device, you may need to switch display modes or bring up additional image information.

Some cameras can even display a live histogram in the viewfinder or on the display when shooting.

This feature isn’t available in DSLR viewfinders because they are analog and show the scene directly through the lens. Mirrorless cameras have an advantage here, although some may have limitations. For example, I can’t display the histogram and electronic level at the same time on my Sony A7R V, while the Canon R5 allows both. In such cases, you need to choose which information is more important or switch between display modes as needed.
Many smartphones also offer a histogram, although you may need to dig through the camera settings to enable it.

Why and how to use the histogram
One of the biggest challenges when shooting is that you can’t reliably judge exposure based solely on the brightness of your display or viewfinder. It’s easy to end up with a photo that’s darker than intended—or worse, one with blown highlights where beautiful clouds become white patches.
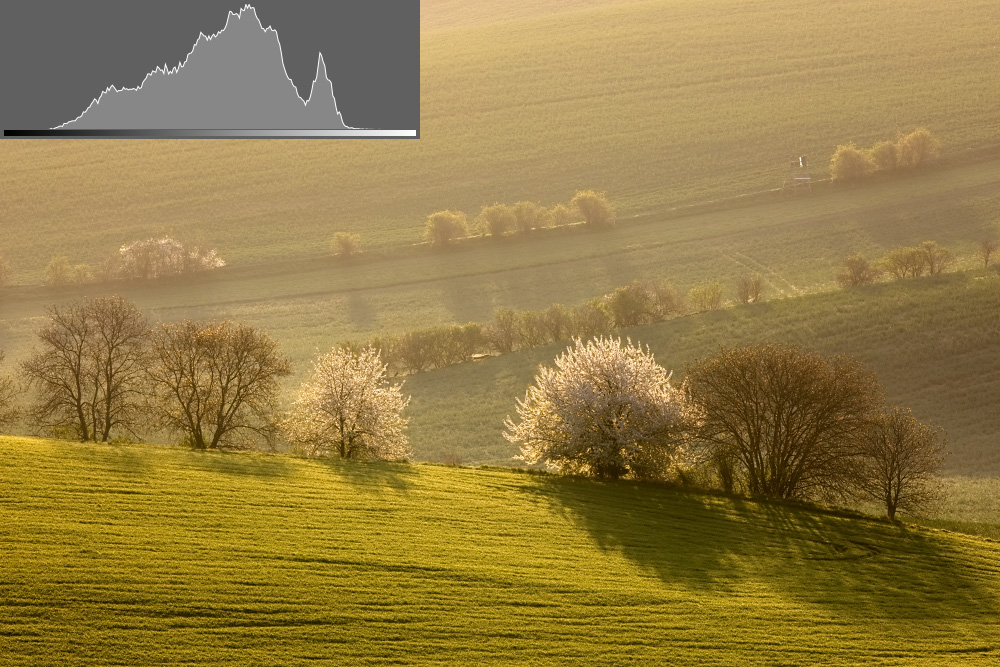
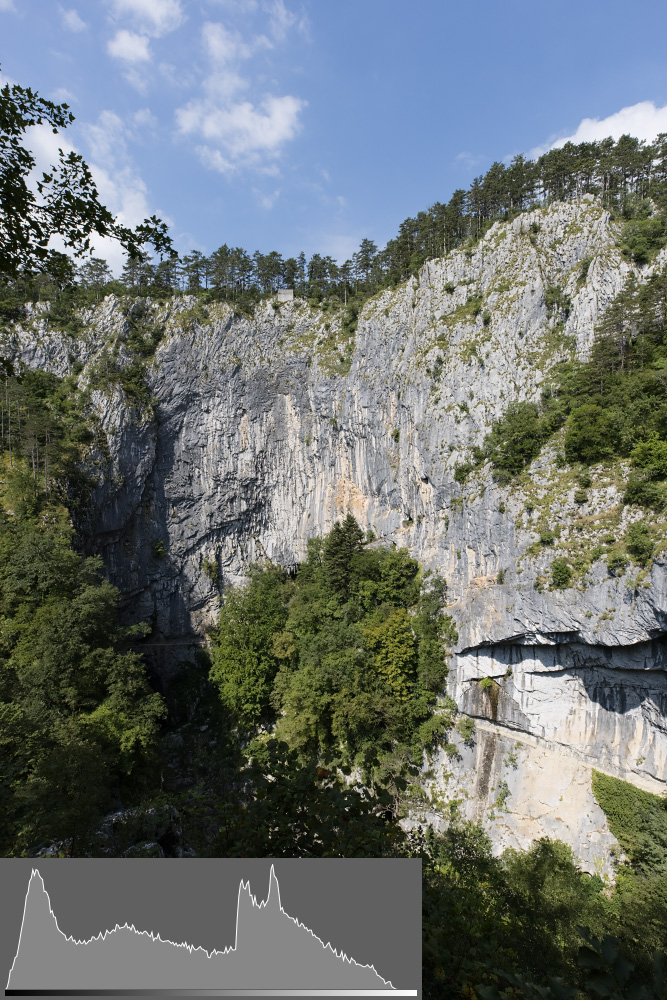
It’s better to rely on the histogram and keep it within the left and right boundaries. A properly exposed histogram looks something like this:
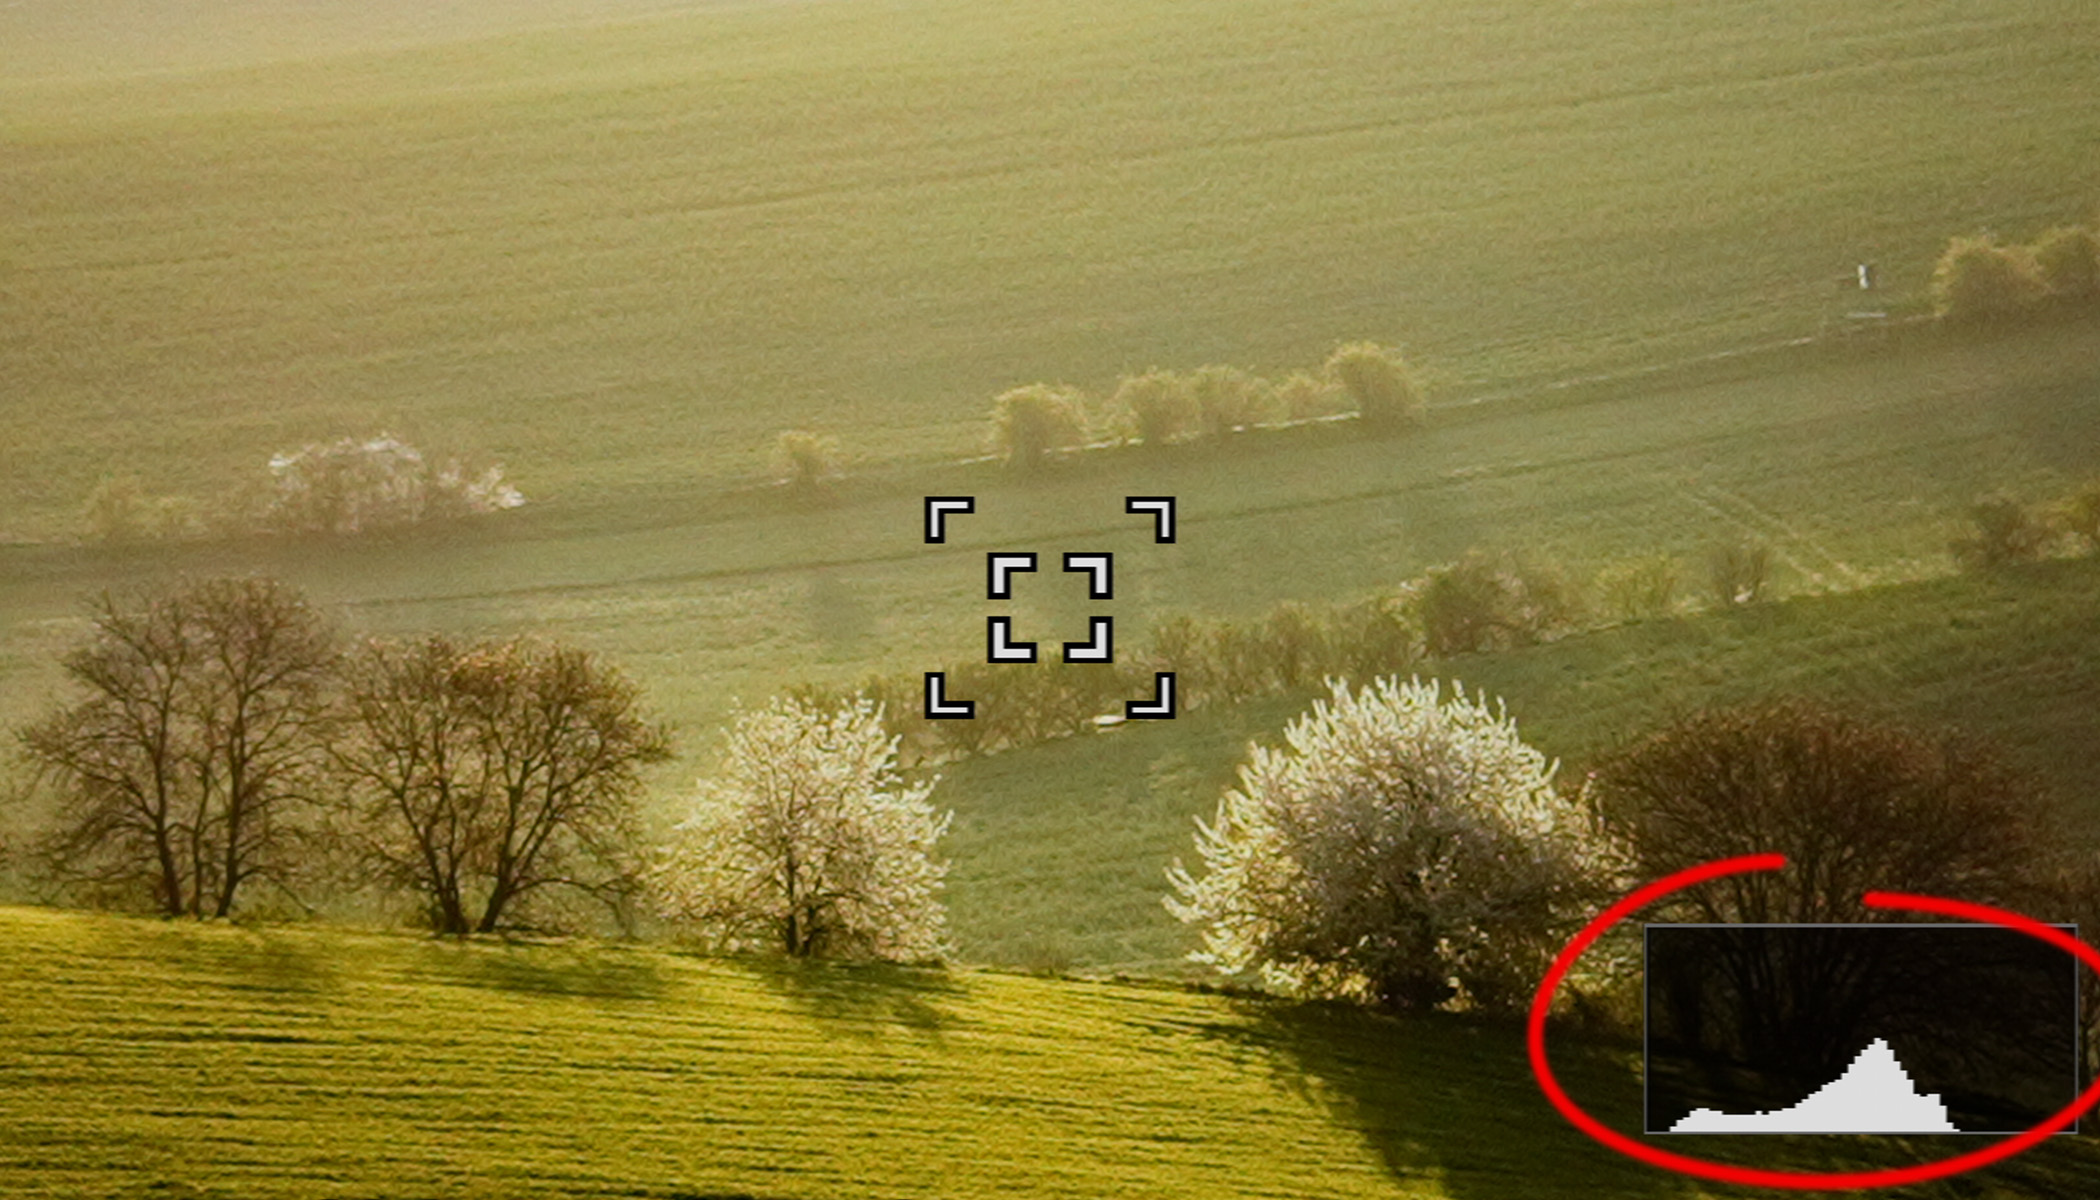
The aperture, shutter speed, ISO, or exposure compensation settings all shift the histogram left or right. If a noticeable peak is pressed up against the right edge, it usually indicates clipped highlights that are difficult or impossible to recover.
When this happens, reduce the exposure slightly and bring the histogram back to an acceptable range.
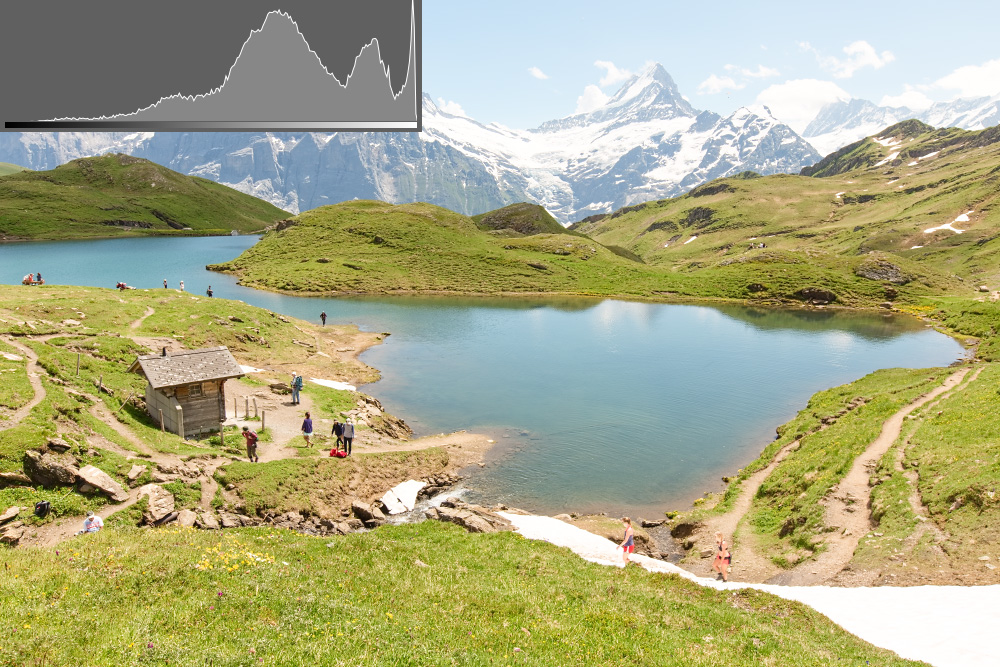
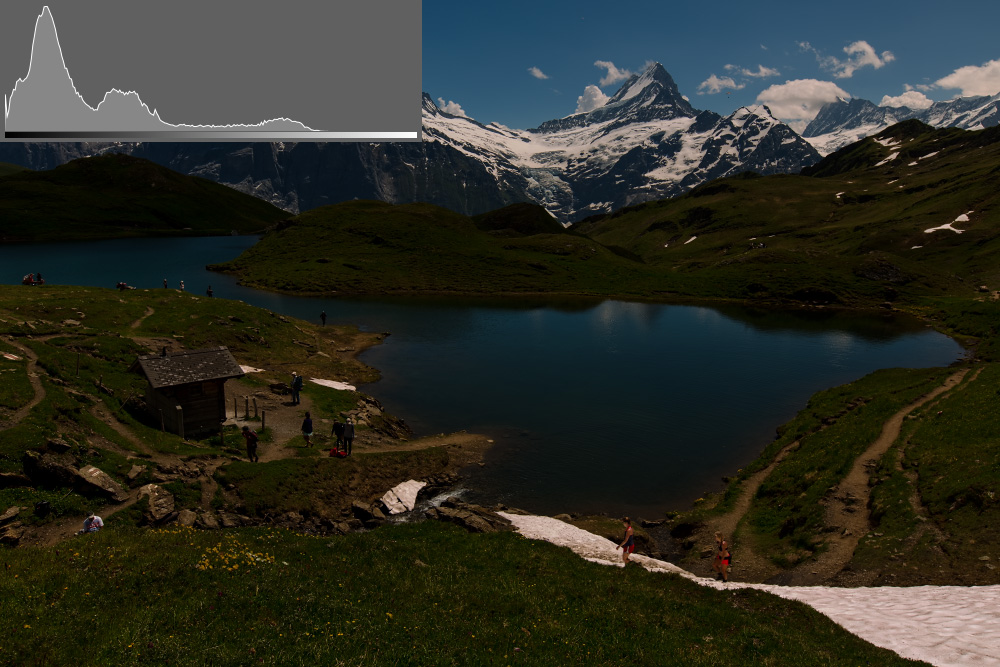
The opposite problem occurs when the histogram is shifted too far to the left and leaves empty space on the right. This indicates that the image is darker than necessary. Brightening it later on increases noise and reduces image quality. Again, it’s better to correct exposure while shooting and capture a brighter version of the photo from the start.
When histograms can be misleading
I’ve encountered situations where the histogram shown in the viewfinder before taking a photo looked noticeably different from the histogram displayed after the image was captured. In the end, the issue turned out to be lens correction.
I always work with RAW files and leave lens corrections turned off unless I specifically need them. However, modern cameras are sophisticated enough to apply these corrections in real time and display the corrected image in the viewfinder. As a result, the histogram you see while shooting is based on the corrected image, while the histogram shown afterward may be based on the uncorrected version.
This can be a common issue in landscape photography. Most lenses exhibit some degree of vignetting—darkening at the edges—and if there’s sky at the top of the frame, the vignetting darkens it. In many cases, this is beneficial. But lens correction artificially brightens those areas again. As a result, the histogram in the viewfinder may suggest overexposure, causing you to reduce exposure unnecessarily. More than once, I’ve come home wondering why I hadn’t taken brighter photos.
This effect is particularly noticeable when using an ultra wide-angle lens at a lower f-number in portrait orientation, where vignetting tends to be most pronounced.
In similar cases, it’s better to disable lens correction, which evens out the histogram.
Exposing to the right: A Landscape photographer’s secret trick
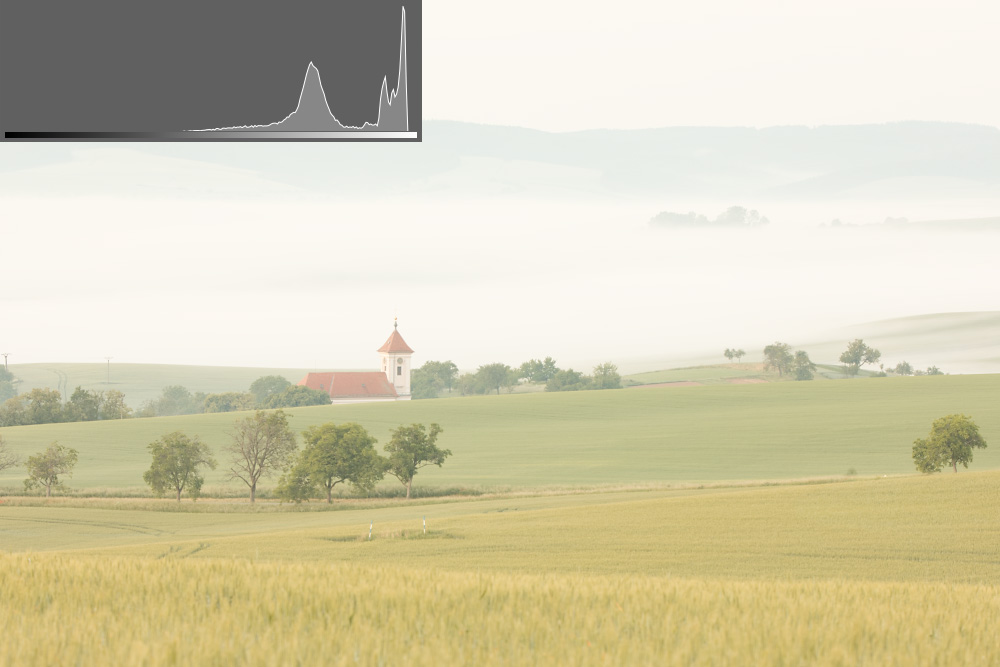
The main trick when using the histogram is this: If you’re looking for the highest possible image quality, shoot with the histogram as far to the right as possible, even if the photo initially appears brighter than you’d like.
This technique is known as exposing to the right (ETTR). By capturing more light, the sensor records more image data. You can then darken the image to the correct level, reducing noise, and getting a great starting point for further editing.
Of course, you still need to avoid clipped highlights. That would damage the image and make it impossible to darken.
You also need to keep ISO as low as possible; otherwise, there would be no improvement in quality. The tradeoff is a longer shutter speed. If that’s not feasible—for example, if it’s too windy—then it’s best not to use ETTR.
ETTR isn’t a universal rule, but a technique worth experimenting with.
When not to use the histogram
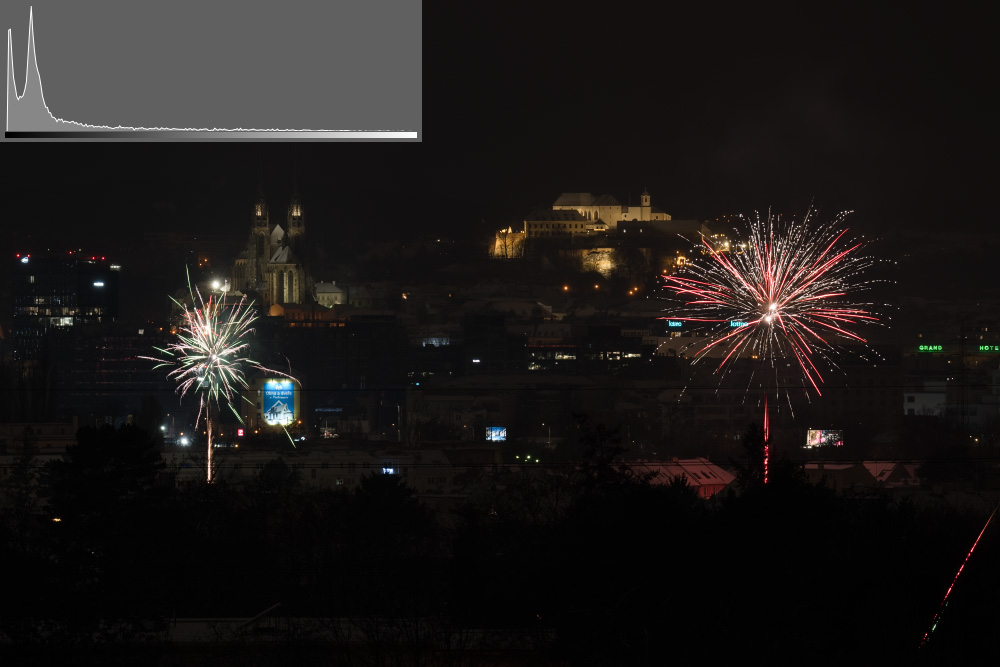
For certain photos, you shouldn’t on the histogram. This is often the case with night photography, where the image is supposed to be predominantly dark. In such scenes, the histogram naturally contains a large peak on the far left, and a few very bright spots in the image have very little effect on the overall graph.
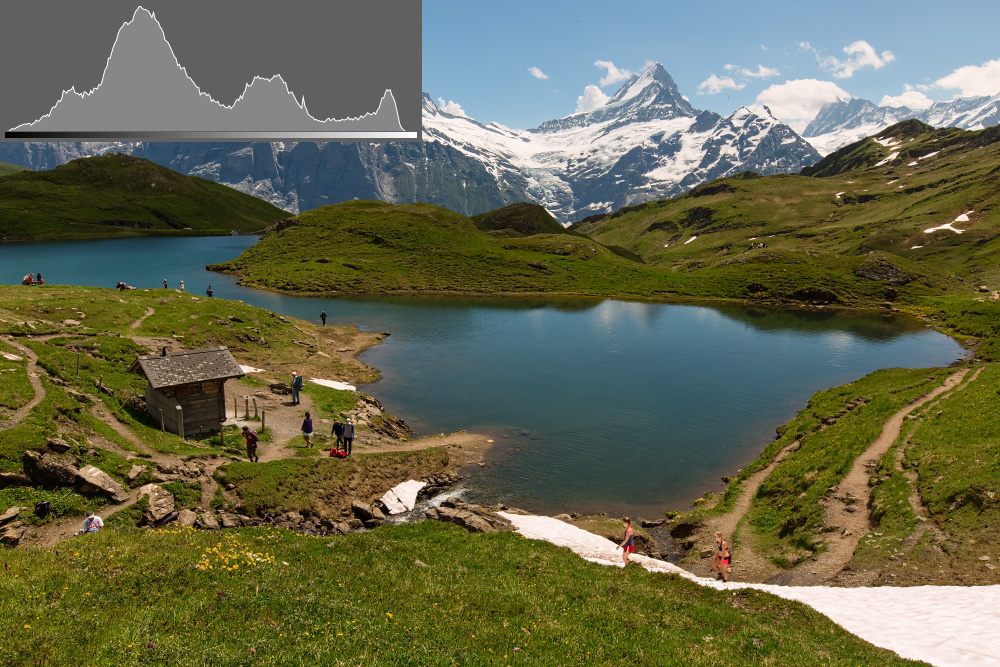
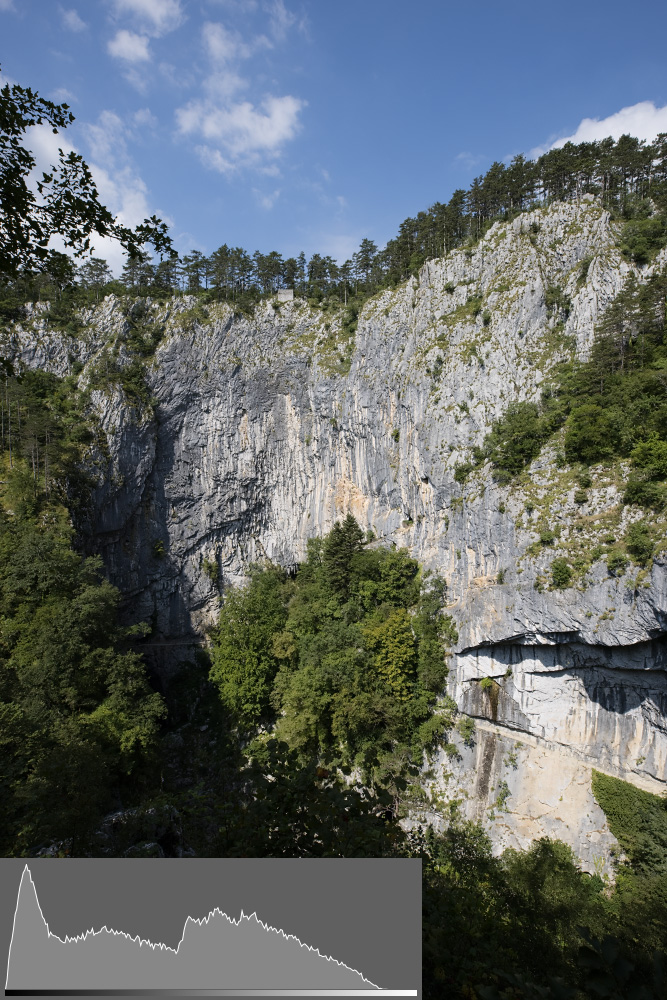
In other cases, the histogram reveals a different problem: the scene’s dynamic range is too wide. The graph shows two peaks on the left and right, and if we want to brighten the left peak—by shifting it to the right—the right peak would end up at the far right of the histogram, resulting in clipped highlights.
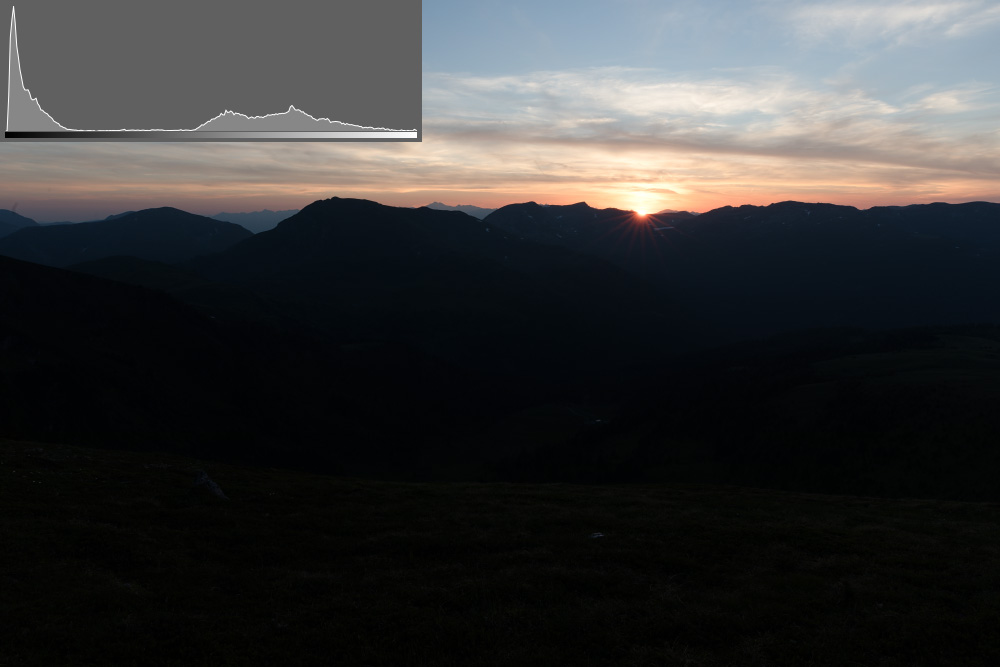
The solution is to take multiple photos at different exposure levels and combine them in post-production.
The histogram is the best tool for landscapes
I swear by the histogram. It’s one of the most reliable tools available when shooting outdoors, especially in changing light, where it’s difficult to judge the exposure accurately from the display alone.
If I had to give just one piece of advice about using the histogram, it would be this: when shooting landscapes, try shifting the histogram as far to the right as possible, without clipping the higlights. You end up with a higher-quality RAW file, lower noise, and more flexibility during editing.
I hope I’ve convinced you that the histogram is worth paying attention to, and you’ll start using it more in your photography. And if you experiment with EETR, you can further improve image quality without needing to buy additional equipment.
FAQs
What does a properly exposed histogram look like?
There isn’t a single perfect shape for the histogram. In landscape photography, the most important goal is to avoid touching the left or right edges, resulting in loss of detail.
What if the histogram is pressed up against the right edge?
This usually indicates clipped highlights. Some of the highlights become pure white, and it may not be possible to recover detail from them during editing.
What if a histogram is shifted to the left?
The photo is most likely too dark. Brightening it later can increase noise and reduce image quality.
What is exposing to the right (ETTR)?
EETR is a technique where you take the brightest possible photo without clipping highlights. This provides more image data for RAW files, resulting in lower noise after post-processing.
When should I ignore the histogram?
Night scenes, fireworks, or scenes with an extremely high dynamic range. The usual rules for the histogram may not apply in these situations. You need to take the nature of the scene into account.