Creating a Zonerama Gallery and Adding Your Photos

No matter whether you’re a Sunday photographer or a Monday to Friday photographer, you’ll want a way to show off your work online. Hobby photographers want a gallery so they can show pictures to family and friends, and the pros want one to present photos to clients. And serving these needs is what the Zonerama free web gallery is all about.
The Unlimited Gallery
Not familiar with Zonerama and what it does? No problem. Zonerama enables you to easily set up a web gallery and share your photos through it. You can work either through the Zonerama website or from inside of Zoner Studio. Other people can view your photos from anywhere and can download them too, if you allow it. For each album, you can also set whether to leave it visible to the world, or protect it by making it hidden and/or password-protected. There are no limits on how many photos you can upload, nor on their resolution—Zonerama is the unlimited gallery.

Creating a Zonerama Account
We’ve done our best to make gallery creation quick and easy, so joining Zonerama should take just a few minutes. Read on for a short step-by-step registration guide.
First open www.zonerama.com in your web browser. This shows the Zonerama front page. Click Get Your Online Gallery in the middle of the page, or click Create Account towards the top right. Then in the next step, enter your email address and confirm the account creation.


Basic setup
Within a few minutes, the email address that you entered will receive a message from account@zoner.com. Click the link in that message to finish setting up your gallery. Choose a name for your gallery—for example your first and last name, or a nickname. It’s up to you. Just remember, other people will be using it to find your gallery.
Then on the second line, enter your choice of web address for your gallery (for example zonerama.com/johnspics). This will be the actual address of your gallery’s front page. Give this address to your friends, etc.
On the third line, enter the password for your gallery. Then click Create Gallery. This sends you to the main page of Zonerama, with an overview that includes, for example, photos by your friends and articles on learn.zoner.com.

To discover other interesting, popular, and new photos, click Discover.
To see your own gallery, click My Photos.
“My Photos,” Albums, and Privacy
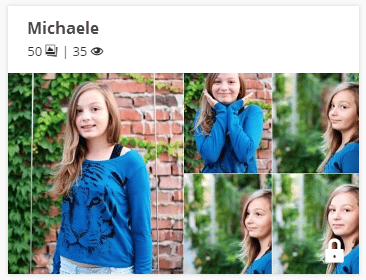
Click My Photos towards the top right to see the front page of your own photo gallery. You’ve just created your gallery, so you won’t see any albums here, but you’ll already see two folders to put albums in: “Public Albums” and “Hidden Albums.”

What’s the difference between these two folders? Public Albums and its contents are visible to every Zonerama visitor. They can show up in the overview of new albums on the Discover tab, as well as in web searches for the gallery’s name or address, or for the album name. Hidden folders don’t show up in these places.
But hiding albums isn’t the only privacy guard available. You can password-protect any new or existing album at any time. That includes public albums. Any password-protected album is represented on-screen by a lock icon. Clicking it shows a box for entering the album’s password. If a visitor enters the password correctly, they can enter the album and browse its pictures.

The albums that you upload to the Hidden Albums folder are hidden to the public—this entire folder is invisible in your public profile. When an album is in Hidden Albums, it’s visible only for you and for people who have a link to the album. To send a link to an album, use the Share button.
Uploading Your First Photos
To upload photos to Zonerama, click the blue Upload Photos button all the way at the top right.
This shows a window on the page. That window mentions that you can also upload photos using the Zoner Studio desktop software and the Zoner Studio Edit & Go Android app.
Let’s assume you want to stick with uploading from the Web for now. Open a File Explorer window in Windows and browse to a photo folder, or do the same in photo browsing software such as Zoner Studio. Then drag and drop photos into the uploading window. This uploads them automatically.
Or if you prefer, click Choose Photos to Upload instead. This shows a file browsing window. Use it to visit one of your photo folders, then select the photos you want, and then click Open. Square icons for the photos you’re uploading appear, and the bottom of the window shows a green progress bar. By the end of the upload, all of the icons are replaced by photo thumbnails.


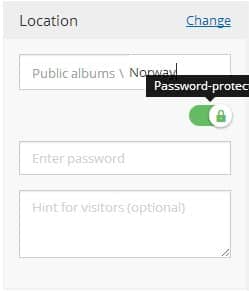
The right side of the upload window has a lot of settings. Some are more important than others. The location setting is the most important. When uploading public albums, you normally see Public Albums and a slash in the location box. Just write the name for your new albums after the slash. To keep an album hidden, that is, to make sure that only people with the link to the album can see it, click Change and then choose the Hidden Albums folder. You can also password-protect a folder, by clicking the lock icon.

This right-hand settings also include a Usage Rights section. Most settings here are just for your visitors’ information. But one of them actually affects your gallery’s behavior. It’s the Permit photo downloads option. If you turn it off, visitors will not be able to download your photos.
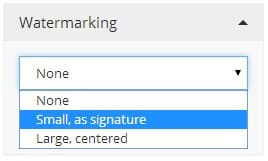
But what if you want people to download your pictures, and then think of you? Use a watermark for that. And use the Watermarking section to add that watermark. Switch from None to the option for a small signature-style watermark at the bottom, or a large one across the whole picture. Want to get more creative with your watermarks? Add them before uploading your photos, using Zoner Studio.

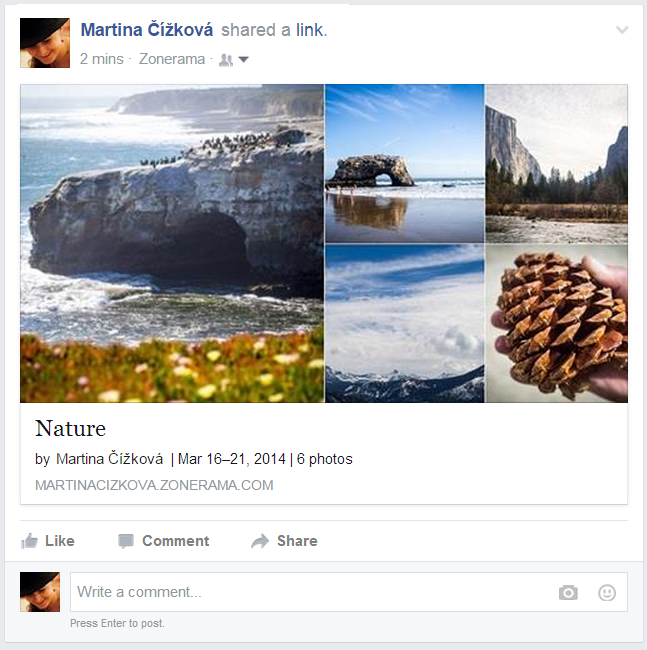
The bottom of the Upload Photos window contains Facebook and Twitter buttons. Use them to easily share albums over these two social networks. Clicking either of these buttons moves the button in question over to the right, and after your album is uploaded, a link to the album will appear on the corresponding social network.

The bottom of the Upload Pictures window includes an option named “Go directly to album editing after saving.” This option is normally turned on, and so normally, clicking Save takes you straight to your album’s Edit Album page. Use this page to, for example, change how photos are displayed and sorted, add album descriptions, watermark photos, and remove photos from an album. …But we’ll save all that for a later article.
Tip: Keep a close eye on which of your albums are public, which ones are hidden, and which are password-protected.
If you ever need advice, just contact our support team. In a future article we’ll take a look at other settings on Zonerama that will help make your gallery even better.