3 Ways That Sharpening Can Improve Any Photo
Many people think that tools for sharpening a photo on a computer are only useful when a botched shot has left the photo blurry. And they’re certainly useful then. But there are also other, more important cases where sharpening should be used. In fact, you should use it on practically every picture. Wondering why? Then read on.
To start out we’ll need to describe how sharpening works. There’s not a magic midget in the computer calling out “Open Sharpeny!” It’s a straightforward math-based process that you can strongly influence by tweaking some numbers—the sharpening settings. That’s why you want to understand what’s actually happening.
There are many sharpening methods, but in this article I’ll be referring to the most widely used of them, known by the somewhat confusing name of Unsharp Mask.
Sharpening: Under the Hood
For illustration let’s take a simple picture of a darkish square against a light background:

The aim of software sharpening is to take the contours in a picture and increase the difference between their individual colors (in this case, their shades of gray). For this picture, the effect will be to make the dark square’s outline even darker and to brighten the light background around it.
To keep from having to recolor the whole object and the whole background, the change is only made at contours, and as the distance from them increases, the effect gradually fades towards the original color. It’s the speed of this fading that you’re changing when you shift the Radius setting.

The second important parameter is the Effect Strength, which determines how different the colors at contours should become.

The last commonly used setting is the Threshold. This one is not as critical; it only sets how much the original colors at contours have to differ for the sharpening to take place. The point of this setting lies in the fact that minute color changes typically indicate noise in a photo, and we don’t want to sharpen noise. So the standard here are very low values, typically in the single digits and often simply zero.
The example used here is deliberately striking in order to make the effects of this setting easy to see. Real-world photos don’t usually contain large single-color surfaces like this, and so the run-ups towards new colors aren’t very visible. You only have to watch out for clear blue skies with an object against them. With those, the results really will look like in our example, and a distracting aura can appear around the object. So in those cases you don’t want to overdo it with sharpening; go with a lower effect strength instead—as well as a large radius that keeps the edit inconspicuous.
The Three Types of Sharpening
Sharpening is used in three ways during photo processing; these are often termed capture, creative, and output sharpening. So sometimes you’ll even use sharpening three times while editing a picture, each time with different settings and a different goal.
I’ll note that these methods work with image data on such a basic level that I strongly recommend shooting to RAW. In RAW you have access to more image data, and so your edits take place at higher quality. If you shoot straight to JPEG, then not only do you lose that extra data, but also, the camera automatically applies its own sharpening at a strength of its own choosing. For quick use it’s not entirely bad—it makes the photo look better right from the start. But it makes later edits difficult, and also, the sharpening setting the camera uses may not fit your purposes.
1. Capture Sharpening
Capture sharpening is used if the original photo was not sharp enough—usually for everyday reasons like a bad focus point, a fast-moving subject, or simply a low-quality lens.
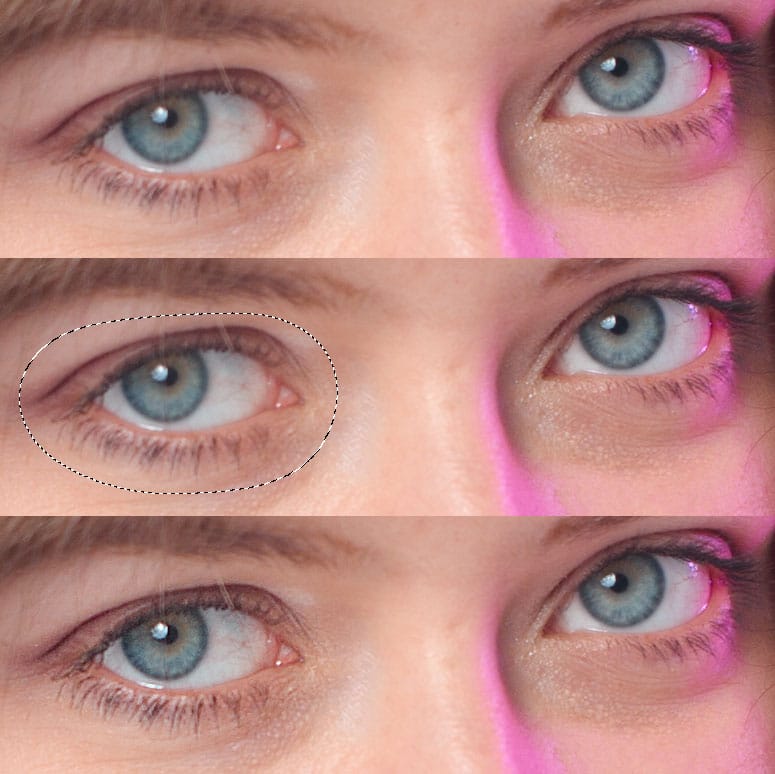
You can’t expect miracles here, but minor imperfections can definitely be saved. The example below shows a model’s eyes; it’s a 1:1 crop. The model’s left eye (i.e. the one on the right in the image) is in very good focus, but unfortunately her right eye did not fit within the depth of field. I applied sharpening with an Effect Strength of 150 percent, a Radius of 1.5 pixels, and a Threshold of 1, and used the Selection Brush to create a selection covering only the right eye. The result is not as good as the eye that started out sharp, but it’s good enough for most purposes.
2. Creative Sharpening
When the mistake-fixing process is done, the creative process begins. You can alter colors, delete or draw over uninteresting parts of the picture, and sharpen again. It’s not a necessity, but in this step you can sharpen areas to make them more interesting for your audience.
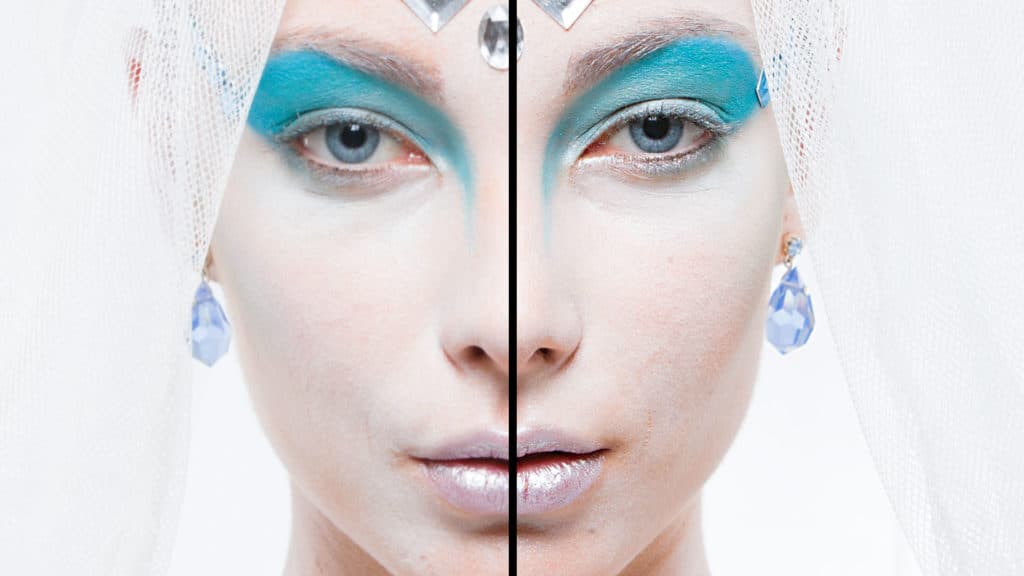
For models, you can creatively deliberately sharpen their eyes, mouth, or hair; for landscape photos you can strongly sharpen the whole photo.
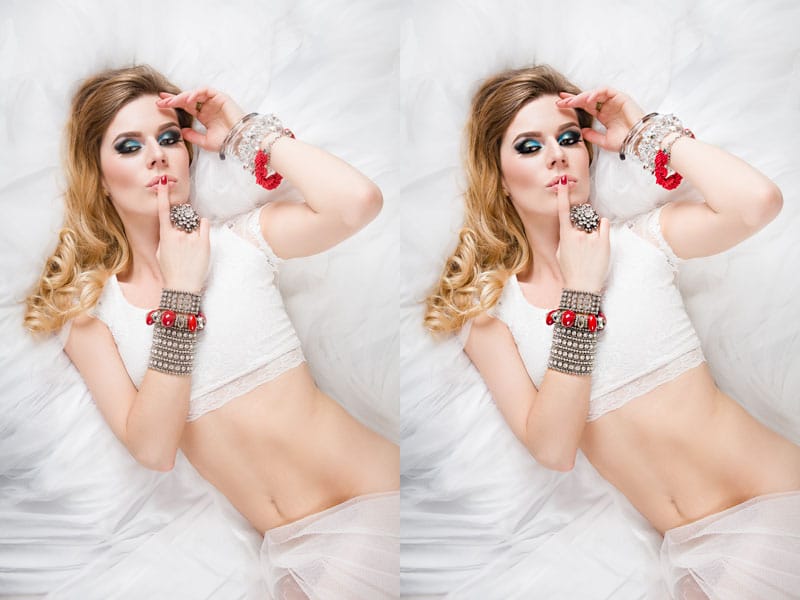
In the picture below, I chose a low effect strength (30 percent) and a very high radius: 50 pixels. The radius, above all, is very much due to the picture’s size in pixels. Here the picture was a mere 467×700 pixels, but in an original photo with dimensions ten times larger, the sharpening radius can be very large (Zoner Studio enables up to 200 pixels).

Creative sharpening is used so often, especially in landscape photography, that the Develop section recently added to Zoner Studio has a shortcut for it. This shortcut is the Clarity slider, which directly applies sharpening with predefined parameters—specifically Radius 20 and Threshold 0. The Strength is determined by the slider here, although it’s expressed in different units than the Strength in the Unsharp Mask, so you won’t be using the same values in the two places (though this doesn’t matter). In short, if sharpening with these parameters is what you want, you can do it here very quickly.
3. Output Sharpening
After you’ve fine-tuned your creation to perfection, it’s time to publish your image on the web or print it out. Here’s where a little problem comes in that can needlessly worsen the quality of your work at the last minute.
During editing you’ll typically work with a picture at maximum size, which today tends to be easily 20 megapixels or more. If you’re sharing the picture on the Web (and let’s face it, this is the most common variant), then you’re sharing a much smaller version. Even the fairly large Full HD resolution has only 2 megapixels; and while UltraHD/4K resolution is growing in popularity, it’s still only about 8. So you need to shrink the picture you’ve edited.
But shrinking reduces sharpness, and so here again you need to sharpen. It only takes a bit, and it makes the picture look much better.
If you see a picture by a professional photographer on the web, and it’s 800×600 pixels and wonderfully sharp, that’s not because of a great lens, but mainly because the person in question is very aware of the need to use sharpening before publishing.
Since different output sharpening will be needed almost every time you publish a picture, you usually don’t even have to archive your published versions; the next time you publish the same photo, you just create a small version again by shrinking and sharpening again.
Sharpening is used during shrinking almost every time, and so the resizing filter in Zoner Studio (in the Edit menu) has a built-in sharpening option. Even though it lacks detailed settings (the usual strength, radius, and threshold), if the built-in settings meet your needs, it saves you a trip over to the sharpening filter. But if you do need to choose your own settings, you can at least handle resizing and together in one batch using the Batch Filter (from the Edit menu, or via the Ctrl+Q shortcut).
Only in Moderation
Sharpening’s one thing where you really want to take care that there’s not so much of it that it leads to visible problems. But in moderation, sharpening is a very welcome aid that improves your photos’ quality.
Have some unsharp photos that you’d like to fix? Download Zoner Studio, try it for 7 days, and get them looking crisp again.