Enjoy Easier Work with Exposure and Colors: Adjustment Layers Are Here to Help
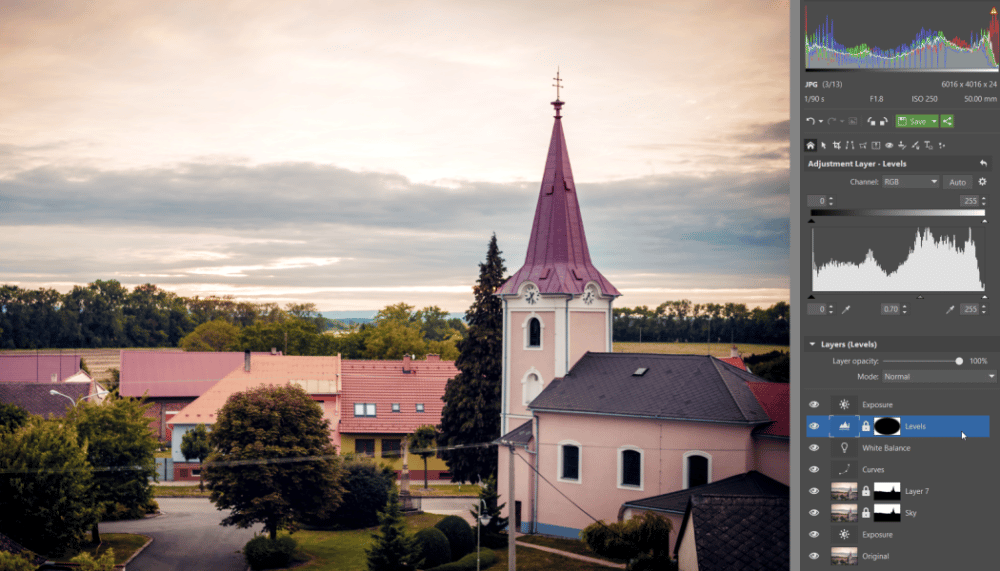
Layer work often requires you to do complicated editing. Adjustment Layers are here to make it simple. Unlike ordinary layers, they don’t contain picture data—instead, they influence the image parameters of the layers below them.
A typical example of where you’ll get good use out of Adjustment Layers is work with multiple “ordinary” layers where you’ve applied a variety of masks to these. For example to separate out the sky from the rest of a photo. To quickly brighten such a picture overall, just add an Adjustment Layer with the parameters you need. And you don’t have to merge layers, or edit each one separately, either.
Adding Adjustment Layers
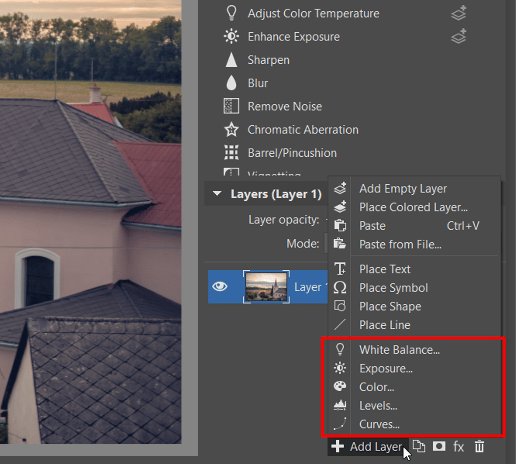
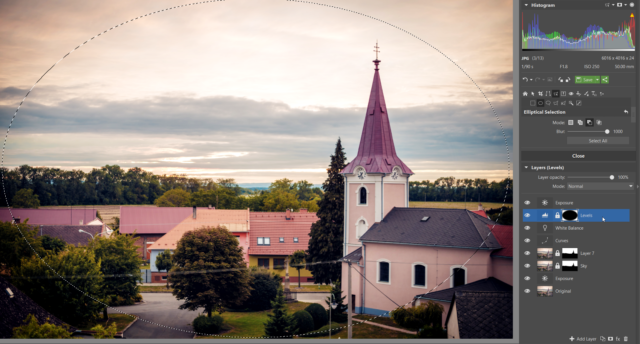
You’ll find Adjustment Layers under the +Add Layer button in the Editor module of Zoner Studio. They’re named directly by what they do (you won’t see the words “adjustment layers” here), and you can choose from White Balance, Exposure, Colors, Levels, and Curves. How many Adjustment Layers you use is purely up to you.
They Edit to the Bottom of the Stack
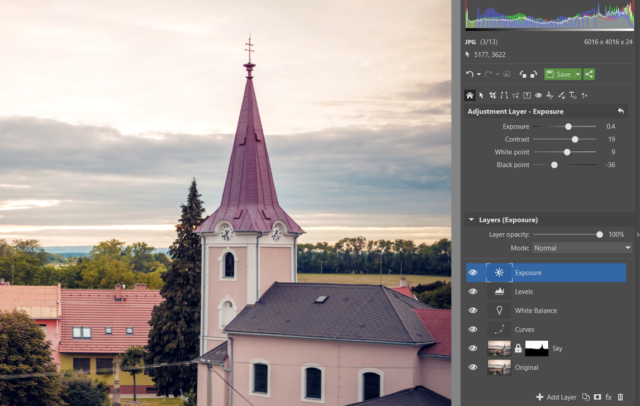
When you’re working with Adjustment Layers, put some thought into where you put them in the layer order. If you add several of them on top of each other, the program adds them together. Adjustment Layers affect all the layers that lie beneath them in the stack. So when you add an Exposure layer as the top layer, you’re affecting all the layers beneath it—that is, all the layers, period.
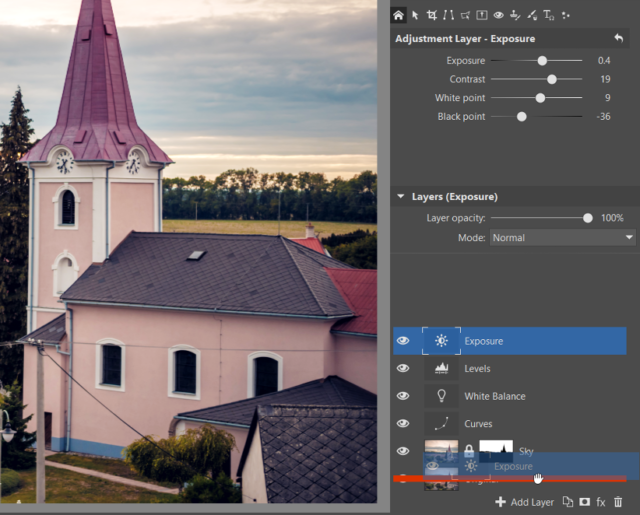
If you need to adjust e.g. only the lower portion of a landscape photo, leaving its sky untouched, and you have the sky and ground on separate layers, then just drag the Adjustment Layer in-between the different layers. You can also drag an Adjustment Layer directly onto a particular layer. In that case, it affects that layer only.
You can also drag an Adjustment Layer directly onto a particular layer. In that case, it affects that layer only. Thanks to this, you can make different edits on different layers. You can use this process e.g. for adding one picture to another.
Adding a Mask to an Adjustment Layer
Just like with an ordinary image layer, you can add a mask to an Adjustment Layer by clicking the Mask button and then Reveal All.
You can use them even for things like adding vignetting to a picture. For that, you add an Adjustment Layer for Levels, add a blurred Elliptical Selection to the layer, and then add a mask with Hide Selection turned on.
Test out Adjustment Layers on your photos! Download Zoner Studio, try it free for 7 days, and try out just how efficient your work is with Adjustment Layers.