Casting Digital Light on Foggy Pictures
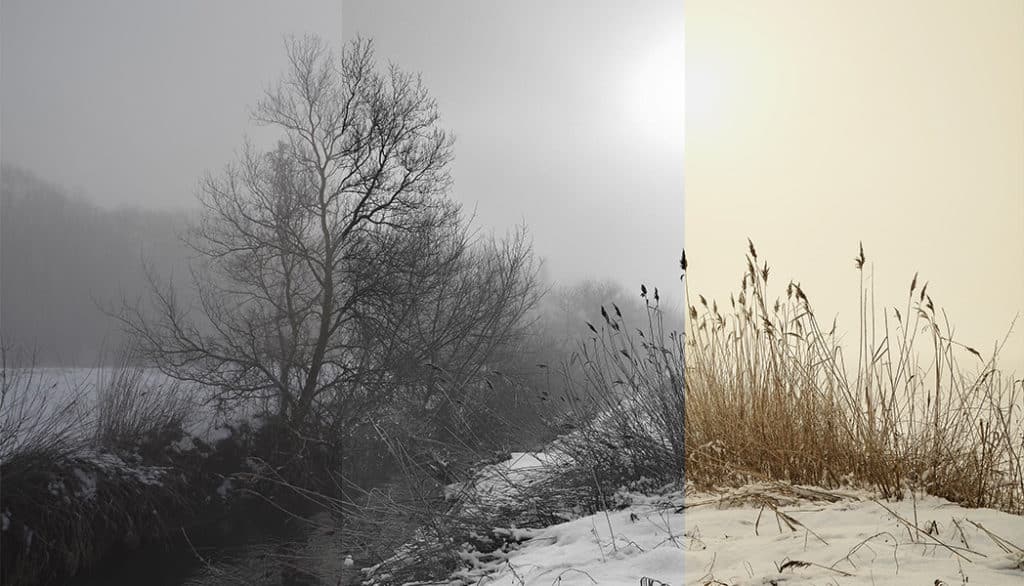
In today’s article, we’ll take a look at how to touch up a winter foggy picture. Our sample picture was taken in the morning fog, and so it’s underexposed and practically monochrome. Because of this, we’ll be focusing in this article on how to adjust exposure and restore pictures’ colors. We’ll be using Zoner Studio for our edits.
What’s Wrong With This Picture?
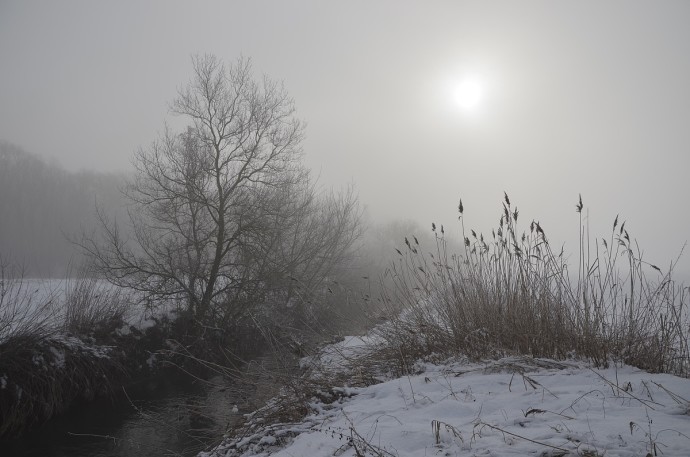
The photographer behind this photo was probably excited by the foggy sunrise atmosphere. However, she didn’t adjust exposure for the fog, and so she underexposed the photo. They also left on the camera’s automatic white balance, and so the camera mis-evaluated the color of the sunrise and then balanced the scene towards the blues. This picture is in JPEG format.
To bring out the colors hidden inside it, we’re going to have to make some major edits, and these are going to reduce the picture’s quality—we’ll be causing some banding in the clouds. So part of our editing job will be to fix the problems caused by our editing job.
If we were working with RAW data from the camera, then the picture’s image quality wouldn’t degrade like this, since we’d have much richer data to start with.
Enhancing Zoner Studio with the DNG Converter
If you love working with RAW and you want to make extra sure that you’ll be able to do so, then the first thing that you should do after installing Zoner Studio is to install Adobe DNG Converter if you haven’t already, and to hook Zoner Studio into it. This will ensure that you can work with RAW files in Zoner Studio no matter what camera they come from.
Adobe DNG Converter is a freeware application that can load RAW files from practically every camera and convert them to the standard DNG format. Even though Zoner Studio already supports RAW from many major cameras out of the box, integrating ADC makes sure that your camera’s RAW is supported no matter what.
For more details on integrating the DNG Converter into Zoner Studio, see our article on this subject.
We’ll be using the following photo editing features in Zoner Studio: the Develop section, Enhance Exposure (Ctrl+3), Preferences (Ctrl+M), Tone Mapping, the Gradient Filter (Shift+G), the Effect Brush (E), the Lasso (L), the Modify Selection dialog, Blur (Ctrl+6), and Add Grain. (The letters in parentheses are shortcut keys for these features.)
Editing Steps in Zoner Studio
We’ll be making maximum use of the Develop section in our approach. All the Develop settings mentioned here are available in the Editor too, but with one difference—they’re not all together in one panel.
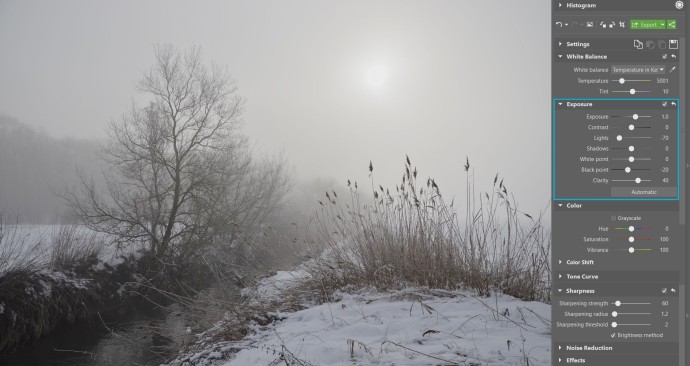
Let’s start by correcting the exposure. We’ll open the photo in Develop and raise the Exposure value to 1.0. This adds detail to the shadows, but it also leaves the photo with less contrast and less detail in the sky. We restore the contrast by sliding Black Point down to -20, and we restore the detail in the sky by lowering Lights to -70. We wrap up by raising Clarity to 40.
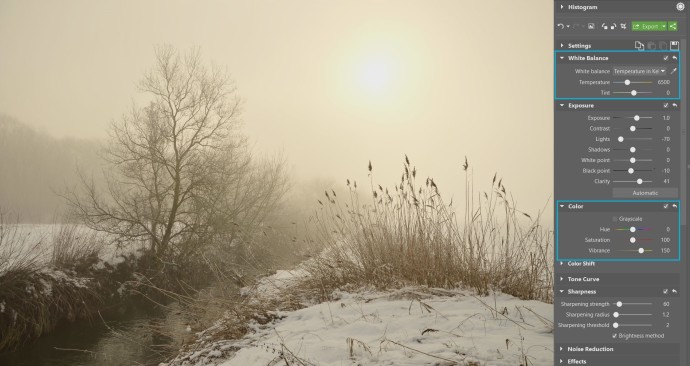
The next step is to fix the colors. First, we fix the bad white balance. We roll down White Balance and choose Cloudy. This restores the picture’s colors. We then emphasize the colors by raising the Vibrance to 150.
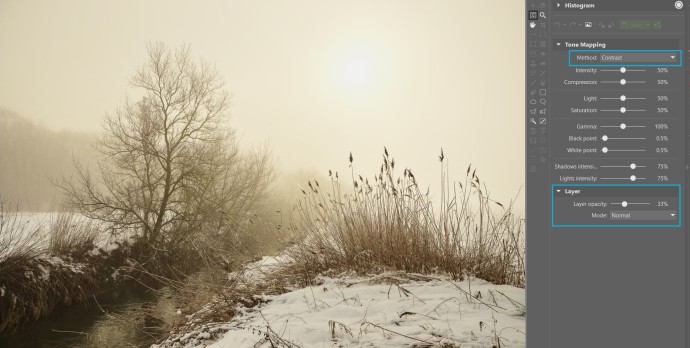
For our next edit, we switch into the Editor. There’s an attention-stealing strong shadow at the bottom left. We’ll use Menu > Effects > Tone Mapping to brighten it. We use the Contrast method and reduce Layer opacity to 33 percent.
A glance at the histogram and the photo itself makes it clear that it doesn’t cover the whole dynamic range. There are noticeable reserves on the left and on the right.
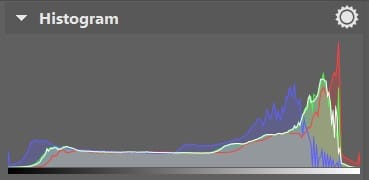
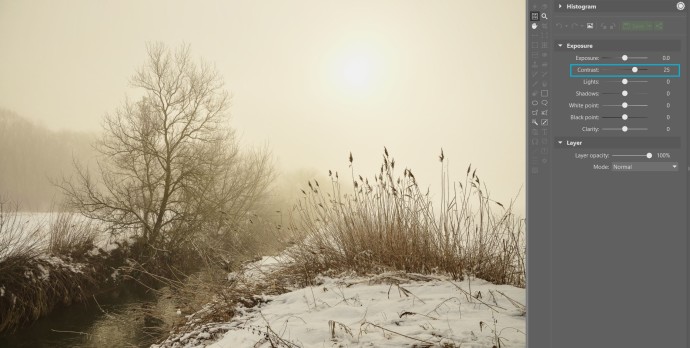
For a foggy picture, that’s not necessarily a problem. But if you prefer more contrast in your pictures, then there are many ways to achieve it. You can use Curves, Levels, or the Contrast setting in Enhance Exposure (Ctrl+3).
An Alternative Route—Black and White
The original photograph is almost monochromatic, and it contains some high-contrast areas, making it a good candidate for conversion to black and white. So let’s do that.
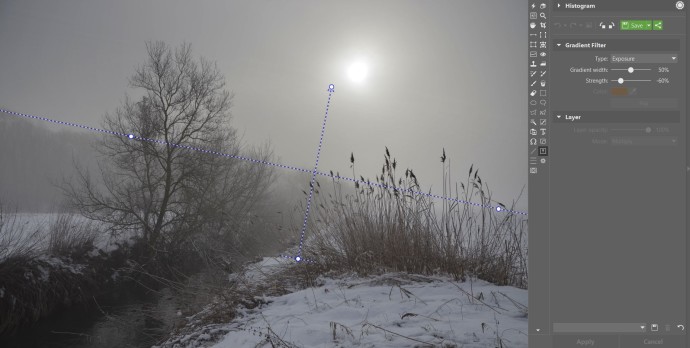
First, we use the Editor to darken the sky, which is significantly lighter than the picture’s foreground. (If we were working with a picture in the RAW format, then we would wait to perform this step until after the RAW had been developed.)
After further processing in Develop, we’ll be brightening the photo. Since this is a JPEG, brightening it later without having darkened it at this stage would leave it without any detail at all. We’ll darken the sky using Menu > Layer > Gradient Filter (Shift+G).
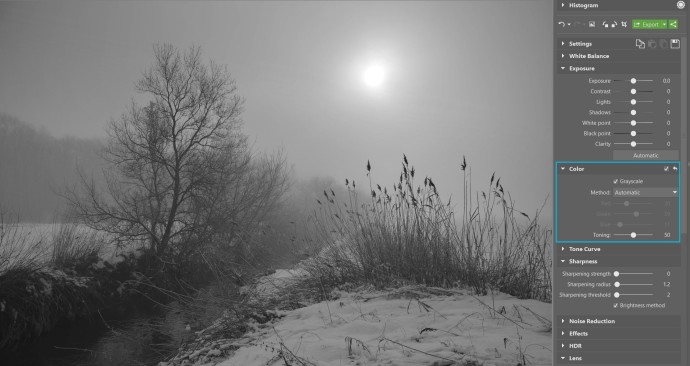
We open the photo in the Develop section and then activate the Grayscale option. For the Method, we keep the Automatic setting. We drag the Toning down to 50.
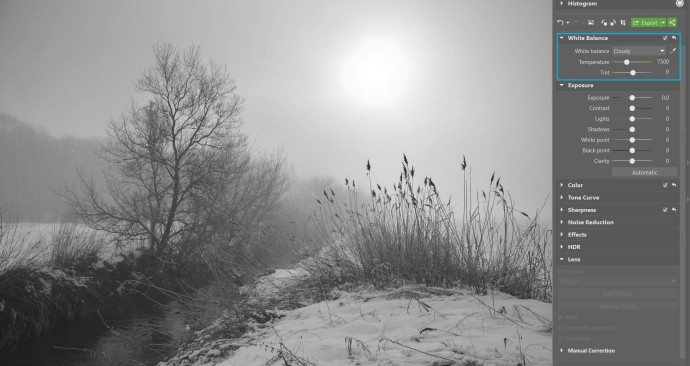
We spend a little time testing how various white balance settings affect the conversion. In the end, we decide to set White Balance to Shadow. Even though White Balance is normally about color rather than tonality, here we’re making use of how white balancing affects tonality in order to influence our grayscale conversion. Our pick, Shadow, has the benefit of brightening the picture while keeping the details in the sky visible.
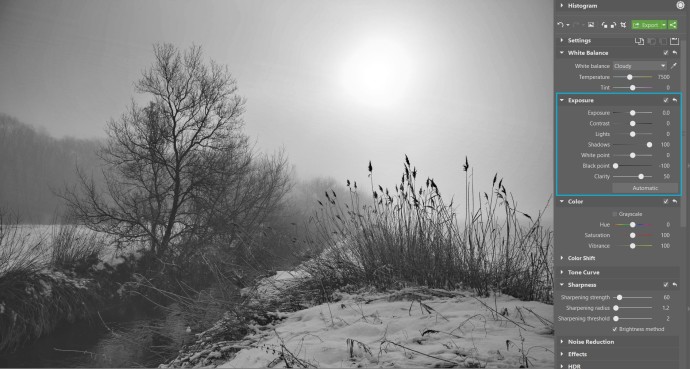
In the next step, we adjust the settings under Exposure. In a black-and-white image you mainly communicate through contrast, and so we can use even extreme contrast levels that would be excessive in a color photo. We pull the detail out of the shadows by setting Shadows to 100. We restore the picture’s contrast by lowering the Black Point value to -100 and raising the Clarity value to 50.
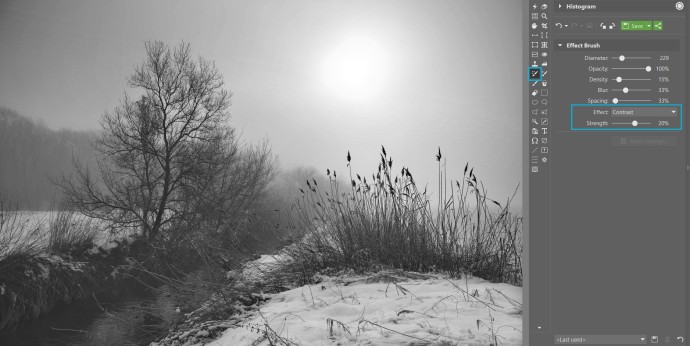
The snow in the foreground is gray when it should be white. We’ll fix this using the Editor’s Effect Brush. We draw over the snow after setting a weak effect strength (about 10 or 20 percent). We first paint some Brightness onto the snow, and then brush on some Contrast (that is, we set them as the Effect, using the drop-down of the same name).
Due to the dramatic edits we’ve made, you can see some banding (the loss of smooth transitions) in the sky. The JPEG format contains only a fraction of the data found in a RAW file, making it impossible to make major edits like these without degrading image quality.
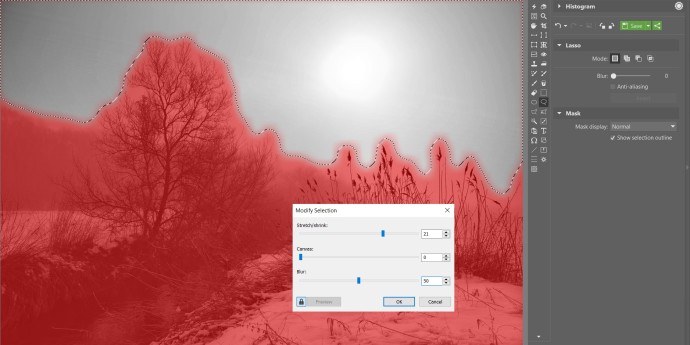
Fortunately, there’s a way to fix this. First, we use the Lasso to make a selection containing the sky: Selection > Lasso (L). Once we’ve made that selection, we use Selection > Modify Selection… to fine-tune it.
Tip: We turn on Selection > Mask Display > Normal during this stage of our work. This gives us a clearer idea of exactly what we’re selecting.
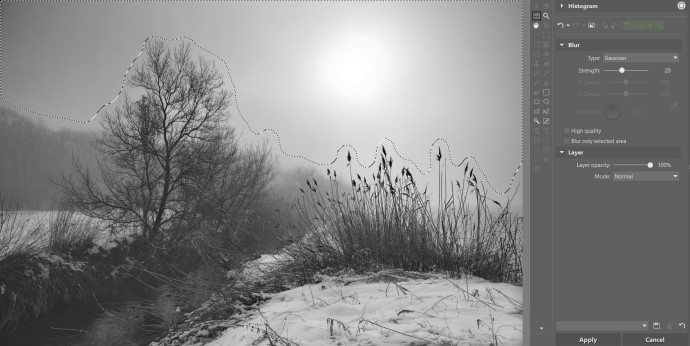
We’ll use Menu > Adjust > Blur… to get rid of the banding. We choose the Gaussian blur type and set the Strength to 20.
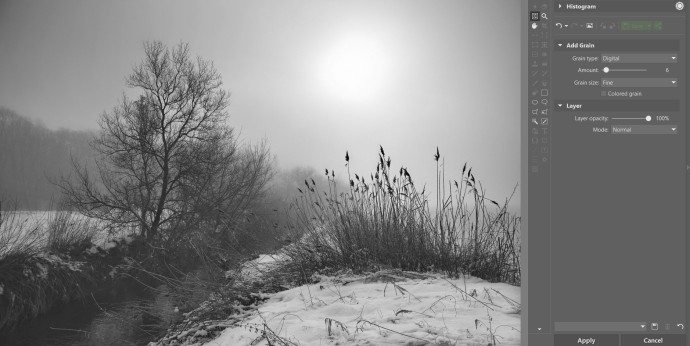
We finish up by adding mild noise to the photo using Effects > Add Grain….
Closing Tips
It’s great to be able to fix a picture like this, but it’s even better to be able to avoid the need to fix it. How do you do that? When taking pictures on foggy days, the rules are similar as for when you’re taking pictures in the snow. Push the exposure up to prevent underexposure, and choose a white balance setting that reflects the current light conditions.
Let’s wrap up with a look at our sample photograph before and after edits:

