Correct Optical Lens Defects in RAW
Camera lenses can suffer from a variety of lens defects. Fortunately, most of these can be suppressed somewhat via computer edits. And this kind of post-processing becomes a lot easier when you shoot RAW.
Vignetting, chromatic defects, spherical aberration: these are the three main defects you can find in lenses. And Zoner Studio is a great way to suppress or even remove them.
Why Correct RAWs Rather Than JPEGs?
Naturally Zoner can suppress these defects even in JPEG-format pictures. But if you shoot to RAW, then these edits have more data to work with, leading to lower losses and less image degradation. What’s more, suppressing chromatic aberration especially is much easier when working in RAW.
Optical Lens Defects
- Vignetting—a loss of brightness in a picture’s corners vs. its center. You can usually prevent it at its source, by using a tighter aperture. But sometimes that’s not possible, for example in faint light or when you want to use a wide open aperture to get a low depth of focus.
- Chromatic aberration—this can further be divided into axial, lateral, etc. aberration based on its source and effect. But for our purposes we just need to know that chromatic aberration is expressed as color shifts in high-contrast contours in a photo. This typically works out as artificial red, purple, blue, or yellow contours surrounding such contours.
- Spherical distortion—the bending of straight lines in a picture. When they’re bent in towards the center of the picture, this is “barrel” distortion. When they’re bent out towards the edges, it’s “pincushion” distortion.When they’re bent inconsistently, it’s called “moustache,” “wavy,” or “complex” distortion.
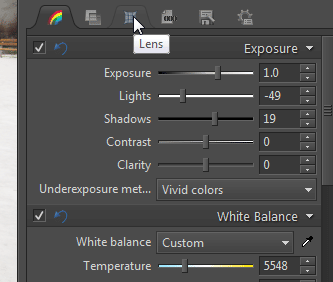
Open your RAW photo in Zoner’s RAW module. After making the basic brightness and contrast adjustments that we’ve discussed elsewhere, switch to the Lens tab in the module’s right-hand Side Panel. It’s devoted entirely to correcting lens defects.

Transformations And Corrections
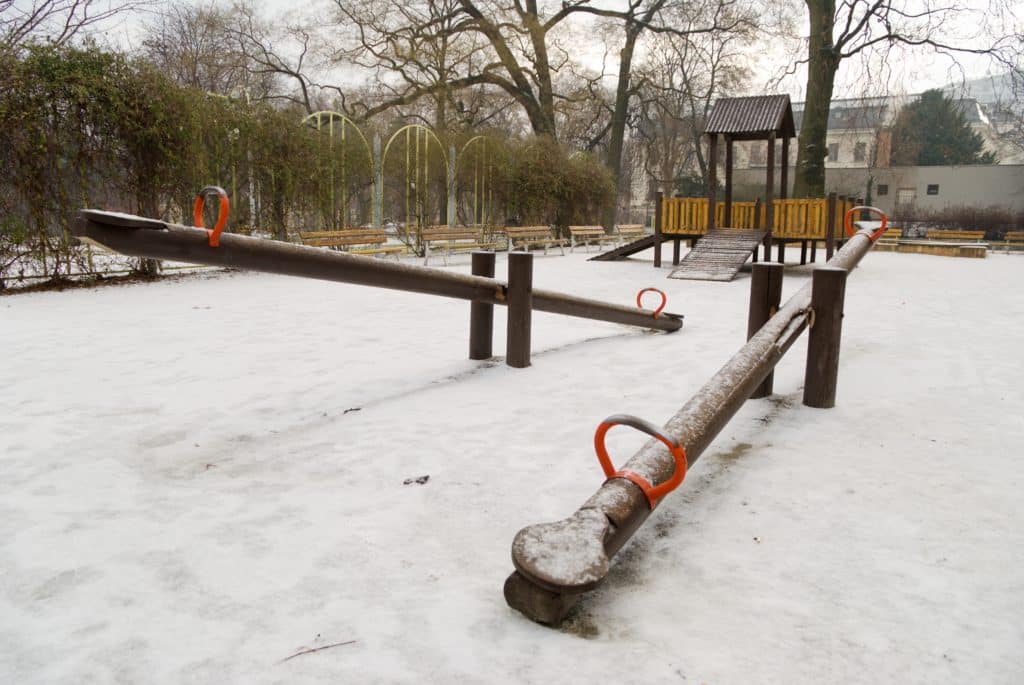
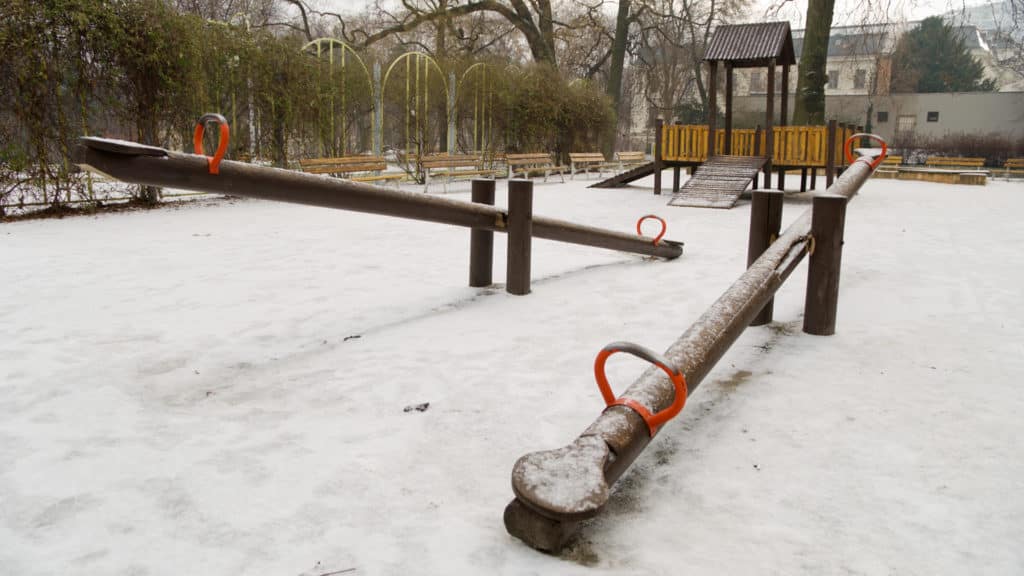
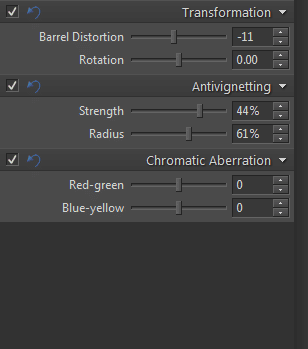
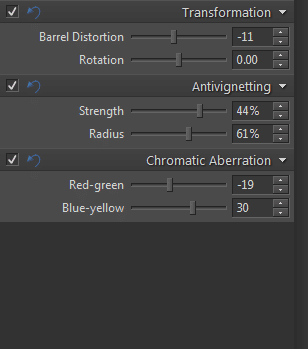
Our sample photo is a poor one for demonstrating spherical distortion correction. (There are no horizontal or vertical lines right at the edges.) But since this is a wide angle shot and since we saw from previous photographs that the lens we used for it does suffer from mild barrel distortion, we set mild Barrel distortion correction.

Note: Naturally in our case we could choose to skip this step, since people looking at it will hardly notice the difference.
Mild corner darkening appears even with an aperture of 5.6 Moving the Strength slightly rightward—into the positive values—slightly brightens the picture’s corners. Moving the opposite way, meanwhile, would make the vignetting even stronger. After adjusting vignetting strength, you should check the Radius setting. The larger the radius, the larger the area that will NOT be affected.
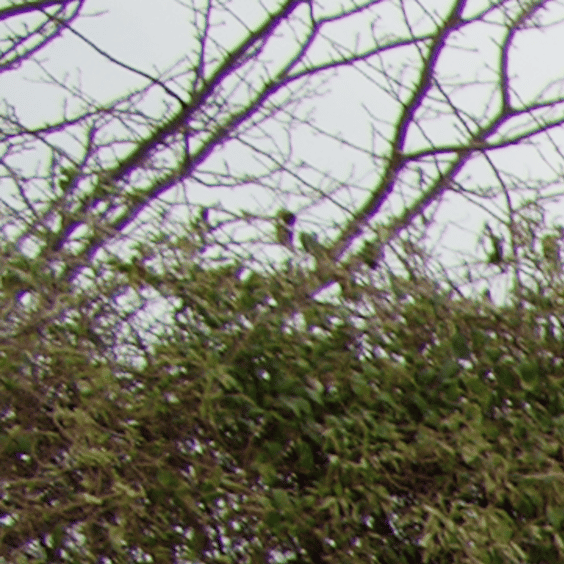
Last but not least, we need to battle chromatic aberration. For this, we recommend zooming the picture in to at least 1:1. (To do this quickly, press the star on your numeric keyboard.) Or better yet, use 200-400% zoom, and then work from a corner inwards.
Fixing Chromatic Aberration
Our picture has purple and green-tinted contours that we’re going to need to suppress. First we’ll use the Red-green slider and drag it slightly into the reds—left of center. Next we’ll drag the Blue-yellow slider slightly into the yellows, to the right. This work is an art, not a science; we drag, look, and drag again.
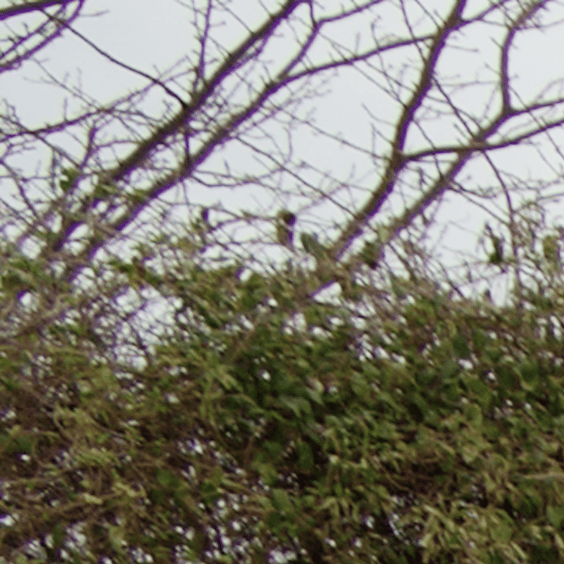
Tip: After correcting chromatic aberration, zoom back out and check the other parts of the picture to make sure that your corrections have not ruined colors elsewhere in the picture.
Once your edits are done, either queue the picture for development by clicking Add to Queue, create a JPEG or TIF based on your settings by clicking Develop, or send your picture To the Editor, so you can make other edits before saving it.