How To Change Photos Format: JPEG, PNG, TIFF, and More
When taking pictures, most people focus on light, composition, and technique. But few stop to think about which format to save their final photo in. Yet this choice can make a big difference in quality, file size, and post-production options. In this article, I’ll walk you through the most common image formats and show you how to easily convert them in Zoner Studio.
For many photographers, the first time they encounter multiple image formats is when they start shooting in RAW. RAW files must be edited before they’re exported to another format, such as JPEG. JPEG is the most common format you’ll use, but there are others that serve different purposes. Let’s briefly introduce them.
The most common photo formats
Each format has different characteristics and is best suited for specific tasks. Here’s a summary of the most common formats used for saving photos.
JPEG (JPG)
- Small size thanks to lossy compression
- Widely supported (web, mobile, apps)
- Best for everyday photos, web, email
PNG
- Lossless quality
- Supports transparency
- Ideal for graphics or logos
TIFF
- Lossless format, very high quality
- Supports layers and color profiles
- Suitable for professional printing, archiving, and scanning
AVIF
- Modern format, excellent size-to-quality ratio
- Supports HDR and transparency
- Great for web and app use
- Still limited support on some systems
Zoner Studio (Zoner Studio format)
- Stores entire editing history: layers, non-destructive edits, and metadata
- Contains originals and previews
- Not intended for use outside of Zoner Studio
HEIF / HEIC
- Better quality and smaller size than JPEG
- Ideal for mobile devices (especially Apple)
- May have limited compatibility outside Zoner Studio, Windows (latest versions), and Apple devices
Changing image formats in Zoner Studio
Once you know what format you need, the question is: how do you convert your photo to it? Zoner Studio makes this simple—whether you’re in the Manager, Develop, or Editor module. Each module gives you different options, depending on whether you want to convert, edit, or export the files in bulk.
In the Manager module:
If you want to change the format for one or more photos (e.g. from RAW to JPG), the simplest way is using batch export.
- Select one or more photos
- Click the green Export button (or use Ctrl+Shift+X)
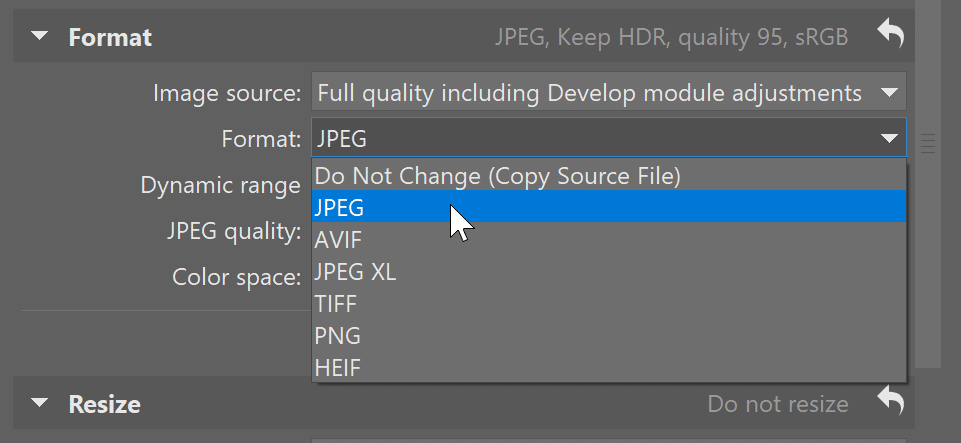
- Choose the output format—JPEG, TIFF, PNG, or another
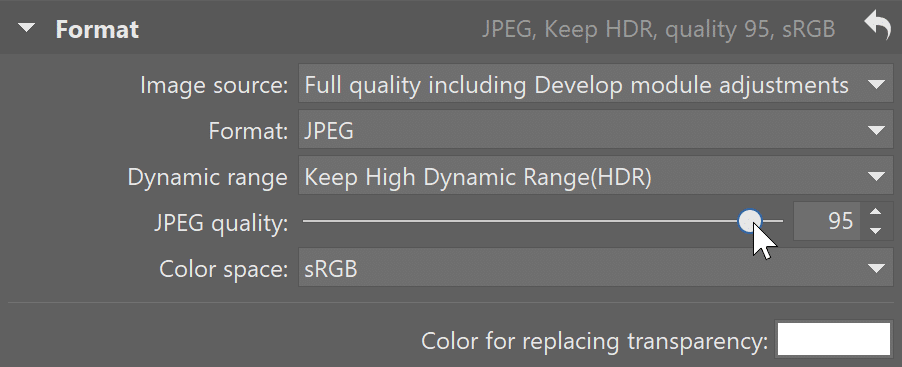
- Set the quality and destination folder, then click Export
Batch export is perfect for preparing a set of images for the internet or printing.
In the Develop module:
In Develop, you work with RAW photos and non-destructive editing. Once you’re satisfied, click Export. The dialog box opens and the entire process is the same as in the Manager.
- Choose an output format (JPEG is most common, but TIFF, PNG, and others are also available)
- Set the export settings—quality, resolution, destination folder, etc.
- Click Export
In the Editor module:
If you’re doing detailed retouching in the Editor, adding text or layers, you choose the format when saving.
- Click Save As… (Ctrl+Shift+S)
- In the dialog box, choose the format you want—JPEG, PNG, TIFF, Zoner Studio, or other
- If your image includes layers and you want to preserve them, choose Zoner Studio format (Zoner Studio’s native format)
Each of these methods has its uses for different stages of your workflow. Choose the one that suits your needs, whether you’re making a quick conversion, final adjustments, or archiving.
JPEG—The universal image format
JPEG is the most widely used photo format in the world. It strikes a good balance between quality and file size. The downside is compression, which often happens without you knowing. For example, photos shared via messaging apps or uploaded to social media are often automatically compressed. It’s also an issue if you download the image online and upload it again. It’s best to avoid this.
Is there a better option than JPEG?
Yes, technically speaking there is a better format—HEIF. HEIF was introduced in 2015 and is revolutionary in that it offers higher quality at smaller sizes because it is compressed slightly differently. With JPEG, when there is a lot of compression, you start to see parts of the image blend together and get visible blotches. This is not as noticeable with HEIF.
The only problem is that despite being used for over 10 years, it’s still not supported across all devices. Zoner Studio can work with HEIF, as well as the latest version of Windows. Apple devices commonly use HEIF as the default format. So this issue is not a major one, just a warning that an image may not open on a certain device due to lack of HEIF support.
Convert files like a pro
Whether you’re saving photos, exporting from RAW, or converting between different formats, Zoner Studio can help. Download Zoner Studio free for 7 days and discover the options for converting image formats and more great features.