Quick, or Thorough? See How to Edit Motorcycle Racing Photos
Everyone who’s photographed motorcycle races knows the situation: You come home and you have a card full of photos that you need to process. But how can you do that without taking up more time than necessary, and while still getting the bikes looking good? My tips from practice will help you out here.
When you’re coming back from motorcycle races or other major motoring events, you generally have hundreds or thousands of photos on your card and need to turn them into a photo gallery. But toiling away to create the biggest gallery possible is pointless.
It’s better to have 50 well-picked photos a few hours after the event than a messy pile of 500 pictures that you only publish after a week. Not to mention uploading pictures straight from the card to your gallery (don’t do this). But we probably don’t have to tell you all this if you like good photos.
So the first thing that awaits you after your return is choosing the pictures you’ll be working with.
Choosing the Photos
Basic sorting is simple. Just open the photos in the Zoner Studio Manager and give them star ratings. To speed things up, you can directly give the photos you choose the full number of stars, and give zero stars to the ones that won’t be in the gallery.

Then choose Organize > Sort by > Rating in the Menu. The photos that you chose for editing will appear in the first positions in the folder listing.
Then you can get started editing. There are two basic ways to approach your edits.
Quick Photo Editing
The first is quick editing. After all, when you’re photographing motoring events, time is often of the essence. And that goes for photo processing as well. Most people won’t care too much about photos a week after the event. Especially in our age of social media.
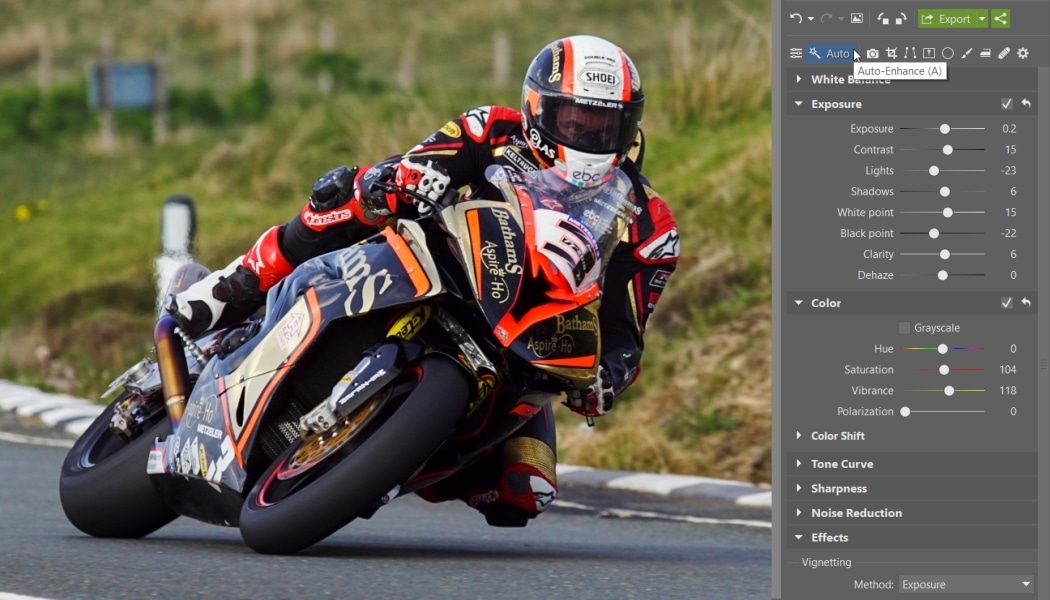
So switch into the Develop module. Since you don’t have much time for editing, and you want to publish your gallery right after the event, stick with just basic edits.
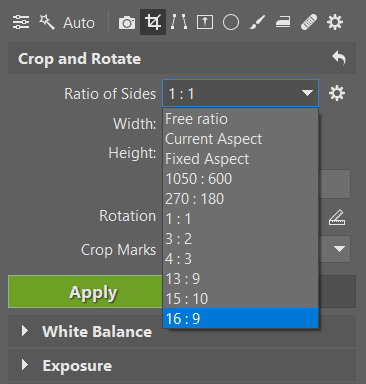
Since photographing motorcycle races and similar events is fairly complicated, you’ll usually need to crop your photos. Naturally it looks better when the photos in your gallery all have the same ratio of sides. So choose a ratio of 16:9, and stick with it for all of your photos.
Then click the Auto button on the right to apply Zoner Studio’s Auto-enhancement. Zoner Studio will edit the photos automatically, and will also show you what settings it used for the job. It’s easy to fine-tune everything manually after that.

While the automated edits aren’t always perfect, they let you significantly improve your photos in a few seconds.
Exporting and Shrinking Your Photos
After editing, it’s good to move your readied pictures to another folder. And if you were working in RAW, you’ll also want to convert them to JPEG.
The Export button will help here. Click it, choose the folder that you want to export the photos to, and set the quality.
For publishing photos on the internet, choose the mode named JPEG – Minimized size for Web. By default the JPEG quality level is set to 85, but if you can trust in visitors’ fast connections, go ahead and use a value of 100—that is, full quality.

You can also set up resizing. If you really want to show off your work, then make the picture’s longer side have a Full HD width (i.e. 1920 px) or more. If your goal is more to provide previews, and you don’t want people to print out your photos, I recommend a maximum width of 1200 px.
Then just click the Export button.
Manual Photo Editing
Naturally it’s best if you have more than just a little time for editing. And if you do, you can try various editing experiments. Zoner Studio offers you a number of possibilities here.
So it’s easy to create your own style. And because there really are a lot of editing combinations, it’s extremely unlikely that someone else out there will create the same photo as you. Even if they took their shots from the same place at the same time.
Right now I’ll show you my usual approach, but you’ll surely find your own. I’ll also deliberately be choosing the same photo as I did for the automated edits, so you can see the difference.
I always start with a crop, usually to my favorite ratio, 16:9.
Because I took this picture in the evening, I’ll mostly be working with basic Exposure editing. I primarily use these settings:
- Contrast,
- Lights,
- Shadows,
- Black Point and White Point.
I use the Show Blowout function (Shift+O) occasionally to check whether my edits have gone too far. Besides the keyboard shortcut, it’s available under the sun icon on the Histogram line.

If the photo wasn’t taken in the ideal light, I also use Vignetting to make the motorcycles stand out. You’ll find this function among the Effects in the right panel. Just set the needed strength and radius so that the picture looks the way you want.

I often use the very effective Radial Filter (R) as my last edit. It lets me locally adjust a wide range of a picture’s parameters. For example Exposure, Contrast, and Saturation.
I always use it to emphasize the area in a photo that interests me the most. That is, the front of the bike and the rider’s helmet. To do this, I use the filter circle to raise Exposure and, if needed, to brighten Shadows. I sometimes also increase Saturation, as I did here.

Fine-tuning in the Editor
I use a different approach for shrinking and exporting the photo during manual editing as well. After my edits in the Develop module, I switch into the Editor, where I manually shrink the photo while adding sharpening. To do this, I go to the Menu and use Document > Resize, or press Ctrl+E.
I then also add a watermark. The Picture Overlay function (Ctrl+Shift+T) is good for watermarking. You’ll find it in the Edit menu. Just go to this function, choose your watermarking logo picture from the folder where you’ve stored it, and set its size and position.

To get a better idea of how these edits can improve a picture, take a look at the following examples.
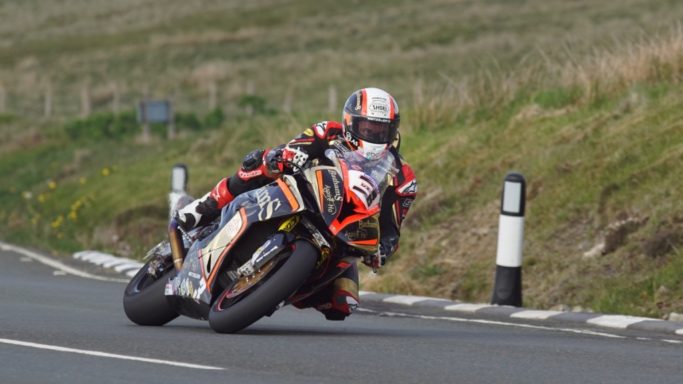
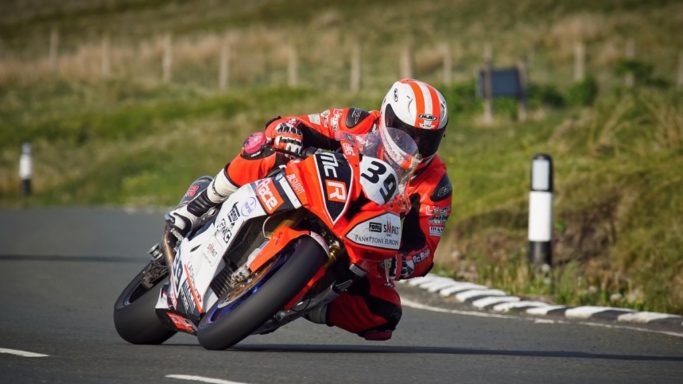
A comparison of the original photograph vs. the photograph edited using Auto-enhancement only. You can immediately see that the auto-enhancement helped.
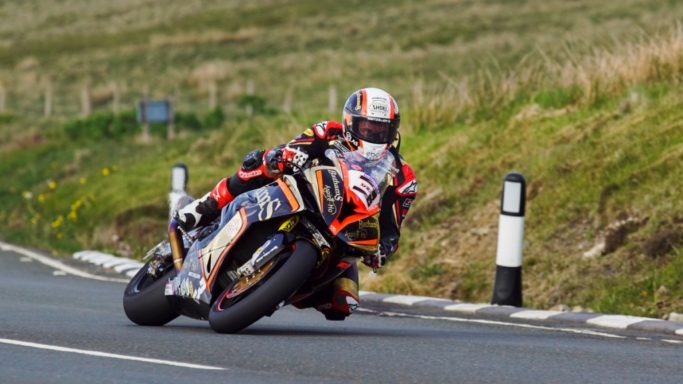
And now see how it looks when you compare the picture edited using auto-enhancement with the version that I edited manually.
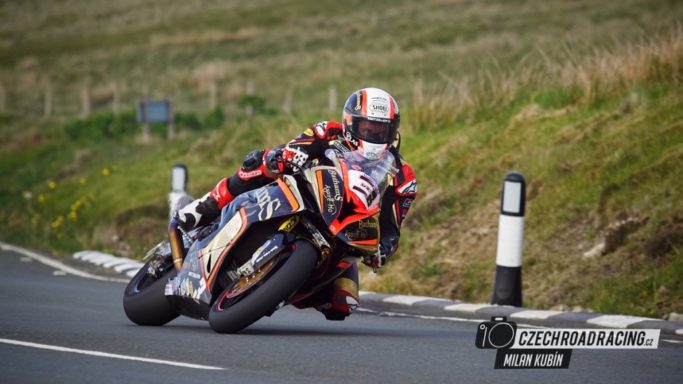
This picture is the same type of example. You’re looking at the original version and the Auto-enhanced version.


And now Auto-enhancement vs. manual edits. You can immediately see that the bike and the rider stand out more in the second picture.
All About Time and Goals
Naturally you can tinker with a photo in other ways as well. But from my own experience I know that if you choose the route of automated edits, you’ll spend about one minute on one photo. From choosing it to cropping and editing it on to exporting it into your final folder with a watermark.
That way you’ve got a gallery with 100 photos ready on the web in less than 2 hours.
If you’d rather try manual edits, be sure to count on spending three to four times as much time. So you’ll need roughly six hours for a 100-photo gallery. And six hours is a lot. But the result certainly is worth it.
So it’s all up to your choice. Though your choice might depend on how you’ll be using the pictures. If you’re preparing a quick gallery for the social web, you’ll probably stick to basic edits. This will still serve you better than just uploading pictures straight from your memory card.
If you want a gallery for your blog, and you’re really invested in the result, lean towards manual edits. And if you’ll be sending a photo for printing or providing it to a magazine for an article, then give it the most attention of all.
Try out these edits in practice. Download Zoner Studio, try it 7 days for free, and improve your photos of motorcycles and more.