How to Remove an Object Against a Background in Perspective
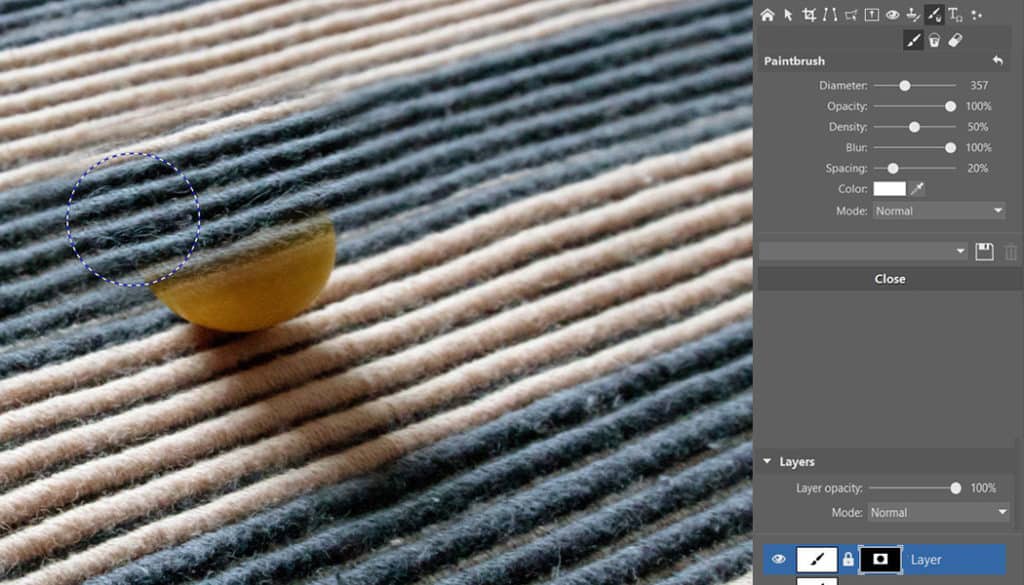
Photo editors have some quite powerful tools available for removing objects from photos—for example the clone stamp and healing brush. But there are some situations where you will need a little something more.
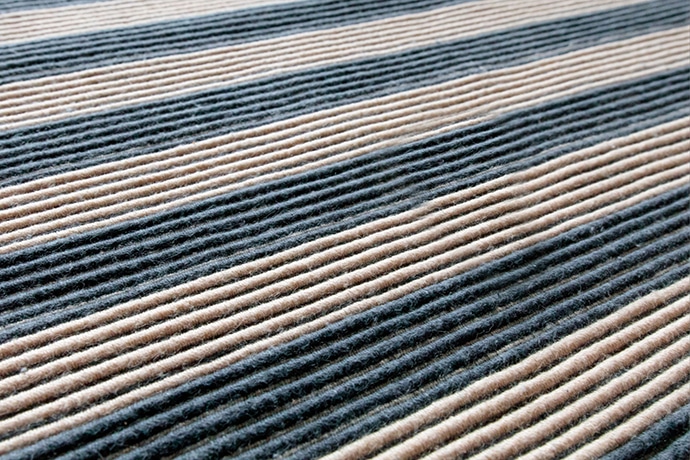
The Clone stamp and the healing brush are great tools for ordinary situations. However, when you need to remove an object that’s lying against a background that contains a striking geometric pattern, and that’s meanwhile also shown in perspective, you won’t be able to make do with these classical tools. The solution is to create a “patch” with the needed perspective distortion.
We’ll use Zoner Studio to illustrate how to handle this kind of situation. We’ll be making this fix to a sample photo and leading you through our steps. Starting from version X, this software supports layers, which make this kind of work even easier.
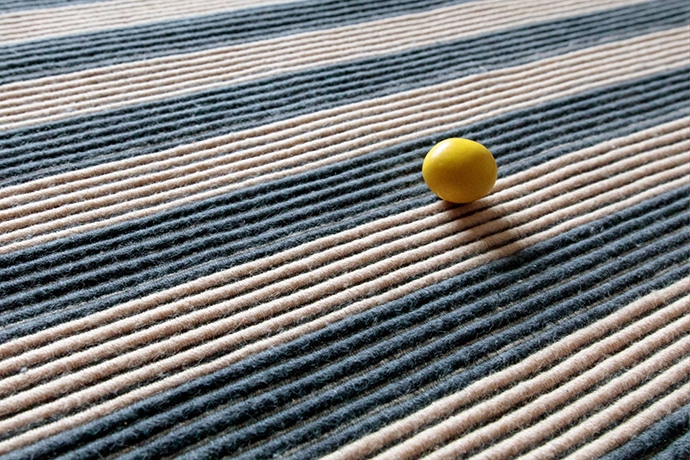
- We open our photo in the Editor. It shows a piece of candy, and the shadow thrown by it, on top of a blanket with a very visible geometric pattern.
- We go to the Selection toolset and activate the Rectangular Selection tool (M). We select a rectangular area in the blanket, which we’ll be using for our “patch.”
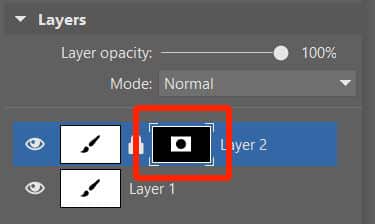
- We use Menu > Edit > Copy (Ctrl+C) to copy the selection, and then Menu > Edit > Paste (Ctrl+V) to paste the patch into the photo. This patch is immediately placed in the center of the picture as a new layer (Layer 2 in the Layers group).
- Now we activate the Move and Transform (V) toolset, and using the resizing tool, the perspective editing tool, and the deformation tool, we make the picture in layer 2 precisely cover the object that we want to retouch away. We change its perspective so that it corresponds to the area lying beneath it.
- We add a mask to Layer 2 using Menu > Layer > Mask > Hide All. By doing this we make layer 2 invisible, as this layer is now hidden behind the mask.
- We’ll continue from here by drawing onto that mask, like a fingernail scratching a lottery ticket. Because of this, it’s very important that we select the Mask icon for Layer 2 in the Layers group. We can tell that we’ve done it because the corners of the Mask icon are highlighted. If we’re not careful here, we can end up drawing on the layer when we want to draw on the mask, or vice-versa.
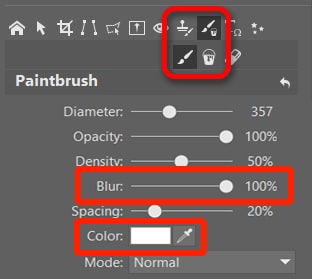
- Now we activate the Drawing toolset and use the Brush (B). We set the Brush’s Blur value to 100, and the color to white.
- By drawing with a white brush onto the Mask in the spot with the object we want to retouch away, we’re gradually revealing Layer 2 again. Thanks to the high Blur value we’ve set, there’s a nice, gradual transition between the revealed part of the patch and the base layer.
- After completing our mask work, we notice that due to the low depth of focus in this particular photo, the cloned part is sharper than its surroundings.
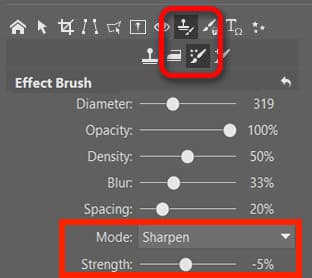
- To fix this difference in sharpness, we go to the Retouching tools toolset and activate the Effect Brush (E). We set its mode to Sharpen and its strength to -5%. By setting a negative strength level for the effect, it blurs instead of sharpening. We always make sure to work with a weak effect strength and use more strokes, instead of trying to get it all done in one stroke per spot. If we tried the quick route, we’d end up with an “overdone” effect. We’re very careful to select the layer itself here in the Layers group when doing this work. This is important since we had the Mask selected just a bit before. We draw with the Effect Brush over the spots that we want to make less sharp.
Work with the transformation tools is… work, and it takes a little training; it’s not always easy to get things right the first time. Keep in mind however that you can always go back and edit your transformation later, even after creating the mask. Just always make sure, when doing this, that you’re transforming the layer itself and not its mask. If you make a mistake while drawing onto the mask, you can change the brush color to black and then restore the accidentally-removed part of the mask.
Perspective Drawing Has Many Uses
The option of distorting perspective in an individual layer in a picture is a useful tool that can help you to resolve certain situations that can’t be fixed in any other way. You’ll also get good use out of this tool when adding various text and other graphical elements to your photos.
