How to Take Better Winter Photos
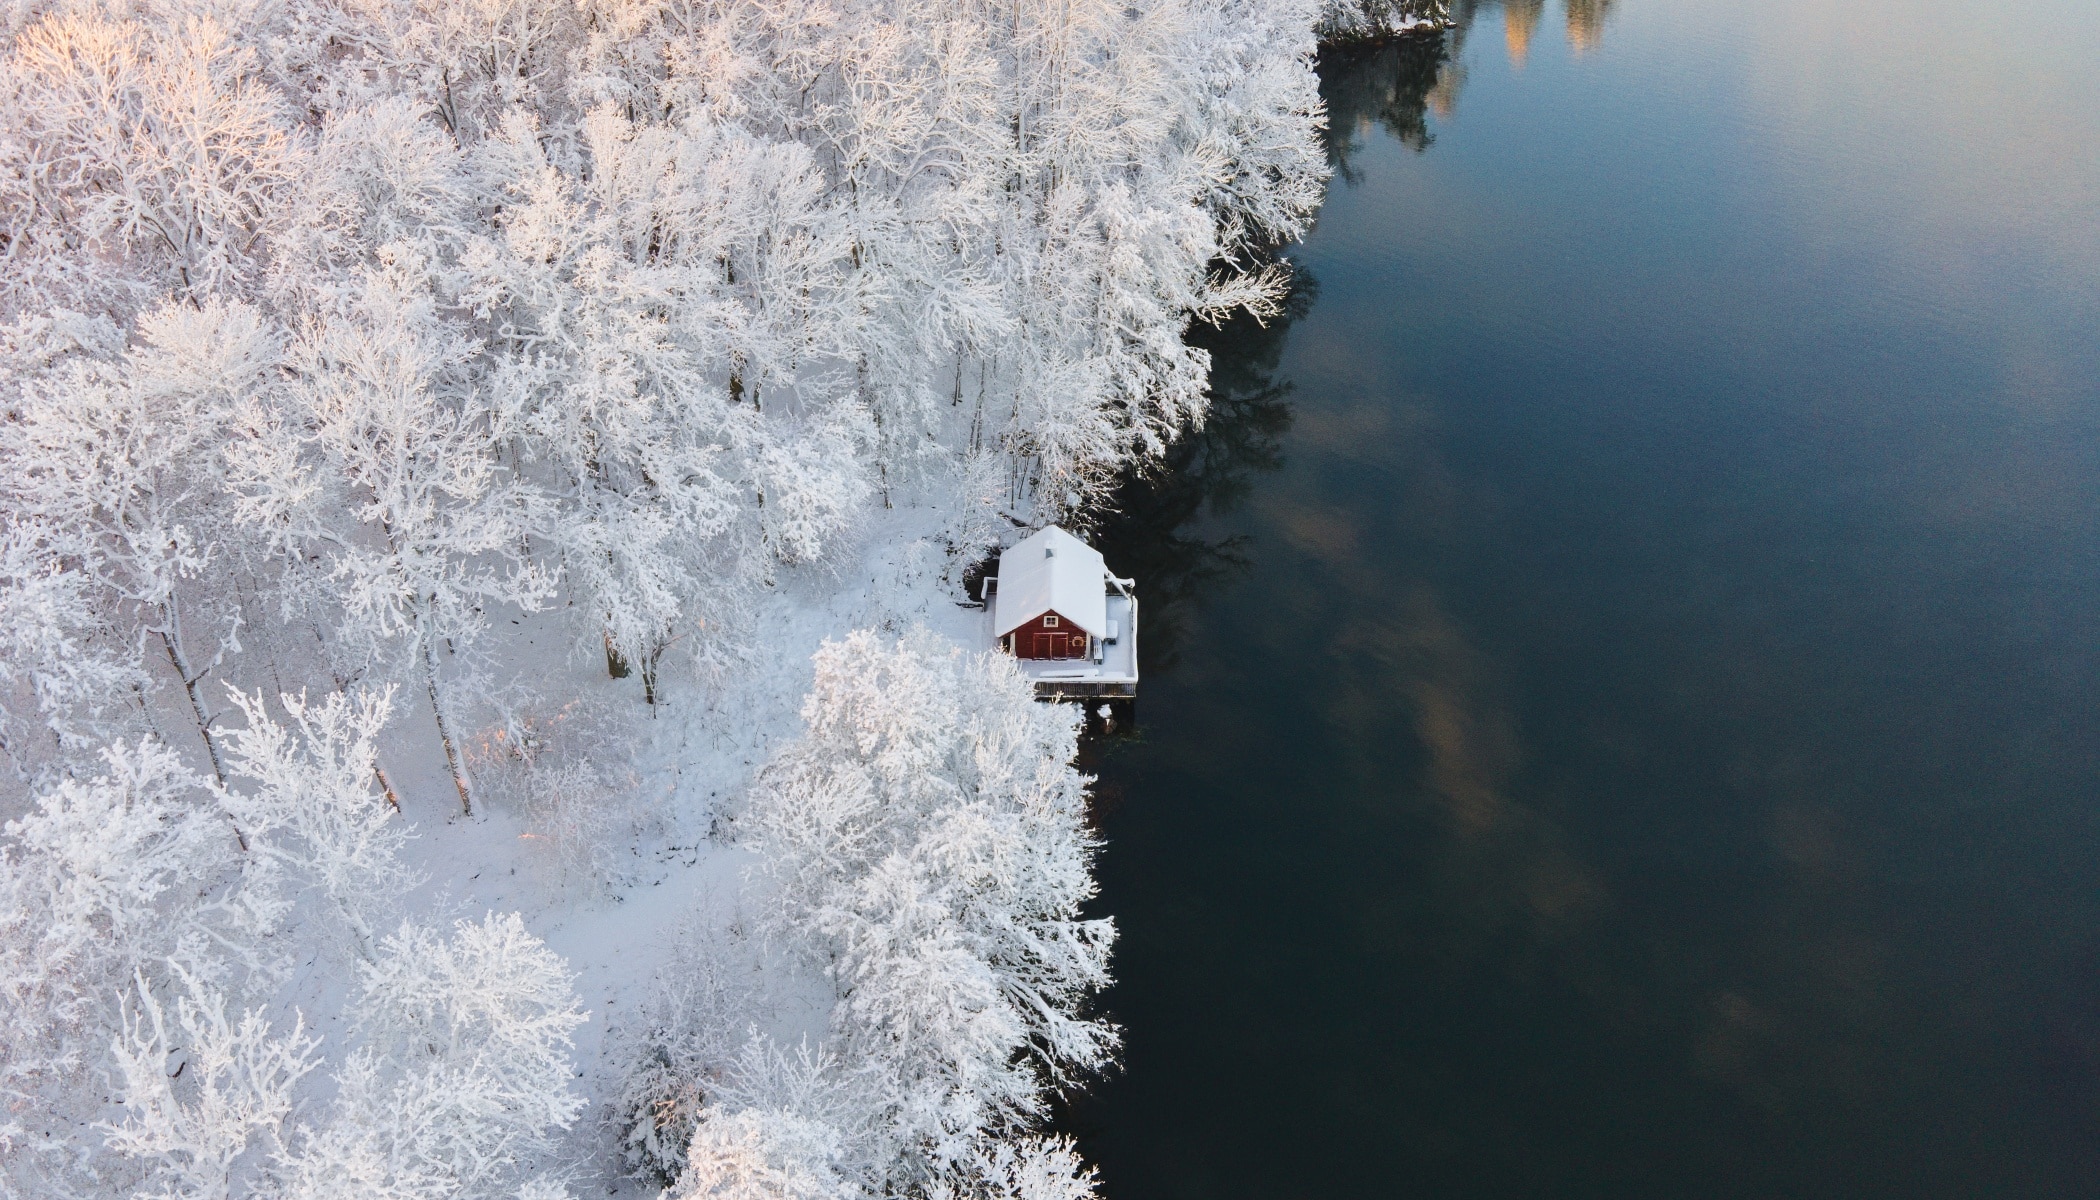
Winter photography offers magical light, unique atmosphere, and striking landscapes—but it comes with both technical and creative challenges. In this article, we discuss how to choose the right camera settings, gear, and compose compelling winter scenes. Then, learn how to refine your photos using Zoner Studio. Whether you’re photographing snowy landscapes, wildlife, or night scenes, these tips will help you bring your winter photos to the next level.
In this article, we discuss:
- how shutter speed, aperture, and ISO work together in winter conditions
- which lenses and focal lengths work best for winter and night photography
- why the time of day and weather play a crucial role in snowy scenes
- simple composition techniques that instantly improve winter photos
- how to enhance winter photos in Zoner Studio using tone curves, exposure, and local adjustments
- practical editing workflows for achieving balanced, natural-looking winter photos
Understanding your camera
Knowing how to use your camera’s settings is essential for capturing high-quality images. The three key settings to consider are shutter speed, aperture, and ISO. Each play an important role in capturing the best possible photos.
Shutter speed determines how long the camera’s sensor is exposed to light. A slower shutter speed leta more light in, making it suitable for low-light scenes or capturing motion blur, such as flowing water. A faster shutter speed is best for freezing movement, like when photographing wildlife.

Aperture refers to the size of the lens opening, which controls how much light reaches the sensor. A wider aperture (such as f/1.8) lets in more light and is useful in low-light conditions or when you want a shallow depth of field. A narrower aperture (such as f/10) limits the incoming light but increases sharpness across the entire image, which can be helpful for landscape photography.

ISO can be thought of as a digital way of amplifying light. Increasing ISO allows you to use faster shutter speeds or smaller apertures in low-light conditions, but it also introduces noise, reducing image quality. To keep your photos sharp and clean, aim to use the lowest ISO possible and increase it only when needed. By balancing these three settings, you can achieve consistent, high-quality results.

Choosing the right gear
While high-end cameras perform better in demanding conditions, my advice is to prioritize high-quality lenses. A well-made lens has a noticeable impact on image quality and is a valuable investment for years to come. Prime lenses, or lenses with a fixed focal length, offer the best image quality. They are also well suited for night photography.
For night scenes, my advice is to get a lens in the 14-24mm range, as wide apertures help gather more light. A lens around the 100mm range can also be a valuable addition, especially if it fits your creative style.


Zoom lenses are extremely useful in winter photography thanks to their flexibility. Longer focal lengths let you isolate details within a scene and create a sense of depth. If you’re looking for a versatile lens that cover most winter scenarios, I recommend a lens in the 24-120mm range. If you often rely on zoom lenses, adding a telephoto zoom lens is an idea worth considering.

Time of day and weather
For snowy landscapes, sunrise or sunset are often the most rewarding times to shoot. Although winter scenes can certainly be photographed during the day, the softer light adds depth and color. Snow can easily appear flat and too white, but the golden hour introduces warmer tones that give your photos more variety and contrast.

Composition
Try not to overthink composition. That being said, there are rules to keep in mind, regardless of what you’re photographing.
Rule of thirds
Place your main subject roughly one third into the frame, rather than directly in the center. This creates a more balanced and dynamic image and can be used in almost any setting.


Leading lines
Leading lines guide the viewer’s eye through the photo. Natural lines, such as roads, rivers, or repeating patterns in the landscape can all direct attention toward your subject and add depth.

Framing
Use elements like branches around your subject to create a sense of depth and make your composition come to life. This is useful in scenes that might otherwise feel flat. Just don’t overdo it—less is more.

Editing Winter Photos
Once you’ve captured stunning winter scenes, it’s time to refine them in Zoner Studio. While there are many tools available, this article focuses on the Tone Curve, Exposure, Radial Gradient, and Linear Gradient. These are universal tools that can be applied to pretty much any winter photo regardless of its colors and tones.
Tone Curve
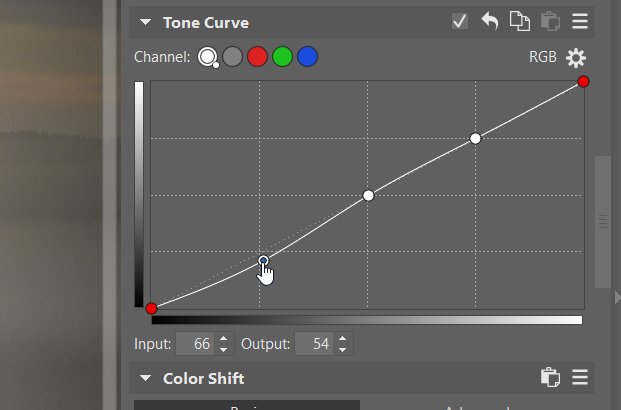
The tone curve represents the full range of tones in your image, with shadows on the left, midtones in the center, and highlights on the right. I use the Tone Curve to increase contrast in a photo by giving it a subtle S-curve, as shown in the image below.
This darkens the shadows on the left and brightens the highlights on the right. The more you lower the left part of the curve and increase the right, the more contrast you create in your image. I usually make small, subtle adjustments to the S-curve, but it’s worth experimenting to see what suits your photo best.
Exposure
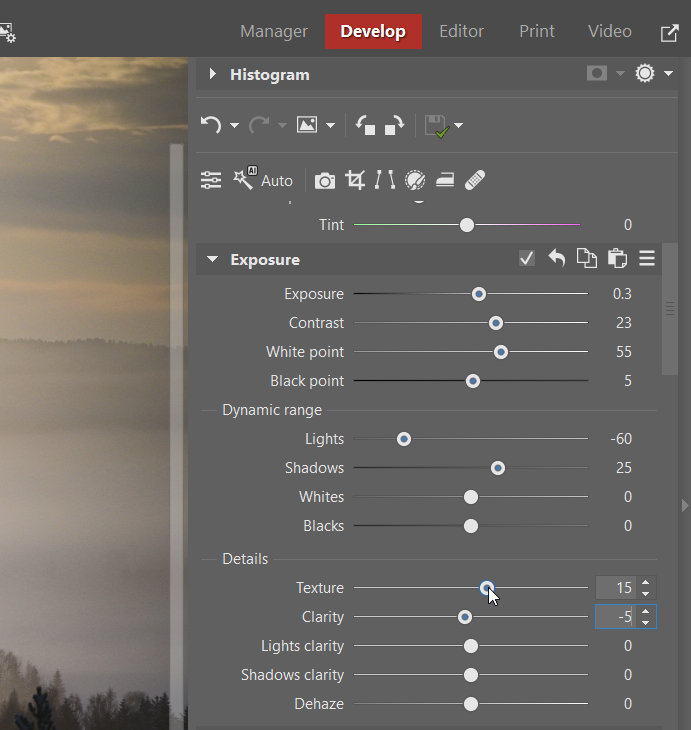
If you tend to underexpose your images, some brightening in post-processing is often needed. My tip for achieving a bright yet soft look is to increase the Exposure slider along with Contrast, White Point, and Shadows, while reducing Lights. This combination helps maintain well-balanced exposure, adds brightness and contrast, while keeping the overall look soft and natural.
Linear Gradient
Linear Gradients are great for making targeted adjustments to specific parts of an image. Winter landscapes often contain areas that are either overexposed or underexposed. If this happens, Linear Gradients can help even out the exposure.
In the example below, the right side of the image was noticeably darker due to vignetting. To correct this, I applied three gradient filters in different positions to gradually even out the exposure and create a more natural and visually appealing result.

Radial Gradient
When you need to make local adjustments to an area that is either in the center or circular, the Radial Gradient is your go-to tool. It’s great for creating smooth, natural transitions between edited and unedited areas.
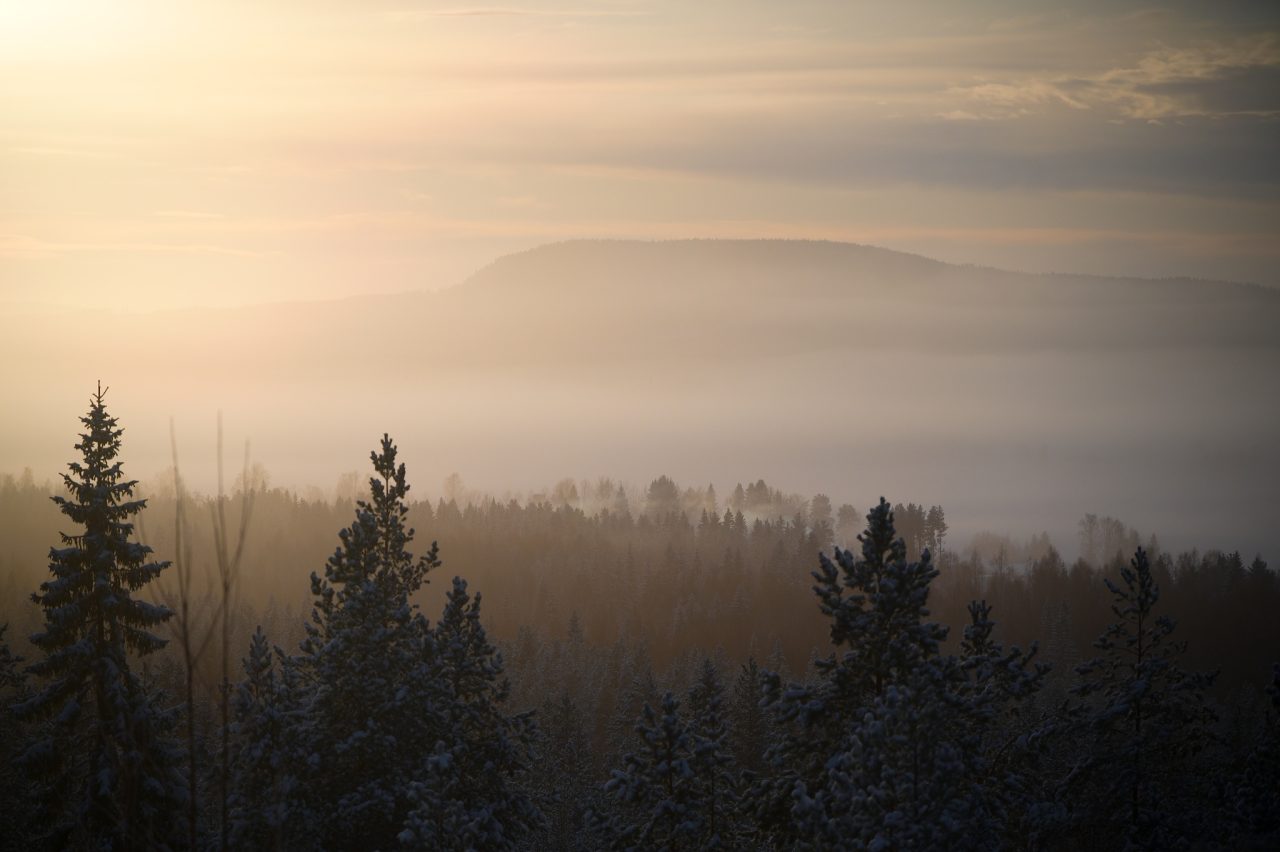
In this example, I applied a large Radial Gradient with +0.4 exposure in the center of the frame to enhance the natural light source. This helped draw attention to the trees emerging from the fog and the distant mountain, guiding the viewer’s eye to the main points of interest.


Before / after
I hope this article has given you some useful insight and inspiration for winter photography. The next time the snow arrives, grab your camera, embrace the cold, and start creating!
FAQ
Do I need a professional-level camera to take good winter photos? No. While advanced cameras can perform better in demanding conditions, understanding your camera settings and using good lenses matters far more than having a high-end camera.
Which camera settings are best for winter photography? There is no single “best” setting. Winter photography requires balancing shutter speed, aperture, and ISO based on light, movement, and creative intent.
Why do my winter photos look too bright or flat? Snow reflects a lot of light, which can confuse your camera’s meter. This often results in underexposed or low-contrast images. Shooting during the golden hour and adjusting exposure and contrast in post-processing can help.
Are zoom lenses suitable for winter photography? Yes. Zoom lenses are very practical in winter as they offer flexibility and allow you to quickly adapt to changing scenes without changing lenses in the cold.
Which Zoner Studio tools are most useful for winter photos? Tone Curve, Exposure, Linear Gradient, and Radial Gradient are especially effective for correcting exposure, adding contrast, and guiding the viewer’s eye within winter scenes.