Master the Tools That Will Get You Perfect Colors
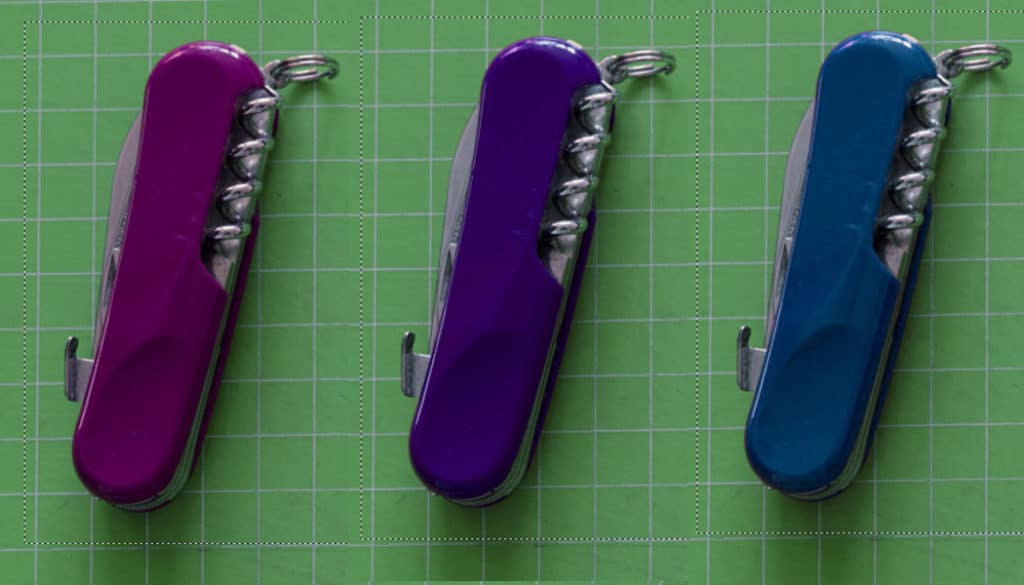
Color adjustments are right up there alongside tone-curve adjustments as the most common edits you’ll make to your digital photos. No matter whether that’s a global repair to a photo that was tinted by a bad white-balance setting, or complicated creative edits using selections.
You’ll learn to use these tools of Zoner Studio:
- Adjust > Adjust Color Temperature (Ctrl+2)
- Adjust > Enhance Colors (Ctrl+1)
- Adjust > Curves (Shift+C)
- Adjust > Levels (Shift+L)
- Effects > Mix Channels
- Effects > Shift Colors
- and the Develop section’s Color Shift group
Removing Overall Tinting
One common color correction is removing overall tinting in a picture caused by a bad white-balance setting. To correct this fundamental problem, use Adjust > Adjust Color Temperature (Ctrl+2) in the Editor. There’s an automatic-adjustment setting offered here, but you can also use the eyedropper to show Zoner Studio which color in the picture should be a neutral gray. Click it and click a color, and Zoner Studio then semi-automatically handles the rest for you. Another option is to manually provide the color temperature of the picture’s lighting.
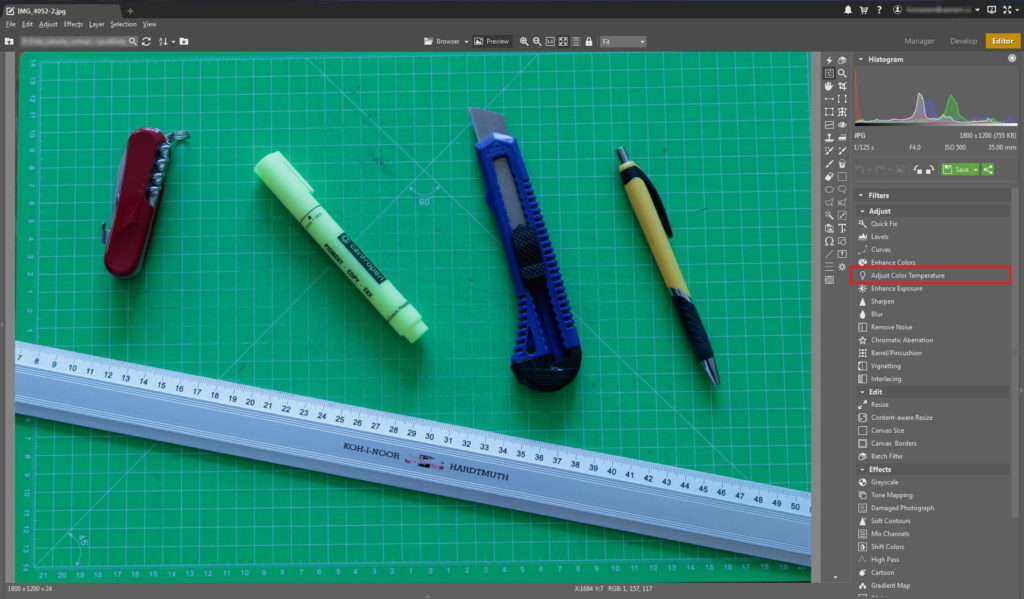
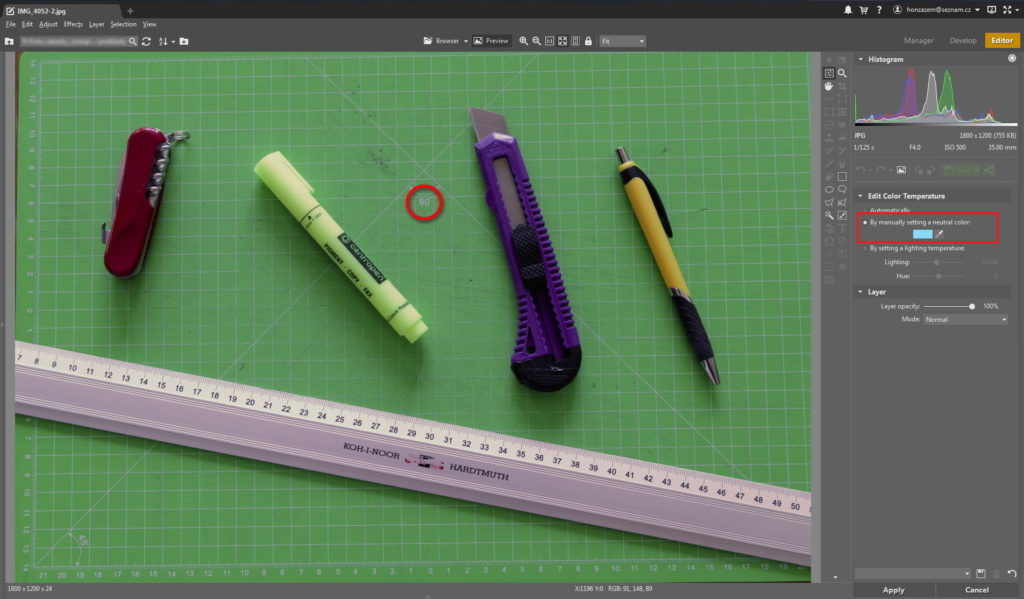
You can use the white balance tool not only to correct bad white balance, but also for creative expression. A typical example of this is deliberate shifting of the colors in a portrait towards warmer tones. A warmer skin color is more attractive than cool colors—those can even feel cadaverous. But if your aim is to emphasize coldness in a winter portrait, use the very opposite effect. It always depends on your intentions. Remember, neutral colors can prevent a bad picture, but they’ll likely also prevent a great one.
You can also find white-balancing controls in the Develop section. Work in Develop has the advantage over work in the Editor that it’s non-destructive. If, on top of working in Develop, you’re also working with the RAW format, you can change the white balance without any negative effect at all on the picture’s quality: RAW files have colors to spare.
Work With Color Creatively
The Enhance Colors Filter
For more detailed global color edits, use Adjust > Enhance Colors (Ctrl+1). These controls use the HSL color model, where colors are made up of three basic values:
- Hue
- Saturation
- Lightness
The Enhance Colors filter lets you globally control these three three parameters, and also offers a setting for “Vibrance.”
Vibrance is actually essentially a more clever Saturation. While Saturation affects all colors equally, Vibrance takes into account the fact that certain colors are more saturated than others, and prevents Zoner Studio from oversaturating them. A typical example here is the red color contained in human skin.
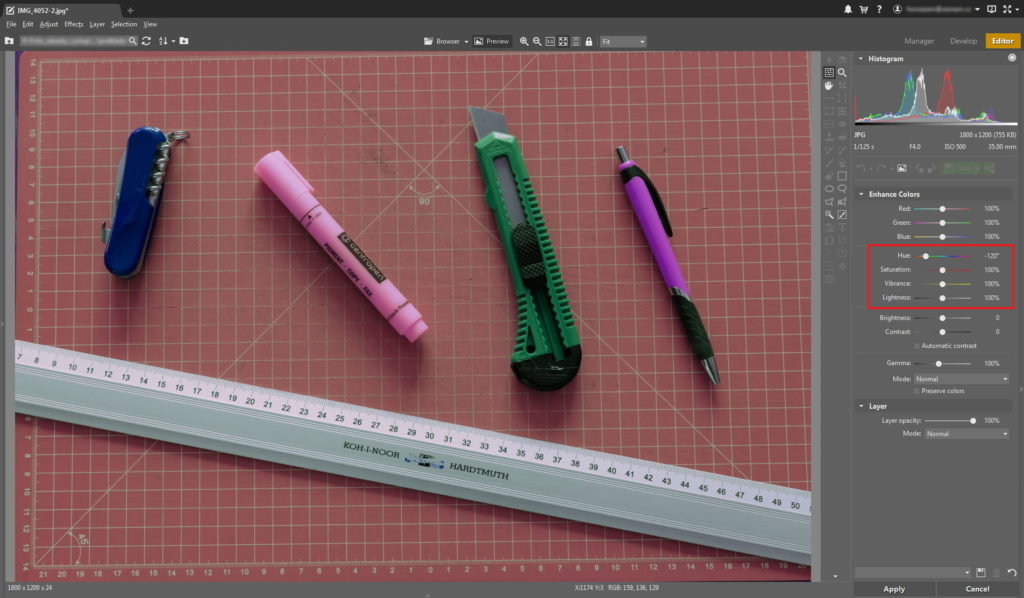
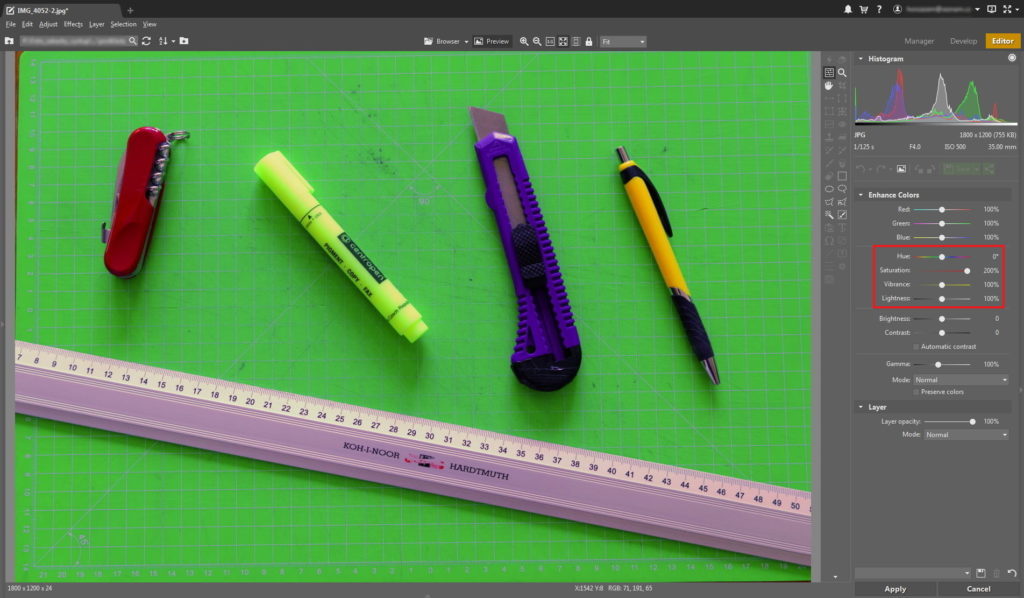
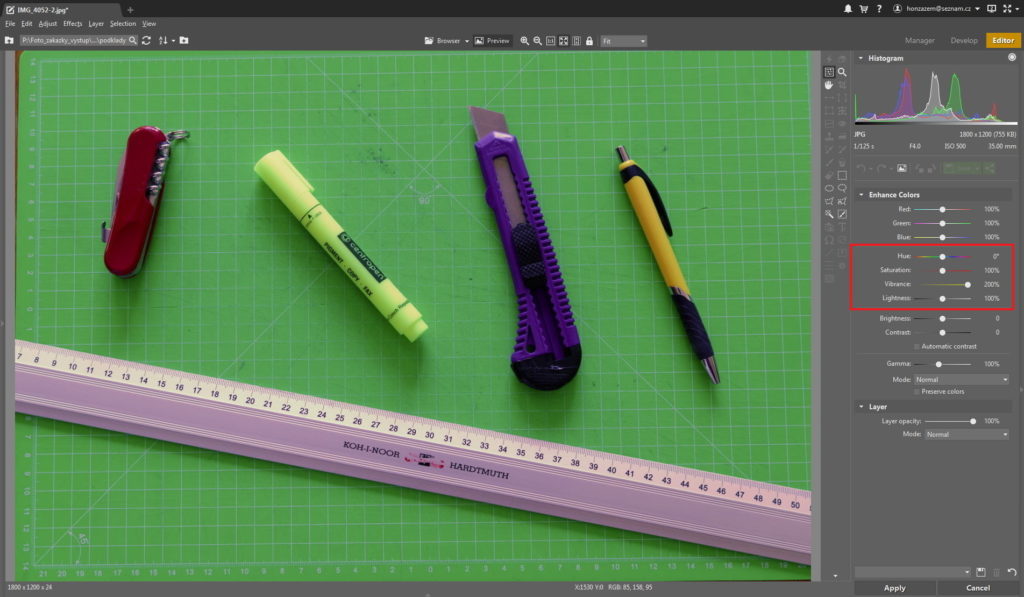
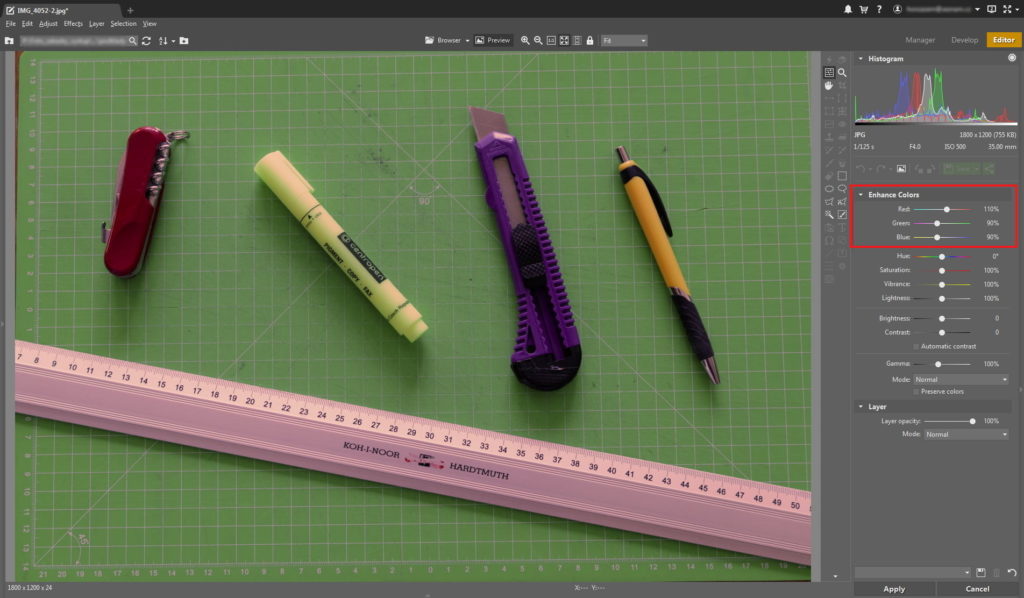
Another three controls (Red, Green, and Blue) let you control each of the three primary colors individually. If for example you want to make a picture feel warmer overall, you can add red at the expense of azure, add purple at the expense of green, and/or add yellow at the expense of blue.
The Curves and Levels Filters
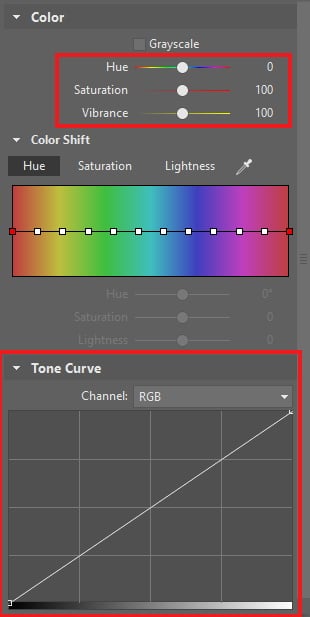
You can achieve a similar effect by modifying individual color channels using the Adjust > Curves (Shift+C) and Adjust > Levels (Shift+L) filters. Controls for working with the tone curve are also available in the Develop section, where you can also change the global Hue, Saturation, and Lightness. So here again it’s better to make these edits in Develop non-destructively and with no loss of picture quality, thanks to developing from a RAW file.
The Channel Mixing Filter
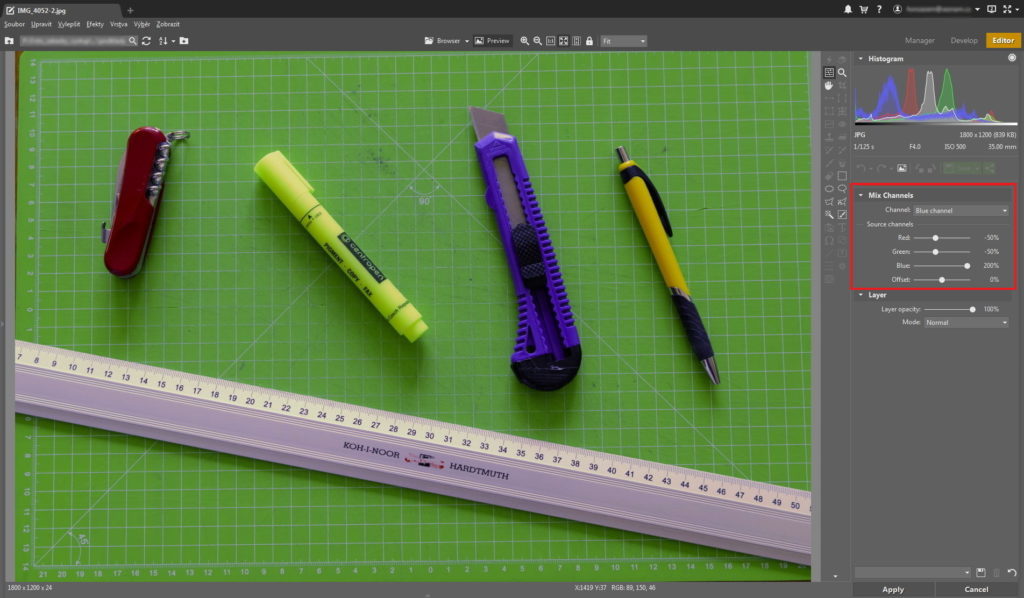
For detailed control over the Red, Green, and Blue color channels, use Effects > Mix Channels. With this tool you can control how the three main color channels are mixed together. In order to retain believable colors, I recommend setting the sliders so that their average is about 100 percent.
Edit Colors in Just the Spots You Want
Using the Selections Tools
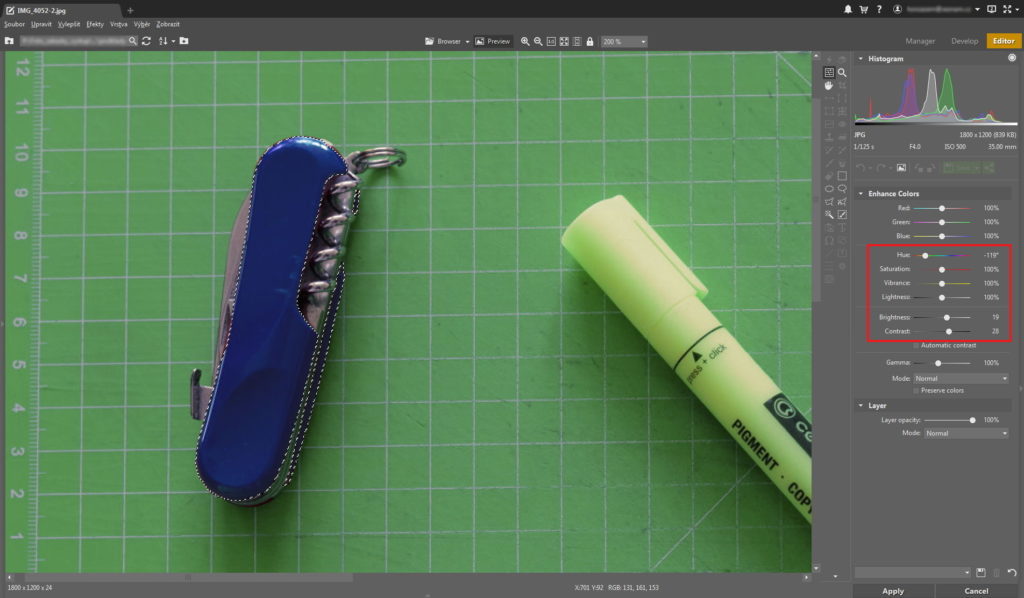
All of the edits we’ve talked about so far are for changing colors globally throughout a picture. But you can also use these same tools to “locally” adjust colors in just one part of a picture open in the Editor, thanks to selections.
The approach here is to first use a selection tool or tools of your choice to select the area you want, and to then apply one of the above color-adjustment filters to that selected area.
The Shift Colors Filter
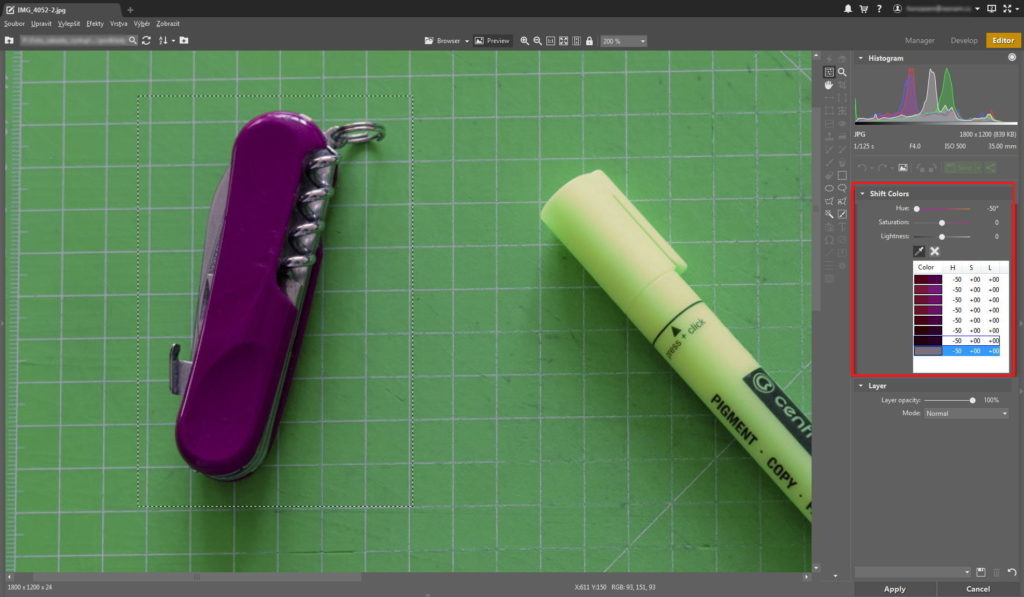
Creating a selection around an area with complex borders can be demanding and time-consuming. In certain cases, you can instead change the color of just part of a picture using Effects > Shift Colors. In effect, this tool works as if you have made a selection containing every area in a picture that has a certain color.
Use the eyedropper to indicate the color that you want to change, and then set the new color you want using the Hue, Saturation, and Lightness values. For major color shifts, you’ll have to use this tool several times in a row. Even though Shift Colors provides some of the benefits of a selection, you’ll still want to make a quick rough selection around your area of interest to keep its effects limited to that area.
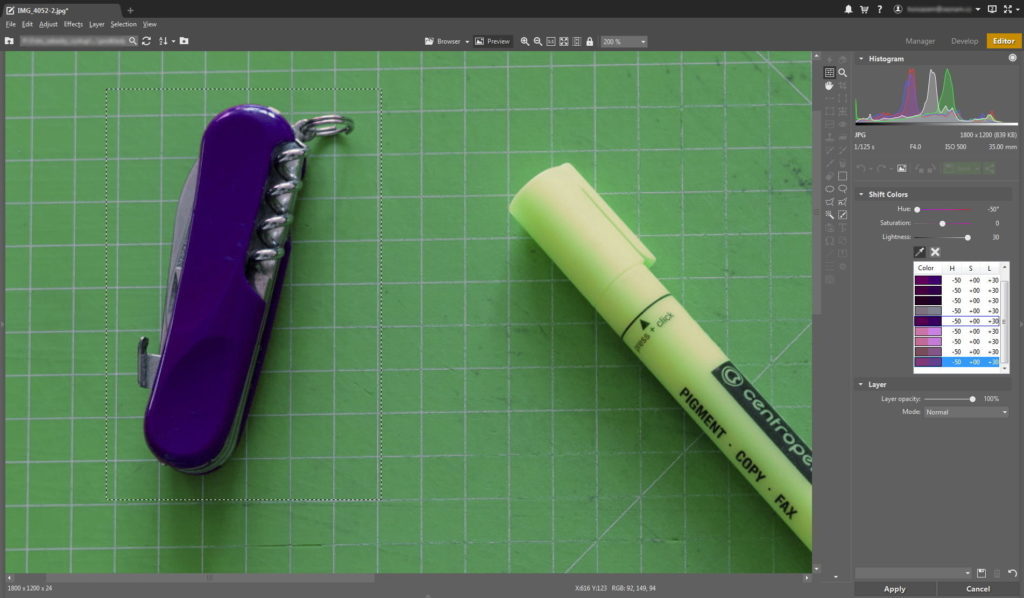
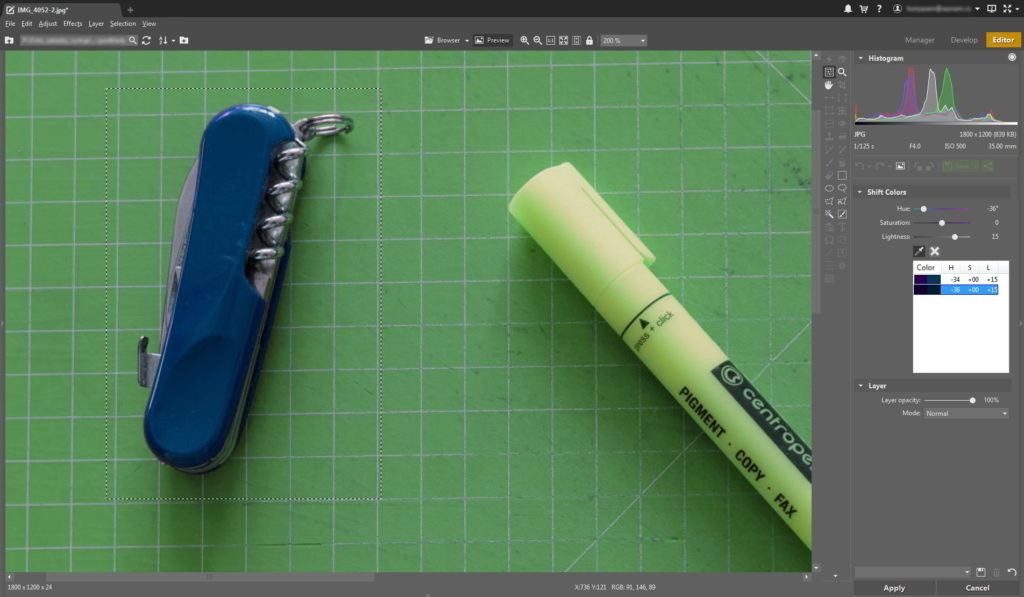
Unfortunately the Shift Colors tool is not simple to use in every situation. If the color of an object is too close to the colors of its surroundings, then it isn’t separated well enough from its surroundings, and so Shift Colors can undesirably shift background colors alongside the ones you really wanted to shift. In some cases a very detailed selection around the object can help here.
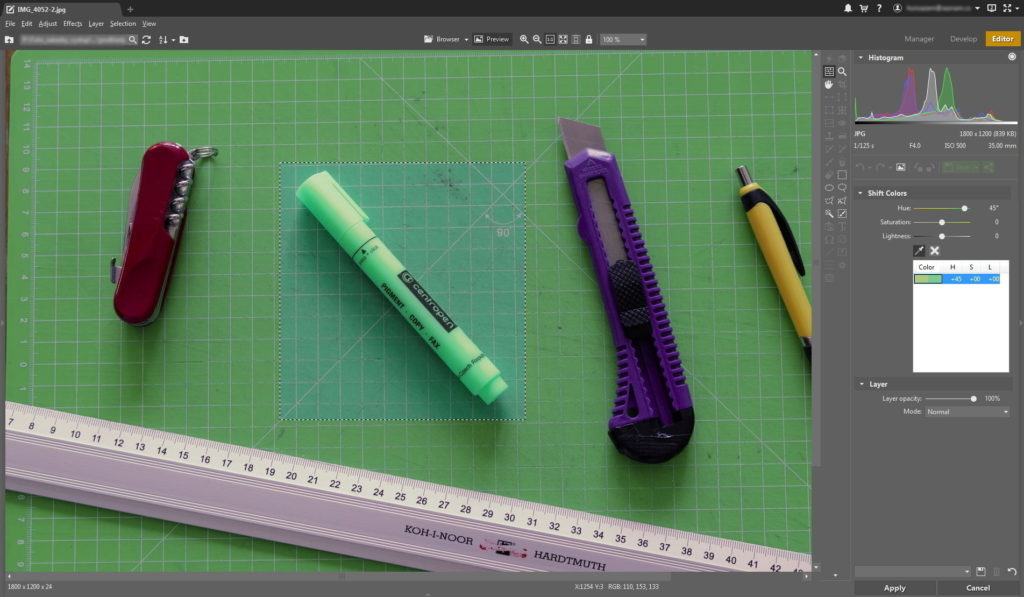
“Partially-local” Edits in the Develop Section
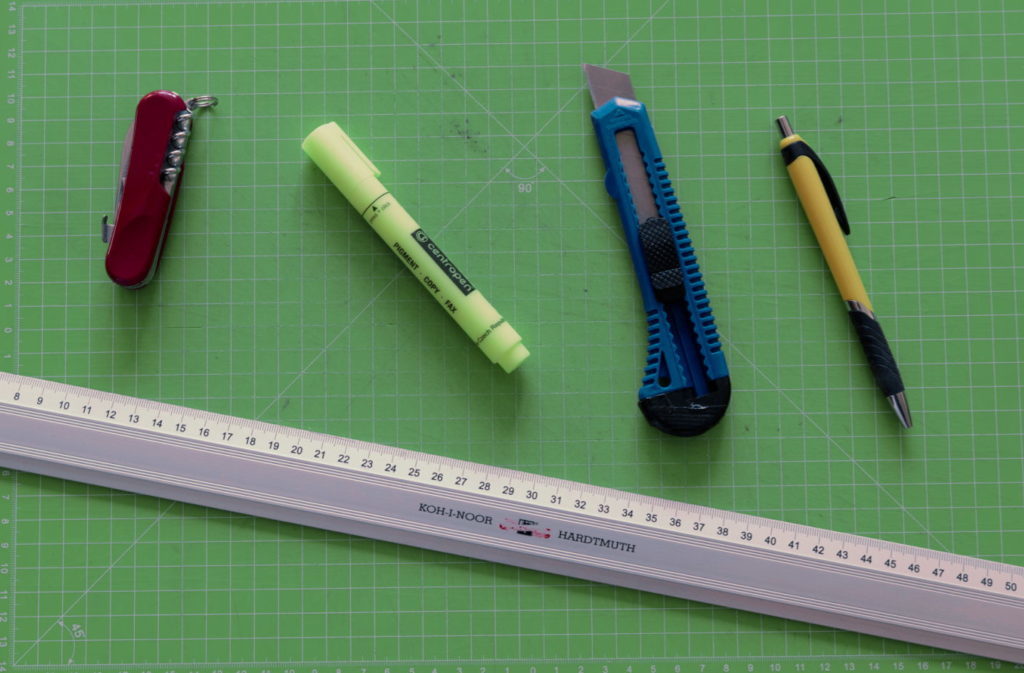
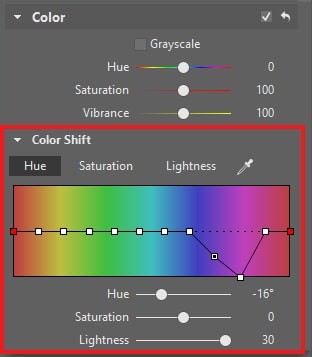
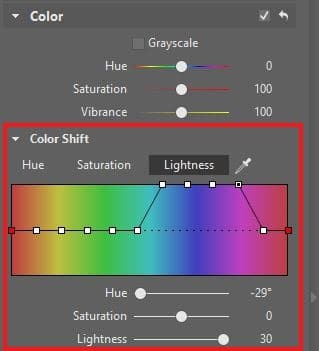
In the Develop section, actual selections are not available. But at least you have at your disposal a filter that you can use to separately adjust Hue, Saturation, and Lightness for individual colors across the whole color spectrum. You’ll find this tool in the Color section, under the name Color Shift.
In the example picture, I could use these controls to change the color of the purple utility knife, because all of the other objects had completely different colors, and so the changes to its color and brightness didn’t affect anything else.
Do as Much in Develop as You Can
A number of the color adjustment tools are available to you in both Develop and the Editor. For global edits, try to always make them to RAW files and to make them in the Develop section, because this prevents the degradation of image quality that would happen if you worked with a RAW after developing it into a bitmap image.
For local edits, you’ll have to work in the Editor, since only the Editor lets you make selections and use Shift Colors for local adjustments.
Need to adjust the colors in your pictures? Download Zoner Studio, try it free for 7 days, and get them fixed just how you need them.