Create Original Photo Tags for Your Christmas Gifts
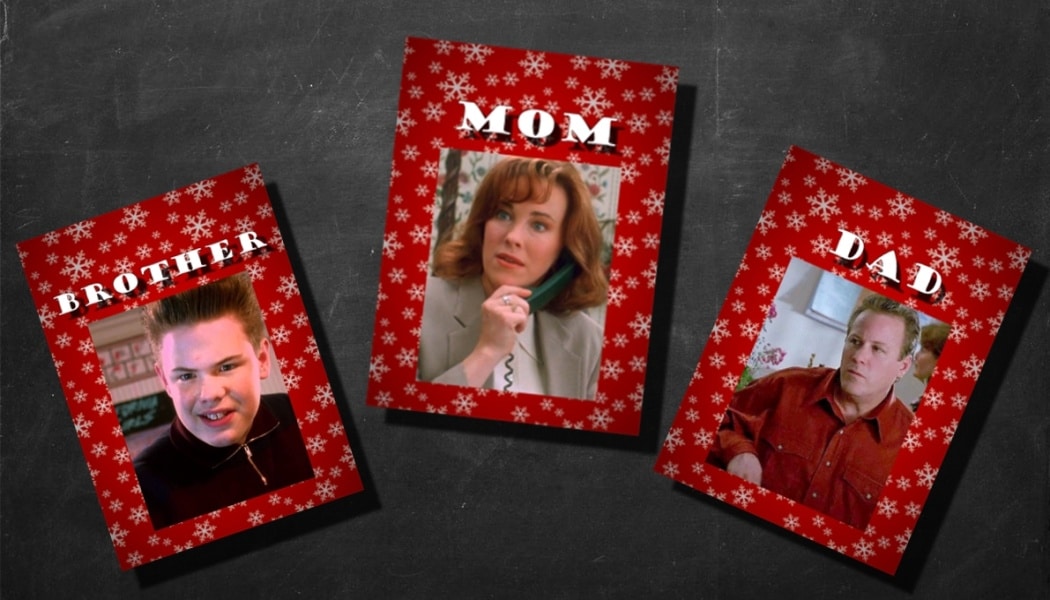
This Christmas, make it easier for the kids in your family to hand out the gifts. Create your own tags with both names and photos. Then even the youngest children, who haven’t learned to read yet, will have the joy of handing out the gifts and finding their own.
Photo name tags have another advantage too. Not only will everyone be able to immediately tell who gets what gift, but they’ll also have fun and remember the times when the pictures were taken. So it’s best to use for example photo sets from weddings and similar family celebrations.
Think hard about whether you’ll use just headshots, wider shots like a three-quarters, or full-figure shots. It mainly depends on the photos you have available. Still, keep in mind that the final name tags will be fairly small, and that they’ll need to be “readable” even in the dim light under the tree.
Choose the Right Background
Custom photo name tags have another small advantage as well—it’s easy to match their colors with the wrapping paper and the Christmas decorations. Just head onto the internet, download a nice Christmas motif, and open it in Zoner Studio.
Then start up the Editor, roll down the Menu at the top left, and choose Document -> Resize (Ctrl+E). Change the size unit (inches/centimeters) if needed, and set the dimensions you need. Here I’ll be using 8×6 cm.
Set the resolution to 300 DPI. This DPI will guarantee that the name tags will look good in print.

Prepare the Photo Slot
Then in the right panel, activate the Selection Tools and use one of them to mark the spot where you’ll be placing the photo. The Rectangular Selection or Elliptical Selection tool is usually best for this.
After your selection, go to the Layers group and use Mask -> Hide Selection. This creates a “hole” in the picture in the selected area. When you then go on and add a photo below this layer, the part of it that’s under the hole will be visible.

Add a Photo
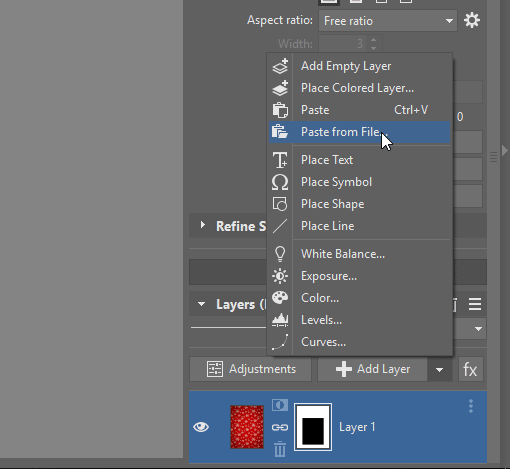
Now you need to add the photo to the name tag. So click the arrow next to the Add Layer button and choose Paste from File…. Then find the right picture.
Move the photo layer under the original layer. That way, it will only be visible through the “hole” you set up. Then set a suitable size and position using the Move and Transform tool (V).

Add Text
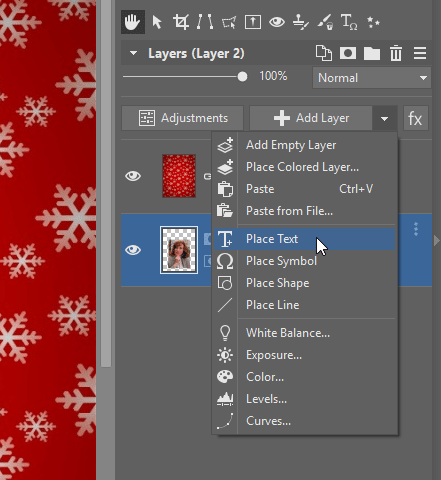
Now add text—once again using layers. The basic technique is similar as for adding a new photo, except that you click Place Text instead of Place from File…. Once you’ve got this layer set up, you just need to change the names for the remaining tags.
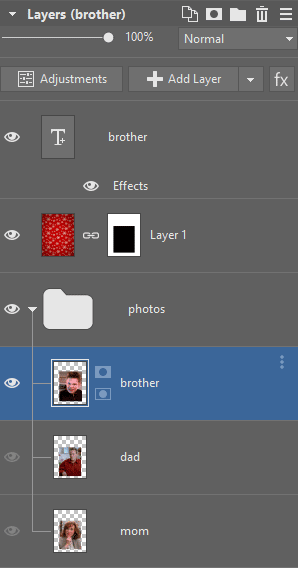
Put the text layer at the top, so that it’s above the previous layers. That way it will always be visible. Then set the text size, color, and font that you want.

Now set some effects for the text layer. These will help to make the text easier to read. Right-click the text layer in the right panel and use Effects -> Edit Effects…. The Shadow effect often works well, with a small offset and size. A tasteful Outline also helps.

Add the Other Photos
Add the photos for the other name tags similarly, placing them under the main layer each time. You don’t need separate files for this; just use the eye icons by the layers to set which photo is visible.
Save to Both Zoner Studio and JPG
Then save your whole project as a Zoner Studio file, so that you can keep the layers and can adjust the tags again later. And then save one JPG file for each actual name tag, with the right name and photo layer visible for each.

So in just a few minutes, you can create visual name tags that will bring joy and smiles to your loved ones. Just choose the right photos, download Zoner Studio , take advantage of the 30 free days, and get to work!