Portrait Lighting IV: Give Work With Combined Light a Try
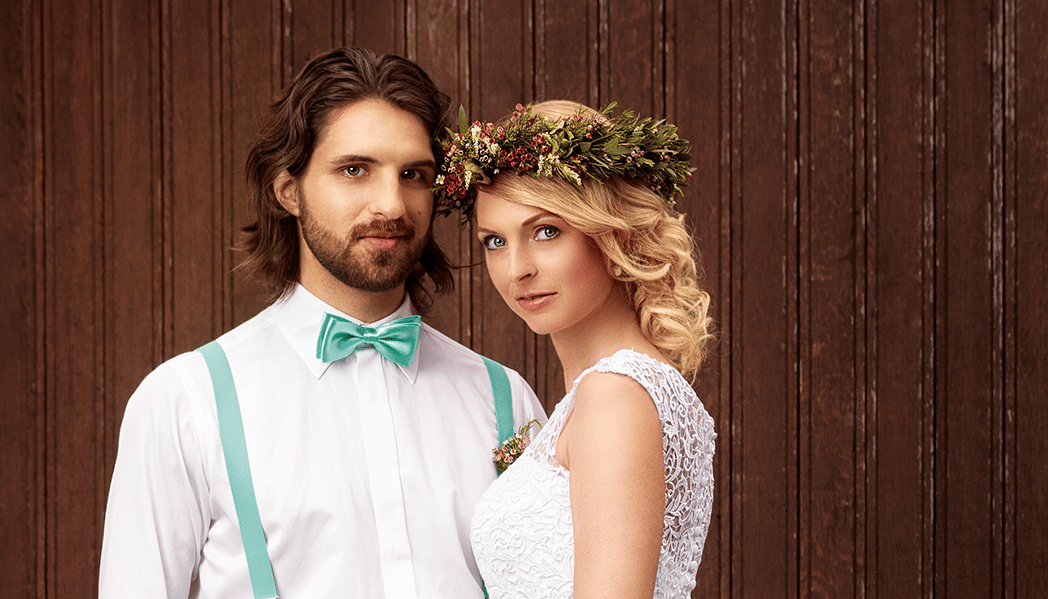
Even when you’re shooting portraits outdoors, you can still have your light under control. You just have to take advantage of combined light—that is, artificial plus natural light. It’s generally ideal if you can keep the two light sources in balance. It’s best of all if your audience can’t even tell that you used both types of light.
You’ll most often use artificial light in portraits to brighten face shadows. Direct sunlight works poorly for portraits, so that’s reason enough right there. The sun is a sharp light source that forms harsh shadows and forces your subject to squint.
The solution is to place the subject in a suitable position, e.g. with their back to the sun. The sun then works as an effect light that separates the subject from their background. You can also use a reflector to light your portrait; this reflects sunlight back at the subject.
Working with combined light can be as simple as just using a flash in a softbox instead of using a reflector. That gives you far more control over your main light source.
- You can position the light precisely.
- You can set the light’s quality through your choice of softbox.
- You set the flash intensity yourself.
- You can even affect the color temperature, through the use of added color filters.
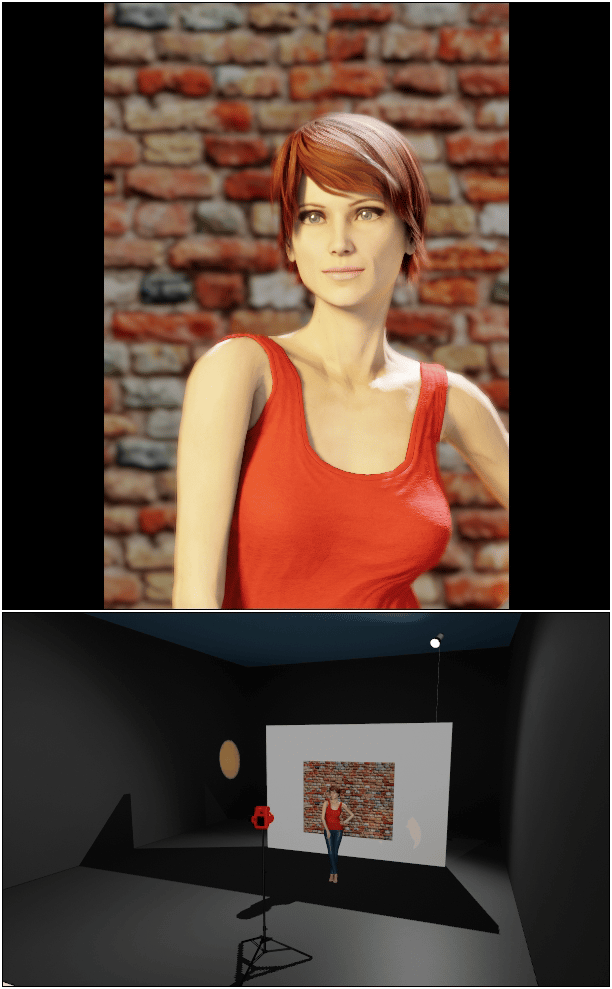
A simulation of sharp noonday sun. The model is in open shade and is lighted using a golden reflector. This portrait is receiving somewhat too much light, just like in many real natural-light situations: after all, you can’t directly regulate the Sun. Tightening the aperture or using a shorter exposure, meanwhile, would darken both the subject and their background.
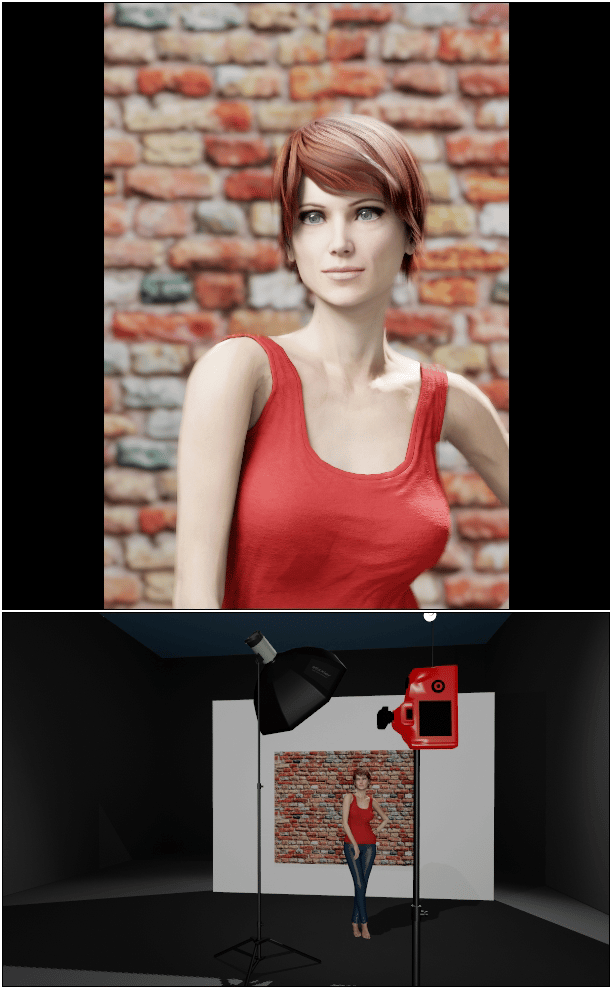
Here a flash inside of a softbox has replaced the reflector. The light intensity is similar to what we saw in the example with the reflector. But this kind of lighting makes a portrait feel less flat, and gives you more control over the results.
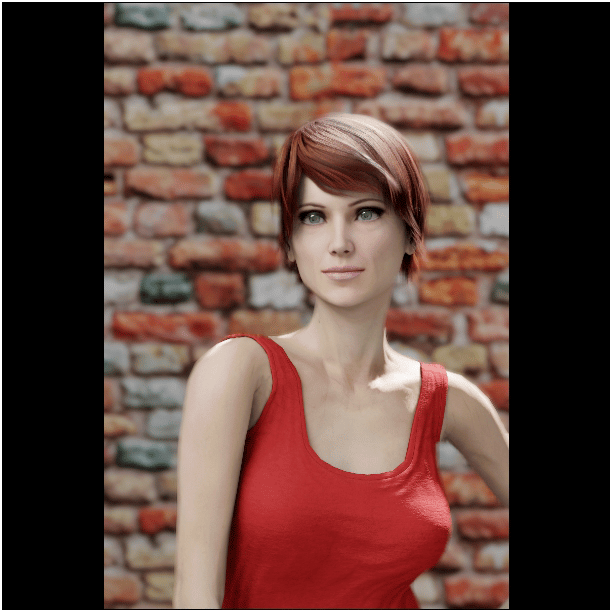
Here the flash strength is 1.5 EV lower. The portrait’s lighting is a better match for the lighting around it.
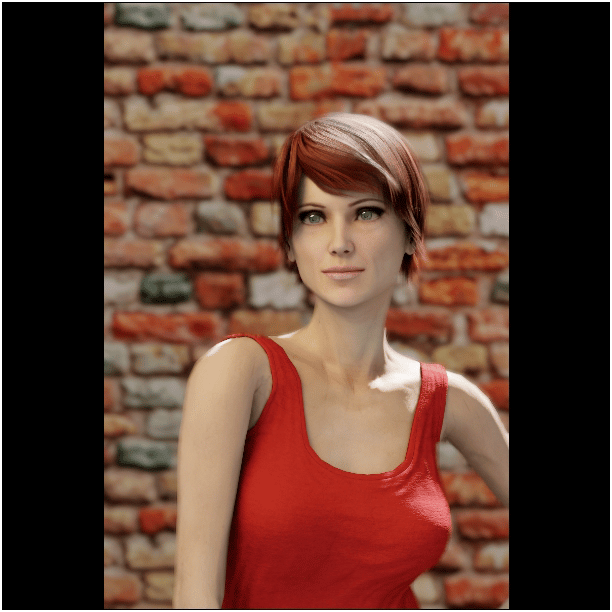
I’ve put a CTO (Color Temperature Orange) filter over the flash to make its light warmer. This warmer shade looks good on the model’s skin.
You’ll mostly encounter this style of photography, where the sun is at the model’s back, in morning and evening photos. Those are the times when natural light is highest in quality.
If you’re taking pictures during the day, you’ll need to place your subject in open shade or take your pictures under cloudy skies. The second of these two options, where the sun’s light is diffused by the clouds, is the simpler one.
You can position your subject anywhere you want in the scene. So you don’t have to adapt your composition to the sun. The diffuse sunlight will light the environment sufficiently, and then you can model your subject using a key light, in the form of a flash.
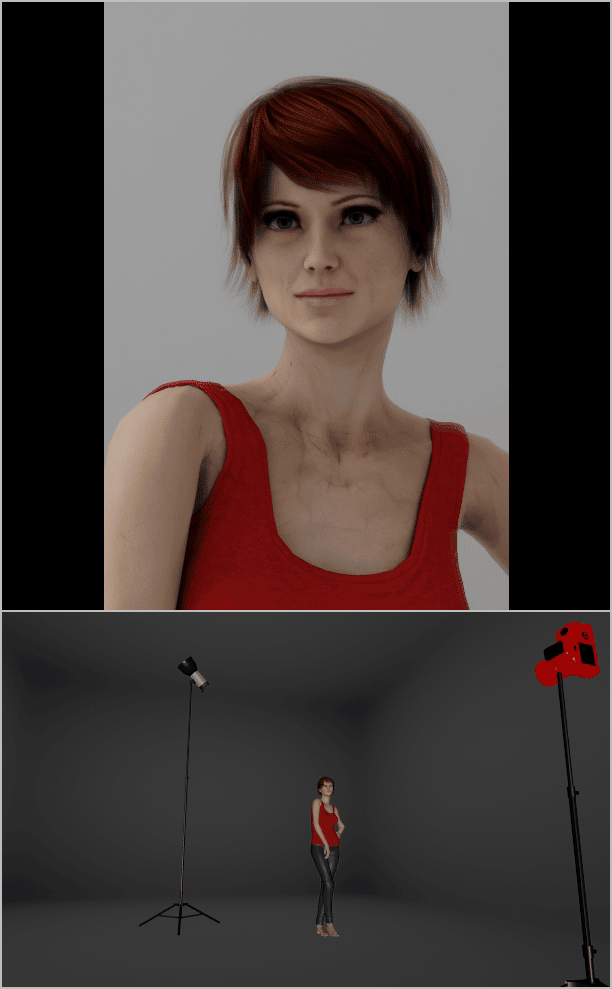
A simulation of the diffuse light that you’ll get from cloudy skies. I chose exposure settings that gave me a good exposure for the background. But the portrait is slightly underexposed, and the eyes are too dark.
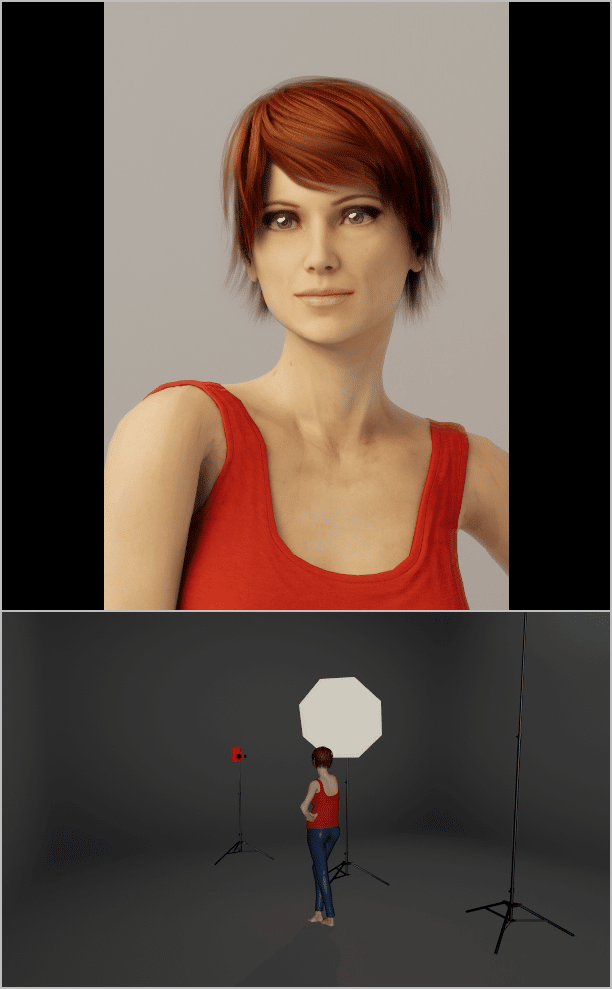
The same conditions as in the last picture. But I’ve added a flash equipped with a CTO filter. Now the model is perfectly exposed and feels “3D.” Her eyes are more vibrant thanks to the reflection from the softbox.
Combined Light Indoors
Even complete beginners will often run into combined light in photography—when they’re taking pictures indoors. That’s because if there’s some natural light, but not enough, a camera may automatically fire its flash.
However, when it does this, it generally uses exposure settings that leave the subject’s naturally-lighted surroundings underexposed. So in this kind of situation, it’s good to not rely on the camera’s electronics and set the exposure manually.
You can also, for example, set a longer time than what you’d normally need for a well-exposed background in a manual shot. Then set the intensity of the flash based on your creative goals. There may be a little motion blur in the final photo’s background, but this tends to be harmless in portraits; meanwhile, the subject will be receiving ideal lighting from the flash. They’ll also be perfectly sharp, because the flash will be fast enough to prevent motion blurring.
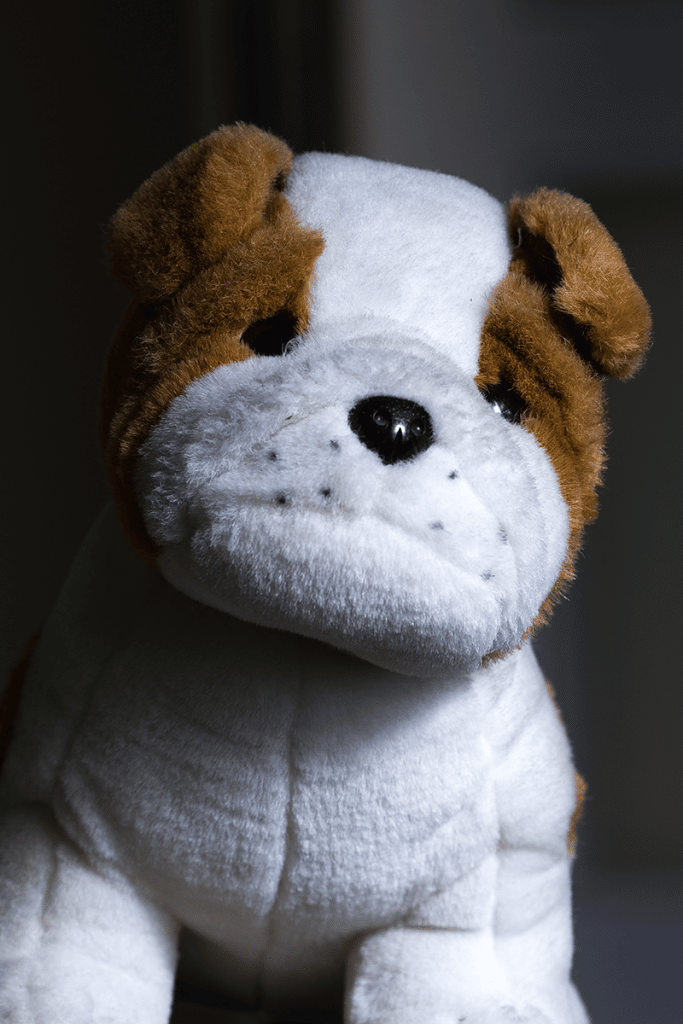
In this illustration, the stuffed animal is lighted by a flash. I chose an exposure time short enough for a handheld shot, and so the background is thoroughly underexposed. Also, the part of the animal that’s in shadow is almost black and without detail. The shadows are fairly harsh, and the subject feels cold.
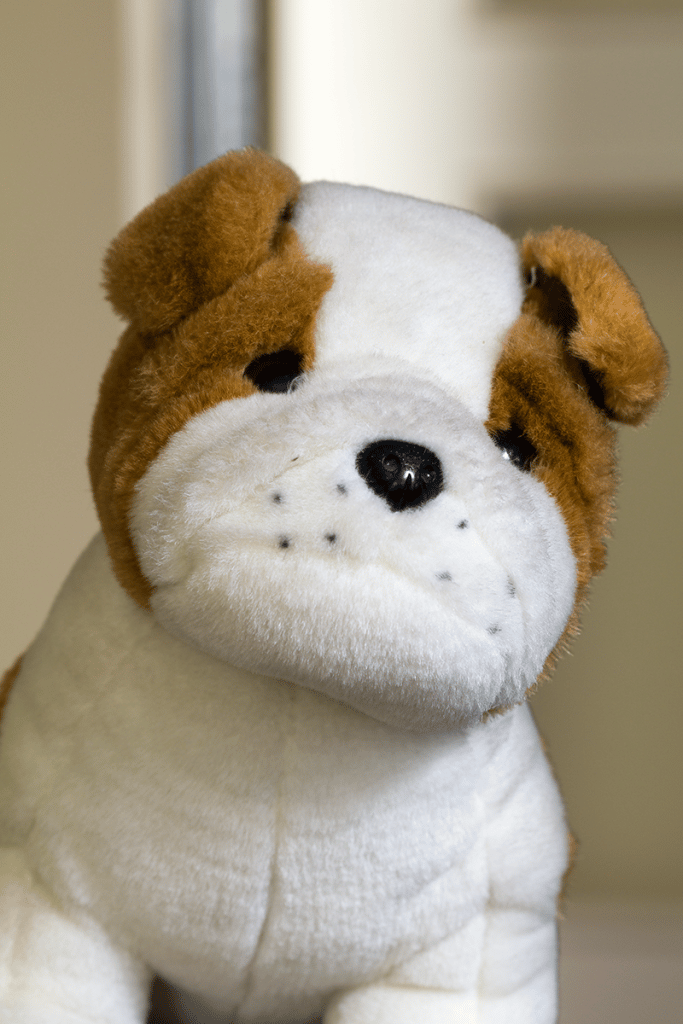
The settings are the same as in the previous photo. With one exception: I lengthened the exposure to 1/8 s—which is far too long for a handheld shot. The background is well-exposed, and since the toy is “frozen” by the flash, it’s perfectly sharp. The shadowed areas are not sharp, and details can be seen within them. The picture’s overall colors are mainly dependent on the surrounding light; this has also added some pleasant warmth to the cold light of the flash.
What Equipment to Use for Mixed-light Photography
For a primer on work with exposure settings when you’re shooting in natural light, see Portrait Lighting II: Master Portrait Photography Under Natural Light. Natural light has the properties that it has, and you have to adapt your exposure to them.
In Portrait Lighting III: Master Portrait Photography Under Artificial Light we discovered that flash photography is a whole different world than photography with natural light. You can use your own choice of exposure settings to meet your creative goals and then adapt your light to your settings.
When you’re shooting in combined light, you need to combine these two approaches. It’s actually fairly simple to do. Just keep in mind that each of the three exposure parameters affects a different aspect of the exposure.
- Shutter speed—this affects the exposure of the places illuminated by natural light, while not affecting the areas that are illuminated by the flash. The flash only lasts for a few thousandths to tens of thousandths of a second, and so it’s all the same whether the shutter is open for 1/60 s or 0.5 s. A portrait exposed by a flash is exposed for the length of the flash. You only have to watch out that your exposure time isn’t shorter than your camera’s synchronization time.
- Aperture—this affects both the places illuminated by the flash and those illuminated by natural light. Tightening the aperture by one f-stop reduces the influx of light through the lens by half. This goes for any exposure length. The lens will let in half as much light from both the flash and the natural lighting.
- ISO—just like the aperture, this affects both natural light and the light from your flash.
Where To From Here?
There are several approaches to work with exposure settings that you can take here. But here’s the approach that’s worked best for me:
- Compose the scene.
- Turn on manual exposure mode in your camera.
- Set the ISO (the lower it is, the higher-quality and more noise-free your image will be).
- Set the f-stop that best fits your creative goals. For a portrait, you’ll probably be working with a low f-stop, something like F5.6 or less.
- Adapt the intensity of your flash to your choice of f-stop. You’ll get a brighter exposure by increasing the flash’s intensity or by moving it closer to your subject. To get a darker exposure, reduce the flash’s intensity or move it farther away from the subject. If you have a flash meter available, don’t hesitate to use it. If you don’t, judge the exposure using some test shots and the photo preview on your camera display. Ideally you’ll want to be judging the histogram rather than the photo itself.
- Shoot a test exposure and check its background. If it’s too bright, increase the exposure time. If it’s too dark, reduce the exposure time.
- Take your final picture.
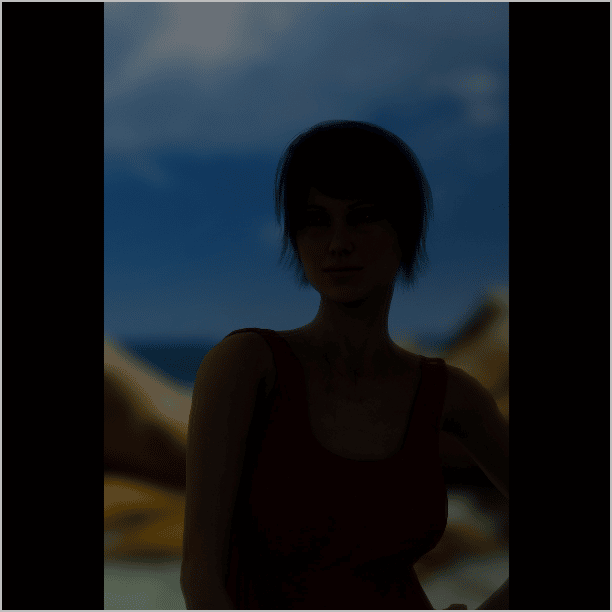
Here I’ve set the aperture to F2. The background is dark, and the portrait is just a silhouette.
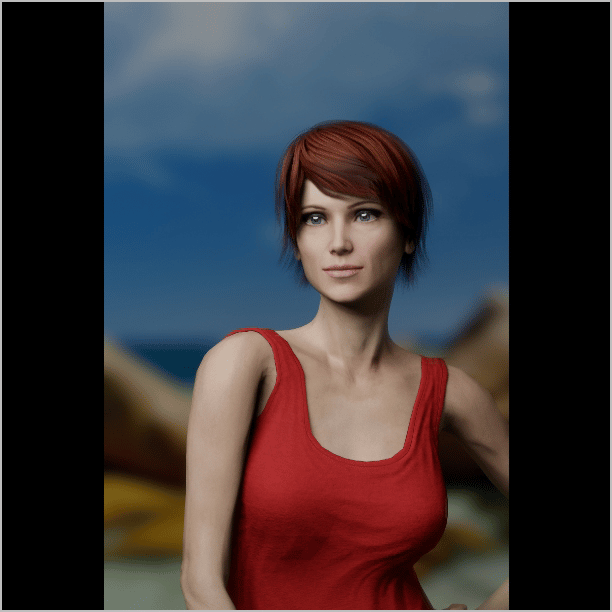
I’ve retained the same exposure settings, but I’ve lighted the subject with a flash inside of a softbox so that they’re properly exposed. The background is still dark, and it’s immediately obvious that I’ve used a flash.
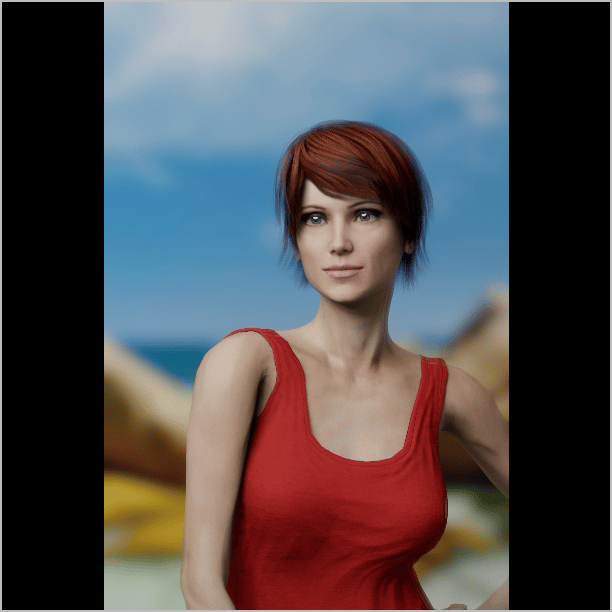
By lengthening my exposure time by 2 EV, I’ve brightened the background. Lengthening the exposure time hasn’t affected my subject, since they’re getting their light from the flash. Here I’ve set up the portrait’s exposure so as to properly expose the background, and the photo feels more natural.
There are a few problems you can run into when you’re shooting this way:
- There can be too much natural light in the scene, and you may not be able to use as low an f-stop as you’d like. That’s because the exposure time would work out to be shorter than your camera’s synchronization time. In this situation, reduce the amount of light by using an ND or polarizing filter. Note that this will also affect the flash, so you’ll need to increase its intensity as well. Alternatively you can use a camera with a central shutter, as this eliminates synchronization problems. Meanwhile, certain flashes will also let you work with what’s called high speed sync flash.
- There can be less than enough natural light in the scene, making your exposure too long, leading to a background that’s (even) blurrier than what you wanted. In this situation the best solution is to place the camera on a tripod or stabilize it in some other way. If you don’t have a tripod, you can raise the ISO. This will also affect your flash-based exposure—you’ll have to reduce the flash’s intensity.
Photography with a combination of natural and artificial light is a fairly advanced and complicated affair, and so many photographers prefer to just avoid it. But there’s no reason to avoid at least giving this technique a try. And it does give you much more control over your portraits.