Straightening Tilted Horizons

There are a few basics that you must keep in mind if you want to take the kind of pictures that other people will enjoy looking at. Keeping a straight horizon is definitely one of them. Take care of this in-camera when you can. But when you can’t, all is not lost!
A well-aligned horizon leaves your audience calm so that they can concentrate on the picture itself. Now, you’ve probably seen some pictures that had a tilted horizon, but were good anyway. Howver, this likely took careful work by the photographer. The tilted skies in your vacation photos probably aren’t about art—if they do have a message, it’s just “I was in a hurry.” Why send out that message? Then there are the extreme cases like water scenes where a bad horizon angle and a boat in the picture practically make it look like the water is flowing uphill.
Nip It in the Bud
If you can, you should straighten out the horizon in a camera’s viewfinder before you even press the trigger. Unfortunately, this isn’t always a realistic goal, and even the best photographer sometimes makes mistakes. Let’s take a look at how to fix horizons in Zoner Studio. This program has a tool made specifically for handling this common problem.

Start up Zoner Studio, select the tilted picture, and visit the Editor. Then activate the Align Horizon tool, using its toolbar button or the H key.
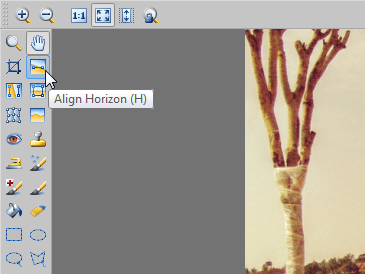
A dashed line with two squares on it as “handles” is shown across the picture. At the same time, the Options toolbar along the top—that’s the one that changes as you switch among tools—changes to show some horizon-related options, and the status bar at the bottom starts showing the dashed line’s angle of rotation.
Now lay the dashed line along the picture’s horizon line. To move the dashed line, place the mouse cursor over it so the cursor changes into a four-arrow cross, then click and drag the line. Place it so that one handle lays on the tilted horizon.
Then click and drag the other handle. The mouse cursor will change to show a circle and an arrow, and you’ll be able to rotate the line around first handle.
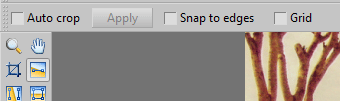
The Grid option on the toolbar can be useful during this process, especially since it makes it clear what kind of crop will normally be applied after the straightening.

Auto-crop is Auto-on for a Reason
As soon as you the dashed line lying across the horizon, click the Apply button. The picture then rotates so that the horizon is straight.
The Auto-crop option, active by default, automatically crops the picture so that empty triangles do not appear at its corners.

With auto-crop off, the empty white corner triangles remain, but on the other hand you can go on to crop the picture with the actual Crop tool. As the illustration shows, a lot can be lost to cropping after straightening… yet another reason to get it right in-camera if you can.
