The Direction of Light: The Key to Depth and Mood in Portraits
Every photo lives and dies by light. You can have the perfect lens, the perfect expression, and the perfect pose, but if the light doesn’t match your intent, the photo will never have depth or atmosphere. In this article, we don’t discuss the quantity or quality of light, but rather its direction. And in portraits, where it falls on the face.
In this article, we cover:
- Lighting options for portraits
- How light direction affects the mood of portraits
- When to use front or side lighting
- How to identify the direction of light in a photo using catchlights
- How to achieve the classic Rembrandt lighting look
- When to use backlighting
- Why lighting from below looks eerie and how to use it effectively
For clarity, I photographed several versions using soft light from a large octabox so you can focus solely on its effect. The same principles apply to natural light, like when shooting by a window or outdoors on a sunny day.
1. Front lighting
Front lighting is the simplest, yet most controversial type of light. Some photographers love it, while others would be happier never using it again. It comes directly from the camera toward the model, like when shooting with flash. If your flash is mounted on the camera, that’s front lighting. It’s also commonly used in documentary photography. The entire face is evenly lit, with nothing hidden in the shadows.
This type of lighting minimizes skin texture, softens it, and hides wrinkles. However, it has its drawbacks. Oily skin can appear overly shiny, and faces without shadows look flat, which isn’t always flattering for fuller or rounder faces.

2. Loop lighting
For loop lighting, move your light source slightly to the side. A small, loop-shaped shadow appears next to the nose, hence the name. This setup is one of the most versatile. It keeps the softness of the skin while adding shape and elasticity. It suits most face types and it is widely used in portrait photography.
Watch the shadow under the nose. If the light is harder, make sure it doesn’t extend past the corner of the mouth. If the shadows look too long, lower the light source a little or ask your model to slightly raise their chin.


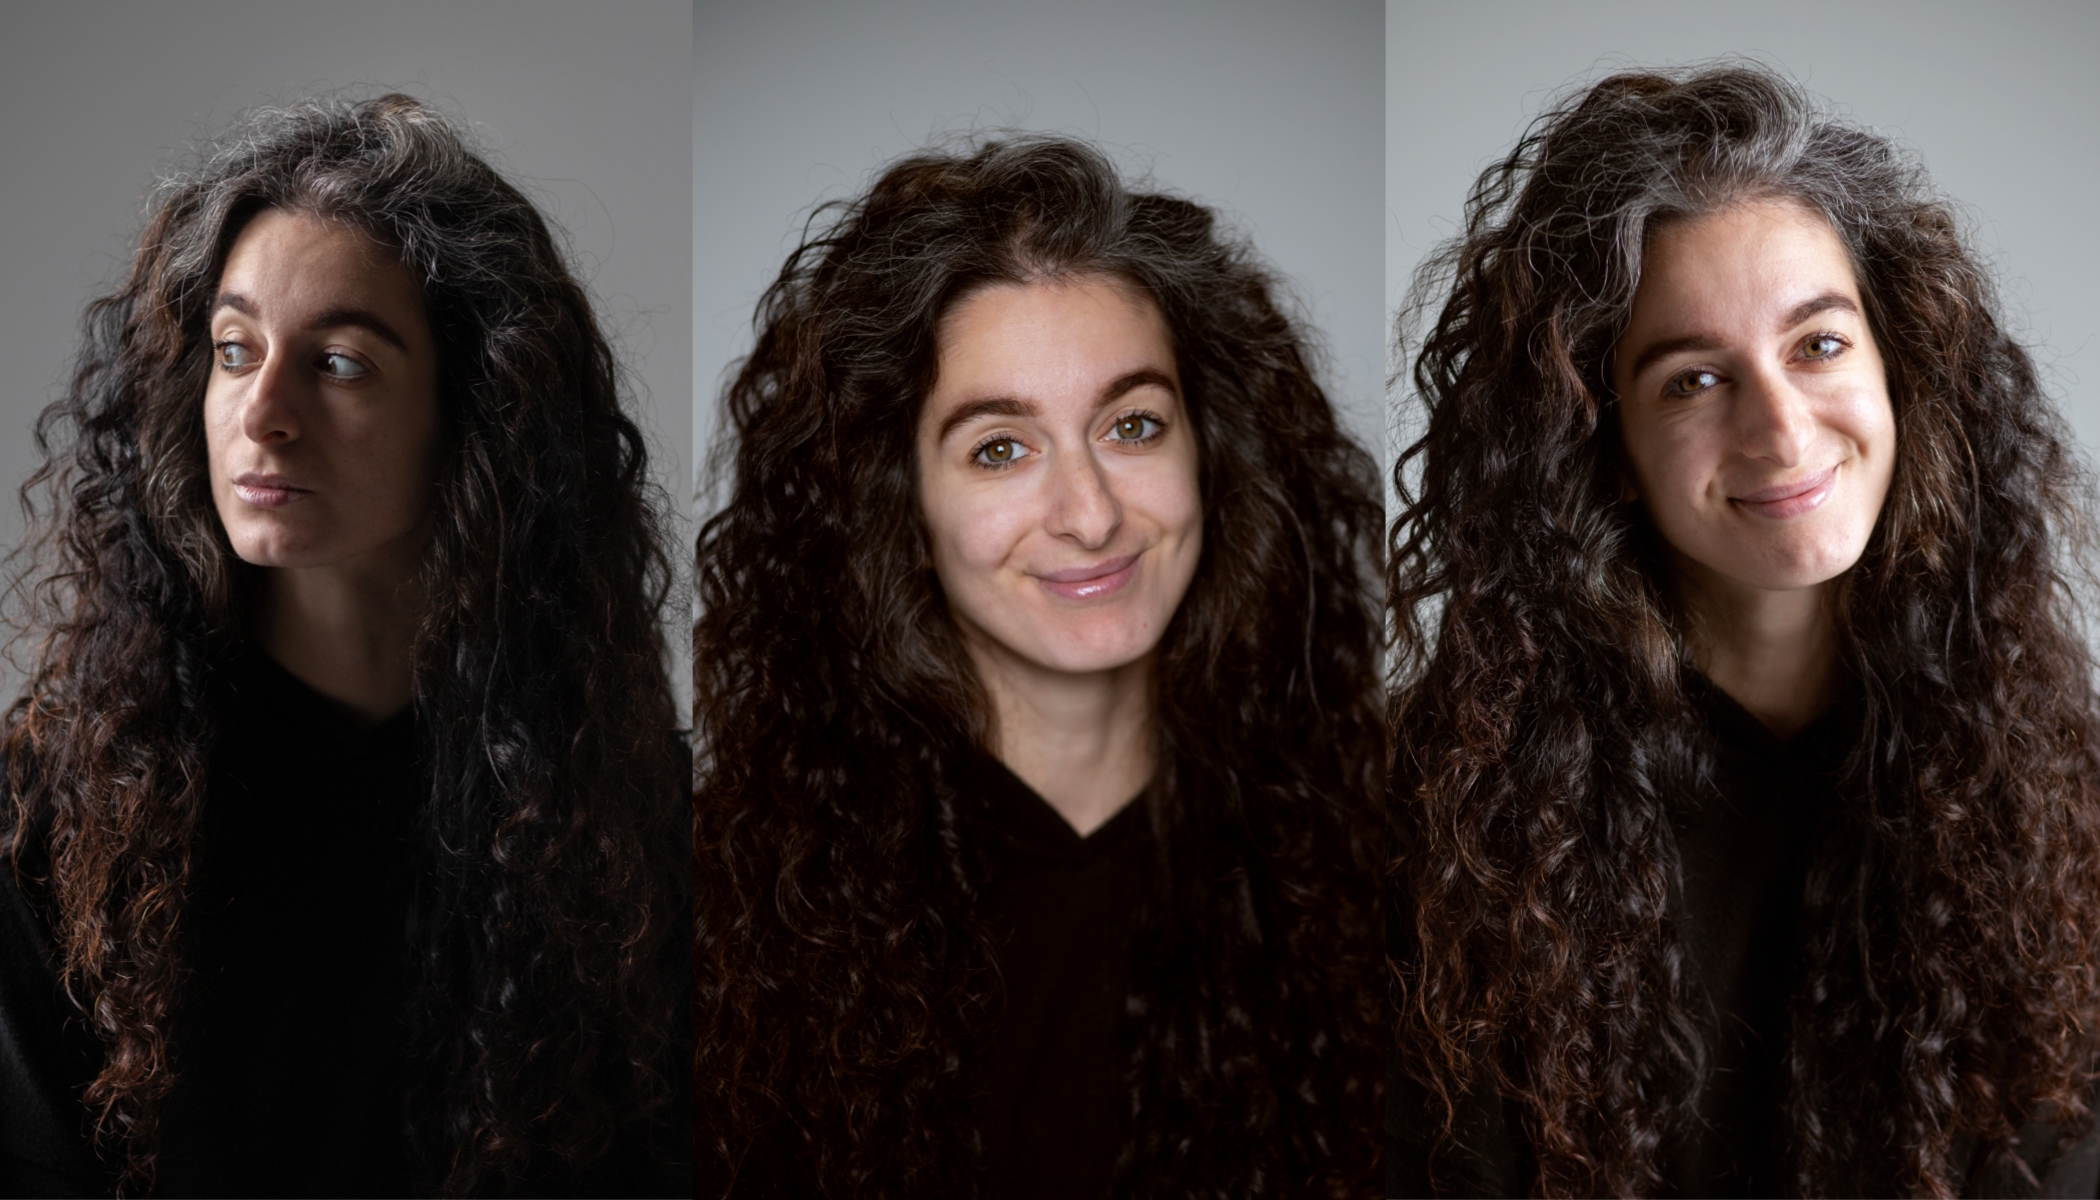
Do you know how to tell what lighting was used in a portrait? Look into the model’s eyes and you’ll usually spot a catchlight, the reflection of the light source. Depending on its height and position, you can tell where the main light source was placed.
3. Split lighting
With split lighting, the light hits the face directly from the side, dividing it into a bright and dark half. The result is dramatic, high-contrast, and very striking. Side lighting accentuates skin texture, so it’s not flattering for everyone. It can emphasize wrinkles and blemishes. On the other hand, when photographing older subjects, it can add character and make the portrait more expressive.

4. Rembrandt lighting
When we talk about light direction, photographers often forget the importance of the model’s head position. In this example, I asked the model to turn her head slightly toward the light source, creating Rembrandt lighting. This is a variation of side light characterized by a small triangle of light on the shadowed side of the face. This setup adds depth and emotional tension to a portrait.


5. Rim lighting
Move the light source even further back so that it only outlines the contours of the head and shoulders. A thin rim or halo of light separates the model from the background, creating a sense of depth. Rim lighting is a great accent light. It can emphasize hair texture, a veil , or add a hint of mystery to the portrait.
It is also effective when photographing smoke, fog, or rain. Tiny particles in the air catch the light and make it beautifully visible.

6. Backlighting
When you place the light directly behind the model, it creates a silhouette. A large octabox produces a bright white background while the subject remains dark. If you add another light from the front, you can bring out facial details and create a classic portrait on a clean white background.
If you don’t have such a large light source, don’t worry—you can achieve a similar result by aiming spotlights at a white backdrop and using their reflection.

7. Lighting from below
Lighting from below is rare in nature. We usually see it when someone is illuminated by a fire or candlelight. It can add drama to a photo, but it can also feel unnatural or even unsettling. People are often disturbed by unfamiliar lighting, and light from below is definitely unusual.
That said, you don’t have to use it as your main light source. Often, simply placing a reflector in the model’s lap is enough. It’s subtle but beautifully “airs out” shadows that are too deep.


Finally, a little homework assignment. Next time you’re at a shopping mall, take a look at the advertising posters. Try to guess how many lights were used and where they were placed.
FAQs
What is the best light direction for portraits? The most versatile is loop lighting. It gives the face shape but keeps the skin soft. It suits nearly every face type.
Why does the face sometimes look flat and lack depth? You’re probably using direct front lighting. Try angling the light slightly, creating soft shadows that highlight the contours.
How do I create Rembrandt lighting? Place your light source at about a 45° angle from the model and have them turn slightly toward it. You’ll see a distinctive triangle of light appear on the shadowed side of the face.
Can these lighting setups be achieved with natural light? Yes. The same principles apply when shooting outdoors or by a window. You can control the light direction by adjusting the position of the sun or window relative to your subject.
What is rim lighting or backlighting used for? Rim lighting emphasizes contours and adds depth. Backlighting creates a striking silhouette or, with added front light, a portrait on a clean white background.