Sign Your Photos: 4 Tips on Watermarking Your Photographs

Need to watermark one of your photos? No matter whether you want to add a text watermark or a picture, Zoner Studio is here to help.
We’re sure you’ve run into watermarks on photographs before. They’re most often used to mark a photo’s copyright. They generally come in the form of a translucent picture or text—you can add a logo, your name, or a combination of both.
Photographers’ opinions on photo watermarks vary. Some condemn them, while others swear by them. But when your photo needs one, how do you make one? It’s easy to do in Zoner Studio… and actually, in Zonerama as well. You have several options open.
How to Add a Watermark in Zoner Studio or Zonerama
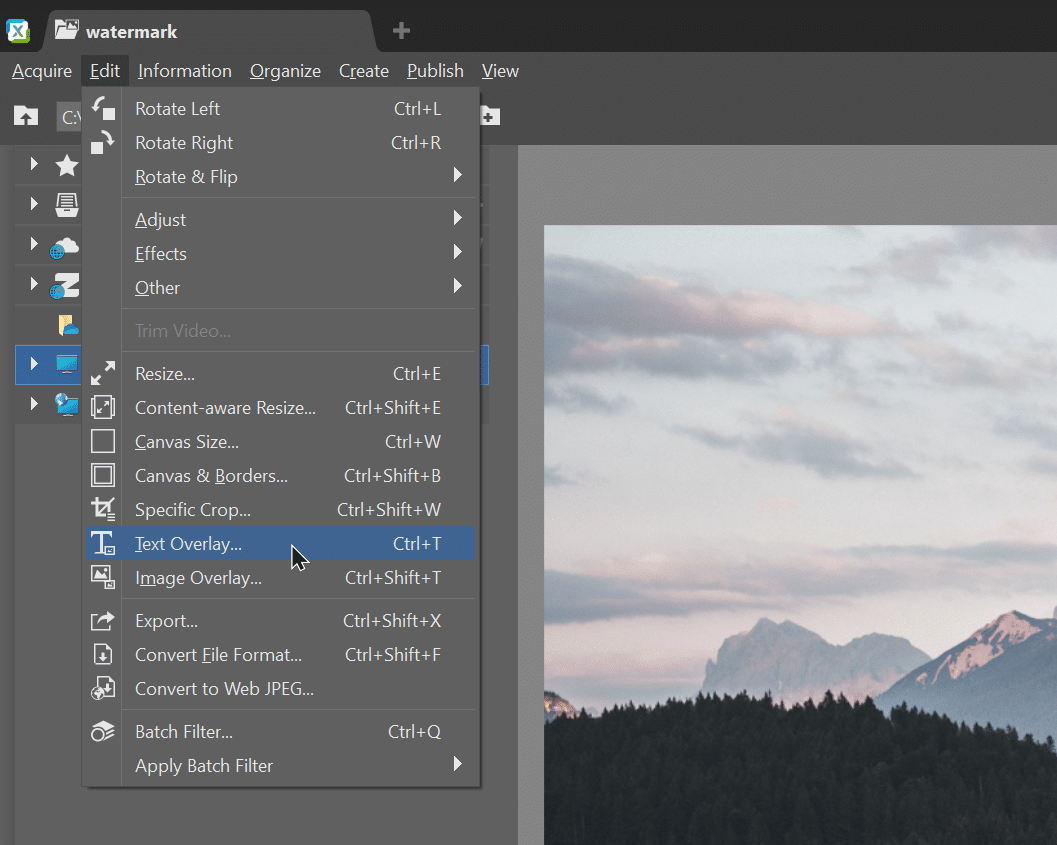
- In the Manager or the Editor, roll down the menu at the top left, go to the Edit menu, and use Text Overlay (Ctrl+T) or Image Overlay (Ctrl+Shift+T).
- In the Manager, use the Batch Filter and, within it, add a Text Overlay or Image Overlay filter.
- In the Editor , visit the Placement Tools and activate Place Text (T) or Place Symbol (Shift+T).
- In Zonerama, turn on the Watermark photos option while uploading your photos, enter the text that you want to add to your photos, and choose its size.
How to Add a Text Watermark
The classic route is to add a text watermark using the Text Overlay feature (Ctrl+T). Write the text you want into the appropriate box. Most often them means the photographer’s name. Then in the bottom section of the Text Overlay controls, turn on the Use as watermark option, and if desired the Transparency option as well.
For both of these routes, you can adjust the opacity, either as Opacity or as Transparency. Set the opacity so that the text does not get in the way of the photo, but still clearly marks it.
You can also set the text’s size, font, and position. When placing a watermark, you have nine preset positioning options available. If you need to have the text lying slightly away from one of these positions, use the Indentation options.
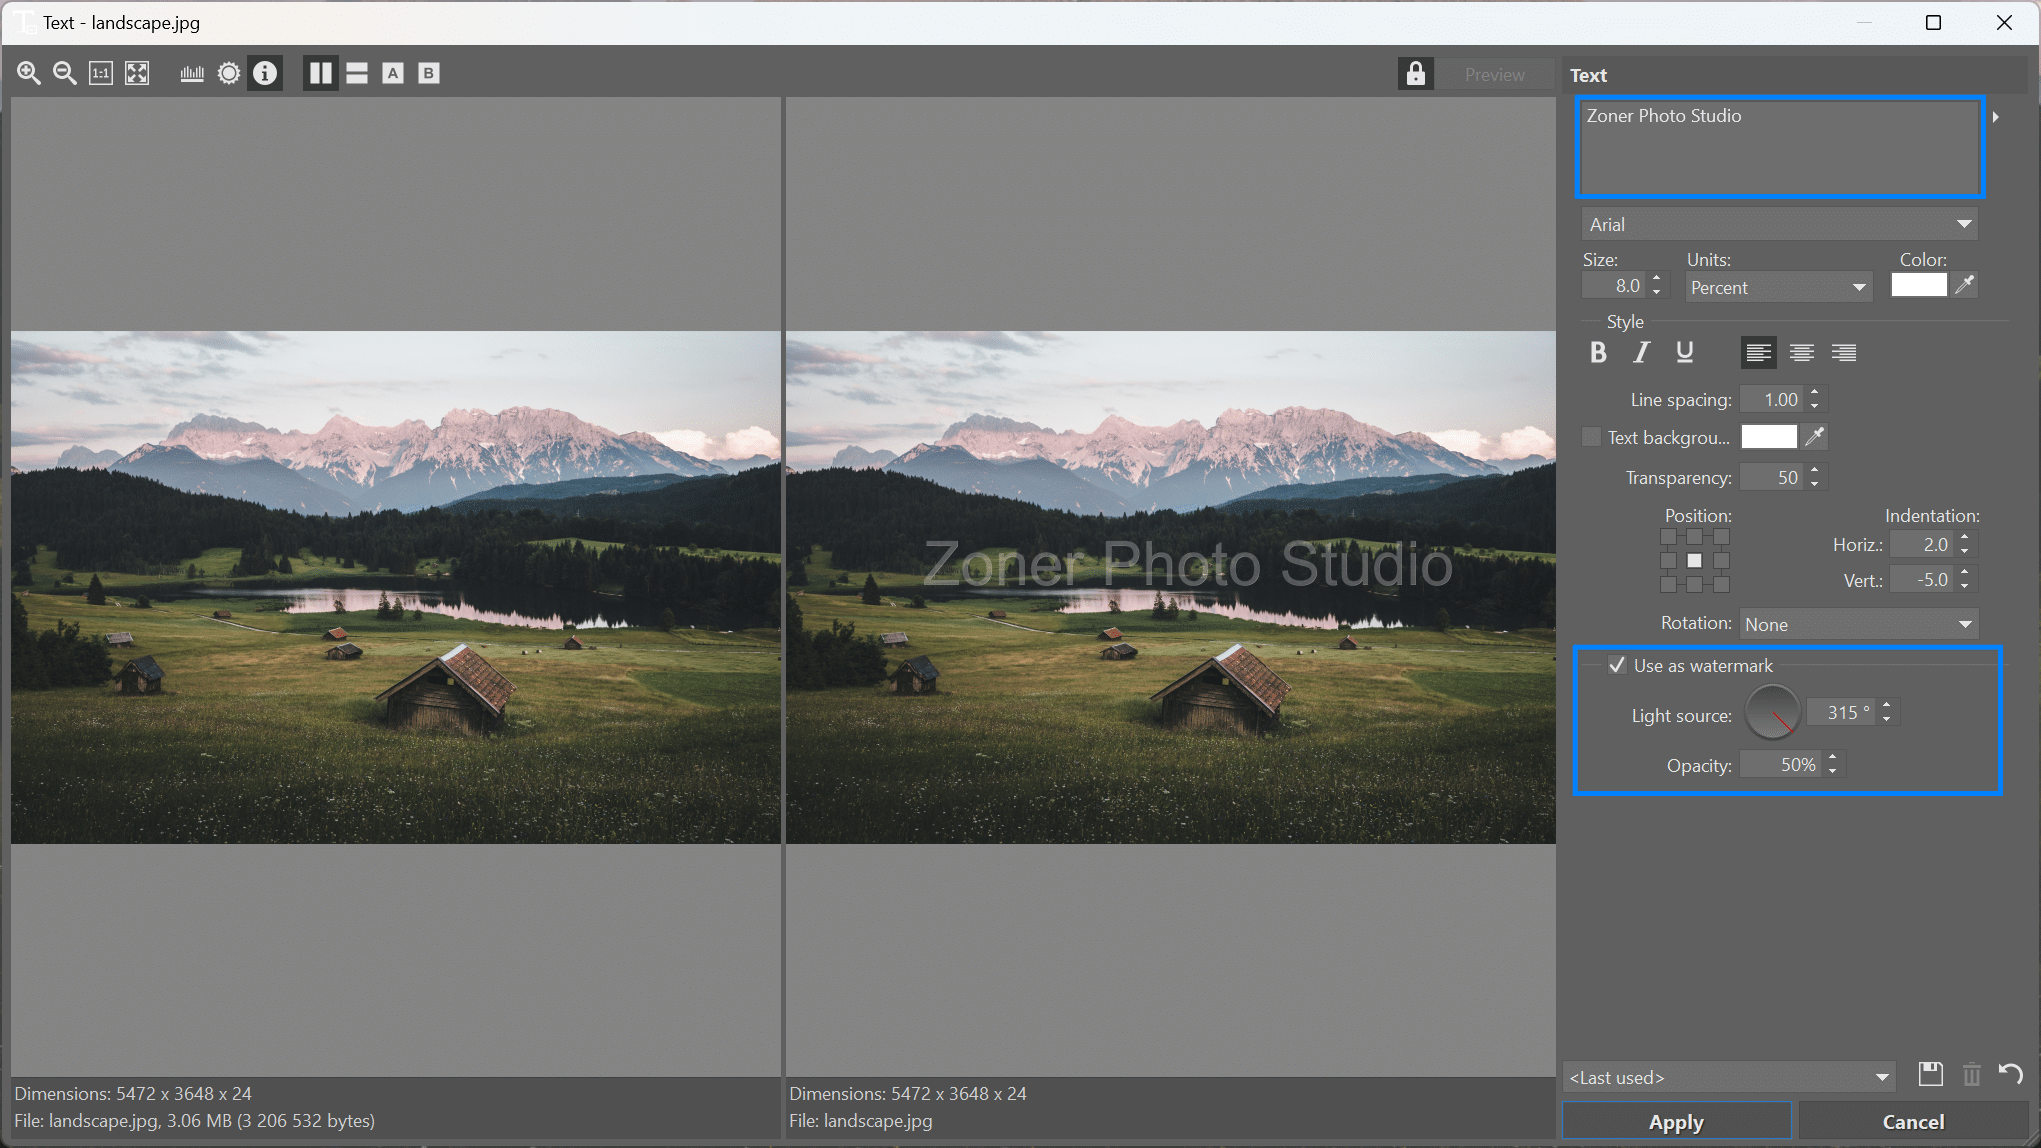
For classical watermarks, text color and background options are irrelevant. But if you want to sign your picture with something other than a traditional translucent watermark, here’s a small trick.
In the text field, indent the text on the left and the right by adding ordinary spaces using the space bar. This time around, don’t ignore Text Background, but instead choose a color and transparency (e.g. 50). This creates a translucent strip with your signature across the whole photo.
By the way, if you’re using the Manager for watermarking, you can also select multiple pictures before using Text Overlay (or Image Overlay). This makes it easy to watermark a whole batch of pictures at once.

How to Add a Picture Watermark
You can add a picture watermark to a photo as easily as a text watermark. This can be for example the logo of your company or the customer for whom you took a photo.
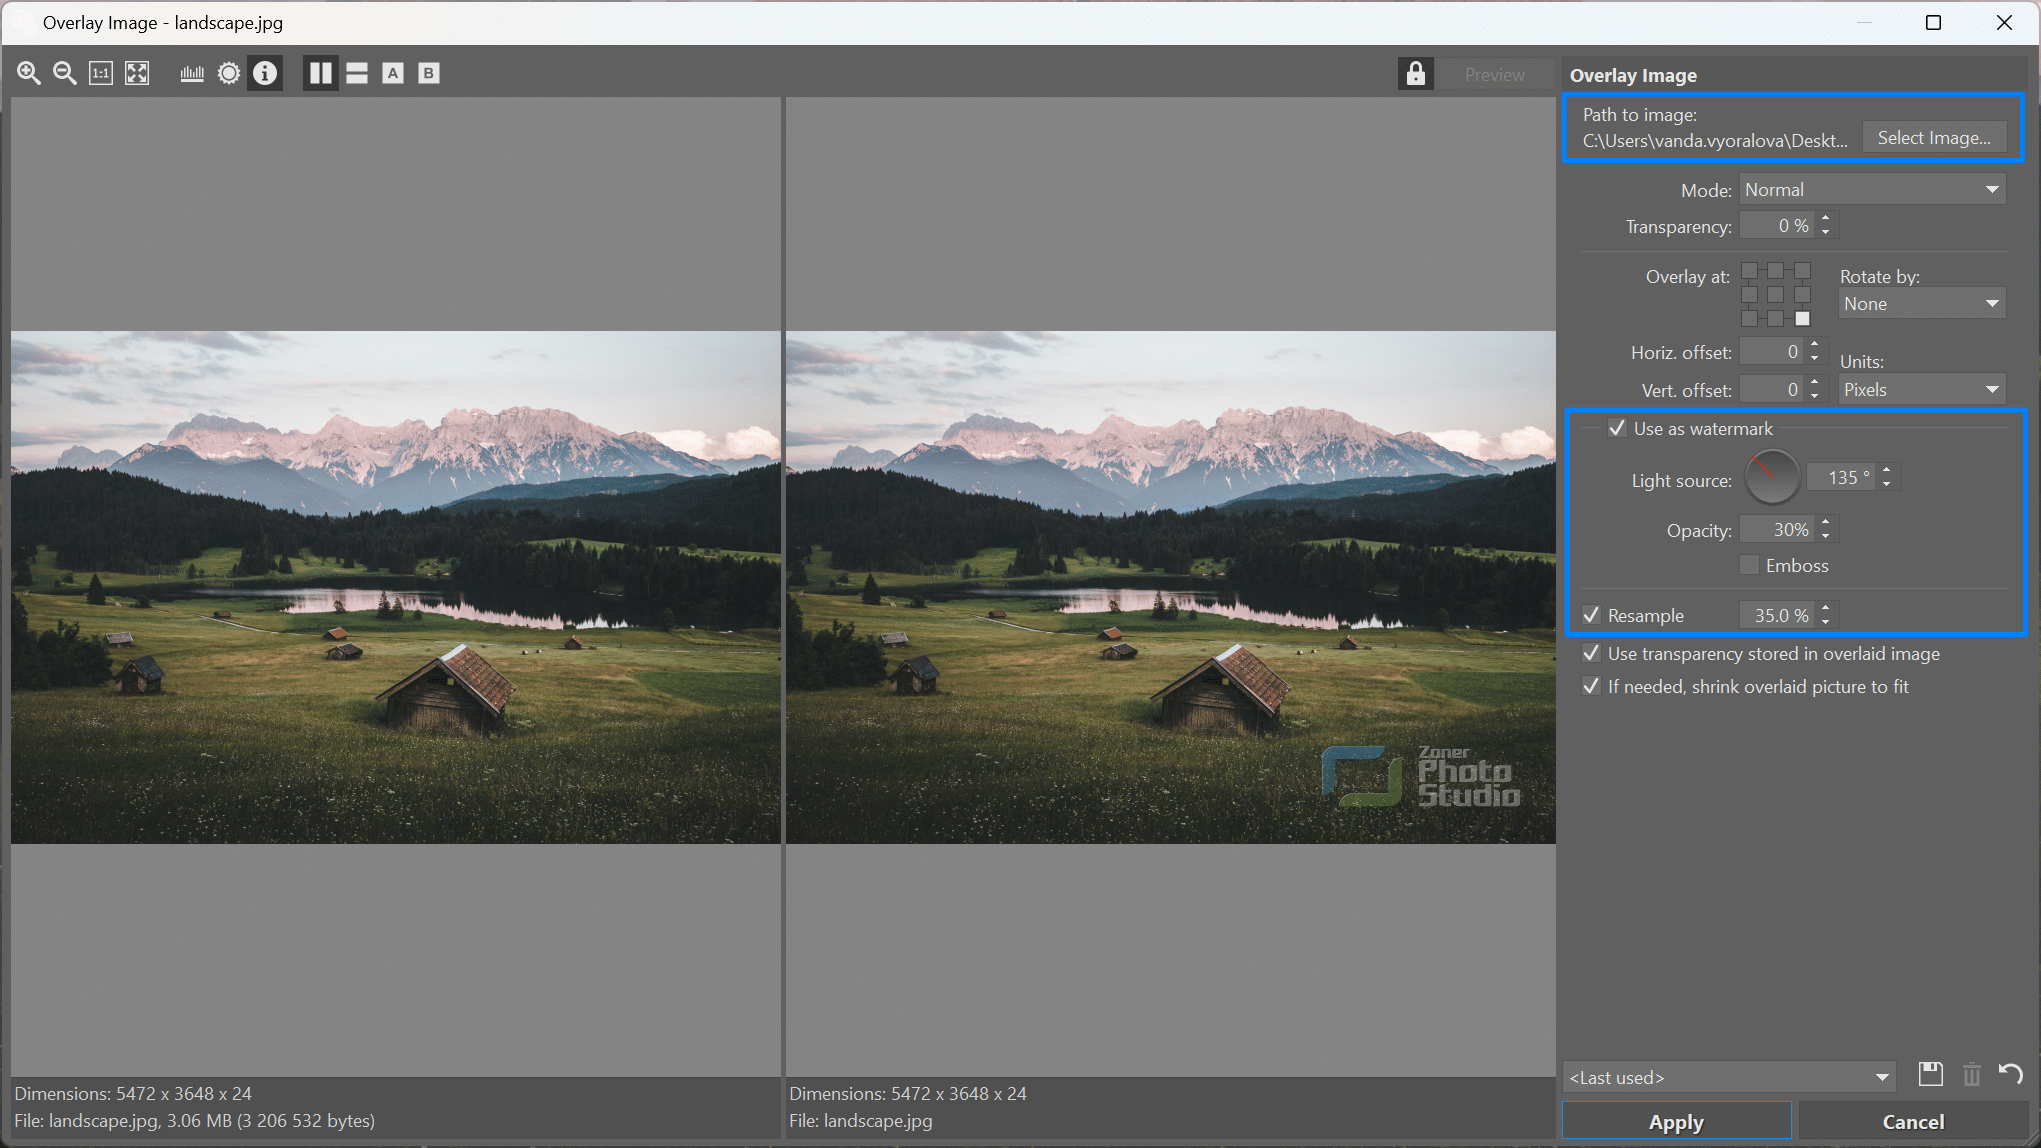
Here once again select the picture (or pictures) you want; then choose Image Overlay and turn on the Use as watermark and Emboss options to improve how the watermark is drawn. Just as with text, use Position to customize your watermark’s position within the picture. Then set the size of the picture using the Resample option.
Batch Watermarking
Simply add the watermark to multiple files at once. We’ve already described one way to do so. You just select multiple files in the Manager, one by one. Another option you can use, meanwhile, is the Batch Filter.
It lets you set up a batch not only with multiple pictures, but also with multiple edits that you want to make to a photo. Among the edits available, you’ll also find Text Overlay and Image Overlay. Just click Add Filter and select one of these options. The watermarking options work the same as in the normal Text Overlay and Image Overlay functions.
Add Text or a Symbol in the Editor
You’ll find other options for marking your photos in the Editor. Although they don’t offer classical watermarking, with the right settings they can serve just as well. And they have their advantages.
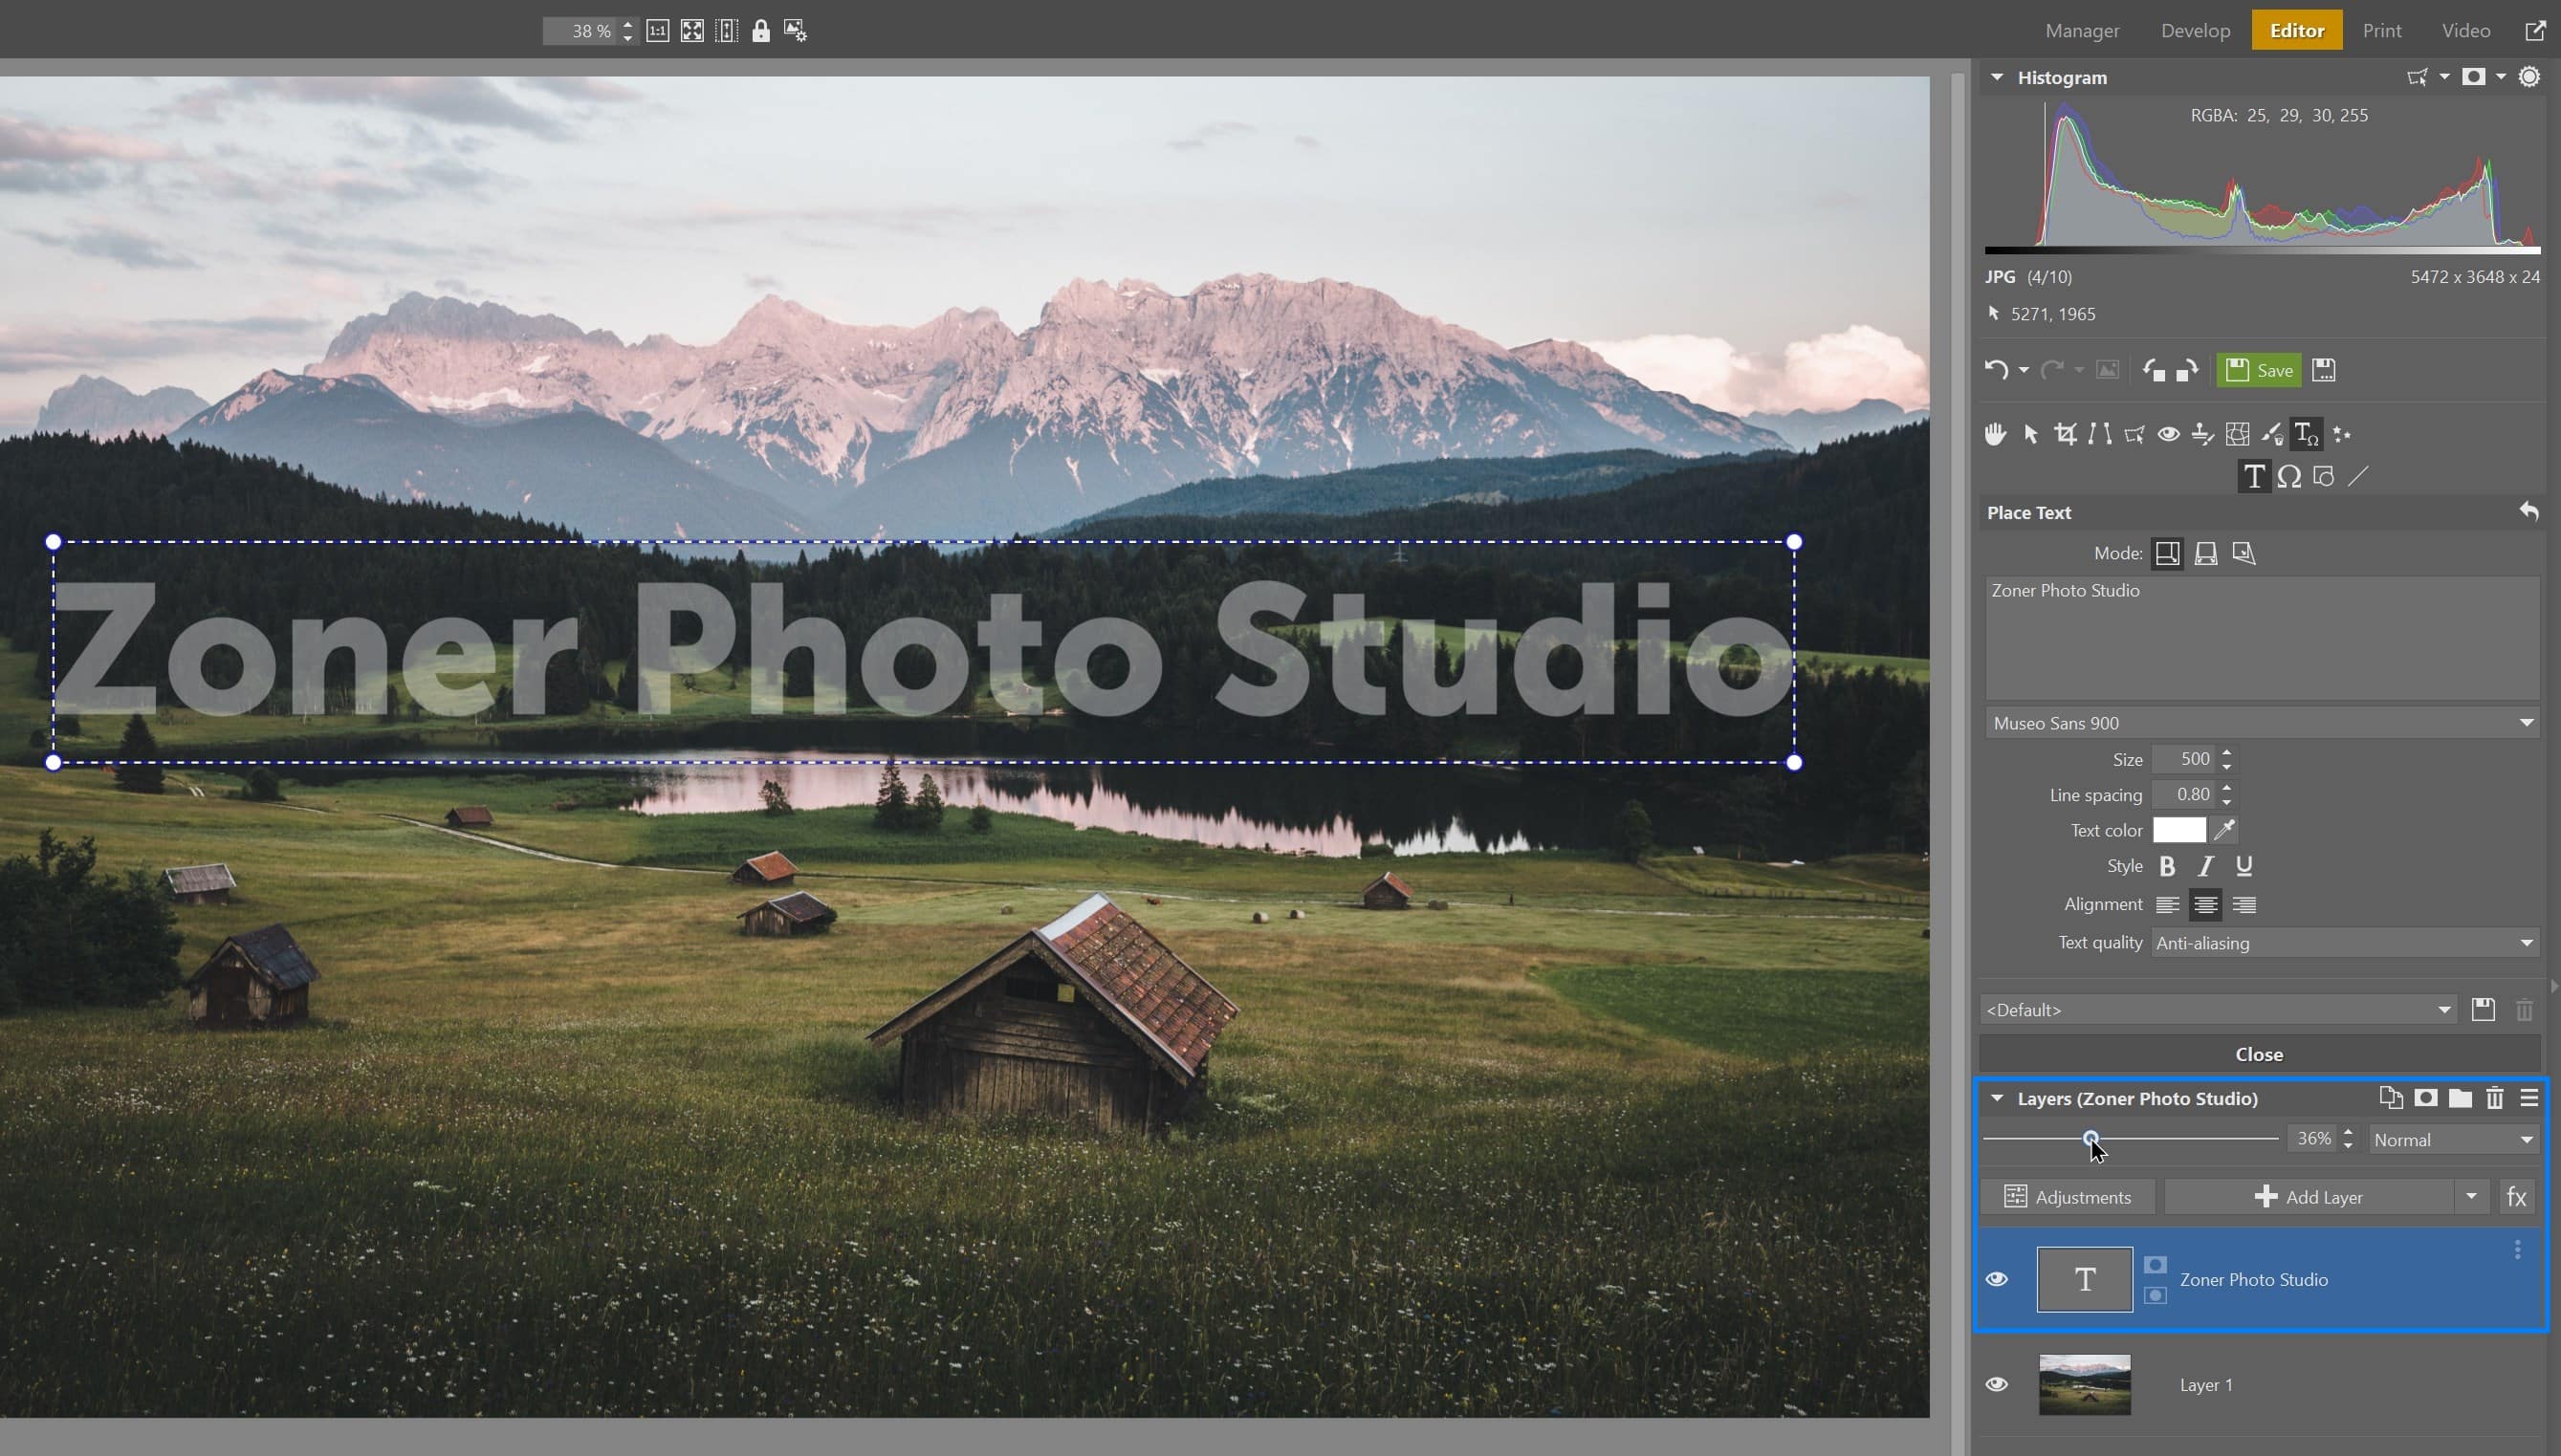
These are the Place Text and Place Symbol features, which you’ll find in the Placement Tools. With their help, you can add text to a picture, or add a symbol from a convenient list. Unlike classical watermarking, here you set your object’s precise location with the mouse. Set its size and location, and then just confirm.
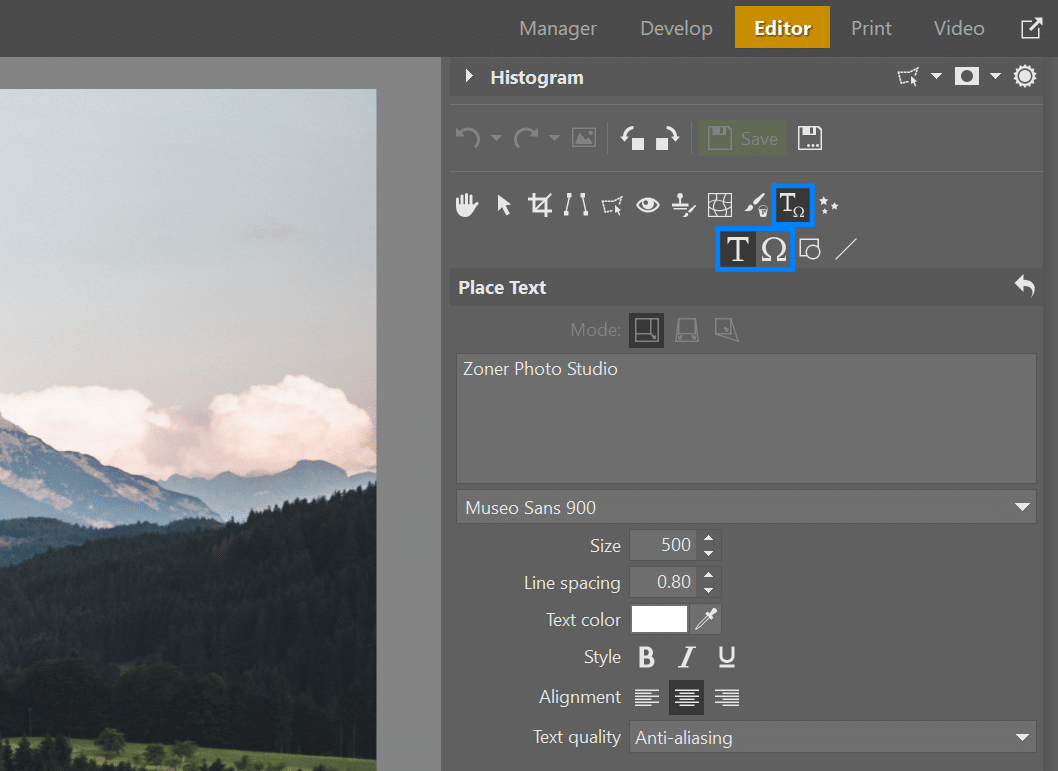
Unlike when adding a classical watermark, here you can go on and adjust things later. That’s because the text or symbol is added to the picture as a new layer, which you can manipulate separately. Not only can you stretch or shrink it at any time, but also, you can set its precise location using the Move and Transform tools. You can also hide or delete everything at any time.
To make the text or symbol that you’ve placed resemble a watermark, you need to do one more thing. Reduce the opacity of the layer it’s on. This will make the added material become translucent, thus making it distract less.
Then save the whole picture. Don’t forget, meanwhile, to save everything in .Zoner Studio format—that way, you’ll be able to return to your edits at any time. If you add a watermark in the classical way, don’t forget to use a copy of the picture, not the original. That’s important, because here the watermark is automatically added as a permanent part of the picture.
Want to try these easy ways of watermarking your pictures? Download Zoner Studio and try it 7 days for free.