What Focal Length Is Best for Landscape Photography?
You’ve probably run into the title question in practice. The answer is: there’s not just one best length. Unlike in portrait photography, nearly every lens works for landscapes. It’s just that each one lets you present the landscape a bit differently. So let’s explore the differences among them via an example landscape.
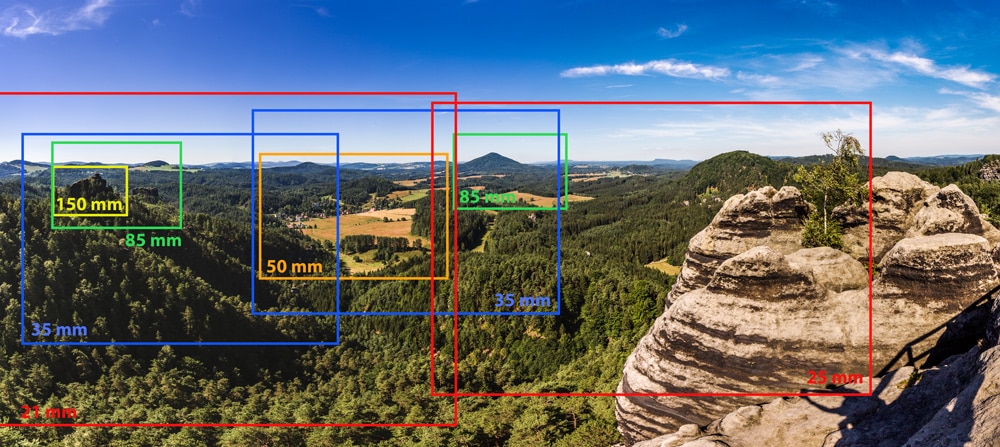
The foundation for this article is a series of photos taken in a beautiful countryside in the Czech Republic, from a point looking out on a vast area, as you can see in the panorama below.
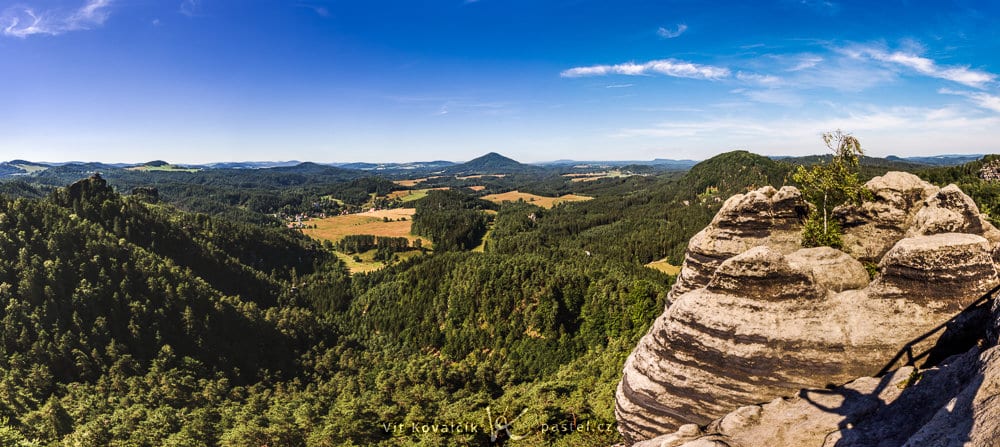
Canon 5D Mark III, Canon EF 16-35/2.8 II, various speeds, f/13, ISO 100, focal length 16 mm
The Widest “Lens”—Panoramas
Shots that will be stitched together are regularly taken with the widest lens available… but not necessarily in landscape orientation. Here not even an ultra-wide lens could capture the whole scene, and so I took five photos with a 16 mm lens in portrait orientation and stitched them into one picture covering almost 200 degrees. My 16 mm in landscape orientation would “only” have captured about 97 degrees, so that’s a major improvement.
Don’t be surprised that I shot the panorama’s source pictures in portrait orientation. Although this forces me to take more pictures, each one has enormous vertical coverage, so I practically never have to shoot a second row.
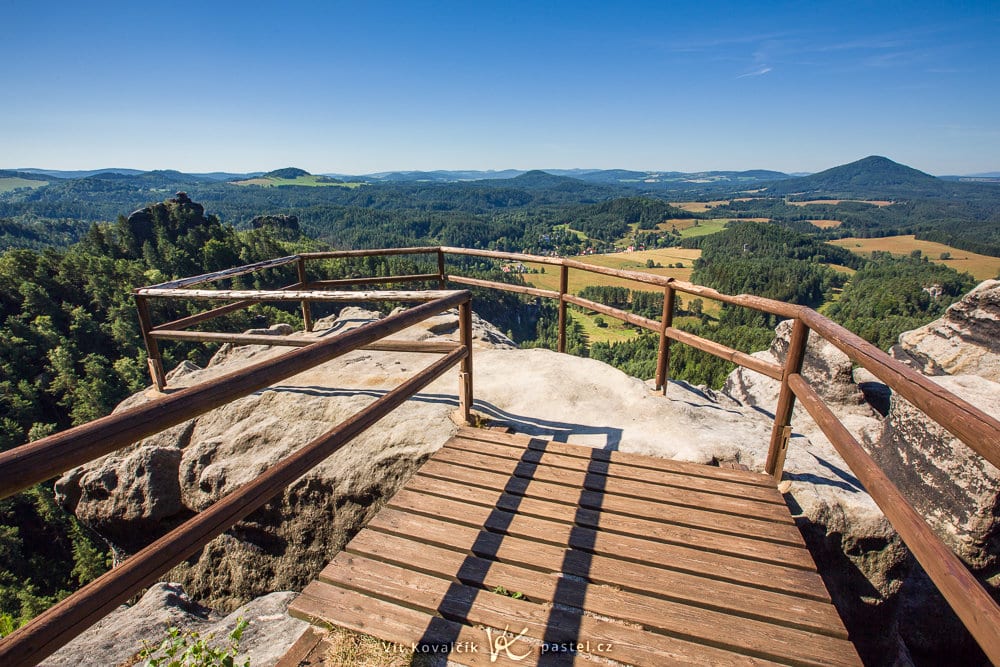
You might also notice how the panorama was shot. To keep it from showing the railing or the crag I was standing on, I stretched out my arms as far as I could past the edge of the railing. This really shows in my shadow at the bottom right. (Most of its width comes from my backpack.)
In the next several paragraphs, let’s explore various focal lengths—wide-angle, medium, and telephoto. I’ll note here that all the focal lengths mentioned are 35mm (full-frame) equivalents.
Wide-angle Lenses
For people wanting to capture a landscape in one shot without stitching a panorama, wide-angle lenses are a frequent choice. They capture the expansiveness of the surroundings, making them attractive for vistas and lookout towers.
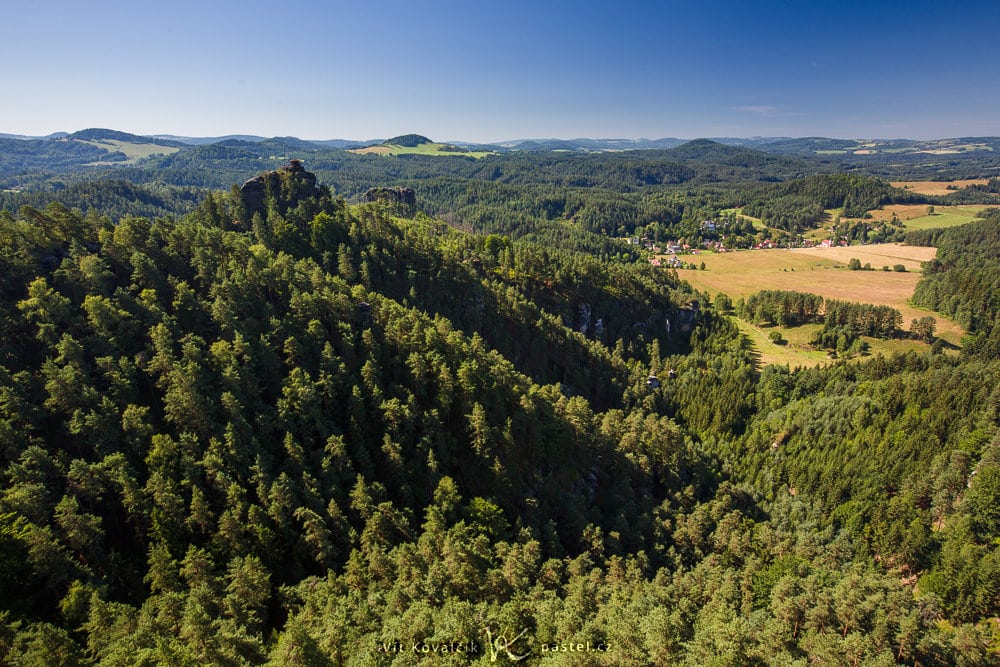
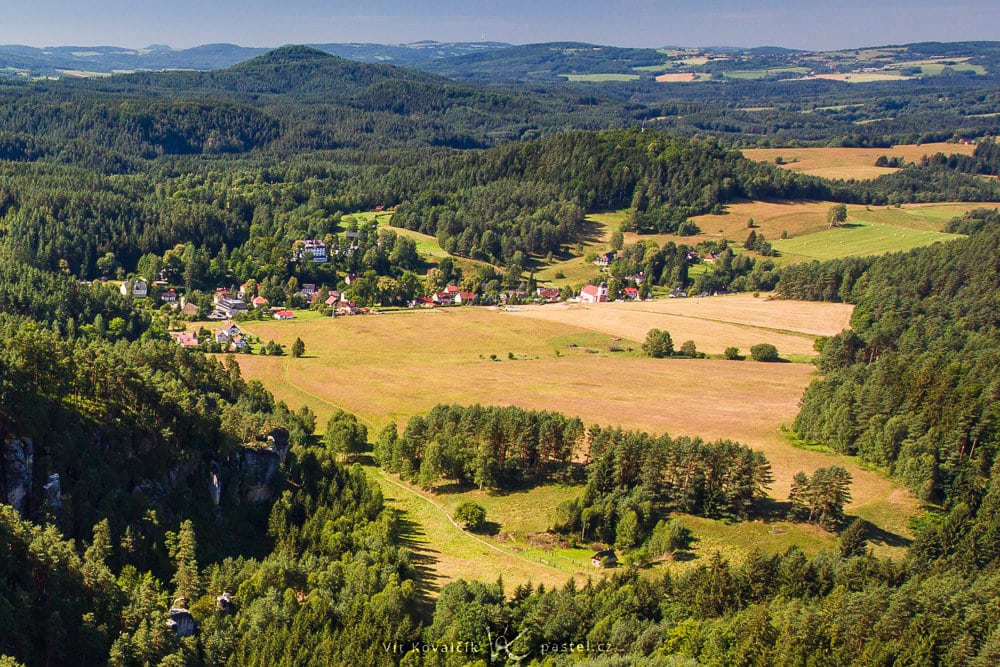
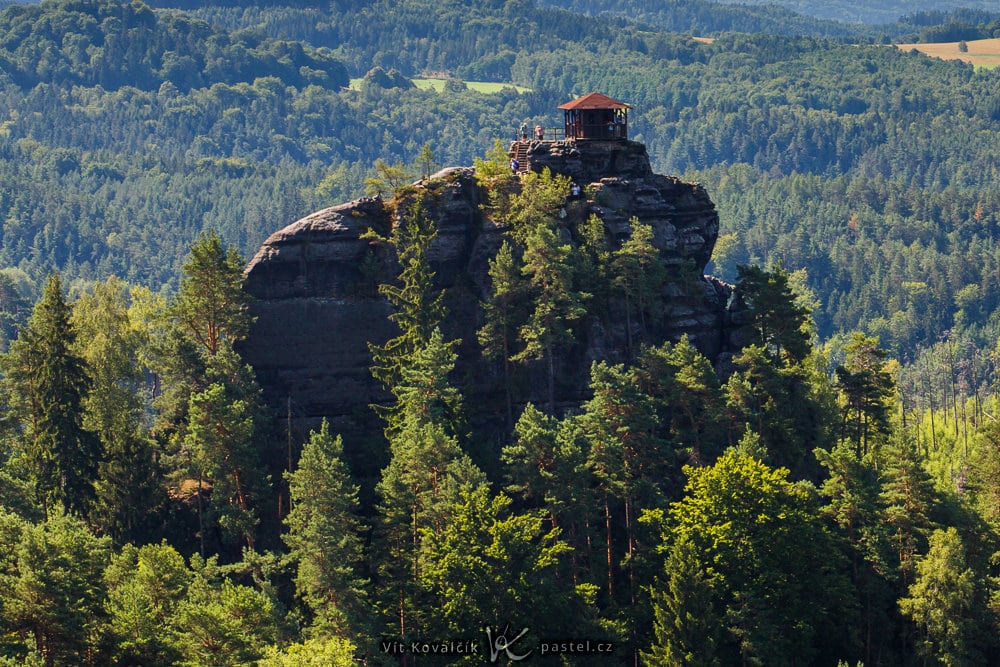
The following example was taken with a 21 mm lens. I kept the horizon in the top of the photo and seized the two points that seemed the most important to me—the valley meadow and the lookout tower on the opposite hill. The meadow valley stands out against its surroundings, and the houses at its edge amplify this even more. While the lookout tower on the opposite hill isn’t quite as prominent, it’s significant, and it livens up the picture—if the viewer notices it.
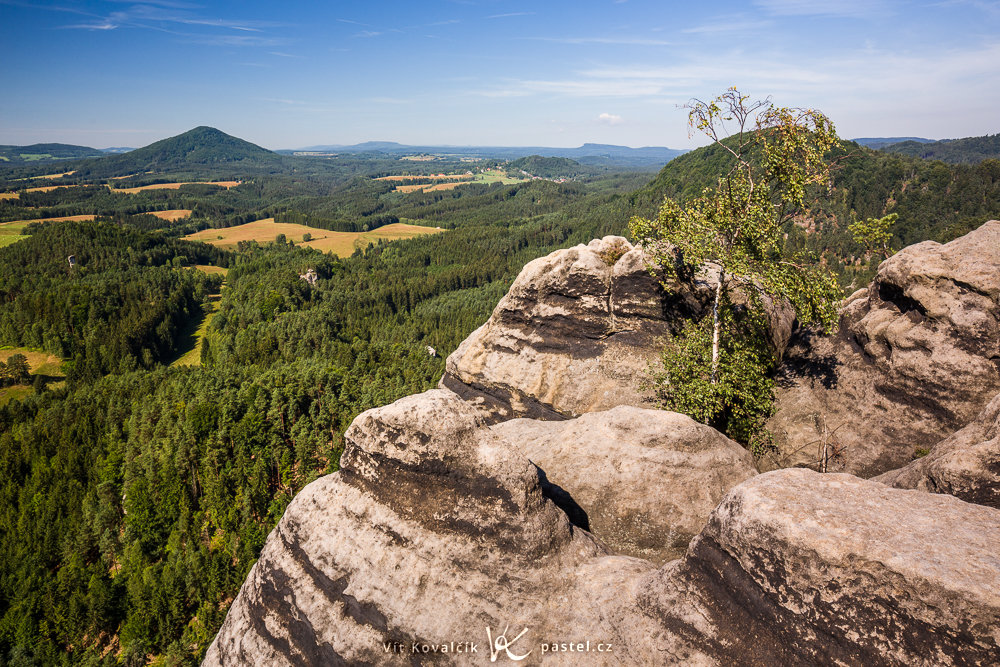
But this is not the only option. I also tried an alternative view, this time with a 25 mm lens, and I fit in both a nearby crag and the faraway hills, to offer my audience a contrast of distances to discover. I took care to also include a nearby tree so that I didn’t end up with just a bare crag.
Medium Focus
There’s more to a photographer’s life than just wide-angle lenses. And also, not every camera has them… although things are improving here, and even compacts are going wider. But still, if I had to guess which focal lengths I’ll find on a given camera most often, it’ll be from 28 to 35 mm. Cameras with zoomless fixed lenses (like the Fuji X100T and the Sony DSC-RX1R II) fall within these numbers, as do the sensors in phone cameras.
With a 35 mm the view is more restricted, and so here I have to decide what point of importance to leave in the picture. Once again the lookout tower was important for me, so I chose it as my subject (and left the little houses on the right to liven things up).
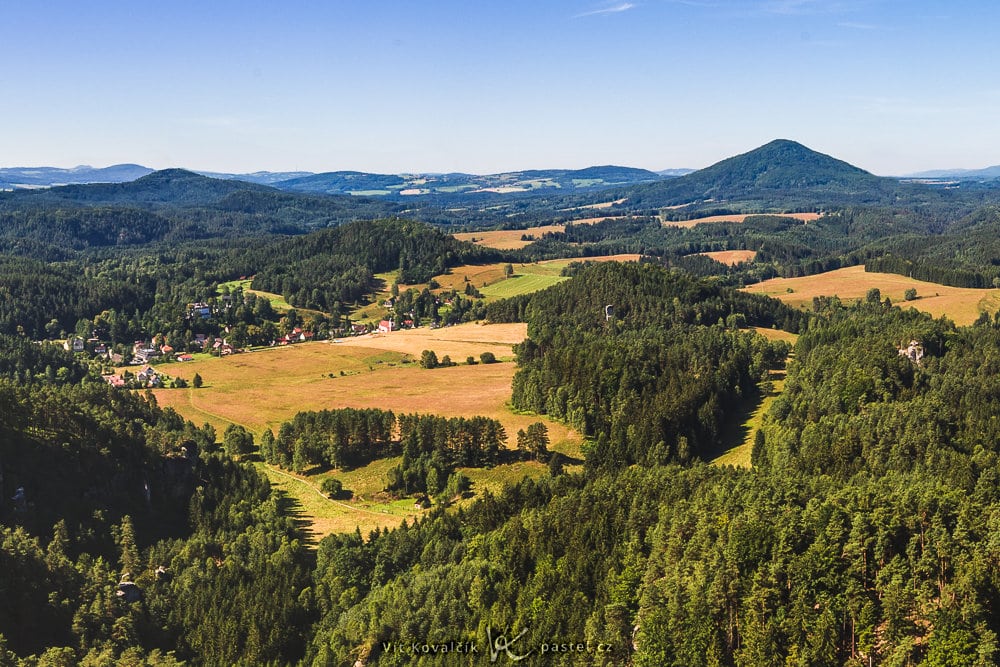
But there was another interesting viewpoint I could find: breaking away from my subject so far, I could go back to the meadow with the houses. Together with the distant hill, they form a nice pair of topics. So here’s the 35 mm in action a second time:
Zooming in further to 50 mm, I can capture the tower from more closely again, but since I’ll also be covering it later with longer lenses, I’ve zoomed in more on the valley meadow instead. With this focal length it fits in the picture practically precisely, while still leaving me the option of also including the horizon, so that the viewer can imagine the situation better.
Short Telephoto Lenses
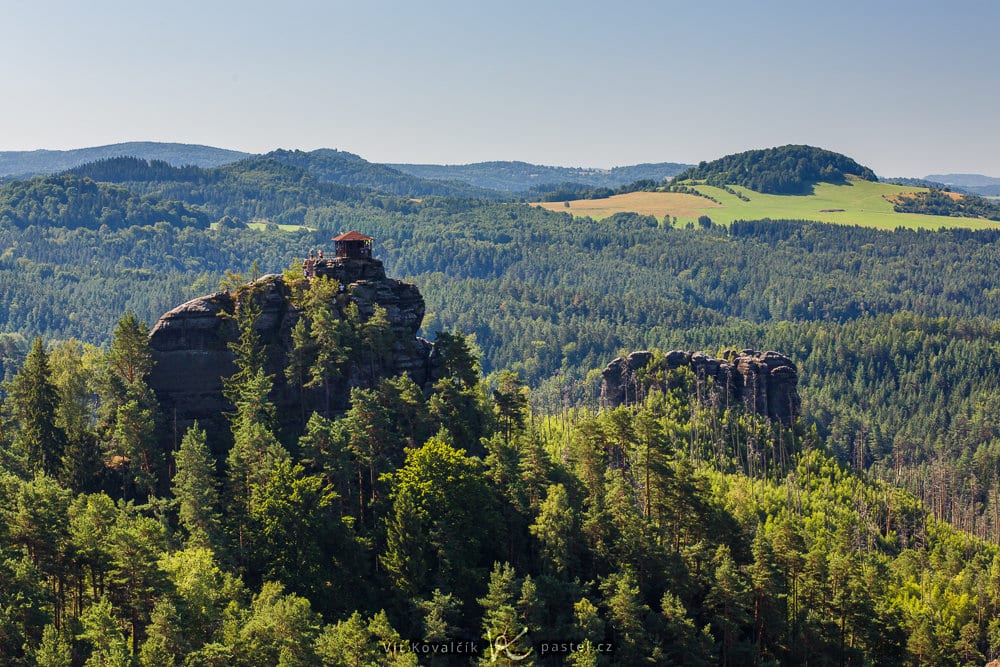
Zooming in further, I arrive in the realm of telephoto lenses, and so I have to choose distant details, with the second lookout tower being the obvious choice. At 85 mm, I get a nice image of both the tower and its surroundings.
If I wanted to choose something else, I would concentrate on the more distant hill, which looks much more imposing after zooming in.

Long Telephoto
Long lenses are also good for landscape photography, although they’re mostly important in mountainous scenes. They really add drama to shots of a row of mountains or hills stretching on one after another.
Here I don’t have such opportunities, so I make the lookout tower stand out all the more—at 150 mm, details of the tourists start to become visible. The background hills also provide some nice context, so this time I left out the horizon, leaving only forests and jutting rocks in the picture.
Wide and Ultrawide Again
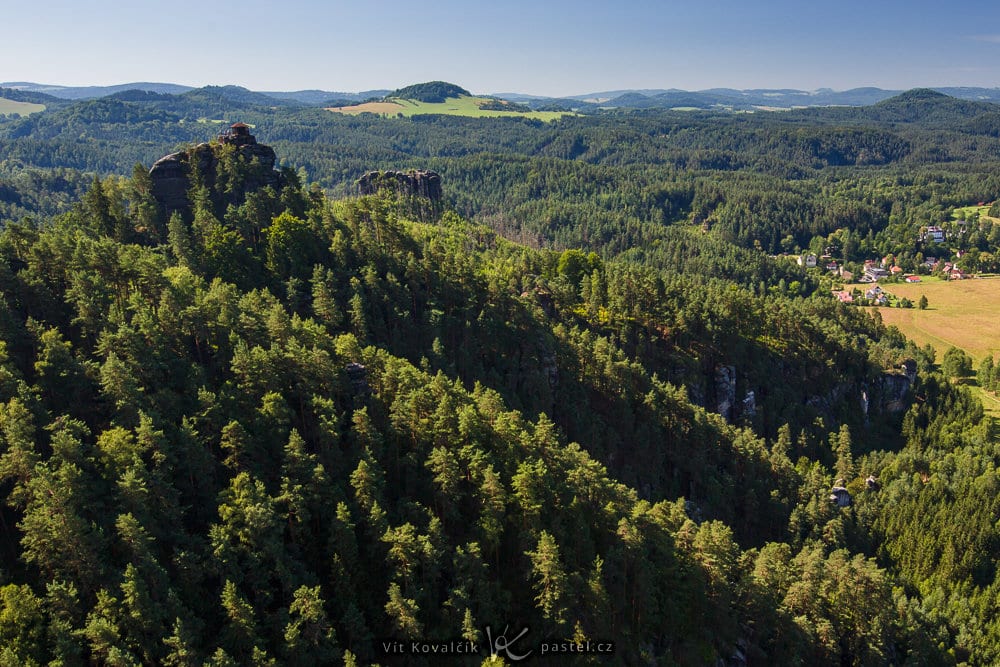
Ultrawide lenses let you do one awesome thing: you just have to take a couple of steps back to get a good chunk of the foreground into the picture along with the landscape. This gives a photo depth. So if you have a 16 mm available, it’s easy to achieve this effect here:
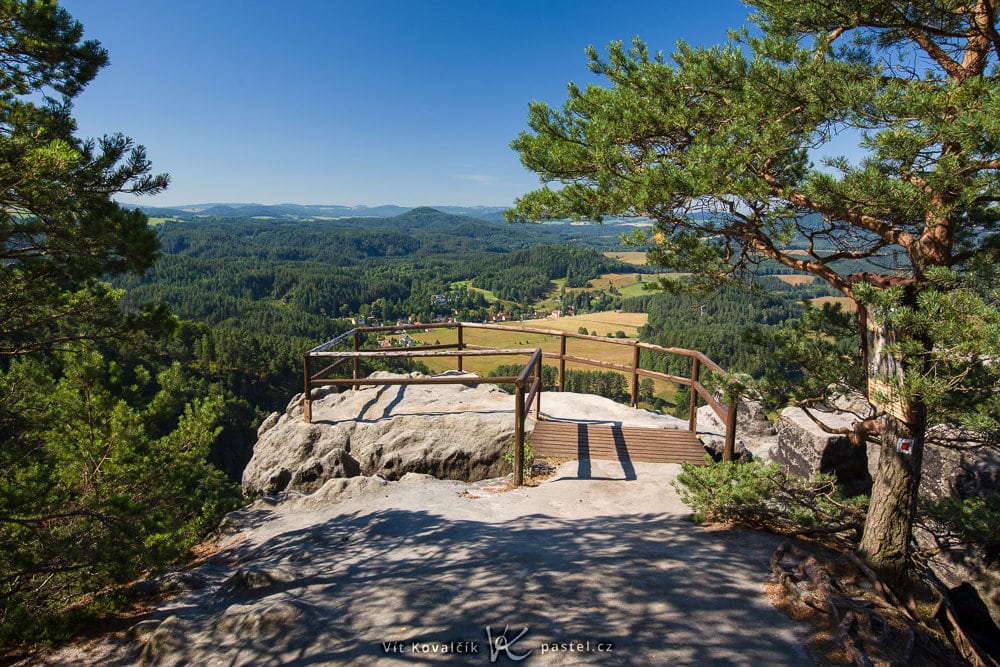
If you don’t own a lens this wide, don’t worry. With longer lenses you just need to take more steps back. In this picture I used a 24 mm, which is wide, yet still not a 16. Since I was stepping backwards anyway, I kept going back until I’d also included trees on both sides, framing the picture.
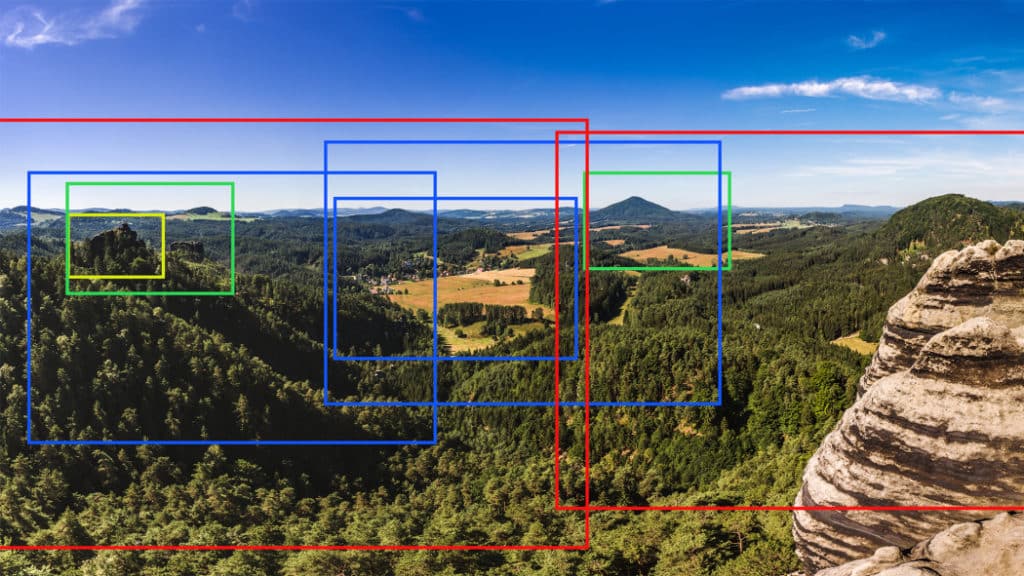
Almost All in One
Ignoring the last few photos with their several steps back, here’s an overview of the shots I’ve presented above. Naturally there are important points in the landscape that repeat in these photos. But you’ll notice that the individual compositions are variously adjusted, and they don’t indicate just a simple zooming towards some main points.
Use What You’ve Got
As you can see, in landscape photography you can use any lens that you happen to have around. You just have to know how. With this overview you can, I hope, get an idea of roughly what sorts of photos are possible and what landscape elements to seek out. And don’t be afraid to spend a few extra minutes at your vantage point trying different compositions! In the end the least usual photos turn out the best.