7 Tips for Easier and Faster Work in the Editor
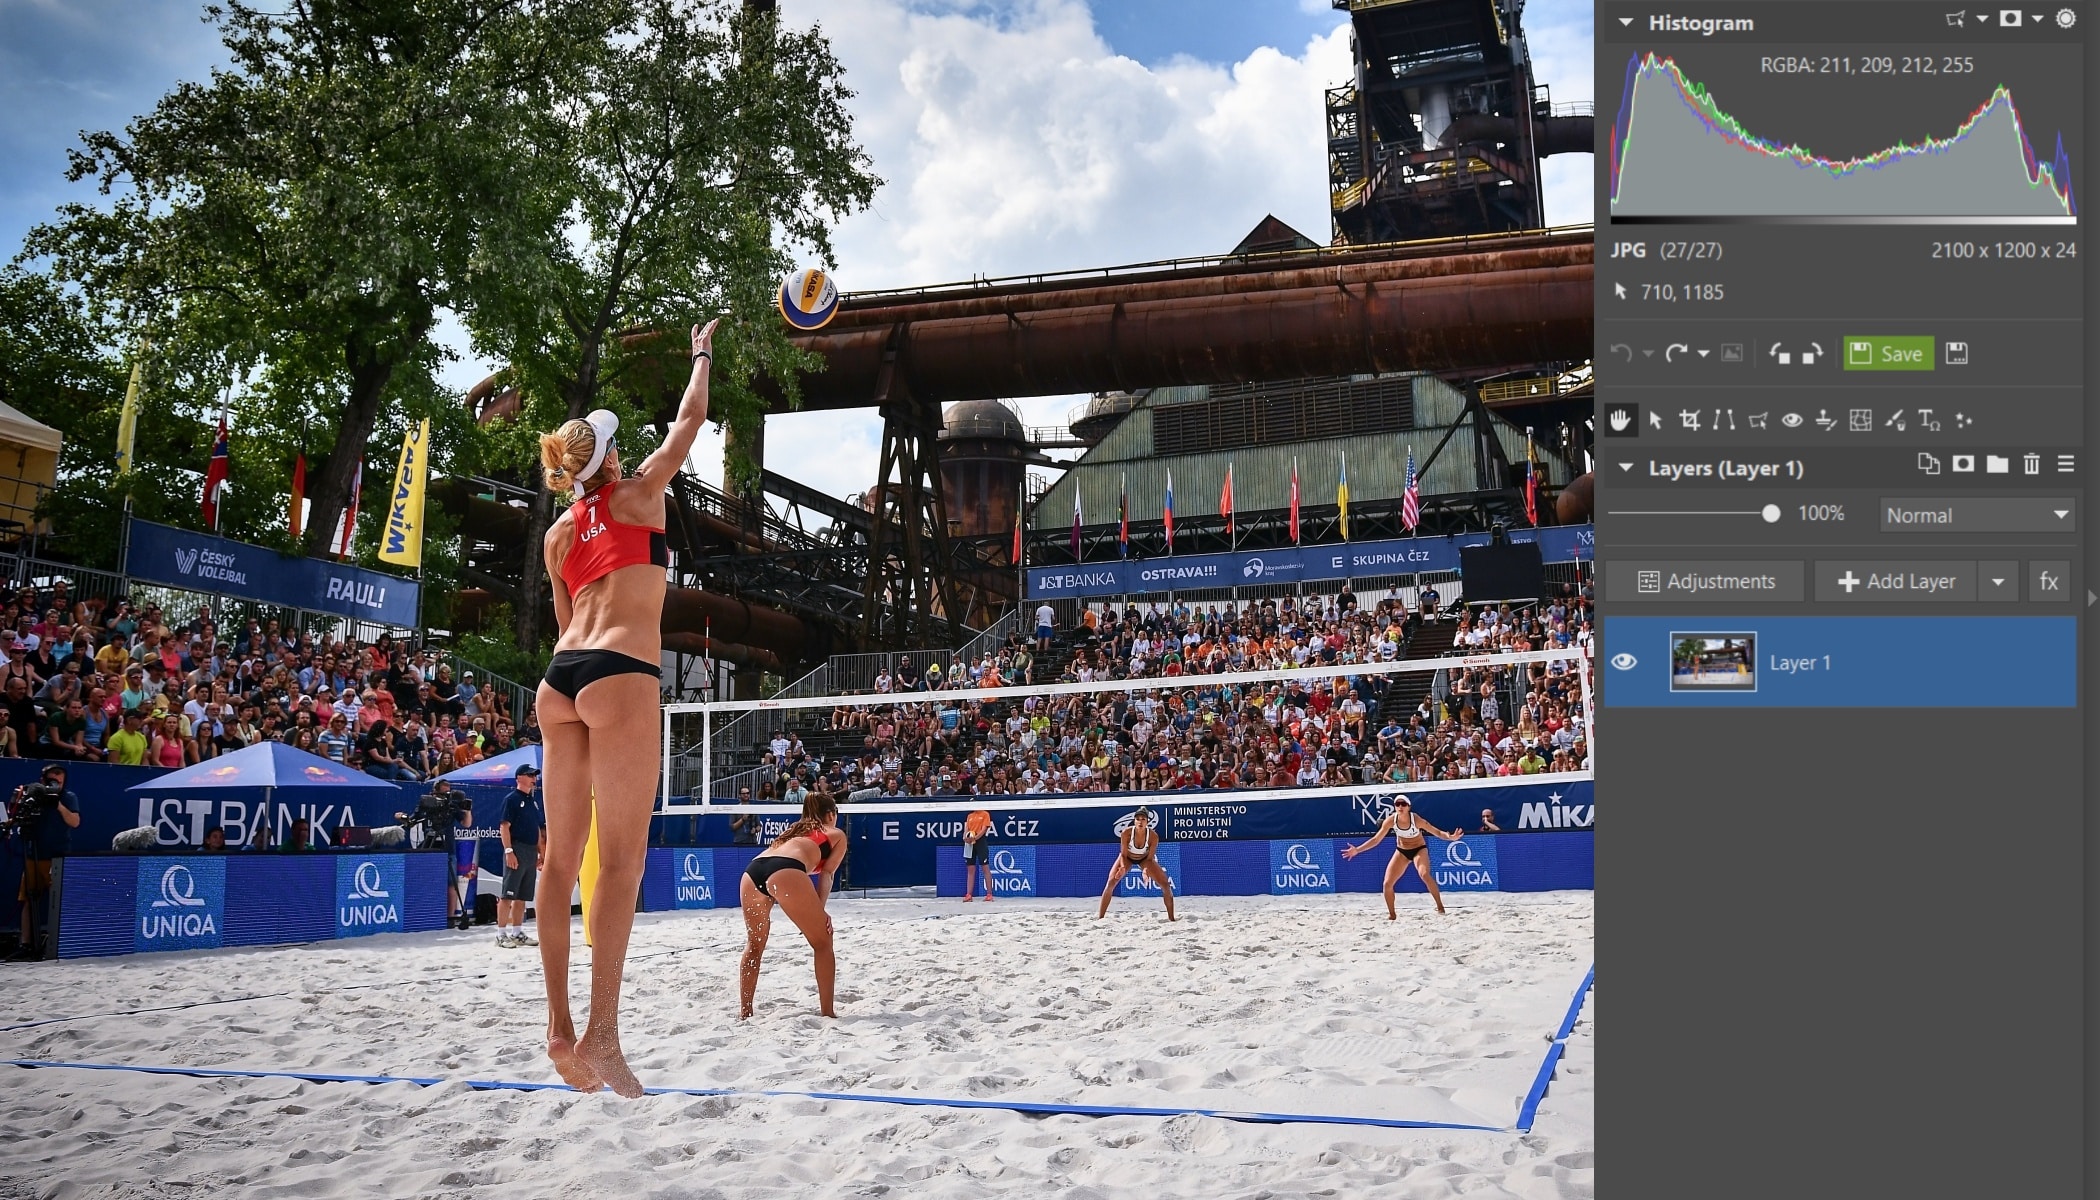
Are you a beginner with the Editor module in Zoner Studio or an old hand? Either way, we’re bringing you seven tips you might not know that will definitely help when you’re working in the Editor. They focus on shortcut keys, speeding up your work with the Editor, and other interesting features you can find in Zoner Studio.
In this article, we’ll show you how to:
- Quickly open a new tab
- Easily highlight blowout in a photo
- Change the background color around pictures
- Shift specific colors in Zoner Studio
- Get the most effective crop while straightening a photo
- Change zoom levels without using the mouse
- Take advantage of function keys
A Quick Way to Create a New Tab
In our first tip, we’ll show you how to quickly create a new tab so that you can easily switch among the program’s modules. You know the situation—you’re editing a photo in the Editor and suddenly you need to briefly switch into the Manager. So you click the Manager button, and before you can switch, a message asking whether or not to save the photo’s changes appears. But you don’t want that at all! After all, you’re not yet done with your work in the Editor.
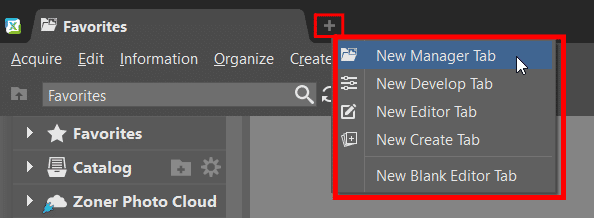
In these situations, you can have several tabs open at once instead—a very practical solution. There are two ways to add a new tab. The first is to click the “+” button at the top left of the top toolbar. This shows a short menu for choosing which type of tab to create.
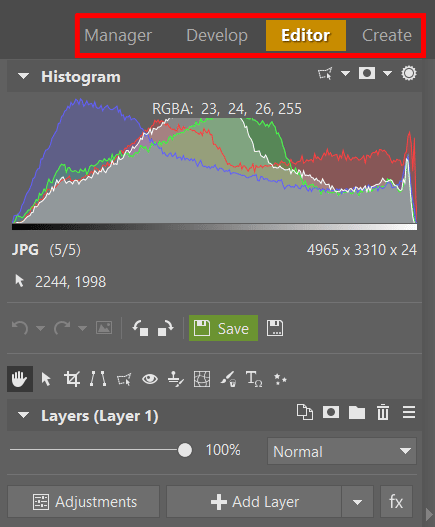
But this wouldn’t be Zoner Studio if there weren’t an even faster, more convenient solution too. You just have to hold down Ctrl while clicking the module’s button at the top right—the tab is created immediately.
Blowout Display
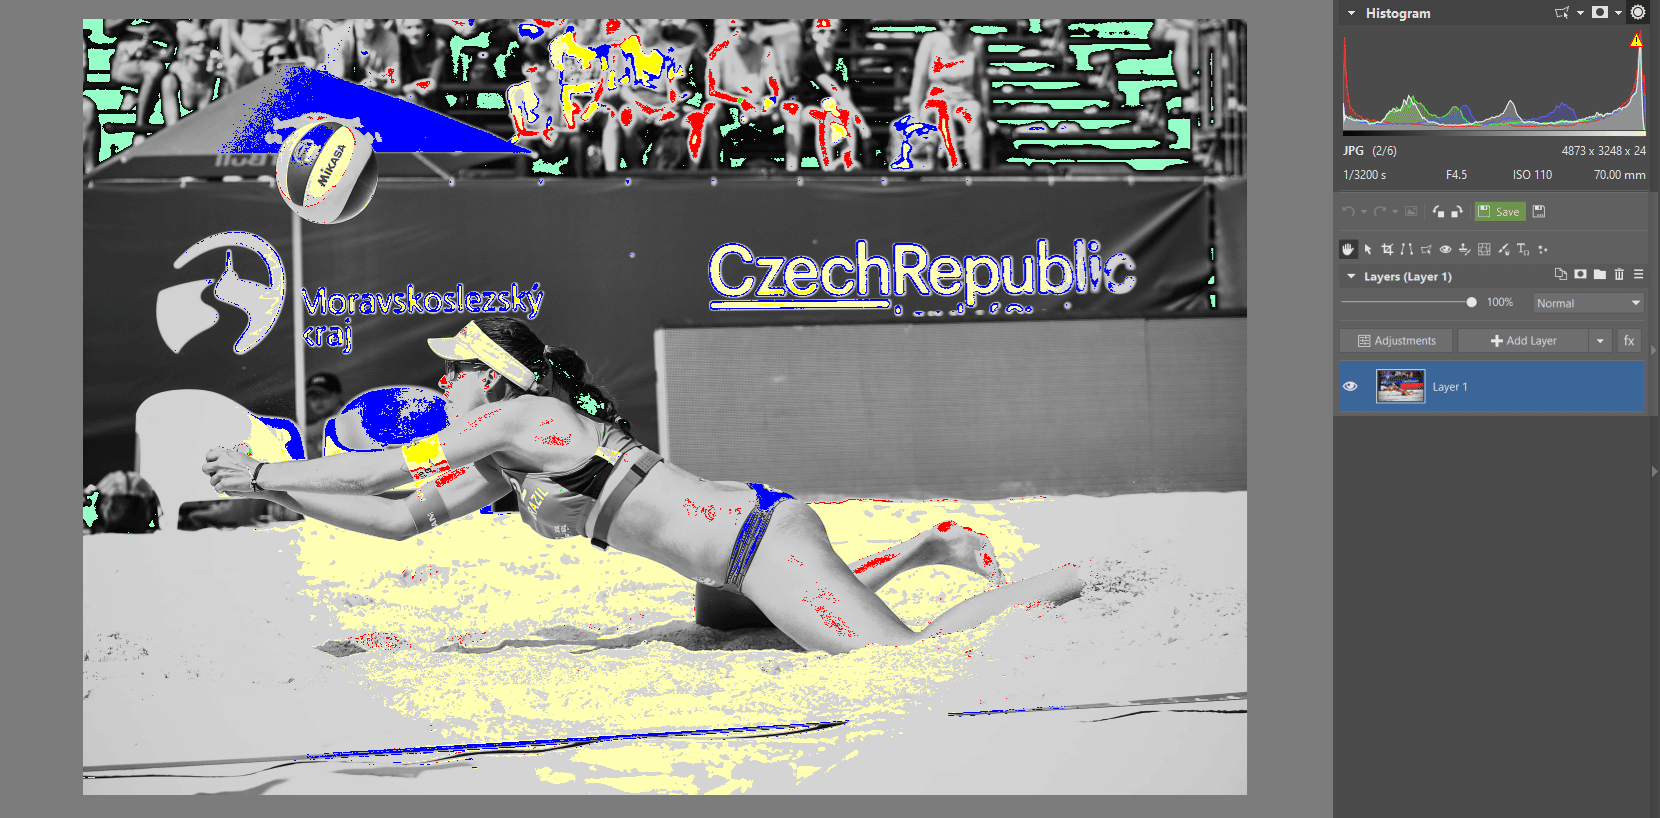
You have a bright photo (or you’re brightening a photo), and you need to know whether or not you’re losing detail in its brightest parts? Use Show Blowout (Shift + O). It highlights any areas suffering from blowout. To turn this feature on or off, click the sun icon above the histogram.
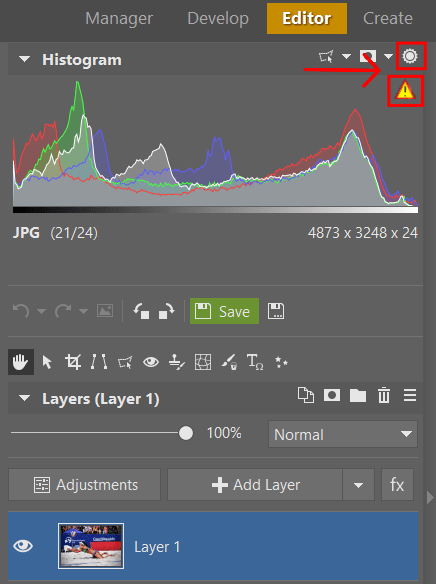
Your first stop when checking for blowout in a picture should be the Histogram. But not by checking it in detail—it displays an exclamation point when there’s blowout. With Show Blowout on, Zoner Studio highlights eight different kinds of blowout separately. Each kind is highlighted in a different saturated color:
- Red – blowout in the R channel
- Green – blowout in the G channel
- Blue – blowout in the B channel
- Yellow – blowout in the RG channel
- Purple – blowout in the RB channel
- Turquoise – blowout in the GB channel
- Bright yellow – RGB blowout
- Medium yellow – Summary blowout
The parts of the photo with no blowout are shown in grayscale. Besides blowout, this feature also highlights underexposed areas (dark areas with a loss of sharpness and detail); they’re shown in sky-blue.
Changing the Background Color Around Pictures
You put this particular tip to work in the Develop and Manager modules besides just the Editor. If you’re using the program’s default color theme, or the dark theme (like me), you’ll know that the background around a photo in these themes is gray.
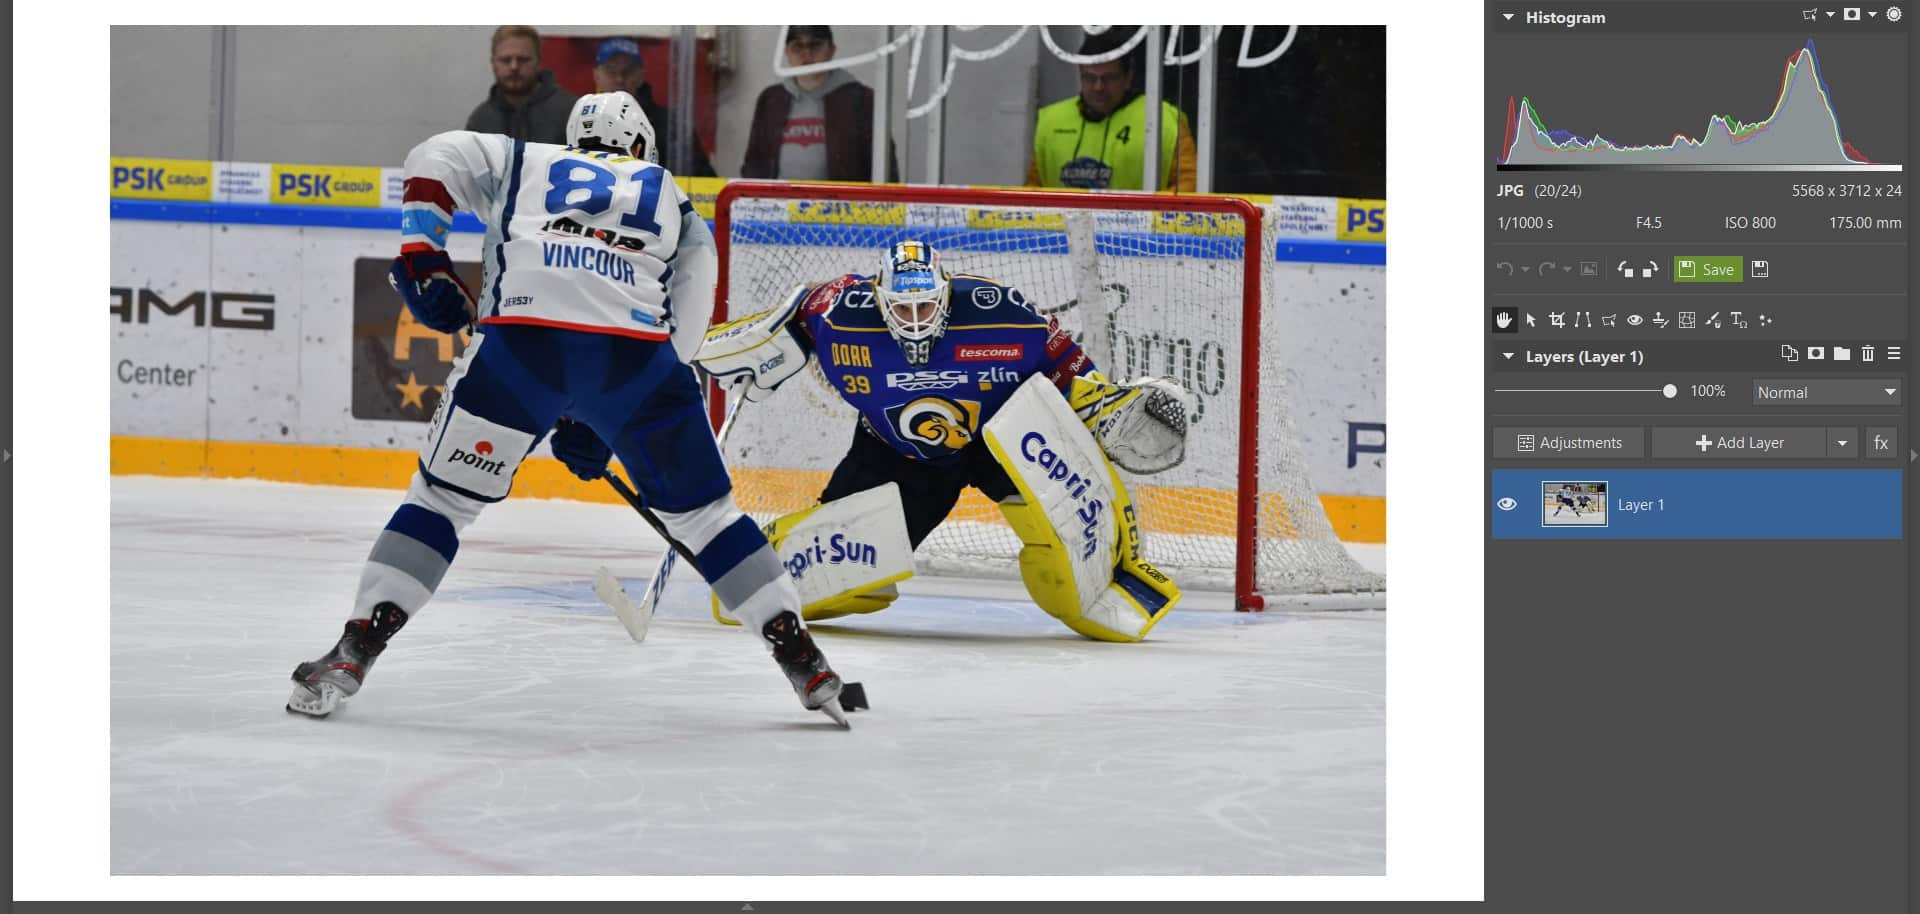
But sometimes it’s useful to be able to change that. I find it important, for example, to have a white background when I’m editing ice-hockey photos. This lets me quickly compare the color of the ice with the background color. I’d be unhappy if the ice ended up too dark, too yellow, or otherwise tinted.
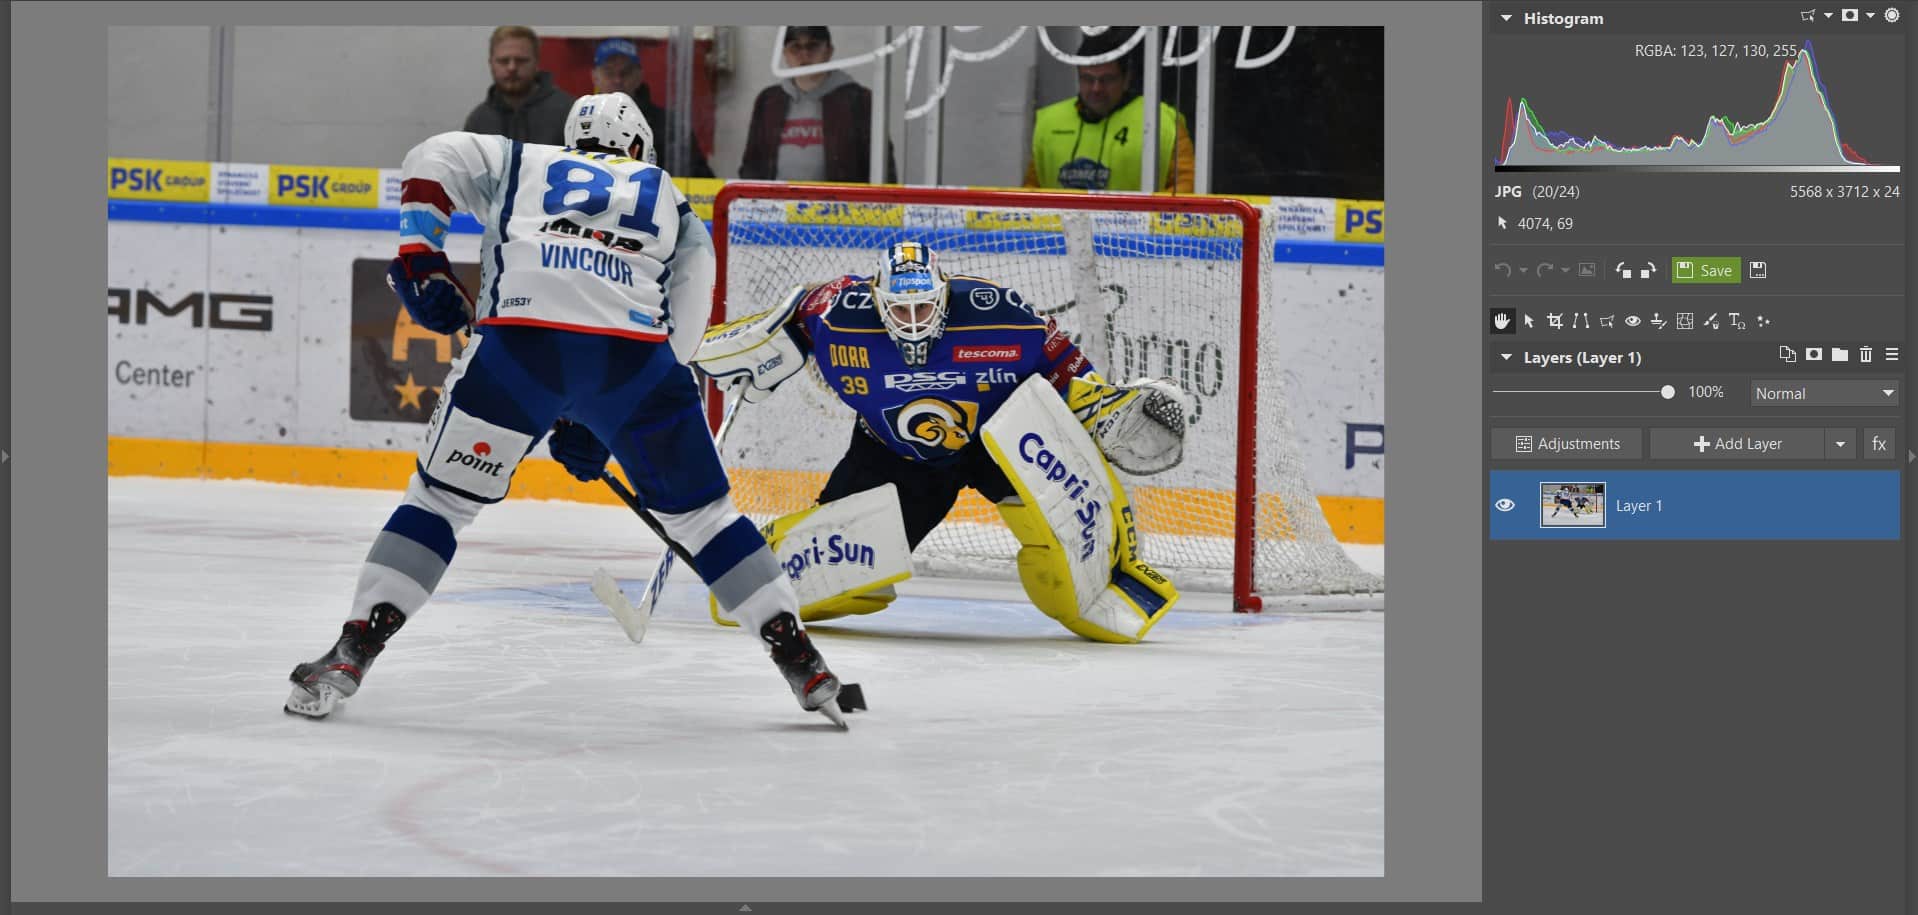
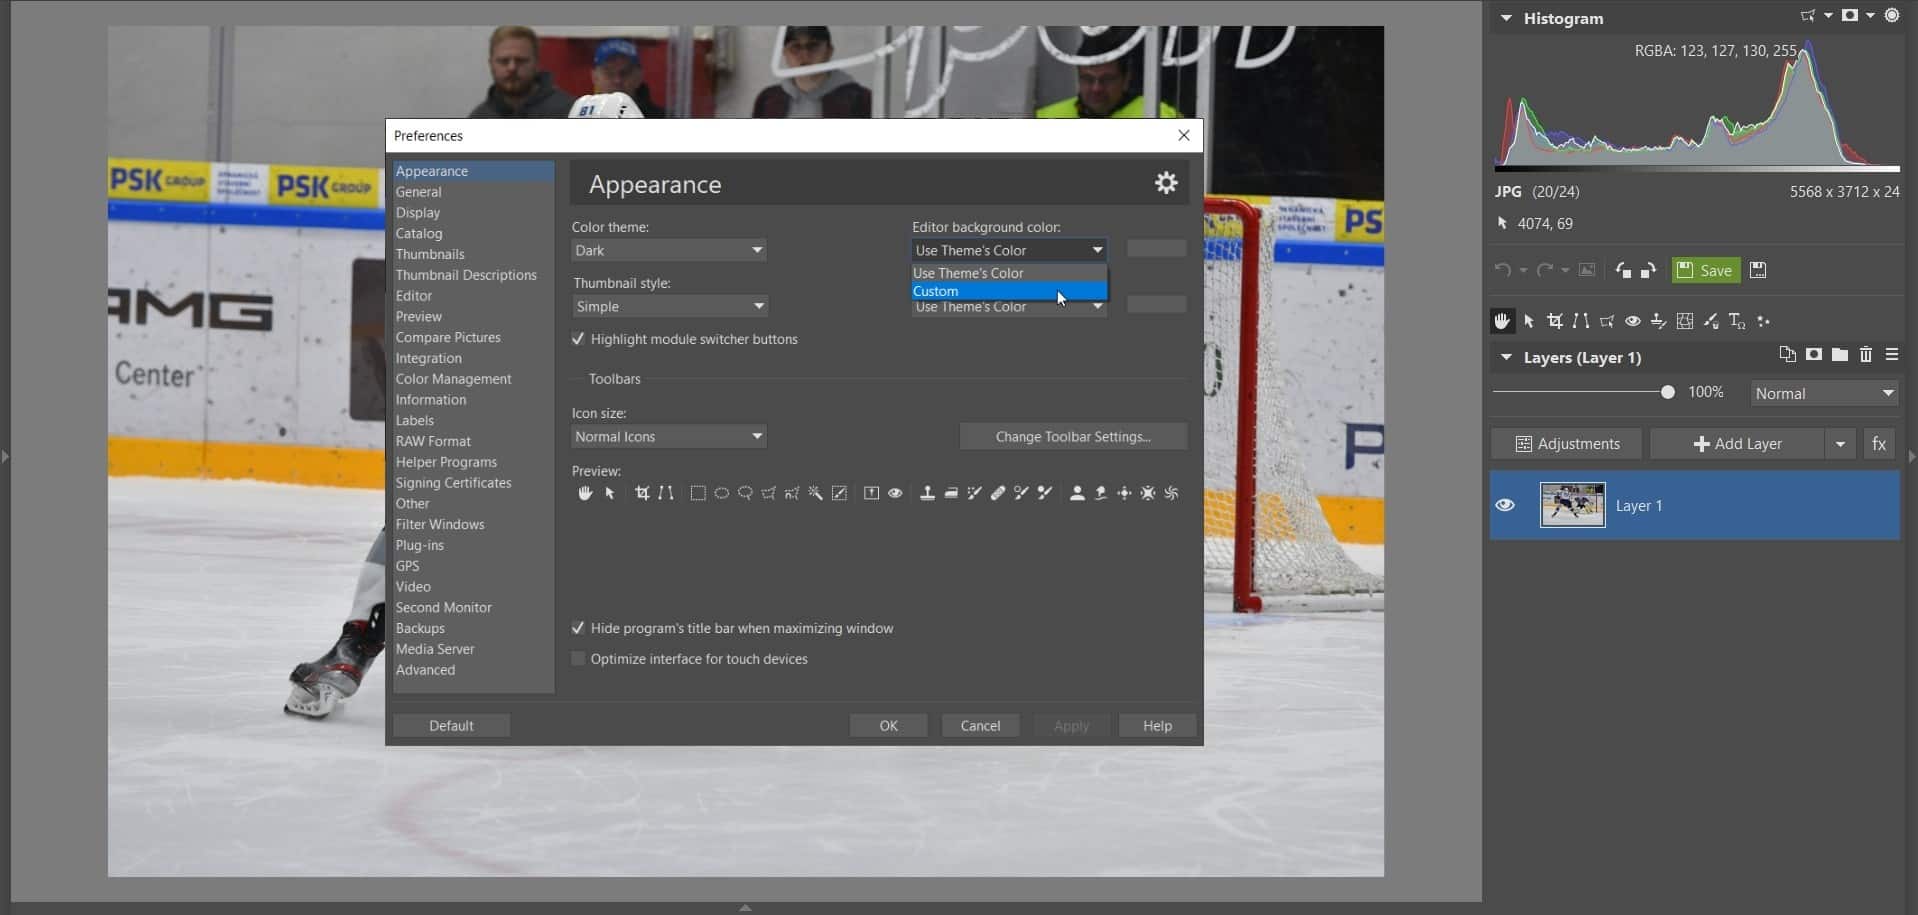
Compared to the gray background, the surface of the ice looks fairly white. But look what happens if you set a pure white background via View → Preferences → Appearance → Editor Background Color → Custom.
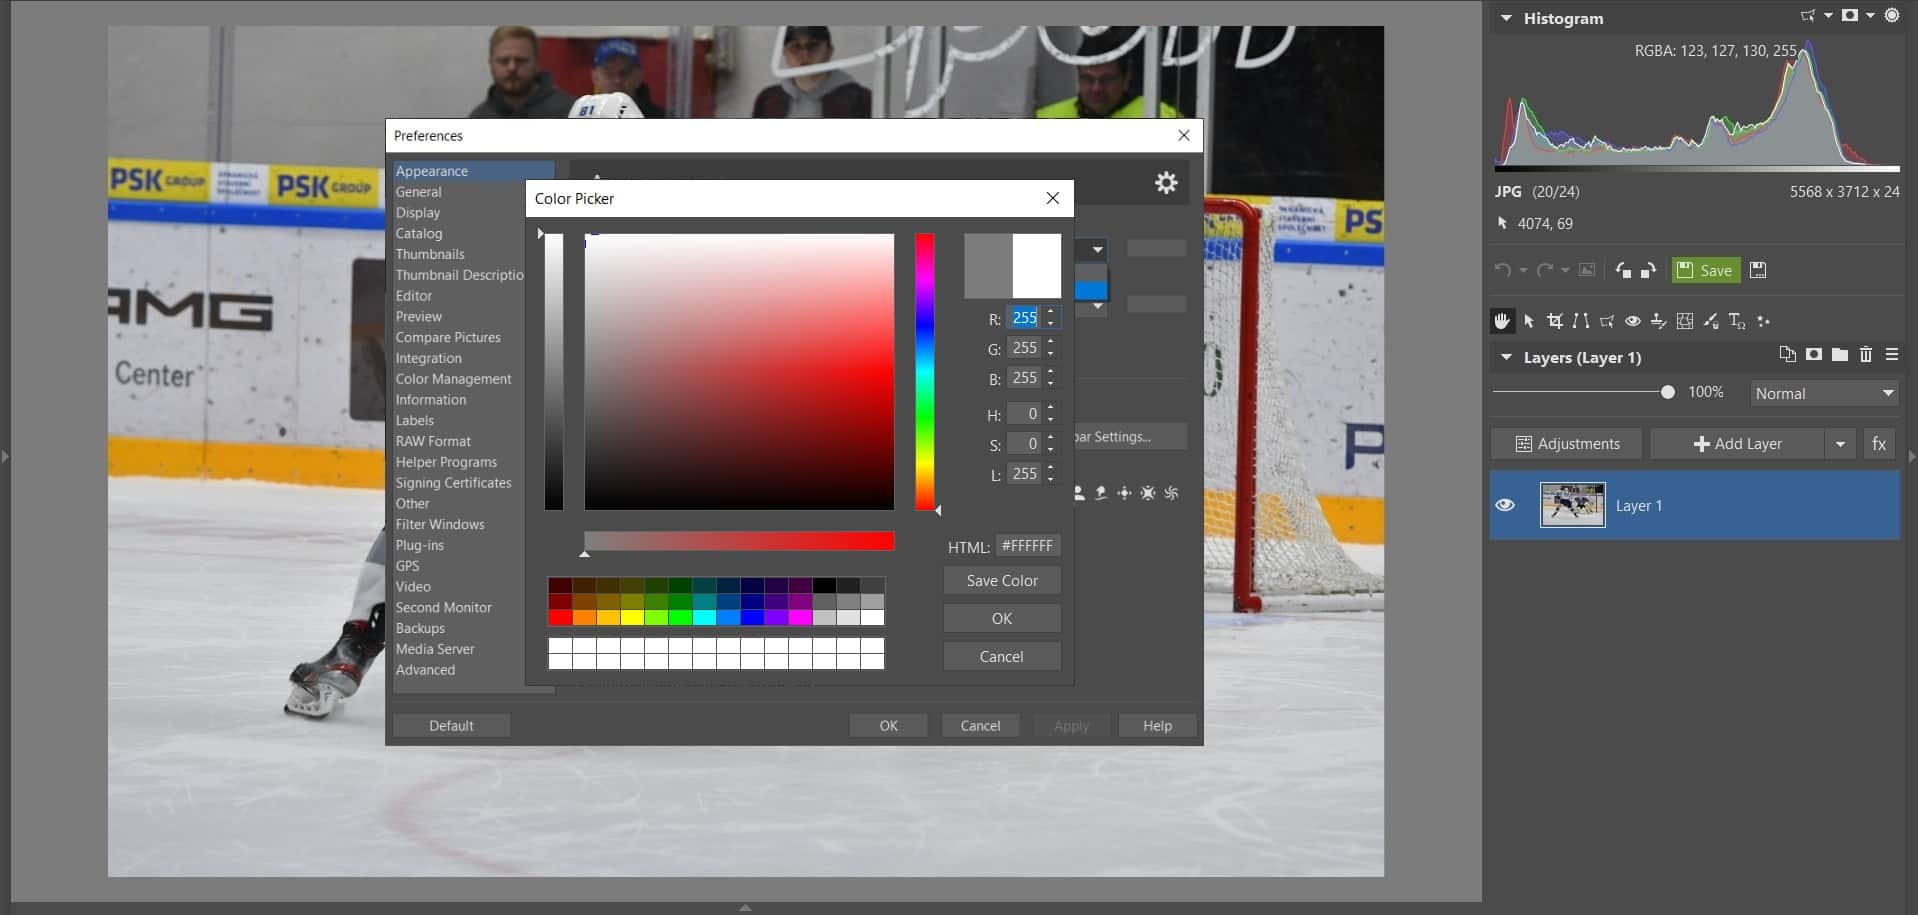
Now let’s try using the color picker and setting pure white:
With the white background set instead of gray, it’s clear that to get the ice close to white, I’ll need to keep on editing the photo. The ice’s mild blue tint has become obvious as well.
Naturally you can use the histogram for these checks as well, but if time is short, this just might be the fastest, clearest comparison around.
Shifting Colors
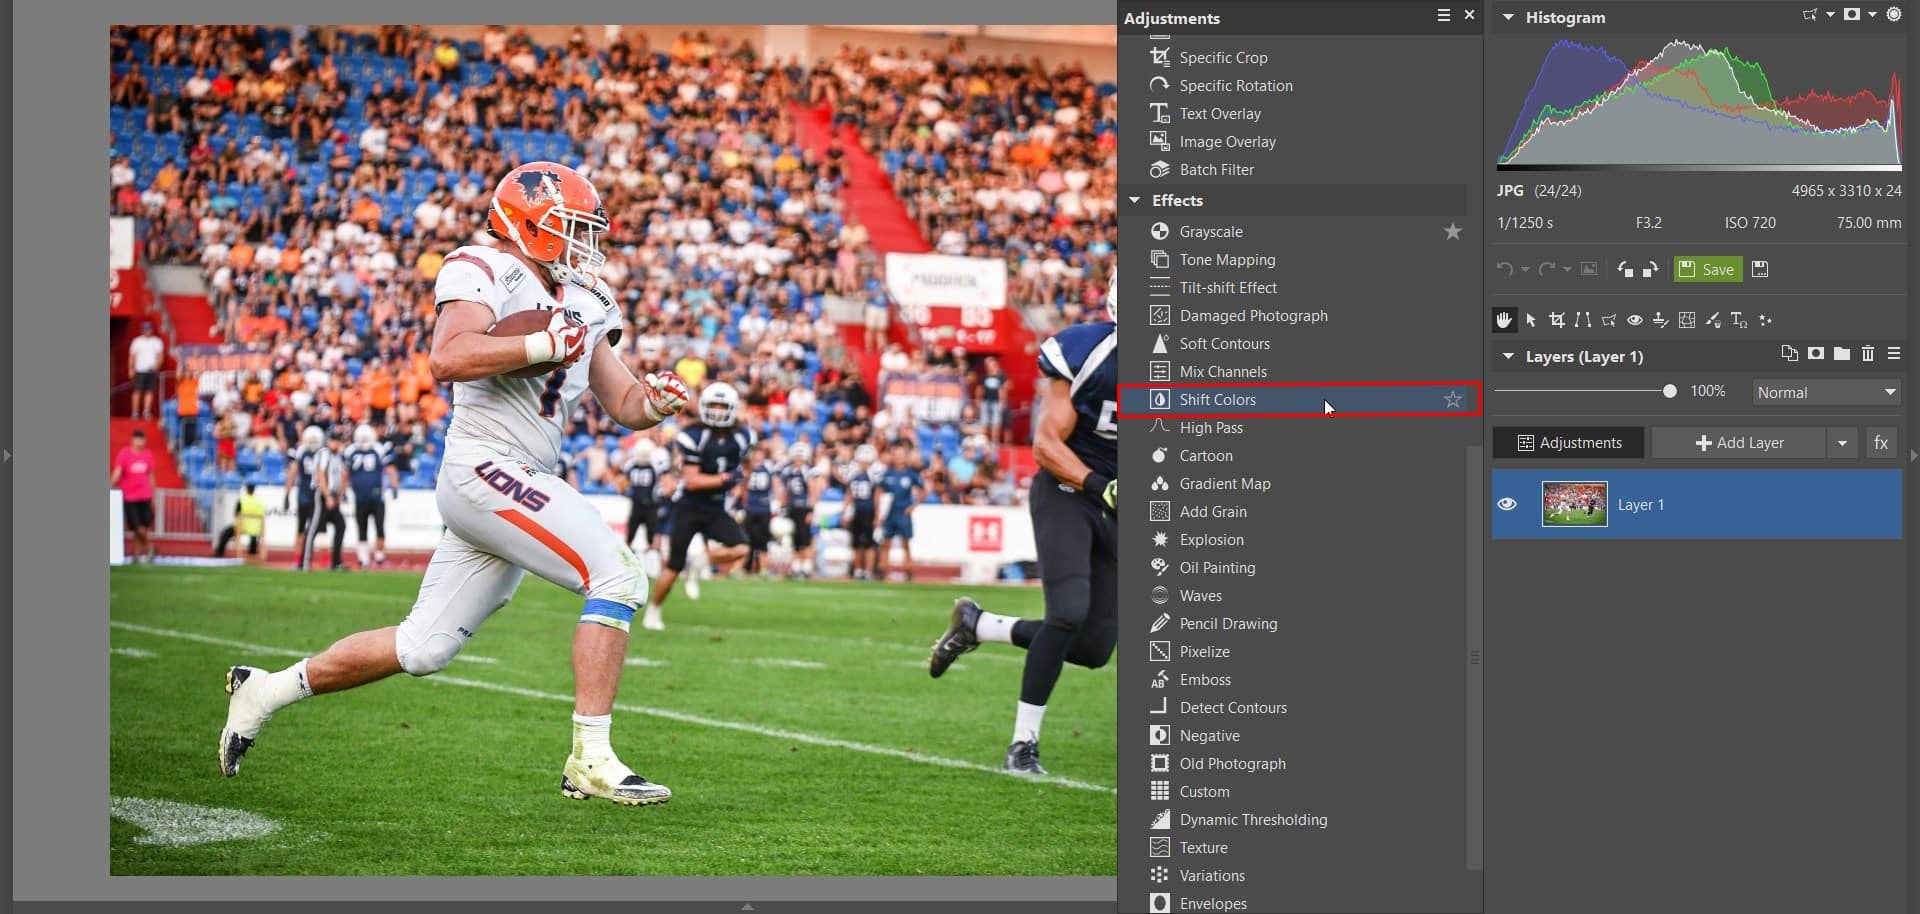
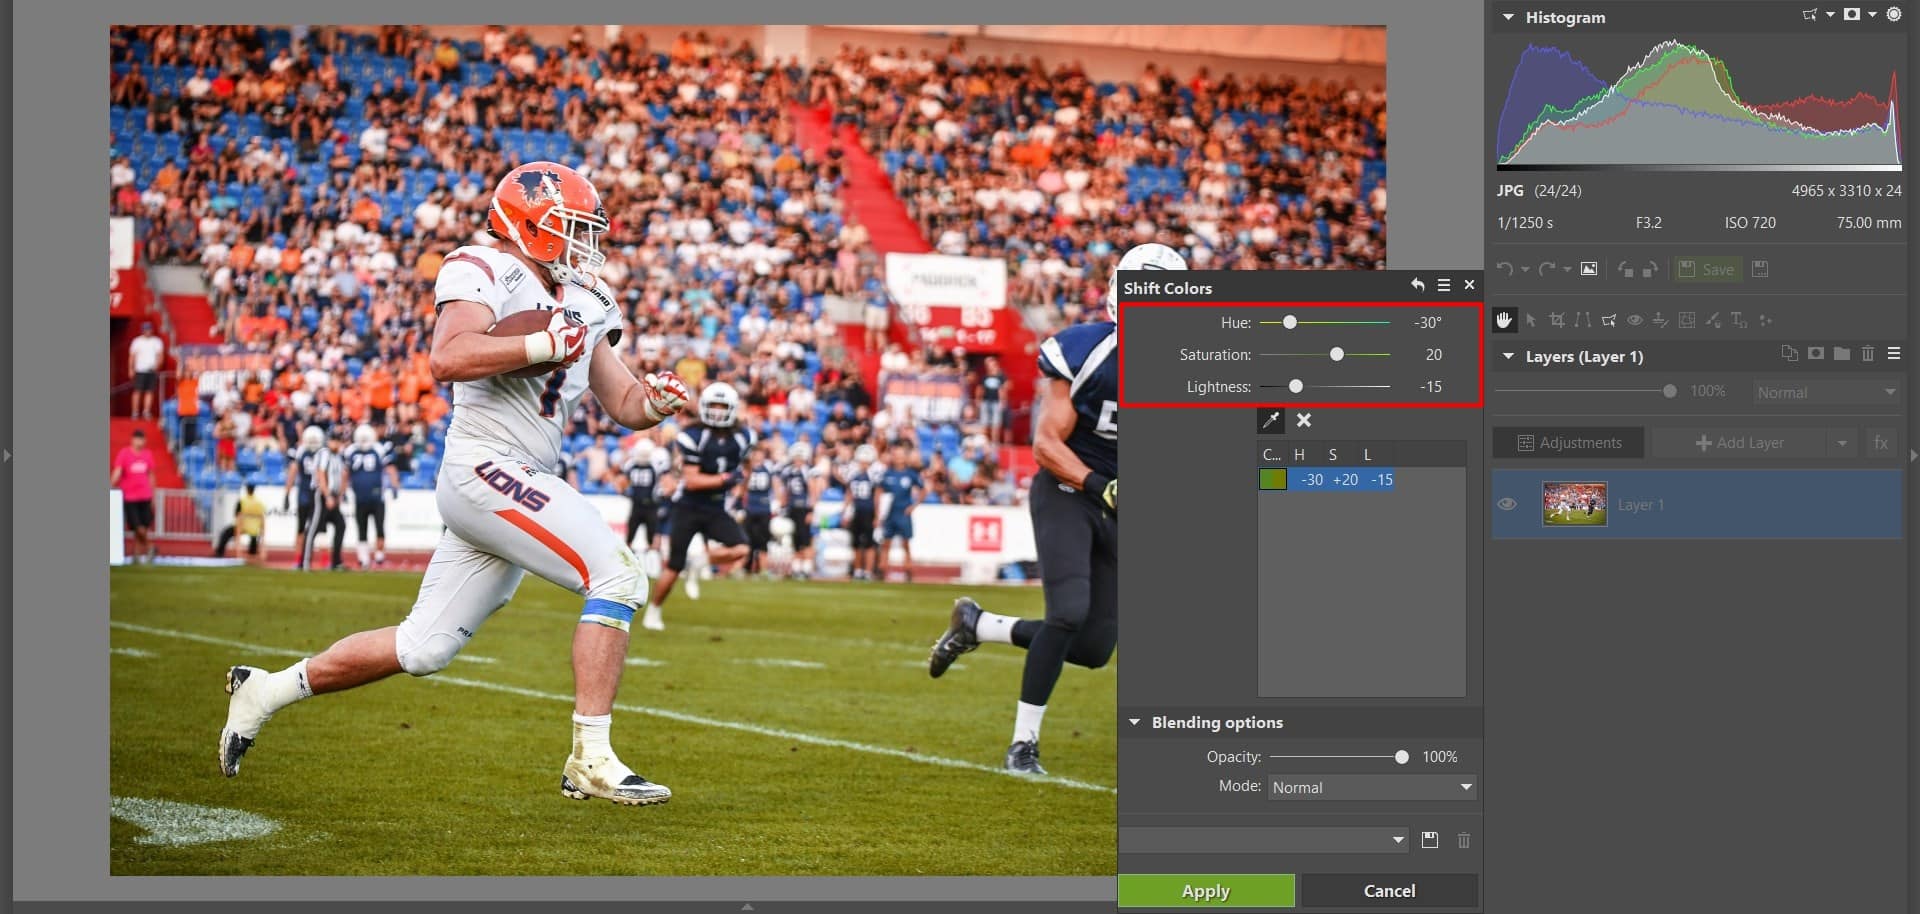
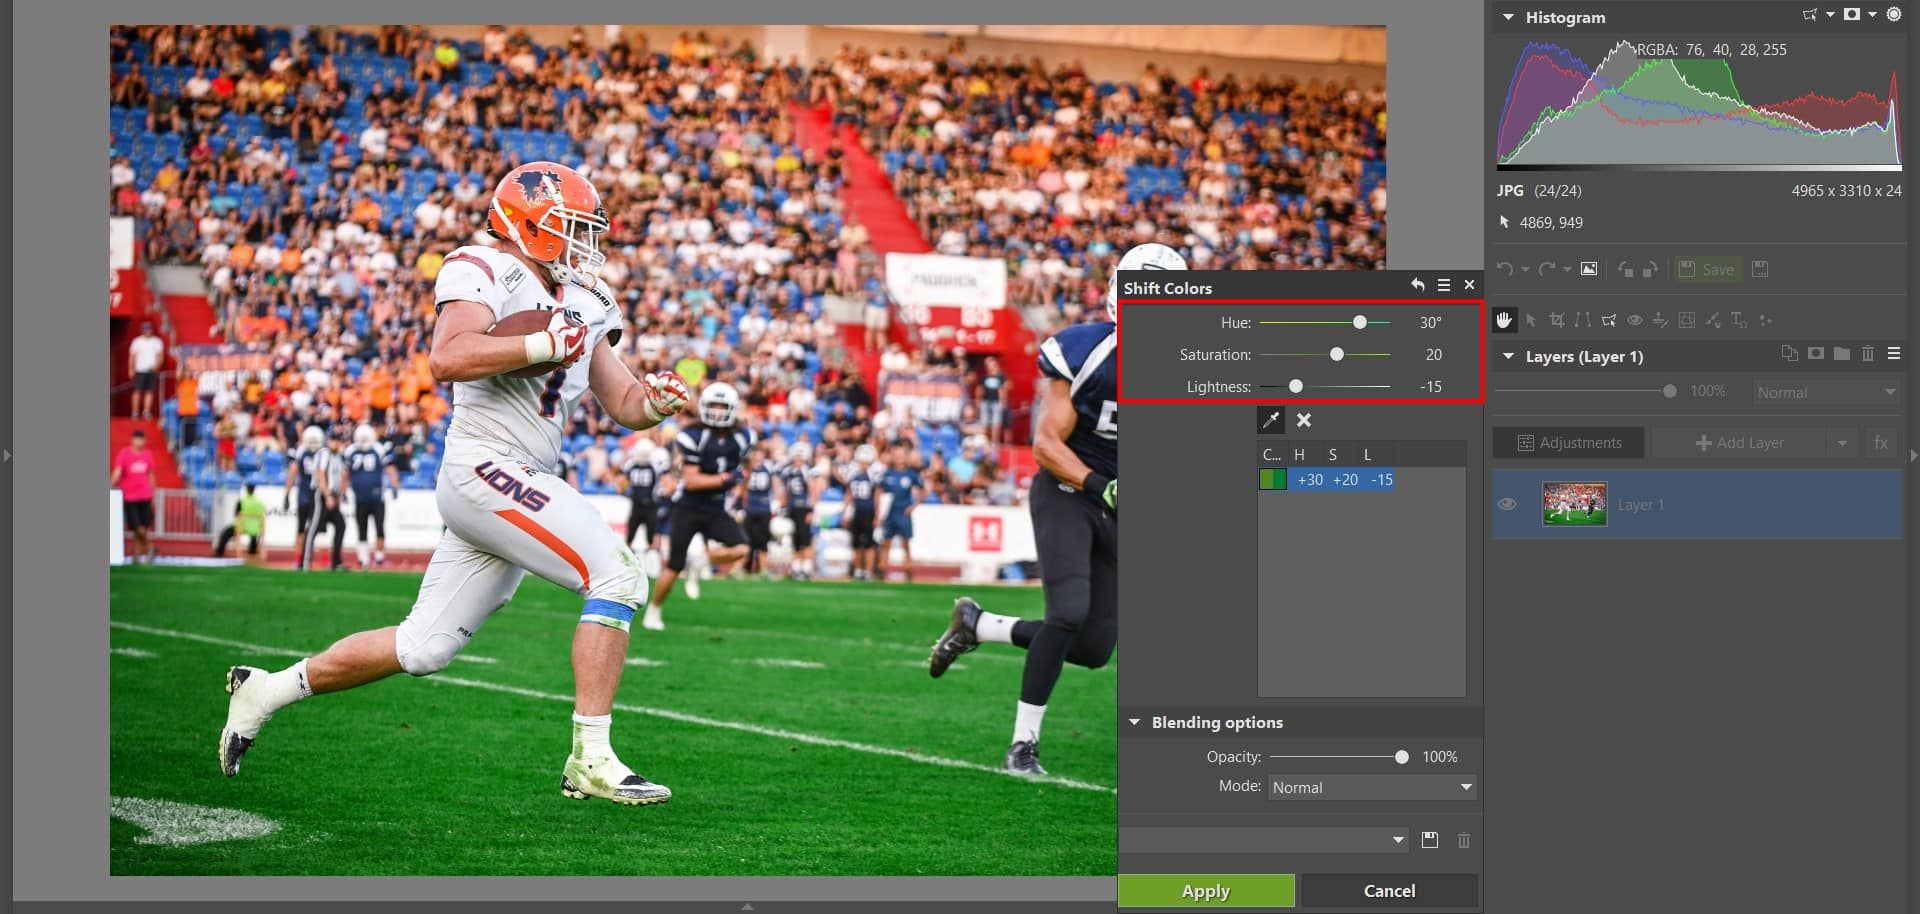
Now let’s take a look at how to shift a particular color in a picture—for example the color of a lawn. We’ll need Shift Colors for this. We’ll be using it to change not only the hue, but also the saturation and lightness, of a specific color and its nearest surrounding colors only. Show Shift Colors by clicking Adjustments in the right panel, then Effects, and then Shift Colors.
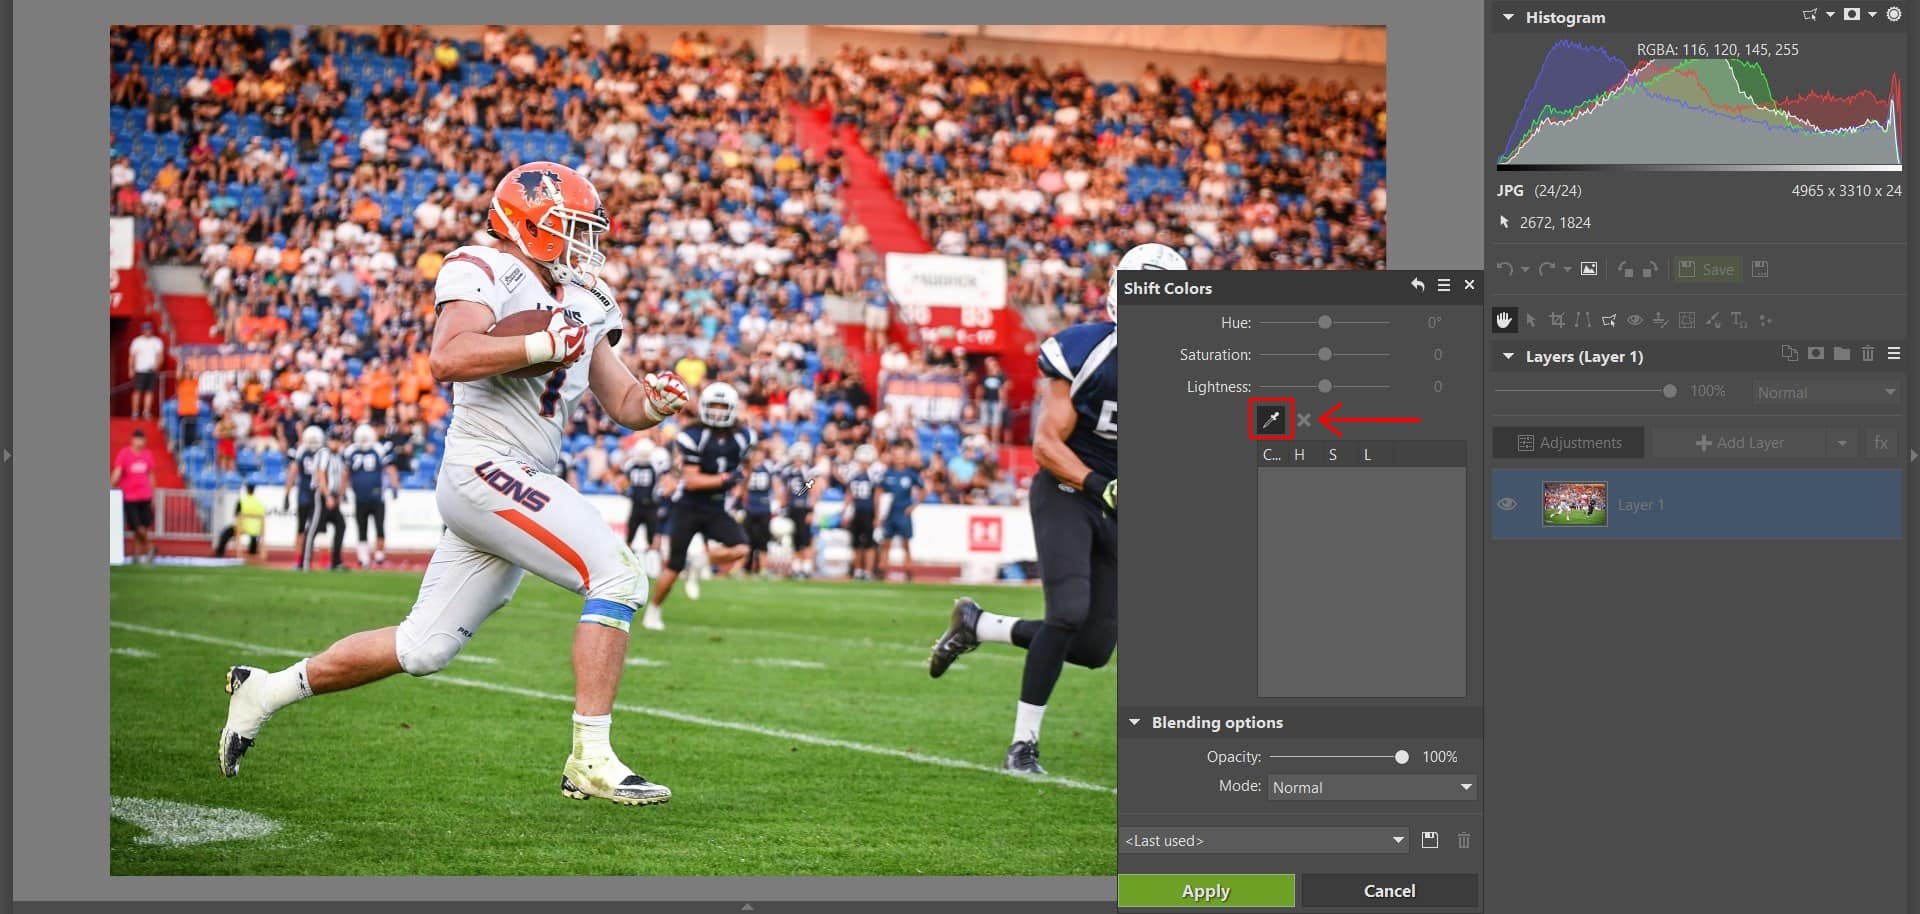
Use the eyedropper to select which color to change. In this case it’s the green of the lawn.
After choosing a color, you can change its Hue, Saturation, and Lightness however you want.
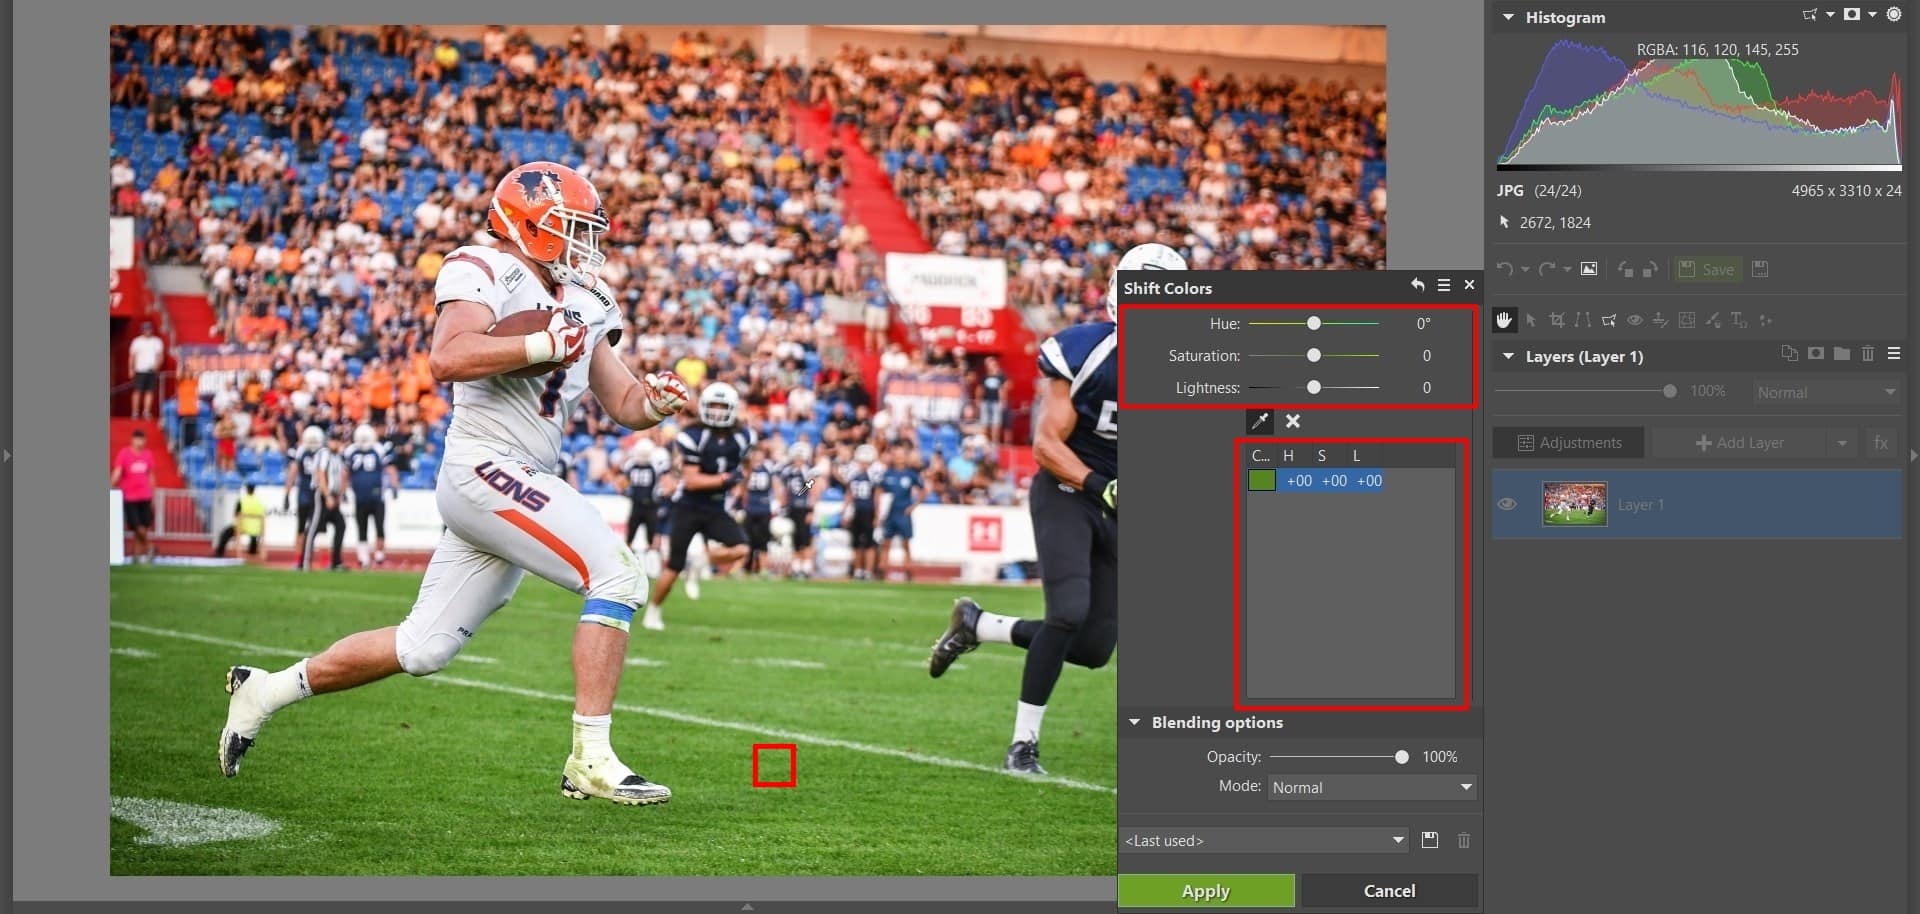
For this lawn here, we can shift it more towards yellow or towards green. This feature is useful in many other situations as well, and you’ll quickly grow to love it.
Getting the Closest Crop When Straightening a Horizon
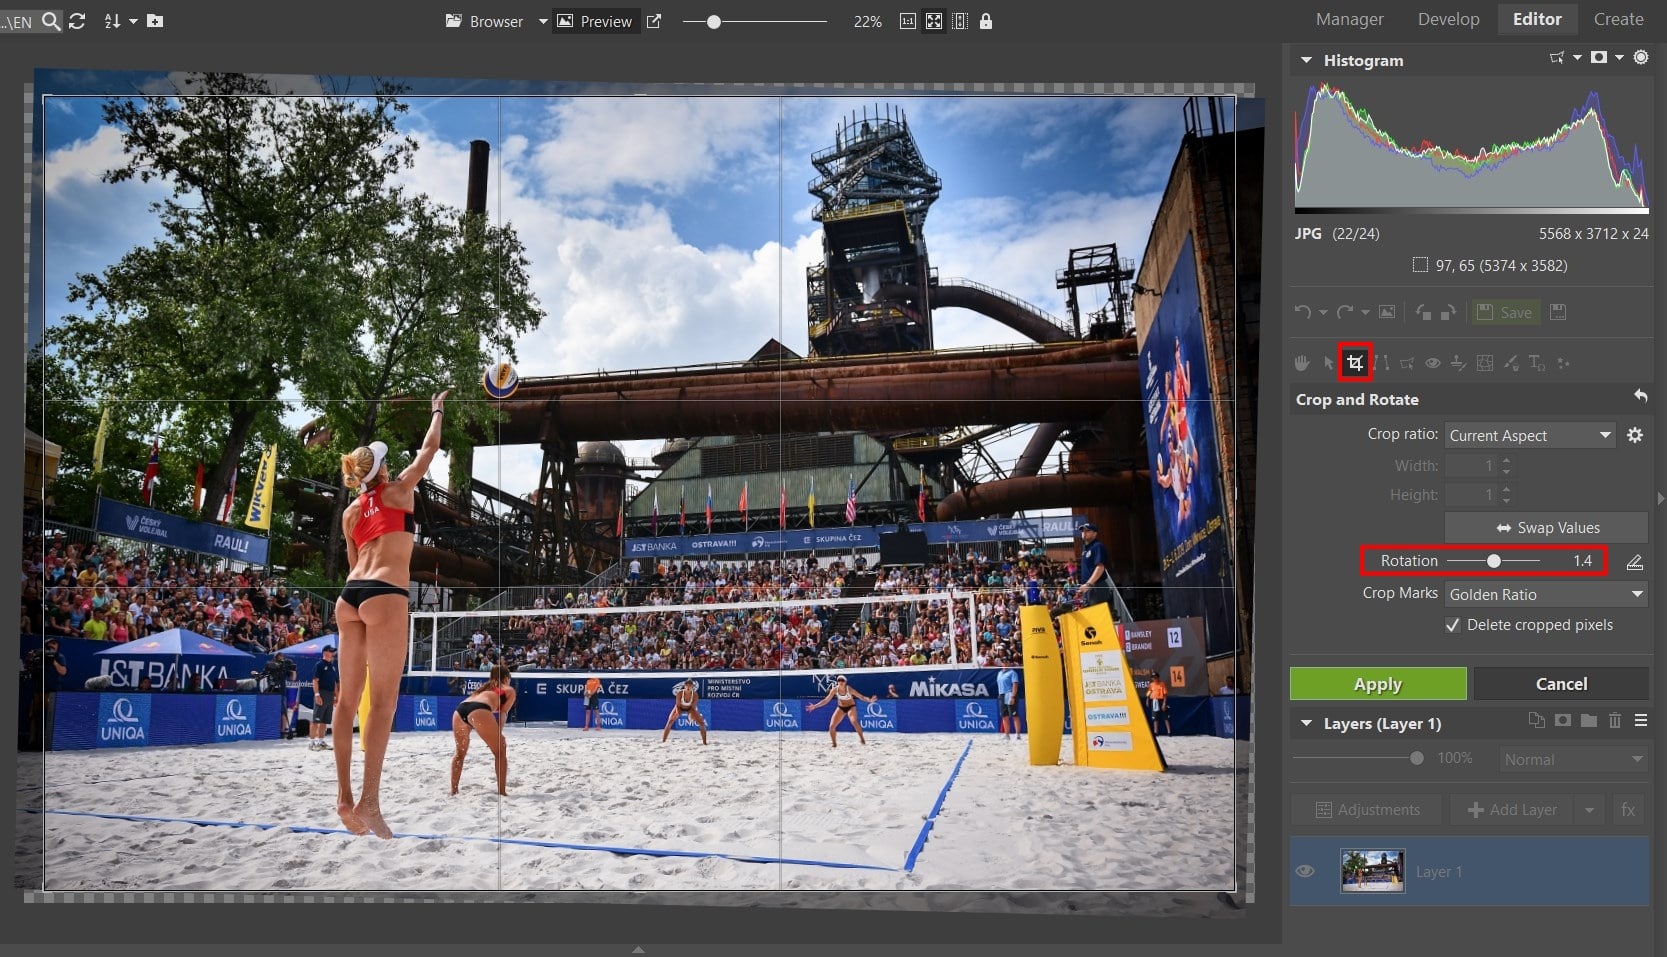
I don’t always manage to get a straight horizon in my photos, and so I use Crop and Rotate (C) often. I then fine-tune the angle of rotation and sometimes shrink and shift the final crop as well. But there’s a problem—after shrinking and shifting the cropping area, it can be hard to get the biggest possible crop by manually adjusting the crop.
To get the largest possible cropping region that matches your chosen ratio of sides, press Ctrl+A. This ensures the largest crop possible.
Controlling the Photo Display Using Shortcut Keys
It’s often important to be able to work with a photo quickly. And that’s why we bet you’ll sometimes appreciate being able to use as many functions as possible via shortcut keys instead of clicking around. One of these time-savers is quick zoom switching.
You’ll most often be switching between normal size (100% zoom) and fitting the photo to the workspace. You can use the buttons in the top toolbar for this, but why waste time when Zoner Studio lets you use shortcut keys instead?

Here’s a brief summary of the photo display options and (in parentheses) the corresponding shortcut keys:
- Normal size 1:1 (*) – shows the photo at 100% of its original size
- Fit to Frame (0) – ensures the whole photo is visible
- Fit Shorter Side (.) – ensures that all of the photo’s shorter side is visible
- Zoom Lock (/) – uses the current setting for showing future photos as well
- Zoom slider (can be moved with the mouse wheel)
Function Keys
In our last tip, we’ll take a look at the function keys, which can make work with Zoner Studio much easier:
- F1 – Show the help
- F2 – Rename file
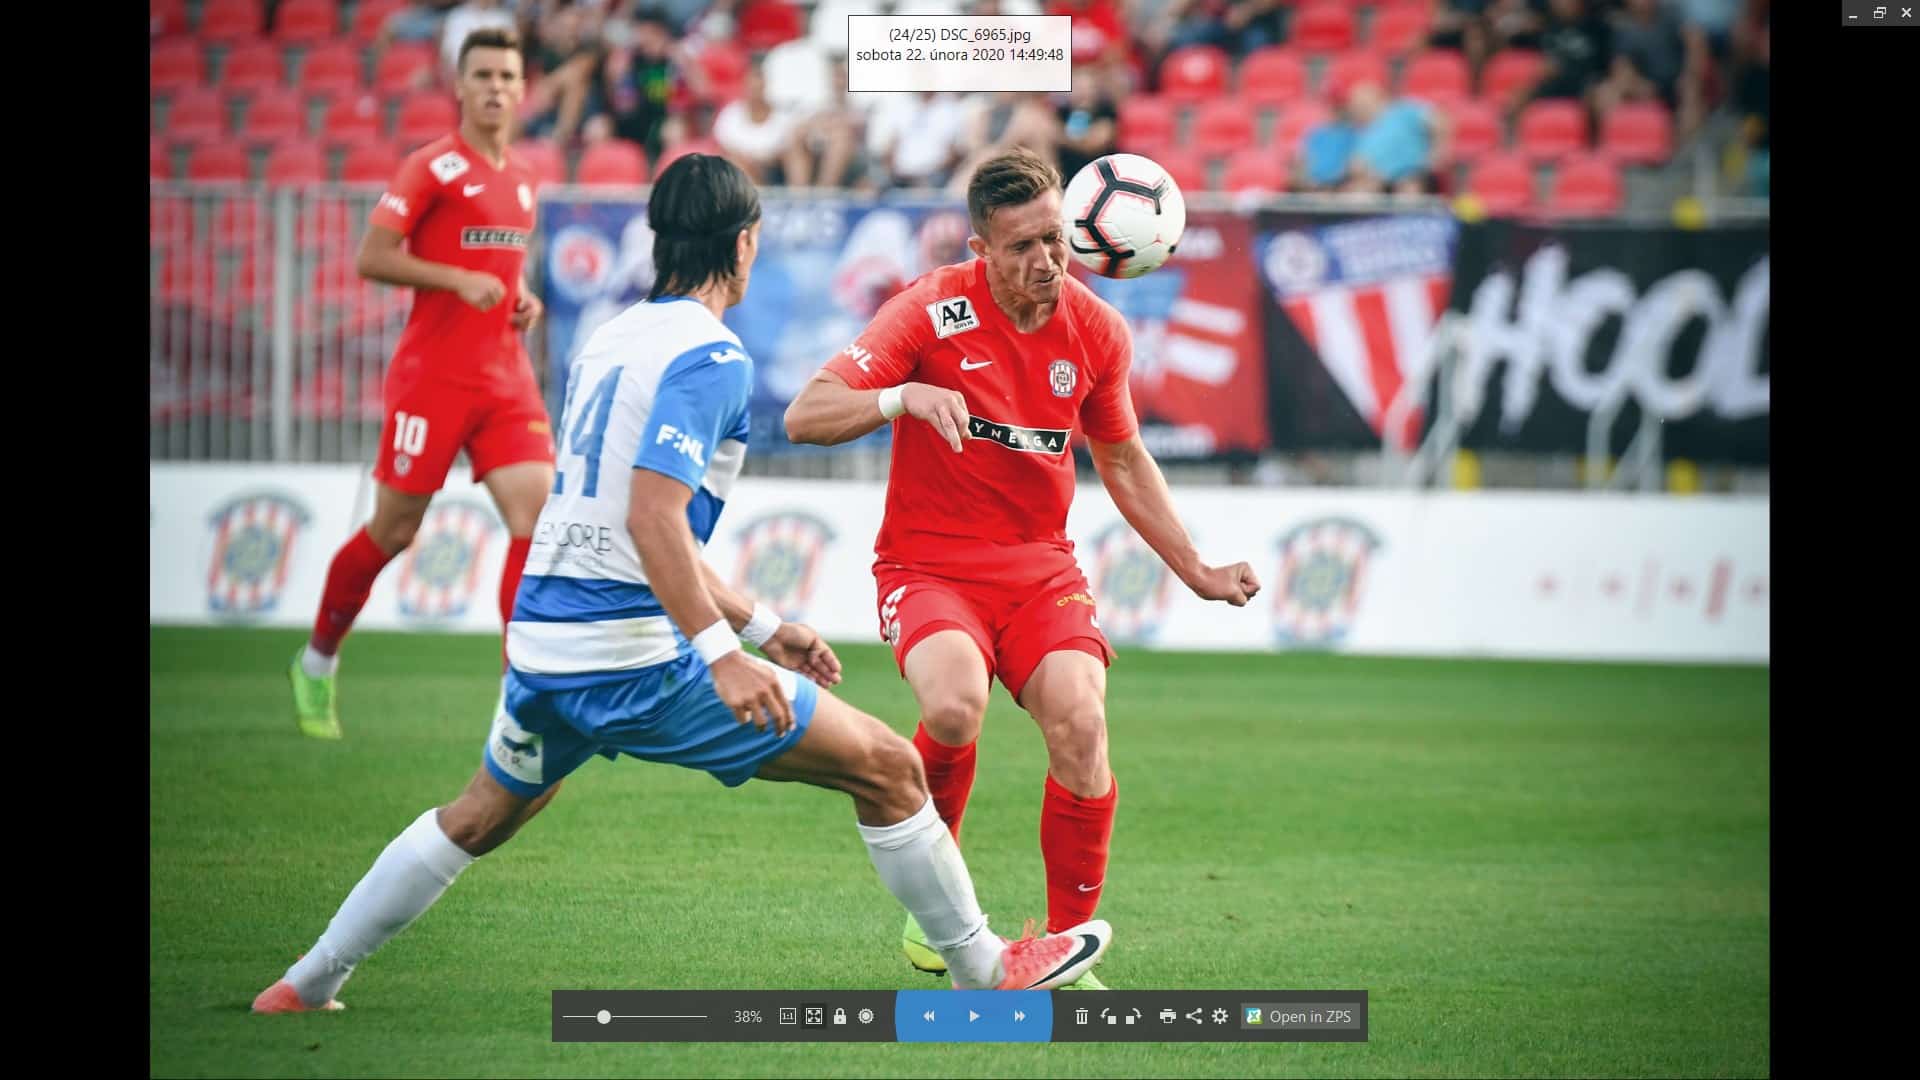
- F3 – Open photo viewer
- Ctrl + F4 – Close the current tab
- F5 – Refresh the display
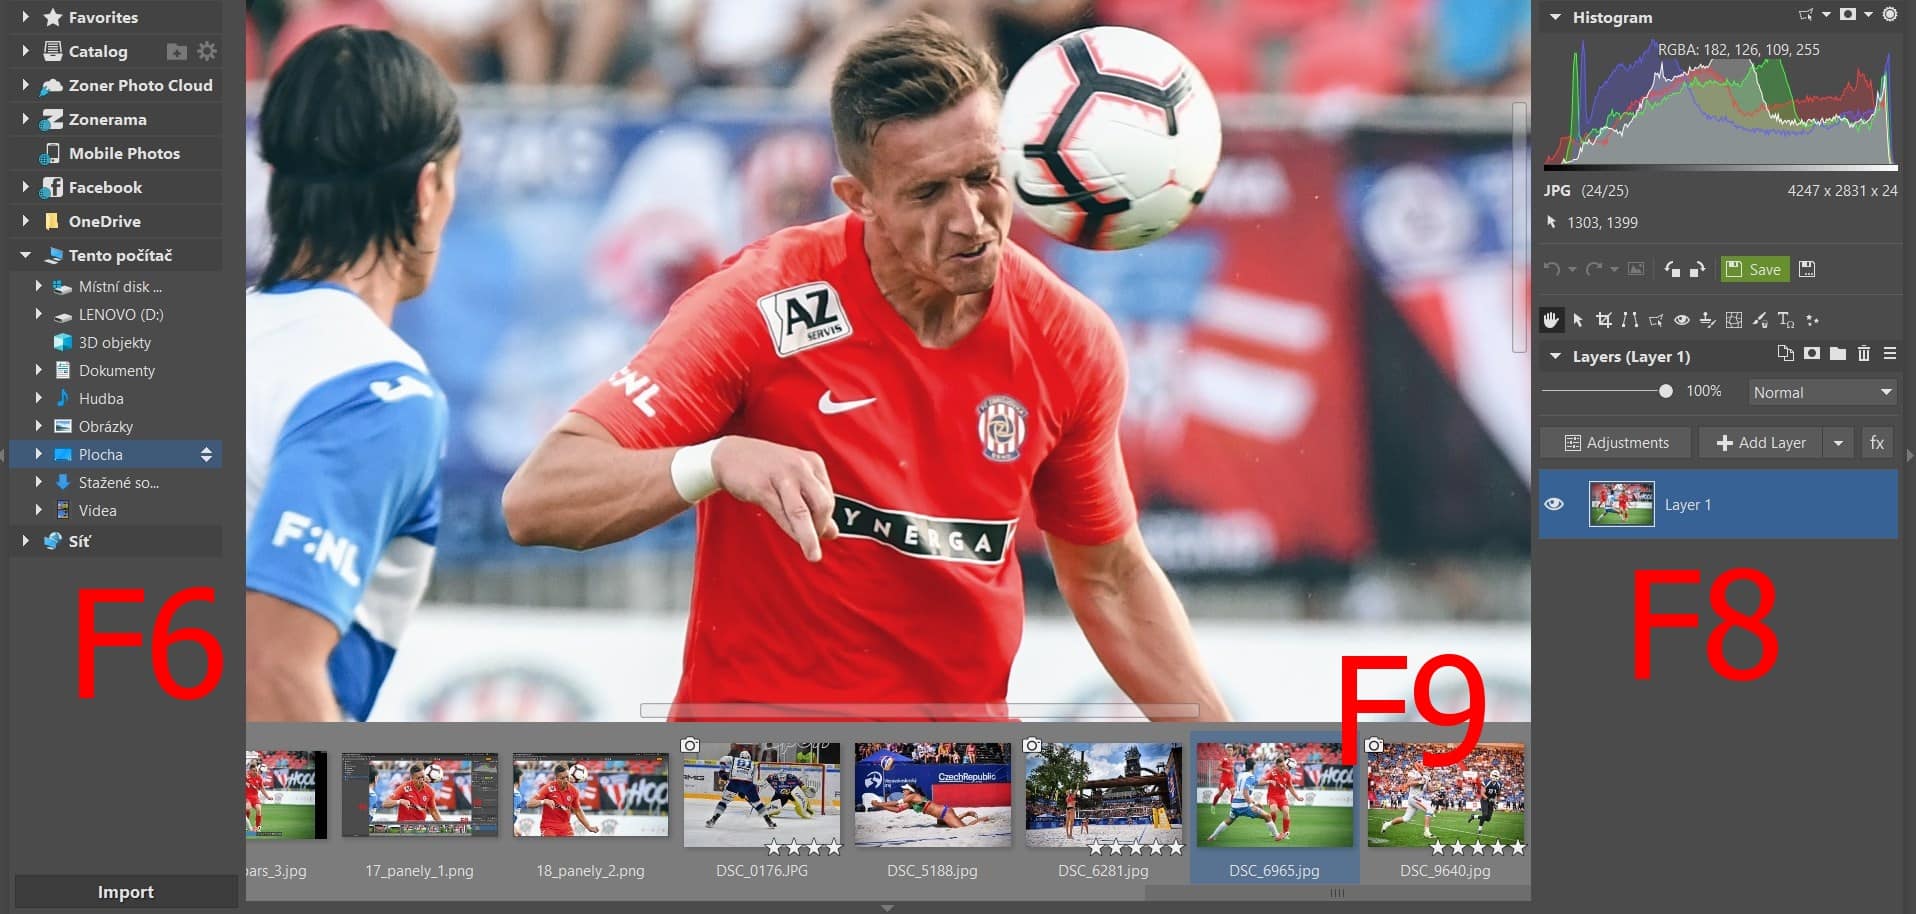
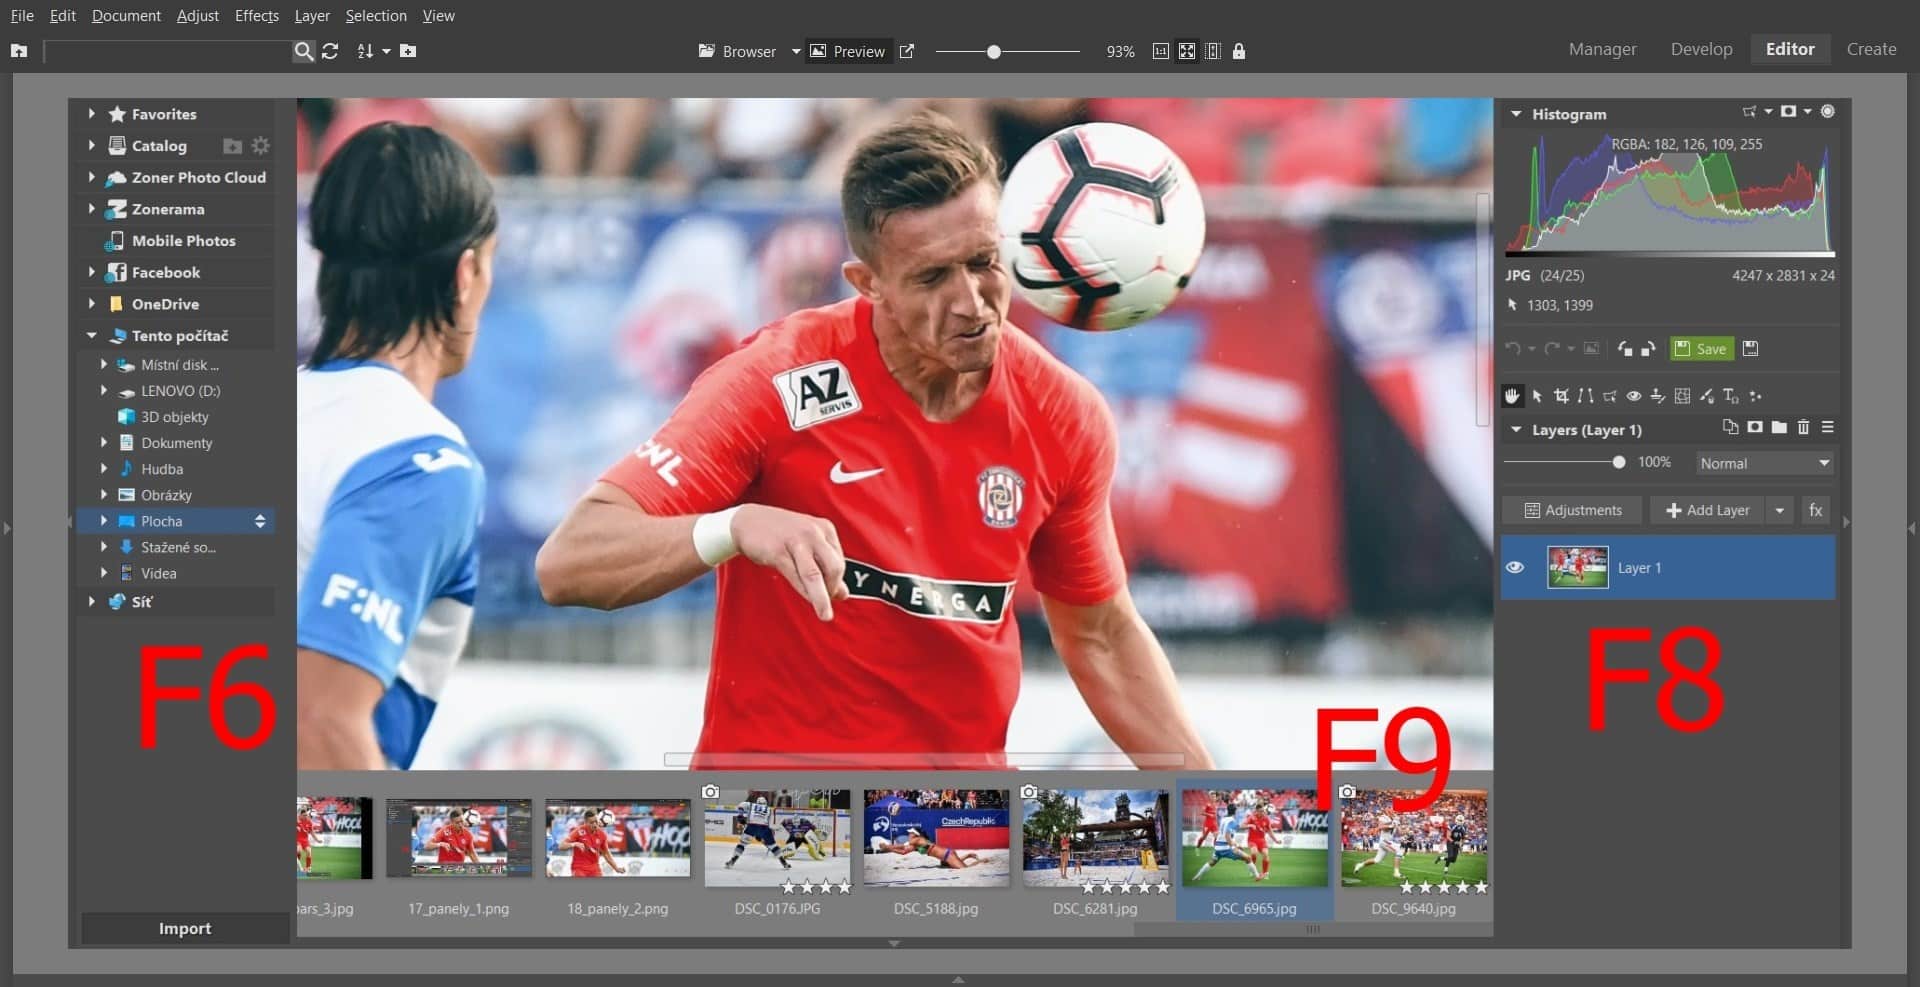
- F6 – Show/Hide the Navigator (the left-hand panel)
- F8 – Show/Hide the Side Panel (the right-hand panel)
- F9 – Show/Hide the Filmstrip
You’ll especially appreciate F6, F8, and F9 during edits where you need the largest workspace you can get.
- F10 – New Tab in a separate window – handy if you’re using multiple monitors
- F11 and F12 – Two different fullscreen modes
We hope these tips have helped you out, and if you have some tips of your own, we’ll be glad to see them from you.
Download Zoner Studio, try it free for 7 days, and see all the things you can do in its Editor. And do them even faster with our tips!