Customize Zoner Studio To Fit Your Needs
The Zoner Studio user interface is designed to make photo and video editing simple and efficient. There are several additional options for customizing Zoner Studio that may simplify your workflow, including some you may not even know about.
Every photographer has their own workflow and different requirements for customizing the programs they use. If you want to customize the default layout of Zoner Studio, you have two basic options:
- Customize the toolbar for each module.
- Create your own keyboard shortcuts, by creating completely new shortcuts or changing already existing shortcuts.
Menu display
Since the fall 2023 update, the top menu has been hidden to save space. This is a welcome change, especially for those who do their photo editing on a small laptop screen. Those who are accustomed to using keyboard shortcuts don’t need the menu, which is why we highly recommend using keyboard shortcuts. But more about them later.
If you need the menu to be visible, it’s easy to display it. To display the menu, go to Menu > View > Menu.
Customizing the Toolbar
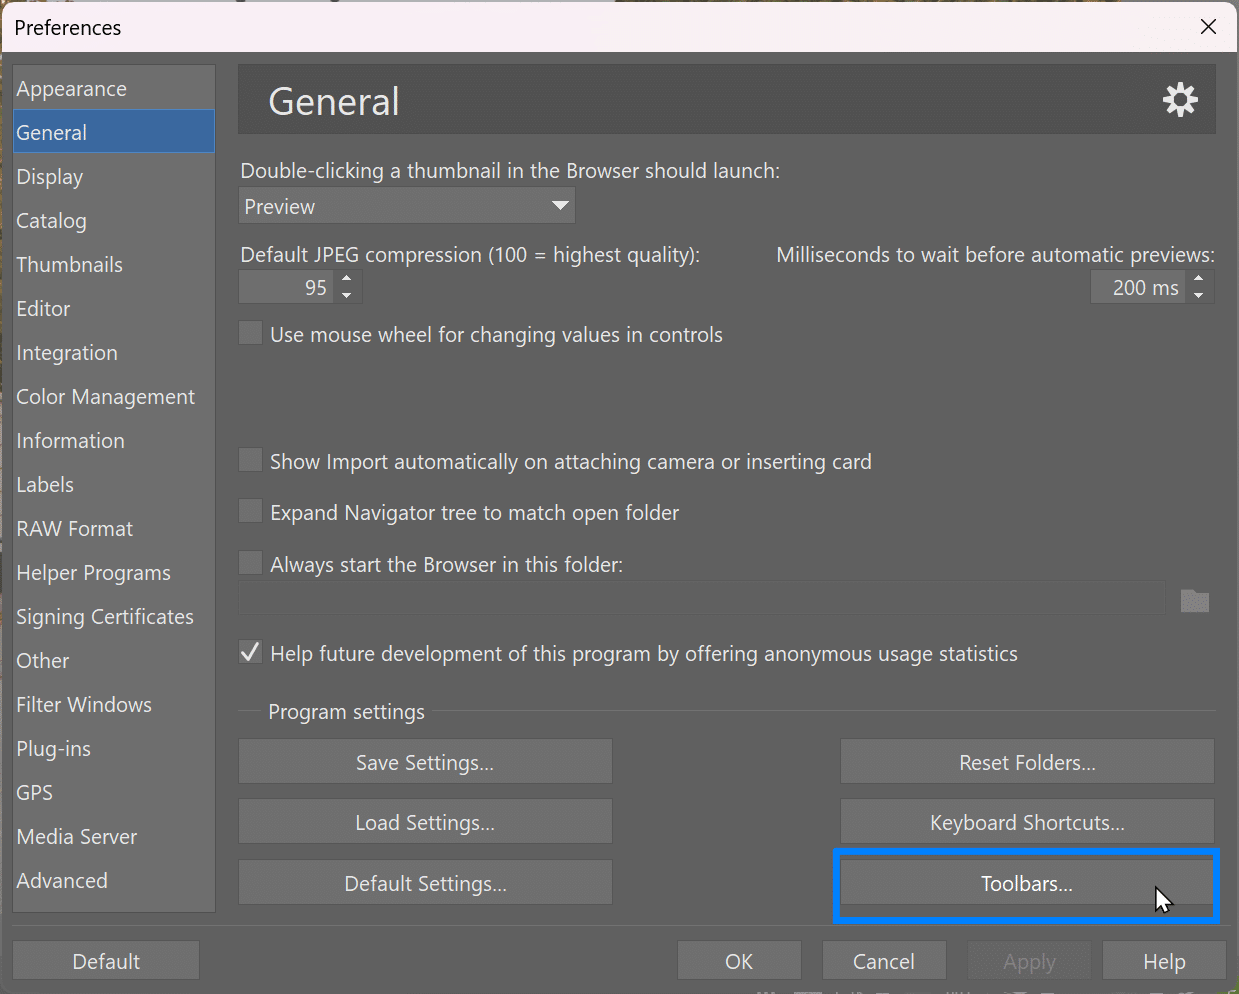
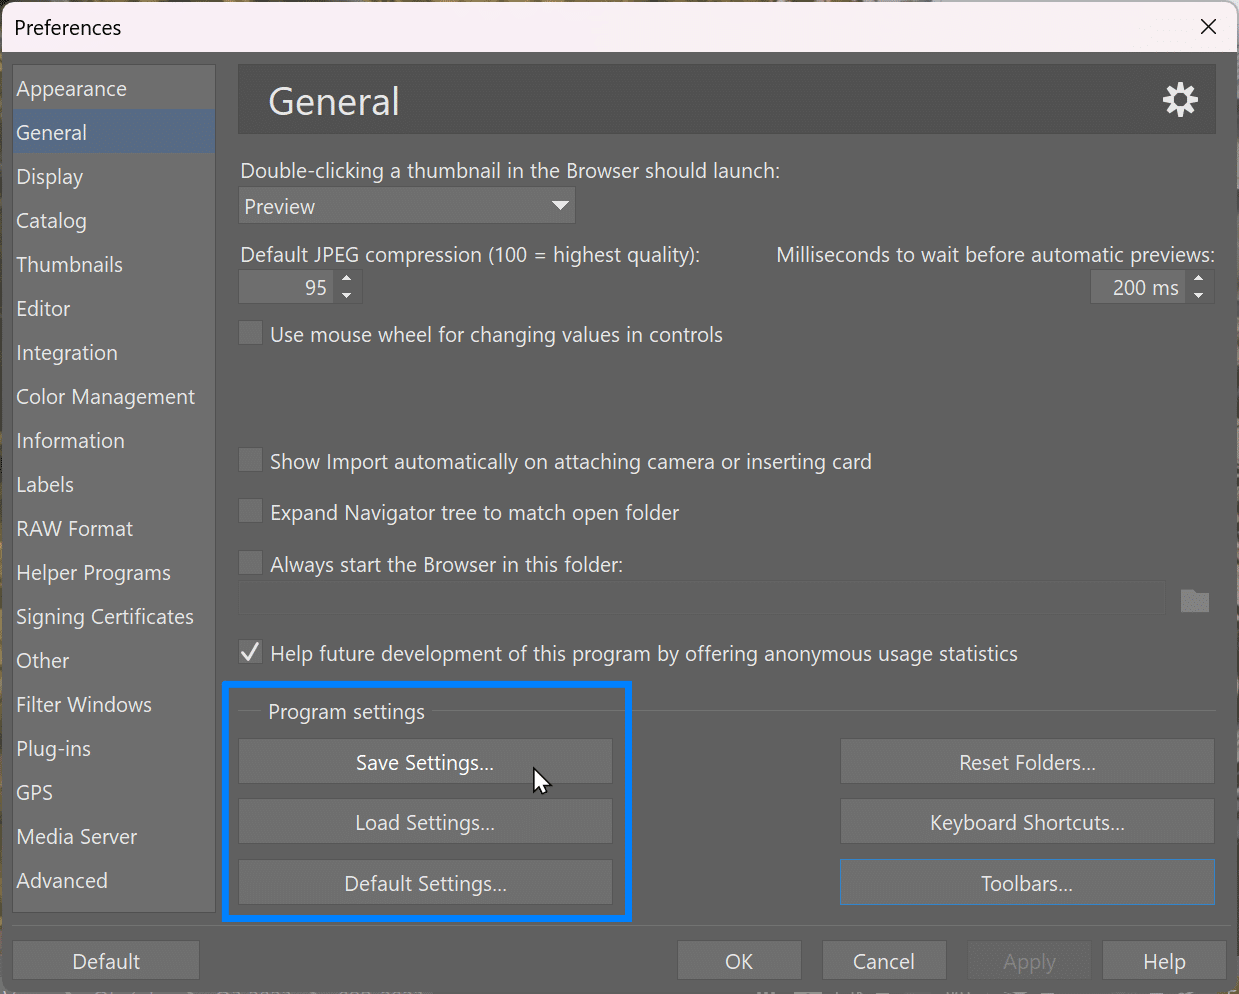
The term toolbar includes both the editing tools in the right panel, which can be configured differently for each module, and the navigation panel and toolbar. You can customize the toolbars using Preferences (Ctrl+M) > General > Toolbars…
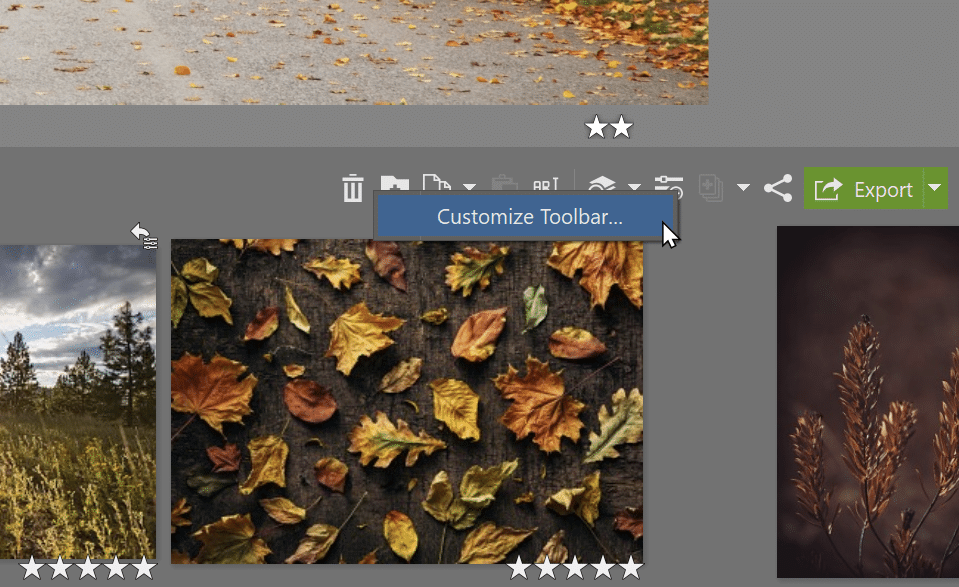
Another option is to right-click the toolbarand select Customize Toolbar.
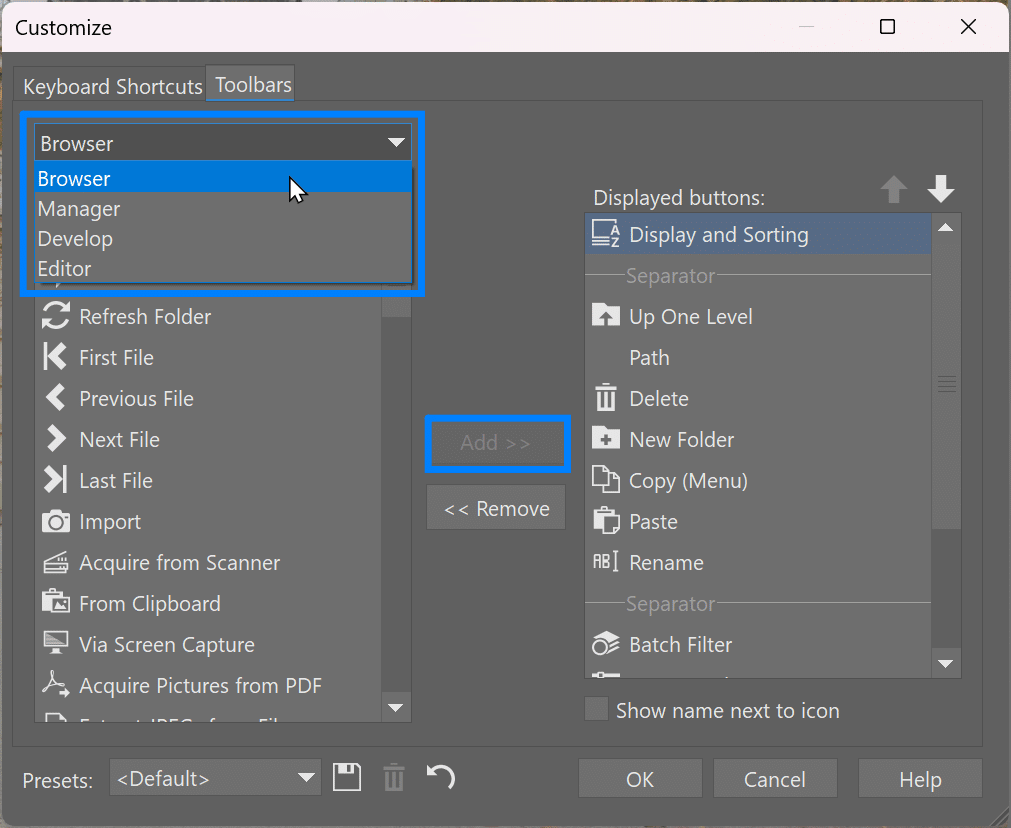
Use the drop-down menu to choose which module you want to customize the toolbar for. Browser is the navigation panel and toolbar located above thumbnails, accessible from all modules. For other options like Manager, Develop, and Editor, you can customize the tools in the right side panel.
Select tools by choosing them in the left column and moving them to the right column using the Add button. You can move each tool as you like, or separate them using a hyphen – which separates settings groups.
Favorite Tools in the Editor
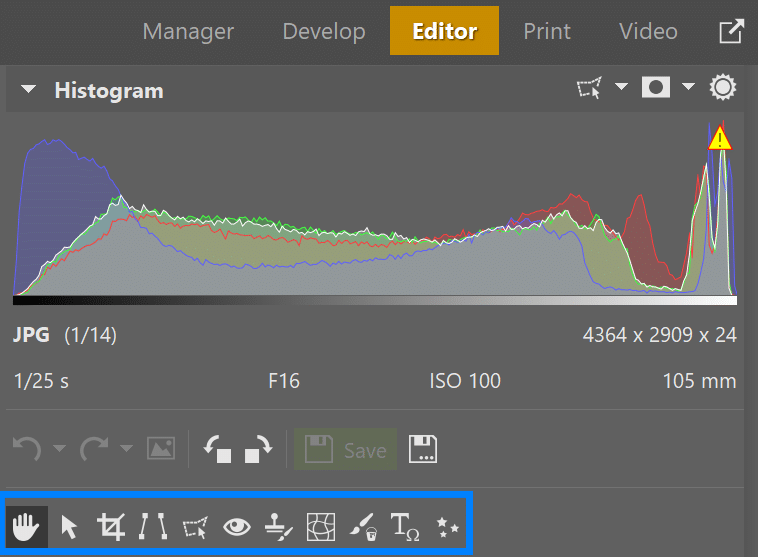
There are additional options for customizing the Editor module. The most important tools are located in the right side panel, just below the toolbar, which you already know how to customize.
If you want all the tools accessible in a single click, you can move the toolbar vertically to the right or left side of your screen. You can move the toolbar by going to Preferences (Ctrl+M) > Editor > Main toolbar location.
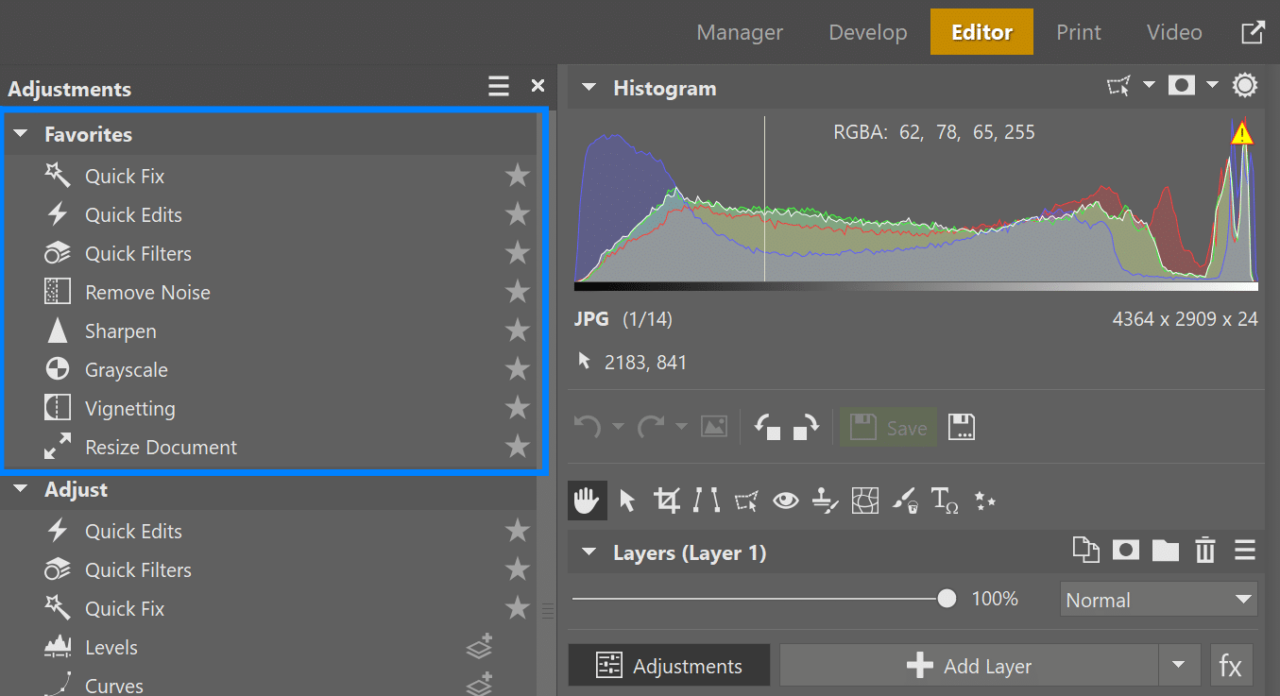
The Editor also has one more customization option, Favorite Tools. You can mark tools that you frequently use with a star in the Adjustments list to move them to the Favorite category at the top. This allows you to access them with a single click.
Keyboard Shortcuts
You can make anything work on a computer more quickly and efficiently by using keyboard shortcuts. Especially when doing multiple adjustments in succession, while still needing control over each of them. For this reason, these adjustments can’t be done using the Batch Filter. Most tools in Zoner Studio already have keyboard shortcuts. However, some tools don’t, or the existing ones may not suit your needs.
For example, a command like create a photo book in the Print module doesn’t have its own keyboard shortcut. You can create specific photo products from the Manager using custom keyboard shortcuts that you define.
To assign a keyboard shortcut, go to the customization settings again: Preferences (Ctrl+M) > General > Keyboard Shortcuts… You can find a drop-down menu to select the module, application, or label for which you want to modify the keyboard shortcuts.
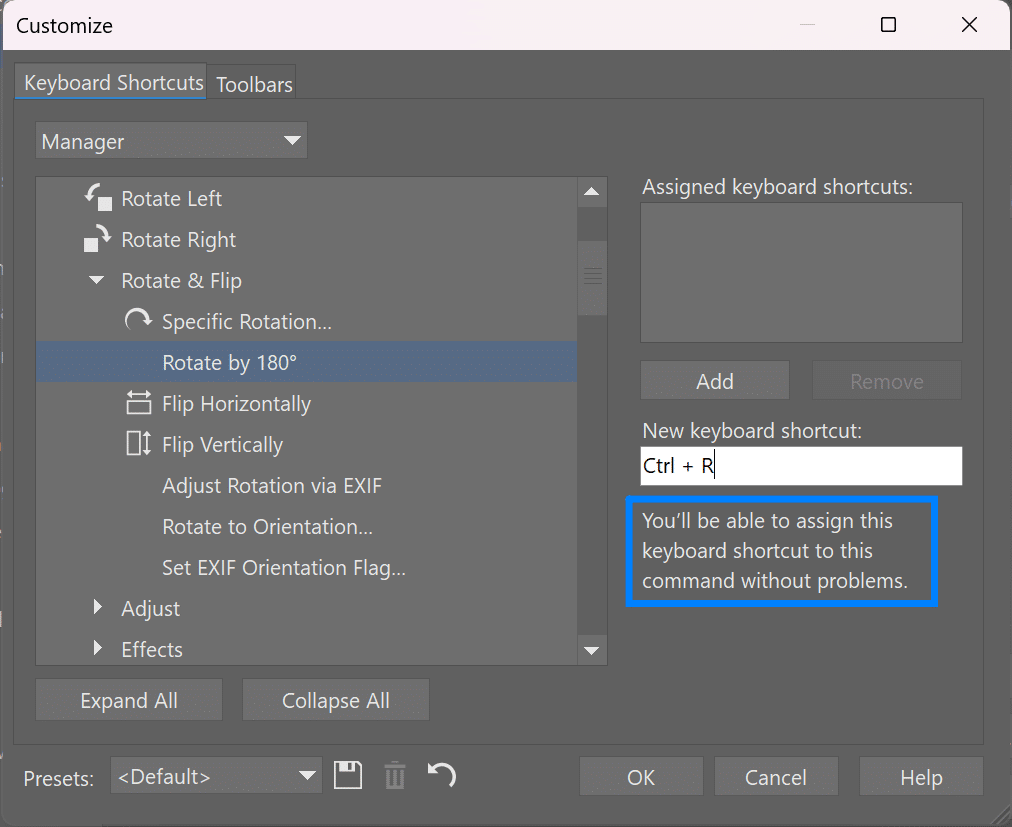
After selecting a module, the available commands are displayed on the left side. Click the desired command, and on the right side, you can see whether it already has an assigned keyboard shortcut. If the defined shortcut doesn’t suit you, you can remove it and add your own.
You don’t have to worry about duplicate shortcuts because Zoner Studio alerts you if you choose an already existing keyboard shortcut. In this case, you need to choose a different shortcut.
If the shortcut you’ve chosen is available, click the Add button.
Make sure to save your custom settings
Save your shortcut settings and the customized toolbar layout for use in case you need to reinstall Zoner Studio or use it on another computer.
Opening integrated files in a specific module
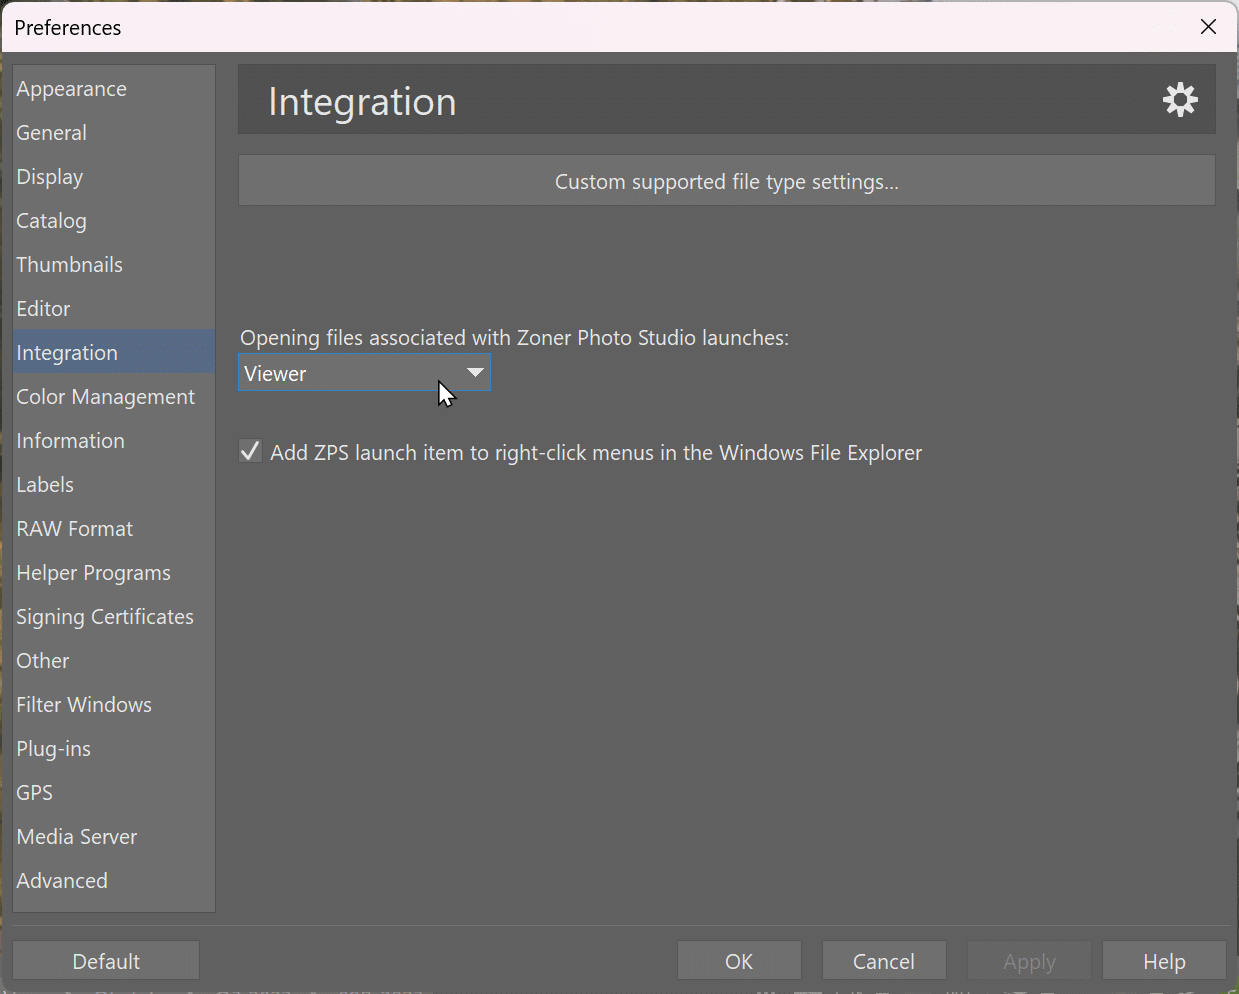
Do you have image files integrated directly in Zoner Studio? These images open in the Zoner Studio Browser by default. However, this doesn’t have to be the rule. You can open integrated files in any module. Simply adjust this in Preferences > Integration.
These are just some of the customization options offered by Zoner Studio. Let us know what custom settings work for you. Also, check out our video where you’ll find more tips on customizing Zoner Studio.

