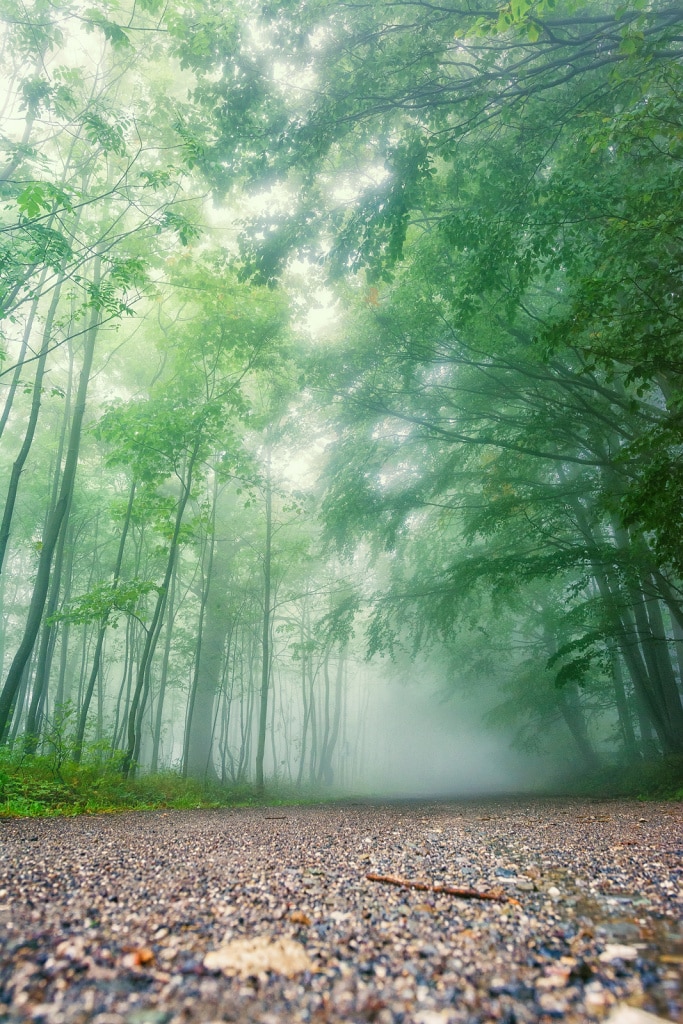
Your Step-By-Step Guide to Photographing and Editing Foggy Landscapes
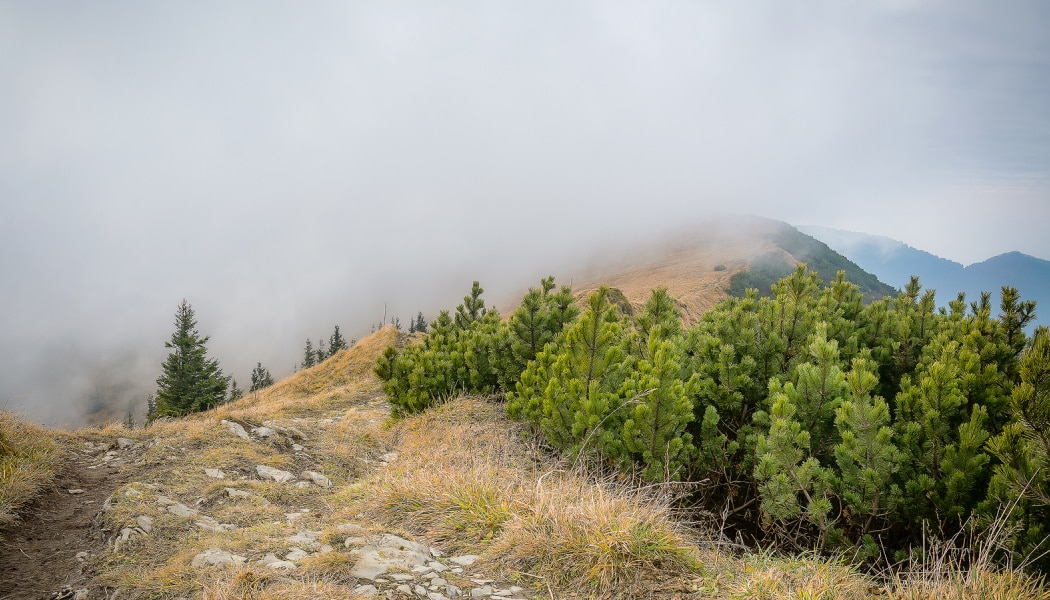
It’s easy to get addicted to taking pictures in the great outdoors. That’s why it isn’t unusual for a photographer to be drawn to shoot a landscape shrouded in fog sooner or later. But do you know how to take and edit these pictures well?
The key part is the fog itself, of course. Unfortunately it’s not always present. Luckily in the summer, the evaporation of water drops will help—this process envelops the forest in a cloud of fog.
You can also increase your chances of encountering fog by visiting a riverside or a meadow early in the morning. Those places are usually quite humid, so there’s a higher chance of capturing the evaporating dew.
Taking these pictures is more fun in the colder months, with their temperature inversions and traditional fogginess, complemented by colorful leaves. Once the leaves have fallen away, it pays to wait for the December frosts. Thanks to the combination of very humid air and freezing weather with inversions, the frosty forests transform into fairytale landscapes.
You can shoot these photos with your phone, but digital cameras work better, since not all phones let you use fully manual settings or save to RAW. And both of those things are quite useful for photos of fog. So prepare a DSLR or mirrorless camera that can handle any exposure adjustments you might make.
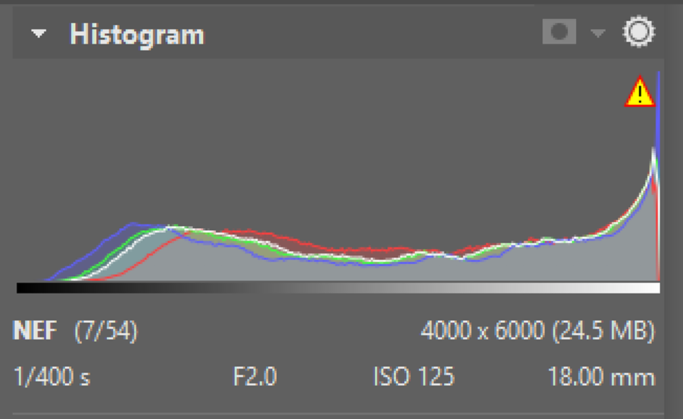
Don’t be afraid to slightly overexpose the photos you take in the fog. They might seem full of just plain white, but the RAW format takes in more data than you might think. And since you’re basically using the ETTR (Exposing to the Right) shooting technique, the photos will be easier to develop than underexposed ones.
Editing the Photos in Zoner Studio
Start up Zoner Studio and select a foggy photo that you want to edit. Then open it in the Develop module.
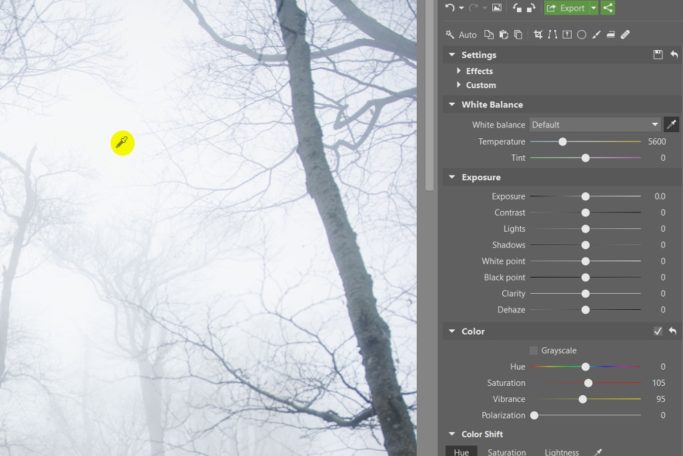
First adjust the White balance using the eyedropper. To get the best results, click right into the fog. To give the picture a colder or warmer feel, click warmer or colder parts of the fog.
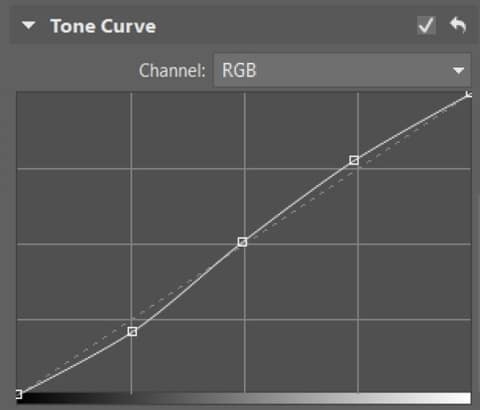
Then go to the Tone curve controls and move points on the curve to adjust the fog’s lightness and the picture’s contrast.
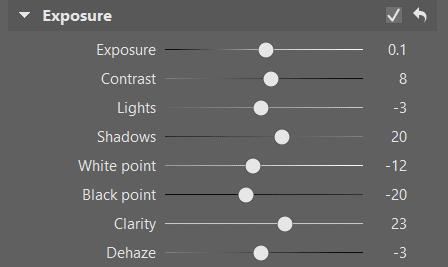
Now fine-tune the details in the Exposure panel. If you used ETTR, you’ll now want to reduce the exposure a bit. You’ll also want to adjust some other values, such as Contrast, Black point, and Clarity. Don’t forget the Dehaze function when you’re editing foggy pictures. With its help you can actually add more fog—or suppress it if the picture seems too misty.
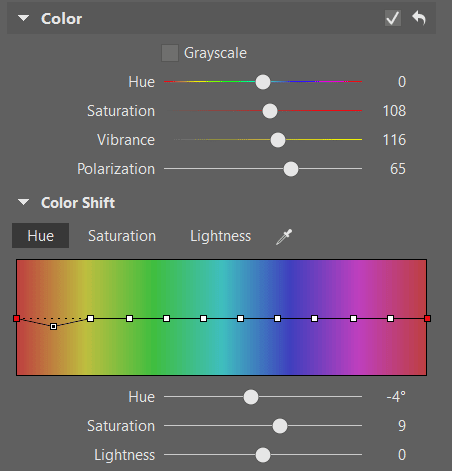
Don’t forget to also adjust the colors using the Color panel and the Color Shift group. For example you can adjust the colors of autumn leaves to better fit your ideal image. Then fix the sharpness of the picture in the Sharpness panel.
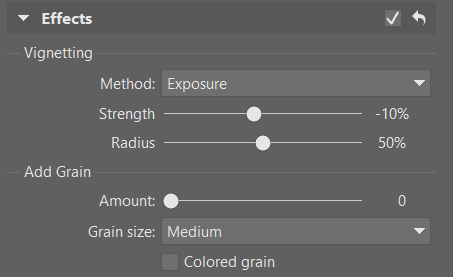
You can add Vignetting to make the photo more dramatic. It’s in the Effects panel. Besides adding drama, it also points the observer towards the picture’s subject.
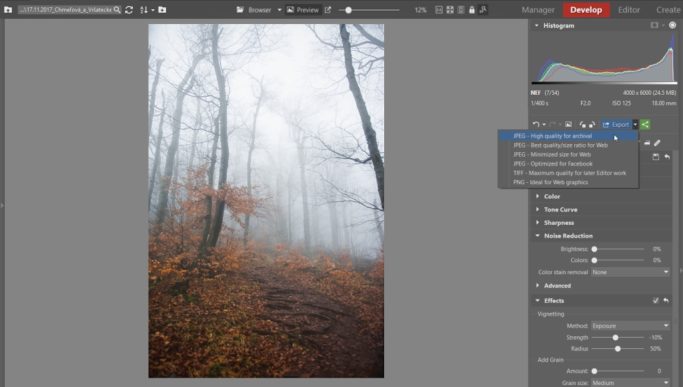
Once you’re happy with the photo, export it.
Remember:
- There’s a higher chance of seeing fog in the early morning.
- You can take photos of impressive details and foggy roads in a forest after the rain.
- It’s better to slightly over-expose photos of fog so that your pictures come out a bit light.
- Make good use of light filtering through the fog.
- You can be on the lookout for spots to photograph fog even on days that aren’t foggy.
- Data on humidity and on whether or not you can expect weather inversions, and fog is easily available via mobile apps.
- When you’re editing a photo of a foggy landscape, the Dehaze function is very handy, since it can emphasize the fog or suppress it.
- You should also adjust other factors such as Exposure, Contrast, and White Balance.
You too can take advantage of foggy landscapes. Take mysterious foggy photos and try editing them based on your own imagination. Just download Zoner Studio and you can start editing—the first 7 days are free.
