HDR: Not Just for Other People
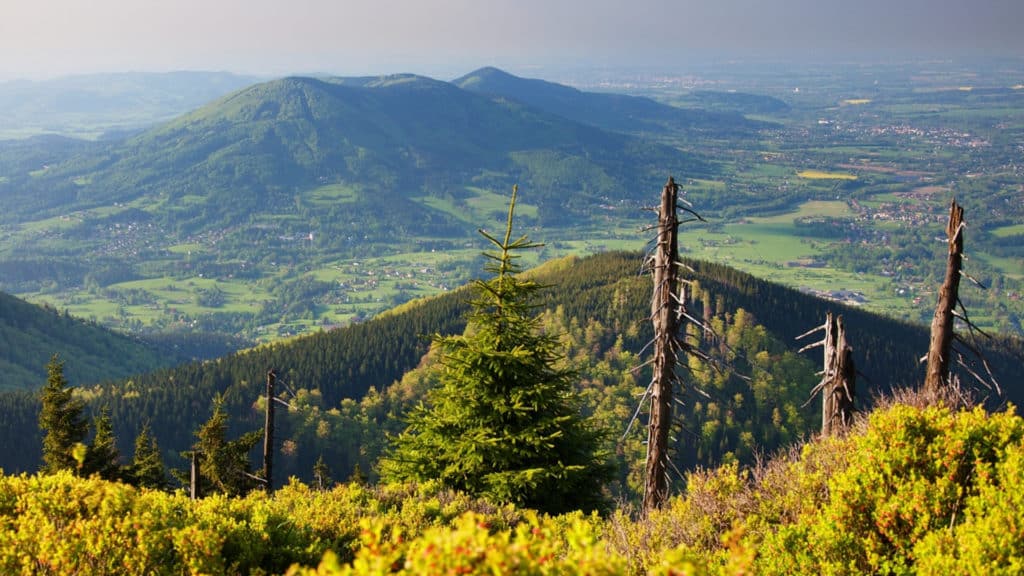
If you’ve ever done landscape photography, then you know the situation where your sensor’s dynamic range isn’t big enough for the dynamic range of the scene. In plain English: you can only get detail in the dark tones if you’re willing to sacrifice it in the light tones—in other words, to accept a washed-out sky—or vice versa: detailed bright tones at the cost of dark tones that all blend into pure black. There’s a solution: HDR.
There are multiple ways to grapple with a large difference between the bright and dark tones in a scene. Some photographers use gradient filters, but those can be fairly expensive, are easily scratched, and can be frustrating to work with. (The Cokin system is a major offender here.) The other option is to make use of HDR. And that’s the subject of this article.
What’s HDR? How Do I Do It?
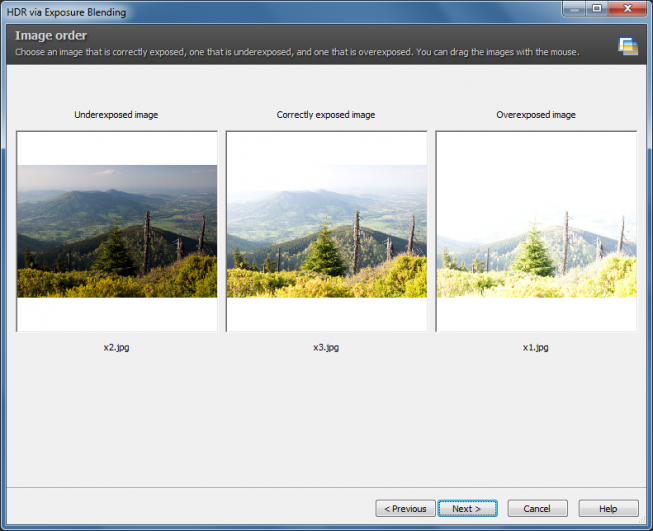
HDR is short for High Dynamic Range. HDR pictures are created by combining (typically) three pictures, with one of them underexposed enough to preserve detail in the light tones, one overexposed enough to preserve detail in the dark tones, and the third one exposed “correctly”—i.e. in the middle. These three pictures are then combined into one picture that, as a result, is fully detailed throughout. For me personally, the following approach has proved itself in practice, and I can recommend it to you with a clean conscience:
1. Place your camera on a tripod!
2. Use your camera’s bracketing function (so that it takes multiple pictures with different exposures). Usually you’ll be able to set the amount of difference in EV between shots—that is, how much darker or lighter each one will be. Since you want three exposures, your settings may look like this: first picture with a middle exposure, the next one at +1 EV, and the last one at -1 EV.
Note: As for the settings on your particular camera, I’ll have to ask you to consult your camera’s manual—every brand and even every camera has different ways to adjust settings.

3. So—the ideal route is to take three pictures with differing exposures. Personally, I use a combination of bracketing and a self-timer. Why? With this combination, one press of the camera trigger gives me a delay set by the self-timer, and then three shots taken right after each other.
If I had to press the trigger three times myself, I might jostle the camera, and then the shots wouldn’t line up perfectly against each other. I could also solve this with a remote trigger of course, but this route is more elegant and effective, and doesn’t demand an extra investment. If you’ll be using long exposures or long lenses, and your camera offers a mirror lock-up function, then go with that as well. It will save you from camera shake, and save your pictures from blurring.
Note: Don’t forget to turn off image stabilization. This is because, if you have your camera on a tripod, then stabilization can actually make your pictures blurrier, not sharper. Also, on my Nikon with its 18–105 lens for example, stabilization makes my photos “shifted.” As if someone moved the tripod between each shot. And that’s a huge problem for HDR.
So—you’ve done all this, and now you have three pictures at different exposures, your camera was stable because it was on a tripod, and thanks to bracketing and a self-timer, you didn’t have to touch it during the shots. What Now? If you’ve stuck to the approach above, then what follows will be pleasant and easy work. For this reason alone, you shouldn’t head out to take source photos for HDR without a tripod in tow.
Creating HDR in Zoner Studio
Start Zoner Studio and, in the Manager module (the one Zoner starts up in), select your three source pictures in the Browser listing.. If you shoot to RAW (which I can only recommend), then convert your RAWs to TIFFs and use the TIFFs. Develop the RAWs straight, untouched. Just take care to ensure that the white balance is the same on all three photos.
Then in Zoner’s Create menu, use HDR via Exposure Blending. This displays the exposure-blending HDR wizard. That wizard’s first step shows all currently selected pictures. If no pictures are selected, then it shows every picture in the current folder. You can actually wait until here to make your selection, but personally I prefer to do it in the Browser.
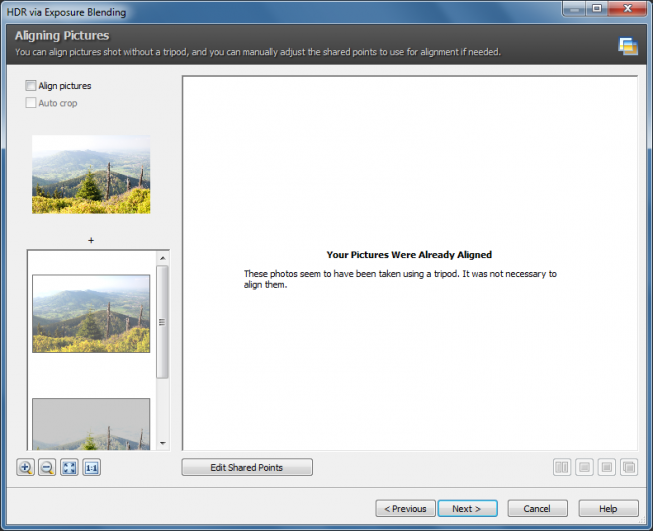
I’ll just add here that, if I know I’ve used a tripod, I turn off image alignment even when Zoner doesn’t think my pictures are aligned. I do this because in theory, Zoner could try to “align what’s already been aligned” and end up shifting the source pictures. (This happened to me once.) In any case, if you use a tripod, then alignment is completely unnecessary.
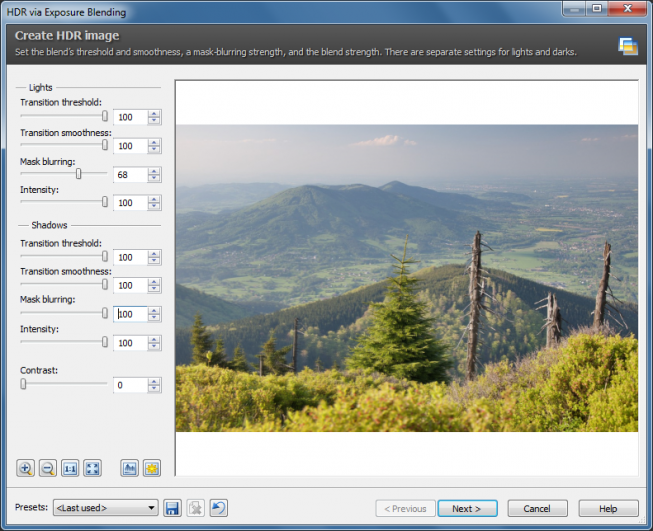
But I suppose I should give at least some advice. Do be careful with the Mask blurring and Transition smoothness settings. Used carelessly, they can make a picture look unnatural by adding, for example, dark artefacts. My other advice is to avoid changing the contrast here.
Wrapping It All Up
At this stage the picture may still not quite match your expectations. That’s fine, as long as it’s correctly exposed, with no loss of detail in the dark or light tones. Also—since you’re a photographer, not a painter—make sure that your result still looks like a photograph, and not a page from a coloring book!
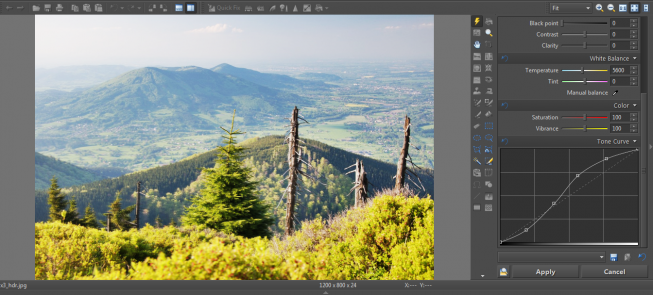
Once you’re satisfied with your settings in HDR via Exposure Blending, click Next and, if your picture is not perfect yet, go on and make a few minor edits in the Editor (using Open in Editor).
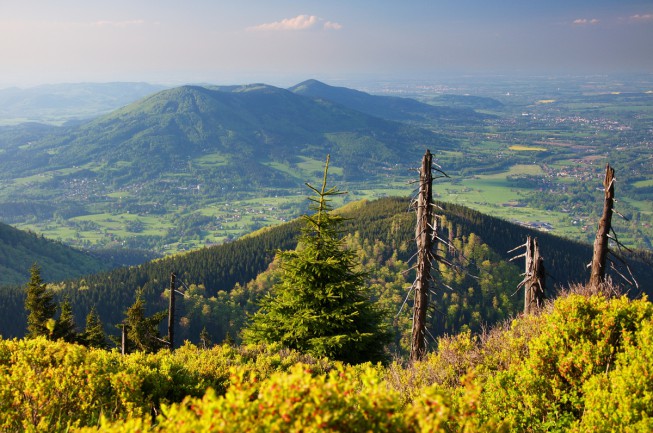
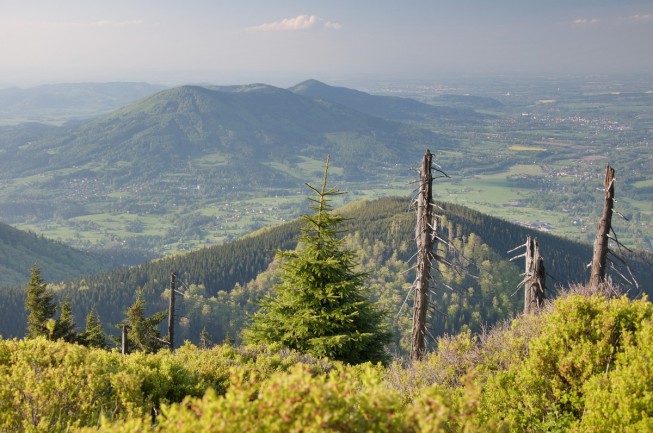
Compare the last two pictures, and you’ll clearly see that the HDR wizard is not the last step in great HDR. Only with post-editing does an HDR image really get its final “shine.”