Highlight the Wisdom of Age With HDR
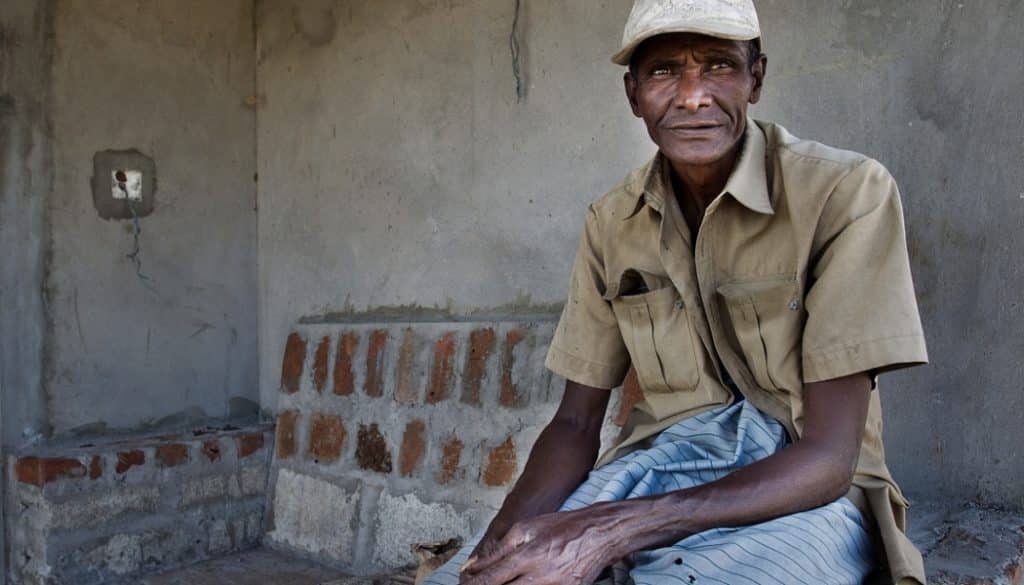
One common photographic subject—especially for portraits—is senior citizens. Portraits of seniors look good. With edits, they can look even better. In this article, we’ll look closely at one of these edits: HDR editing.
Senior citizens are an attractive subject for photography, and the photos from such shoots are rewarding. Senior citizens never fake it in photos, because they no longer need to. This guarantees that your photos are honest and that your portrait can capture real emotions and life experience.
To make a photo like this look even better, you’ll need to edit it. There are lots of ways to go—one example is Hollywood contrast. But today we’ll be looking at HDR edits instead. You can find an HDR function right inside Zoner Studio, and using it is quick and easy.
Editing the photo with HDR is attractive for several reasons. It adds detail to portraits and simultaneously deepens wrinkles, which further strengthens the portrait’s aura of experience and atmosphere. But take care not to overdo your edit, because then you can end up “aging” your subject, mixing dishonesty into the overall honesty.
First Do Basic Edits
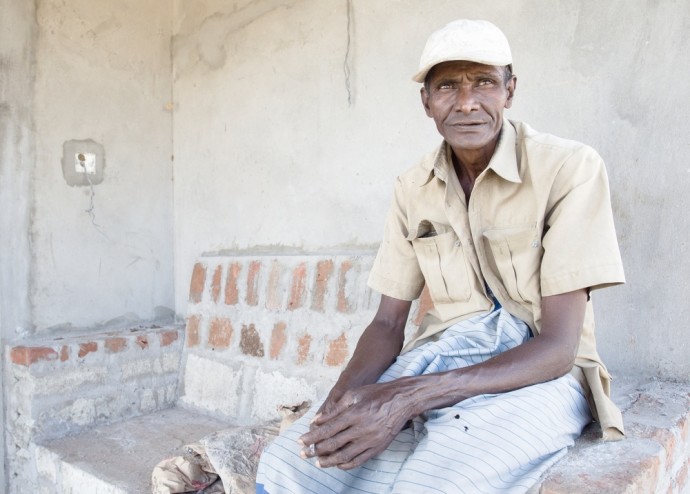
HDR works with source pictures, typically extracted from a RAW, and while you’re extracting those, you’ll want to do some basic touch-ups along the way. You can see this in our sample HDR edit—here’s the original:
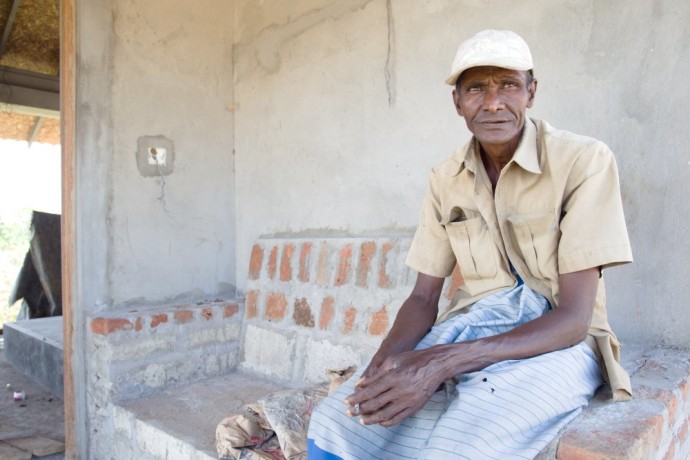
- Since we’re developing the RAW, we work in Develop, where we first crop the picture, removing some unwanted, distracting parts.
- Then we roll down the contrast by suppressing lights and shadows (we’ll be adjusting contrast again after applying HDR).
- In this picture, we also reduced the Clarity by 15 points (we’ll fine-tune other details later).
- We additionally sharpen the image with a value of 40 points and a radius of 0.8.
- We then export it to the TIFF format (with a 16-bit color depth).
Creating the Source Pictures
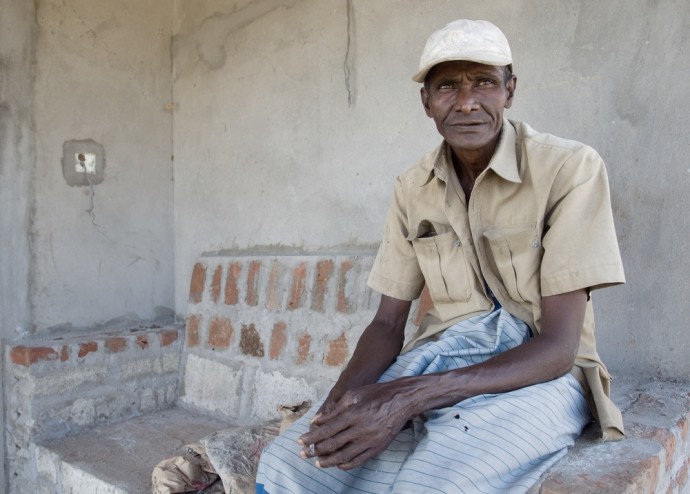
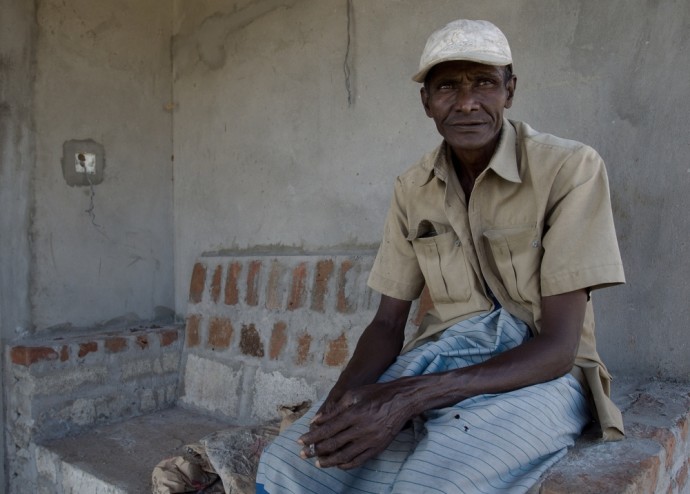
We actually export three differently exposed versions of the picture, so that we can later have Zoner Studio overlay them on each other to create the HDR. We create a normally exposed version, a “+1 EV” version to draw out detail in the shadows, and a “-1 EV” version to draw it out in the lights.
We export all three versions, giving us these three pictures:
Adding HDR
Now we just need to do the HDR edit itself. We call up an HDR window using this menu item: Manager > Menu > Create > HDR via Exposure Blending.
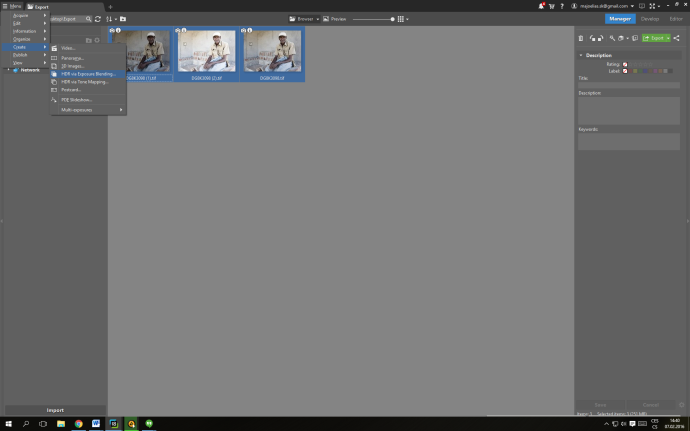
All we need to do in the different steps of the HDR wizard is to fine-tune the various HDR settings. To read up on what the different settings do, read our article on creating HDR images using Zoner Studio. That article also includes a guide to using Zoner Studio’s other HDR method, that is, tone mapping. We’re avoiding tone mapping in our work with portraits of senior citizens because its effects are too strong.
For this kind of edit, the Exposure Blending method works better, because the man with his dark skin is in the photo against a fairly light background, causing him to fade into the picture’s darkest tones. Exposure Blending helps us to suppress those lights and draw out the man’s skin tones.
We use the following values in the Exposure Blending settings:
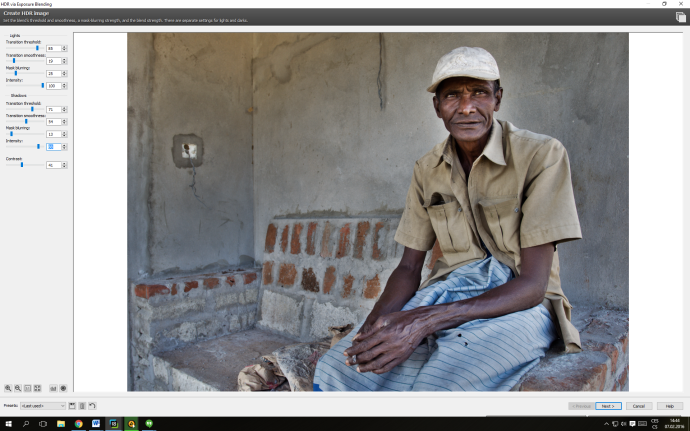
These values are good for our photo, but others might be better for yours. In your own work, aim to make each photo look good and above all to make it say something. Work with HDR carefully, to keep from crossing the boundaries of taste and ruining your photo.
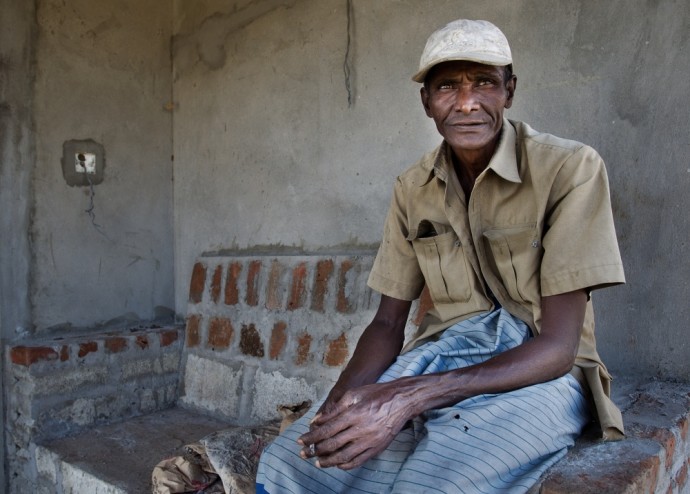
Our photo looks like this after our HDR edit:
Give Your Photos Atmosphere
We’ve used HDR to give this photo atmosphere. With a quick and simple edit, we’ve turned a rather gray and inconspicuous photo into an interesting one that draws attention. So try making edits like these to your own photos too—HDR may be what makes your pictures really shine.
Do you need to edit your product photos? Download Zoner Studio, check it out for 7 days for free and try HDR on your photos too.