Learn How to Make Circular (and Other) Photo Crops Using Layers

“This photo could really use a circular crop. And this one here an elliptical or maybe triangular one.” You may have found yourself saying something like this before. But there isn’t a way to crop photos like that on a computer… or maybe there is? Actually, you can produce a circular or elliptical crop in just a few clicks.
Even though it may seem like cropping a photo to a circle is complicated, you actually just need to be able to manage basic work with layers. Using layers, you can create even quite complex crops. And you can even crop a picture into a polygon if you really want to.
How to Make Circular and Elliptical Crops
For simple shapes like circles and ellipses, you can get by with even just one layer. It’s safer to work with two, however.
So in Zoner Studio, open the photo that you want to crop in the Editor. Then copy the layer with the picture by clicking Duplicate Layer. You’ll find it in the Layers toolbar in the right panel.
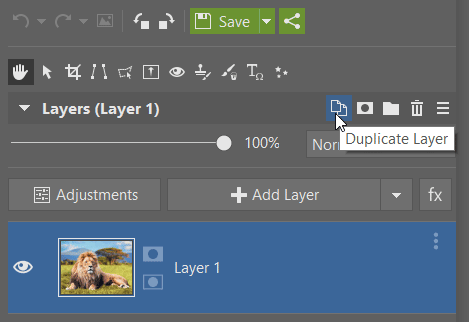
To get a better idea of the changes you’re making, hide the lower layer by clicking its eye icon. You can show the original again at any time during your edits by clicking that icon again.
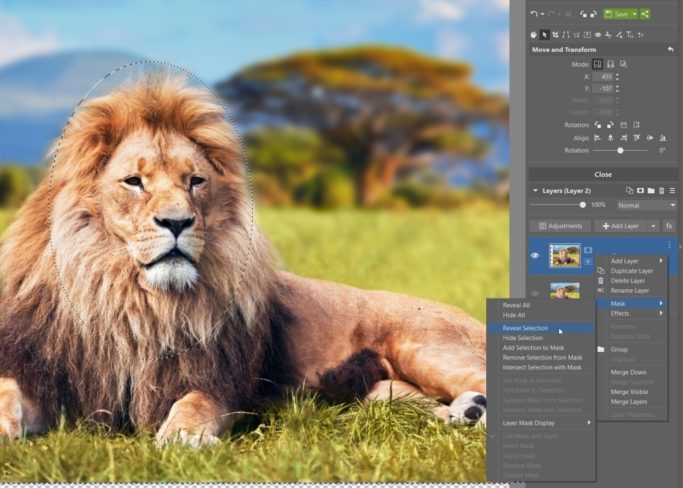
Now reach for the Selection Tools and choose Elliptical Selection. Use it to mark the part of the picture that you want to be visible in your crop.
Then right-click on the layer with your selection and use Mask > Reveal Selection in the menu that appears. And your elliptical selection is done.
A circular crop works the same way. Just hold down the Shift key while you’re creating your elliptical selection. That makes Zoner Studio turn your ellipse into a perfect circle. Hold down Shift until you’ve got the selection you want.
Sometimes after you’ve made your selection, you might find that you need to move it a little. In those cases, you can finalize things by using Move and Transform (V) to shift the image layer so that it precisely fits your selection.
Then use Crop and Rotate (C) to crop your picture with your round or elliptical crop, so that the visible part fills in the part of the picture you want. That gets rid of empty space in the picture.
Wrap up by saving the photo to PNG format. That way, the area around the circular crop will truly be transparent. If you saved the picture to JPG, it would replace the transparent area with white instead.

How to Do a Triangular Crop
In Zoner Studio, you can also do more complicated crops. But you’ll need some work with layers for this.
First open the photo you want in the Editor, and click Duplicate Layer to copy it. Then hide the bottom layer.
Click the small white triangle by the Add Layer button, and then in the menu that this shows, click Place Shape. This makes a small white rectangle appear on the picture. Meanwhile, controls for choosing the type of shape and for its settings are shown in the right panel.
Now set the Shape for the crop. For example, a triangle. Zoner Studio then automatically changes the placed shape into a triangle.
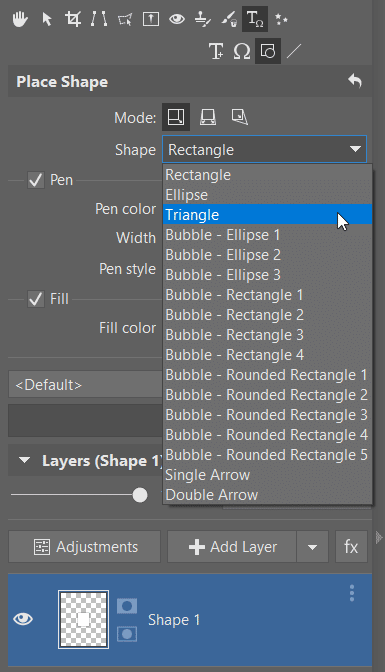
Now just adjust its size, placement, and exact shape.
It’s a matter of 4 steps.
- Click and drag the shape box’s anchor points to set the size of the whole triangle.
- Then use the triangle’s own anchor points to adjust the lengths of the individual sides and the positions of their corners.
- Then click in the shape box and drag it to where you want it.
- To rotate the shape, click next to the shape box and drag in any direction. That rotates the shape in the corresponding direction.
Once you’re satisfied with the shape’s size and location, use the controls on the right to set its fill color to black. Then click Apply to confirm it all.
Then hide the layer with the shape and go to the Selection Tools. Then activate the Magic Wand (W) and click on the black triangle. That creates a triangular selection.
Then just:
- hide the layer with the shape you’ve placed,
- show the layer with the picture,
- right-click on it,
- and use Mask>Reveal Selection.
And your triangular or other crop is done.
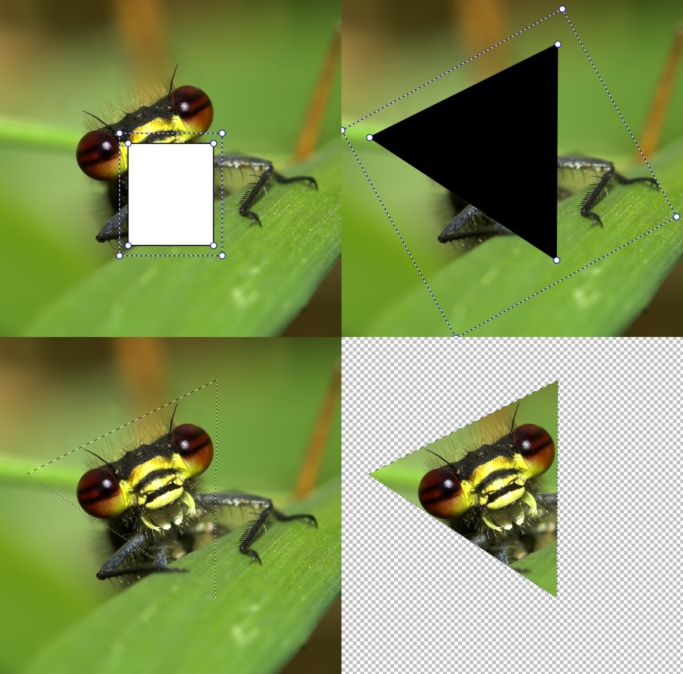
Now just save the picture. Ideally, you’ll want to save it to .Zoner Studio format. That way you can go back and re-adjust everything at any time. Wrap up by also saving the photo to PNG format.
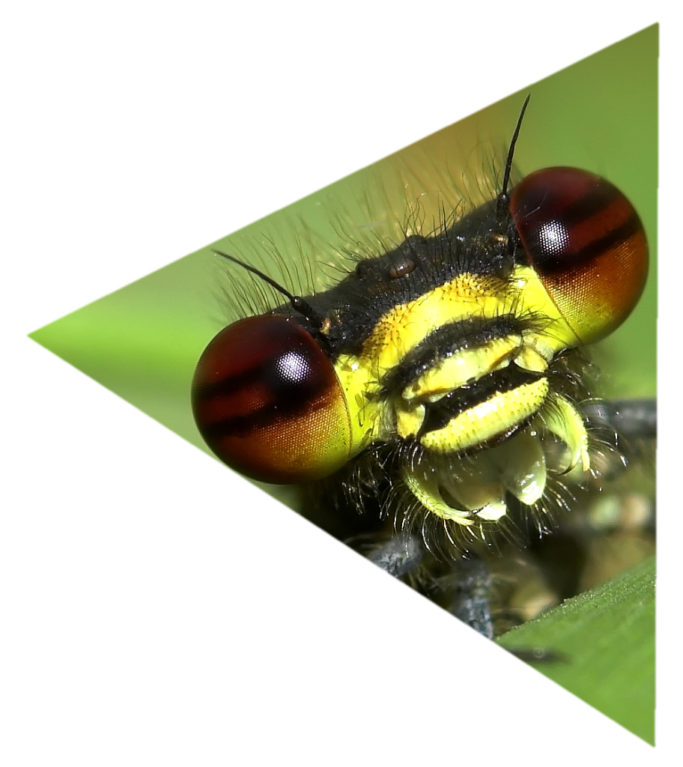
You can also produce things like a diamond crop or a crop in the shape of a tilted ellipse. Just place an ellipse or a rectangle instead of a triangle, and rotate them as you need.
More Complicated Crops Are Fine Too
You can prepare more complicated crops in a similar way. You just need to combine multiple shapes. You’ll be working with each of them in a separate layer.
The basic workflow is the same as for the case above. So duplicate the layer with the picture and add the layer with the new shape.
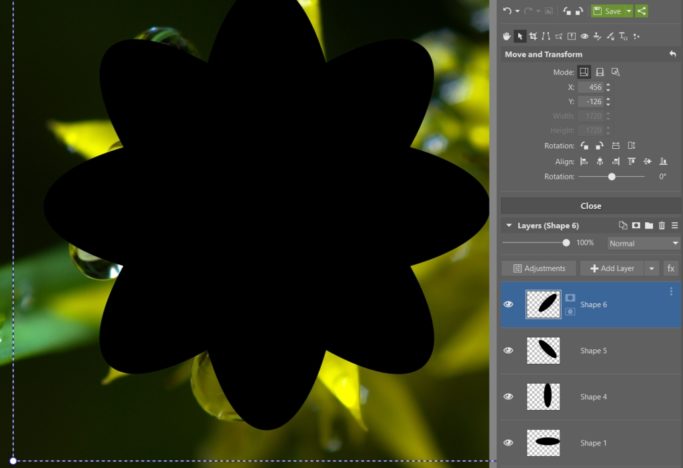
Choose each shape based on what kind of crop you want to make. For example to create a flower-shaped crop, use ellipses. Use the anchor points to fine-tune the shape, and then give it a black fill.
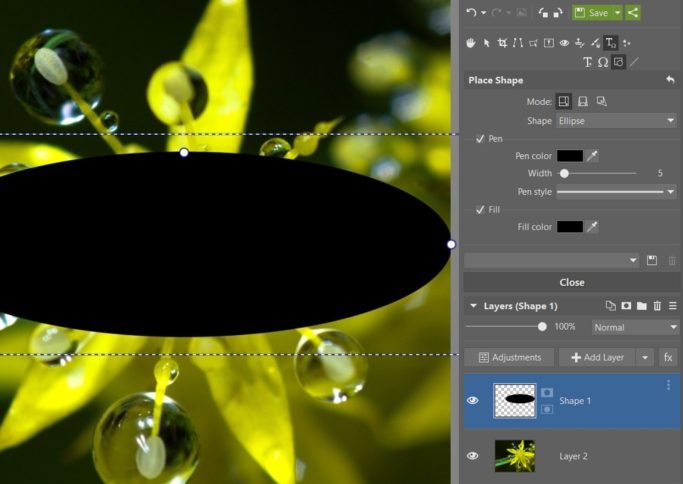
Then just copy the layer with the shape. Visit the duplicate layer, activate Move and Transform, and then rotate the layer by 90°.
Duplicate the layer again. This time, rotate it by 45°. Wrap up by creating a fourth layer, and rotate it again by 90°.
Then just:
- hide the layer with the picture
- use the Magic Wand to select the black-colored area,
- turn off the layers with the shapes you placed,
- turn on the layer with the picture,
- and use Mask>Reveal Selection.
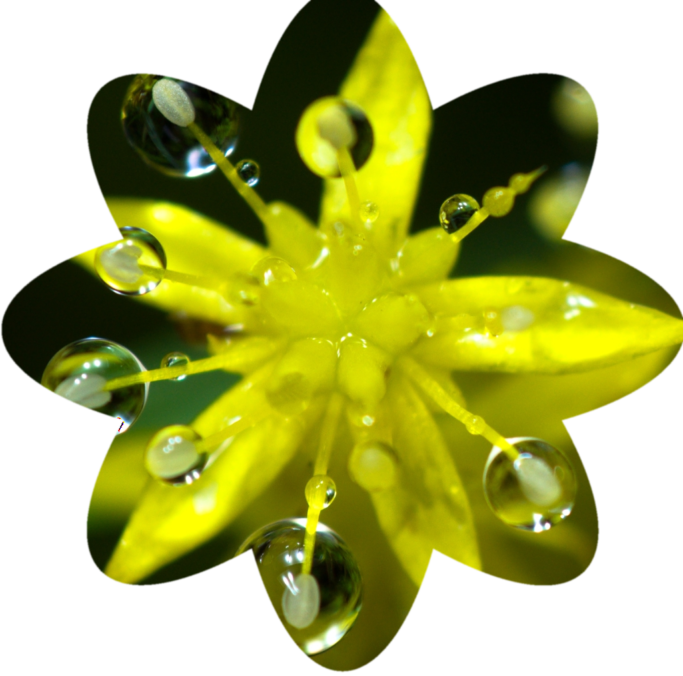
The only limits to the kinds of crops you can create are your skill and your imagination. Combining various shapes gives you unlimited options here. But don’t forget to save your finished crop to the PNG format. That’s the only way to preserve the transparency of the parts that you removed from the original image.
Try circular, elliptical, and other non-traditional crops for your photos. Just download Zoner Studio and check them out during your 30 free days!
