Learn to Use a Polarizing Filter
If you often photograph landscapes, then a polarizing filter is an important accessory. When you start using one, the difference will be visible right away. This article will explain the principles behind this filter, and what you can expect from it. Every photographer should know a bit about these filters: they’re good for more than just landscapes!
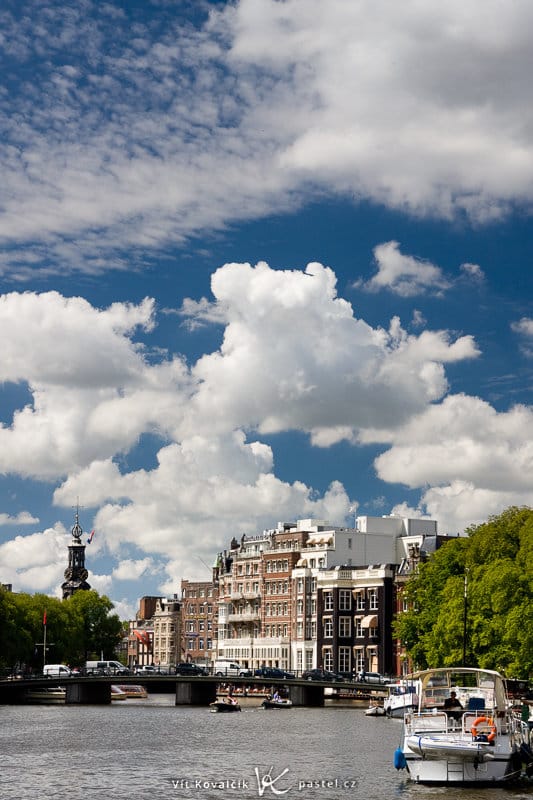
You may have already heard that polarizing filters use some sort of magic to get more saturated colors, the kind of colors you see below.

But you can’t really use them without a little knowledge, so it’s good to know the principle behind them. By the end of this article, you’ll have a better idea of what is actually happening when you have a filter attached, and what you can expect from the filter.
And There Was Light
Light can be thought of as a particle (a photon) and as a wave. Here we’ll be more concerned with the second of those two variants. The wave motion can have some kind of unified order, and thus be polarized. Our main focus here will be linear polarization.To help imagine it, look at the pictures below, which illustrate the wave motion of light on a plane as it passes through space. It’s important to note that this plane has a certain angle; while you can’t tell vertical polarization from horizontal with your eyes, this plane is fundamental for understanding the polarization principle.

Normal light sources like the Sun or an incandescent bulb give off unpolarized light. This light does not all lie on any particular plane, and it can be viewed as a combination of a number of waves with varying polarization.
So where does linearly polarized light come from then, when a normal light source does not produce it?
It can be created from unpolarized light in various ways, most commonly by reflecting it off some sort of object. At that moment it gains a polarization roughly parallel with the surface off of which it was reflected. (This polarization can be larger or smaller based on the angle at which the light falls; for more information, Google the term “Brewster angle.”) You can think of this effect as the wave “flattening” when it hits an object.
Light waves reflect even as they hit air molecules, and so normal daylight is partially polarized.
Why a Filter?
Sometimes the reflection of the sun covers up an object’s original color. A richly green leaf that happens to be turned towards the sun gets covered in a white reflection, and the result is a bright and not very saturated color. But because this reflection can be recognized by its polarity, we can use a filter to let in all light except for this part. And that’s the whole magic. The result looks like this (the light goes from right to left):

Unpolarized light arrives from the right. It’s a chaotic mix of various waves.
The first filter (on the right) would be entirely enough—it lets only the chosen light through and discards the rest. The filter is designed so that the photographer can rotate it to set the polarization plane they need. Filters usually also have a groove on the side to indicate the current angle.
The filters almost always include a second piece of glass that “re-scatters” the polarization. This part exists mainly because of DSLRs. These contain a set of mirrors inside them that handles polarization internally, and if they receive linearly polarized light, then it can fail to pass through one of the mirrors correctly, making the camera lose focus.
Filters with this improvement are called circular polarizers (abbreviated CPL, PL-C, or PL-CIR), and actually, you can’t normally buy any other kind. Old filters without the circular part are called linear polarizing filter (Linear PL, Lin Pol, or just “PL”—careful, that last one is ambiguous). With a little searching you can still find them; at the end of the article, we’ll talk about when they can be useful.

In Practice, In the Wild
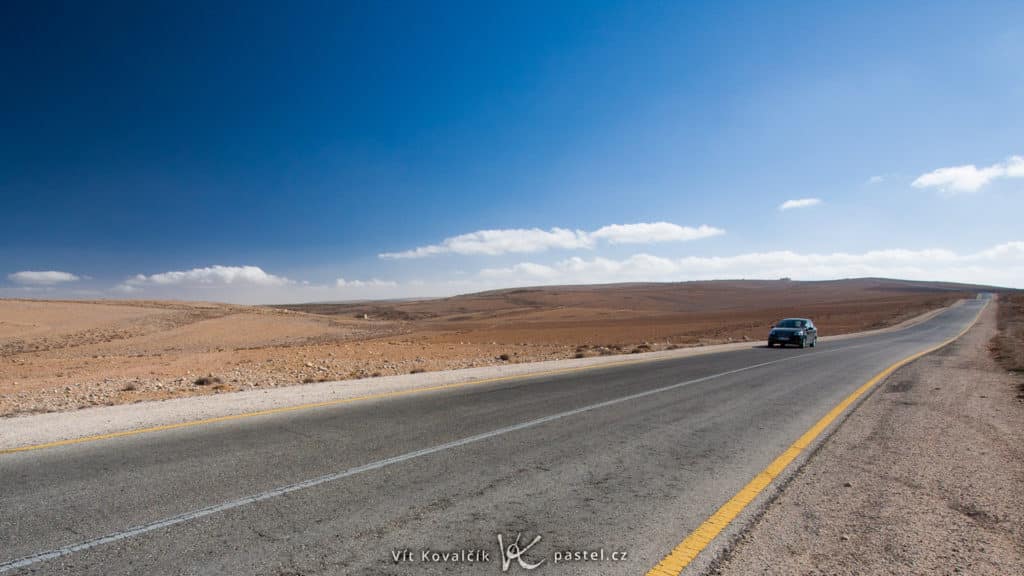
Polarizing filters have perhaps the most noticeable effect when you’re photographing a sky with clouds, or the green of nature. The effect is strongest when the sun is setting or rising and whenever the light is coming perpendicularly from the right or the left (i.e. your camera is pointing neither towards the sun nor in the direction of the sun’s rays).
Below is an example of a correctly-used filter on a small tele focus:
Ultrawide lenses are a problem here. Because the effect of polarization is different for different angles of the sun, when the camera has a horizontal range of over 90 degrees, the effect is very uneven, and the sky takes on an unnatural color gradient from light blue almost all the way to black:

The solution is to either not use a filter, to capture a smaller part of the sky, or use computer editing to fix the problem afterwards.
If it’s a cloudy day, then there’s no point using a polarizing filter at all. The clouds diffuse light so that it comes from all directions, and there is no particular plane on which reflections can occur.
For More Than The Outdoors
Besides adding saturation to colors in landscape photography, this filter can also remove unwanted reflections elsewhere, on anything from windows, to water surfaces, to other surfaces. But note that some surfaces, especially metal surfaces, do not polarize reflected light.

LCD screens also emit linearly polarized light, so with a correctly rotated filter, you can darken them completely.

What To Watch Out For
Filter quality varies by brand and by technology used. Some filters may slightly tint the image (which can be corrected with white balance), add lens flare, or blur the image (which is difficult to correct). The major names are the best, but not a guarantee in themselves. Read reviews before buying. One of the most thorough comparisons of polarizing lenses ever came out five years ago here, and it contains examples where you can easily see the difference between using the best filter and then the worst (Marumi, the second from the bottom).
For some lenses you may need to use the “slim version” of the filter, because the normal version cuts into the corners of the picture. This is mainly a problem with wide-angle lenses.

In higher-budget lenses, you’ll appreciate the fact that that the frontmost part, on which the filter is mounted, does not rotate when you’re focusing. If the front part of your lens rotates, then to get the best effect, during your shots you’ll need to focus first and only then rotate the filter.
By definition when you are using these filters, you are stopping some of the light. That means that less light will reach the sensor (about half, although sometimes it’s only a quarter). Thus you’ll need to use longer exposures or set a higher ISO.
One advantage, on the other hand, is that outdoors, the filter mostly darkens the brightest parts of the scene, so the overall brightness range is smaller and easier to capture.
A Trick in Closing
If you have two polarizing filters and one of them is linear, then you can attach both of them to the lens. (Put the linear one farther from the camera body.) When they are lined up, they let through just as much light as a single filter. When they are perpendicular to each other, they hardly let any light through at all.
You can regulate how much light the filters let through overall by changing their relative angles. You now have a filter with variable darkening—a variable ND (neutral density) filter. Some manufacturers sell a compact version of this setup, under this same designation (variable ND).
These are useful when you need to take a long exposure during the day, for example a multiple-second exposure to blur water or an exposure of several hundredths of a second to maintain X-sync time when shooting with a flash.
Polarizing filters aren’t made for every situation, but they can sometimes be very useful. May your shots with them turn out great!