Going With Or Against the Flow
If you let the sunshine and fine temperatures of the autumn days lure you out, and you don’t forget your camera at home, you can take some fairly interesting pictures. Naturally there are lots of ways to capture the world’s natural and manmade joys, but in today’s article, our focus will be narrow: capturing waterfalls and water fountains. In short, capturing water in motion… and of course the stumbling blocks you may encounter along the way.
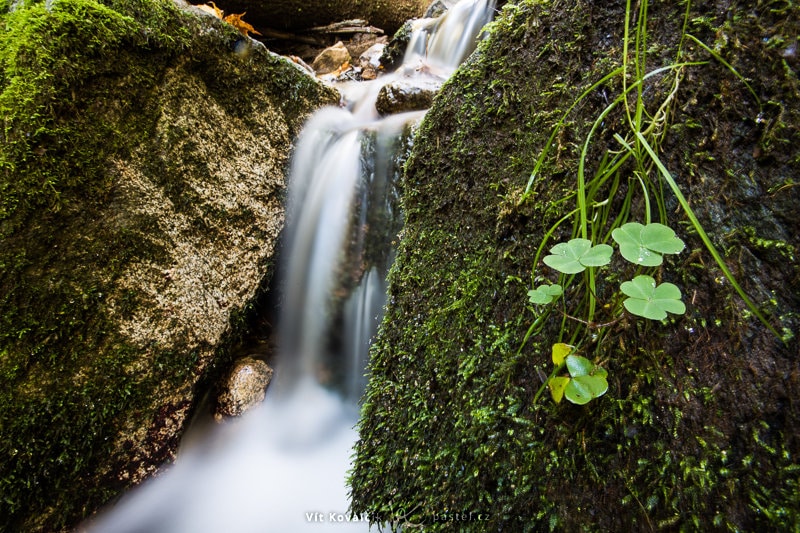
River and stream photos generally don’t catch eyes just by showing smooth, calm waters. They impress through a special shape for the flow or (above all) by showing off waterfalls, where the water is rapidly churning over rocks and various barriers. In this article we’ll stick to a small scale, and experiment mostly with streams.
Three Legs, Or No Photo
If you haven’t already decided on a stream, picking a suitable place tends to be the biggest problem. Personally I use a simple trick: just open an online hiking map (if they have those in your area) and search for small streams that quickly cross several lines of elevation. These are the spots where there’s the greatest chance of there being small waterfalls.
It’s a well-known fact that while photographing flowing water, you have to use a tripod. Ideally one that won’t mind if you give it a foot bath. When using a tripod, it’s important to turn off any stabilization, inside either the lens or the whole camera. If you don’t do this, vibrations from the stabilizer can transfer into the tripod and vice versa, so paradoxically you’ll get a blurrier shot than without stabilization.

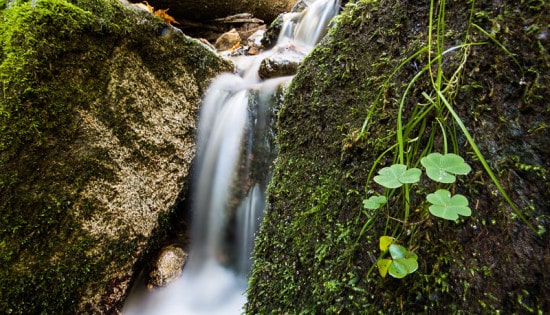
Elegant blurring of the water is a product of exposure times in the seconds or dozens of seconds—depending on taste and the water’s flow.
There’s more than one way to get such long times. The simplest is to set the lowest sensitivity (typically ISO 100) and a high F-number, usually F22 and up. But that means you can’t focus on anything in particular, because the photo will be sharp practically throughout. So what should you do when you want to experiment or emphasize a certain point?
Light Lite
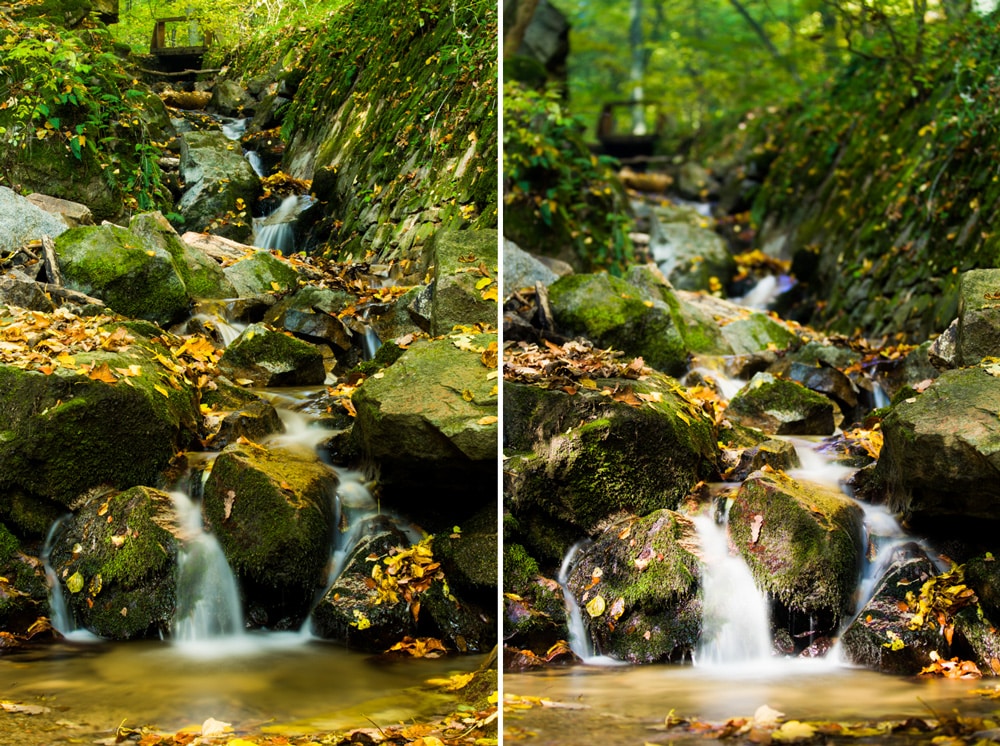
Here it’s time for plans B and C. Plan B is to use a normal ND filter. That’s a neutral gray lens that darkens the area enough that you won’t have to instead darken it using a higher F-number. The filters are usually produced in various levels each with a fixed strength. However, there is also plan C: variable ND filters. These are pairs of polarizing filters laid against each other, whose final darkness changes as you manually rotate them.
If you own two polarizing filters, you can place them together to create your own variable ND. However the far lens has to be a linear polarizer (PL) and not the usual circular type (CPL), which means that you’ll still probably have to acquire one of those for this use.
Whether you buy your ND filter or are lucky enough to be able to craft it, it opens up some great possibilities. The normal fixed ND filters are e.g. ND4 or ND8. An ND8 only lets an eighth of the light through (8x darkening, which is also 3 EV values). A variable filter can give you even darkening equaling an ND128, which you’d be hard pressed to buy.
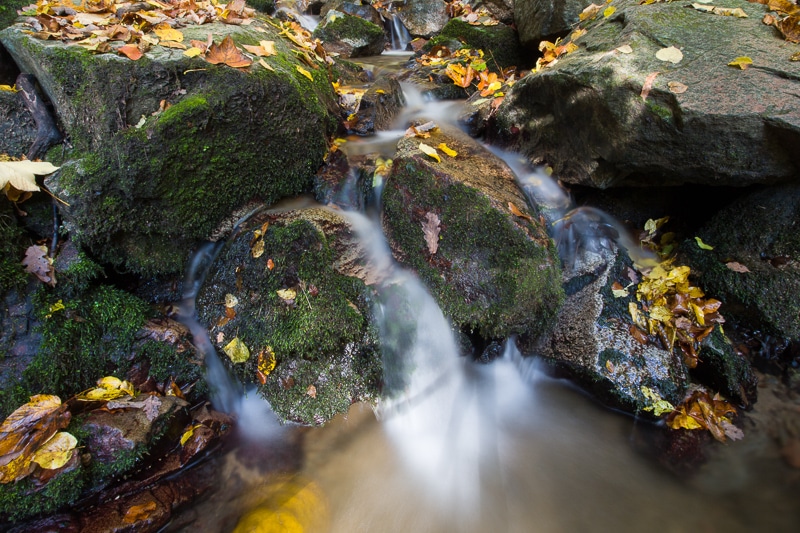
During very long exposures, pay attention to where the tripod’s shadow is. It’s not visible on wild water, but still water turns from transparent to milky, and can carry the shadow.
More Than Just Rivers
The same photographic principles also apply for fountains in cities. For these you can also let the water blur for greater effect.

It’s usually easier to take pictures in the city: you usually don’t need waterproof boots, or a cloth to wipe water off the lens. But there are exceptions, when you’re trying to get very close for better composition:

You use practically the same tools for fountain pictures as for the awkward photography process in nature. Including some we didn’t mention above. Like the LiveView function, useful because of a too-distant viewfinder. (It drains the battery, so bring an extra.) The electronic level in the camera also becomes important here, because the complex angles involved make it hard to guess the right camera tilt. A timer or remote trigger is also handy. By pressing the trigger directly on the camera, you may unintentionally jostle the camera.
But more important than these details is to find the resolve, head out, and find the place for your shoot. Bon voyage!
There are no comments yet.