What Is a Cinemagraph and How Can You Make One?
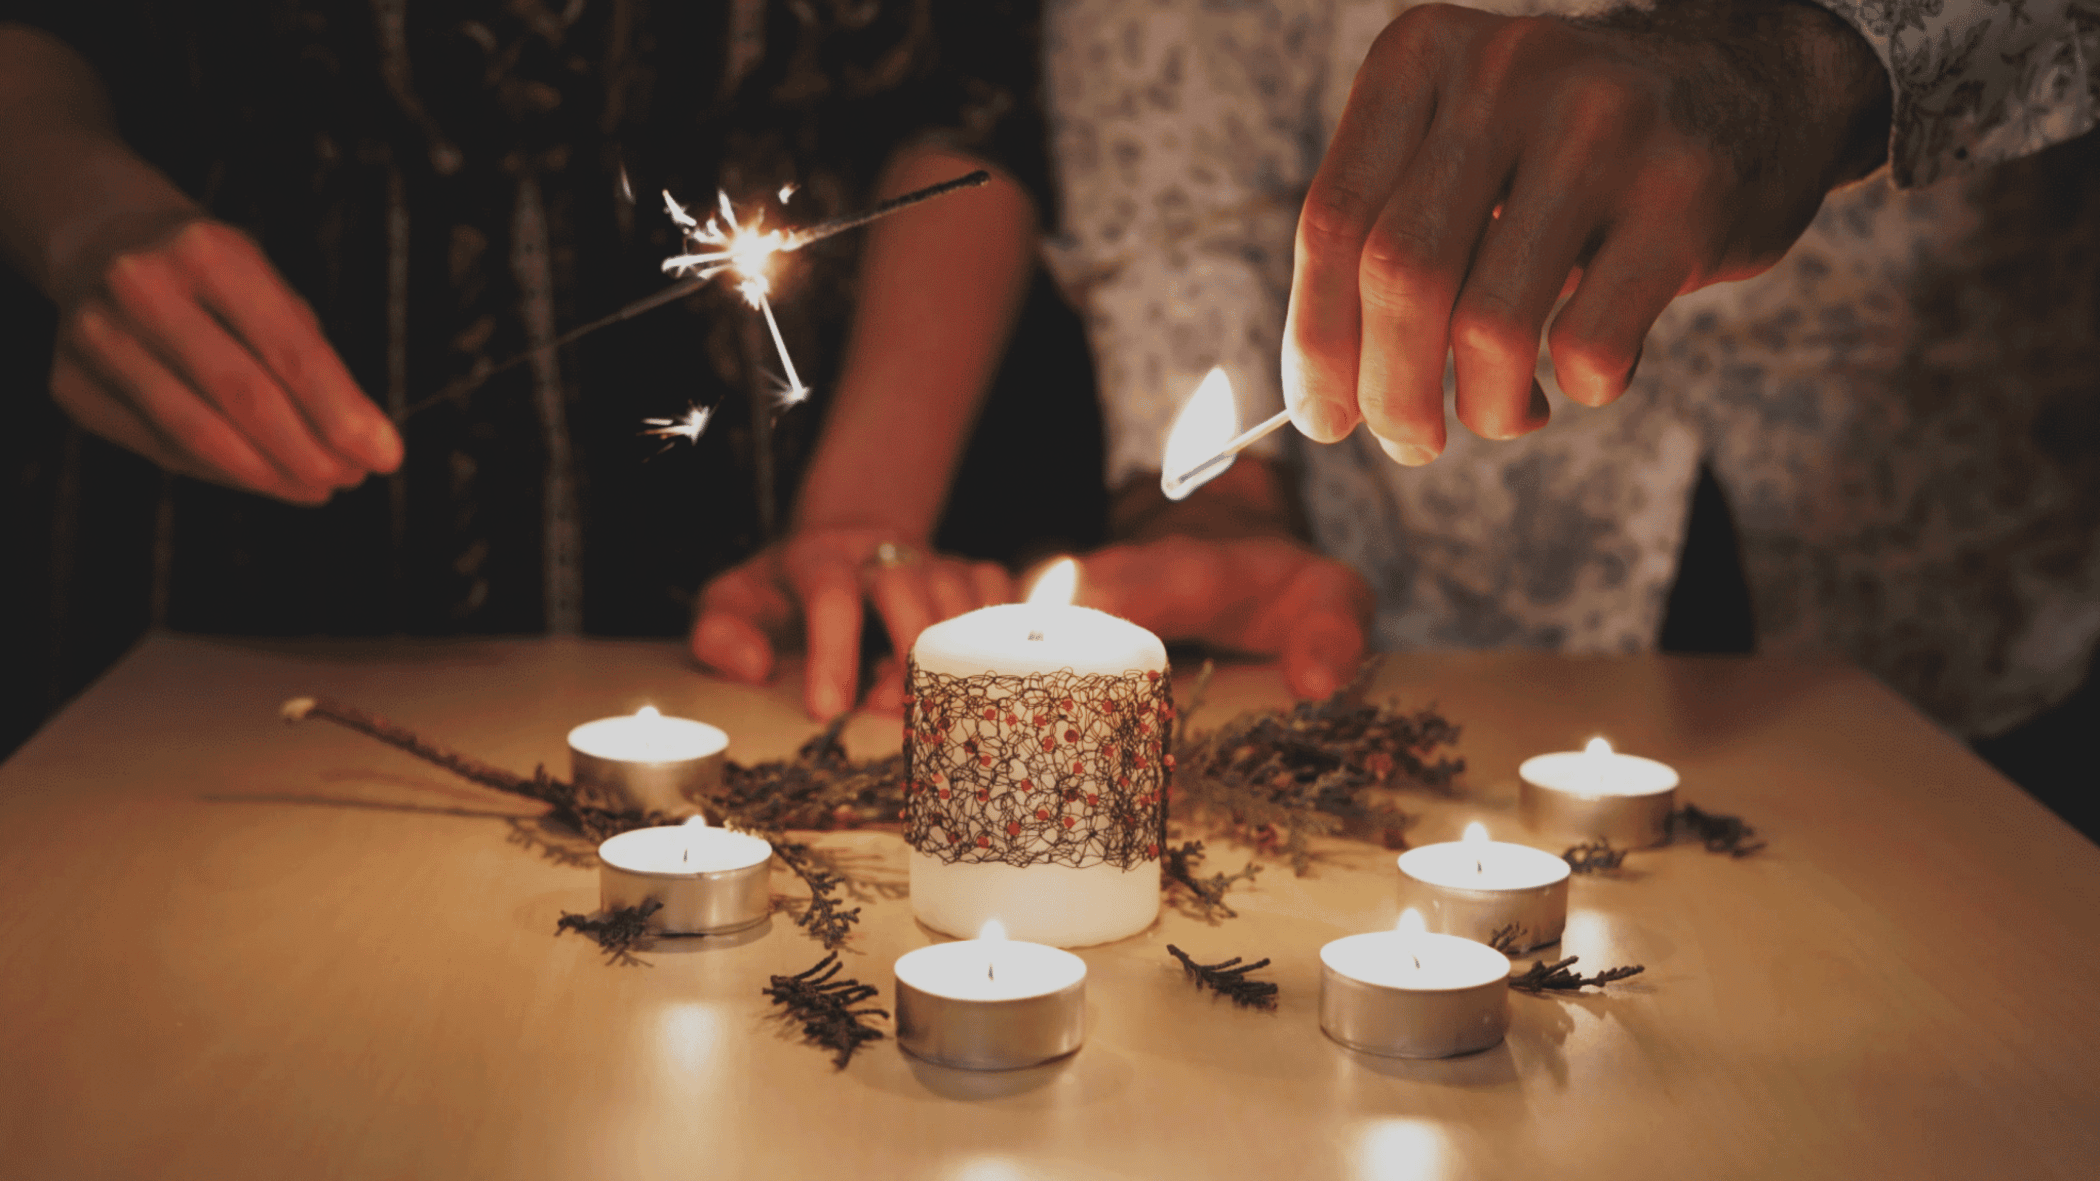
It’s not a photograph, and it’s not a video—You get the feeling you’re seeing something magical when you look at a cinemagraph. Part of the image moves like a video, but the rest is still like a photograph. Ready to add some movement and make your photos more dynamic and fun? This article is for you!
Cinemagraphs, or animated photographs, are a medium where motion takes center stage. The animation is played over and over again in a short, continuous loop. The rest of the image is still. The motion differs from video in that it transitions seamlessly into a still photograph, making the photo stand out.
Because of the moving element, cinemagraphs have gained popularity not only in the art world, but also in advertising. This is because the moving element helps keep the viewer’s attention on the photo longer. Take a look at what a cinemagraph looks like.
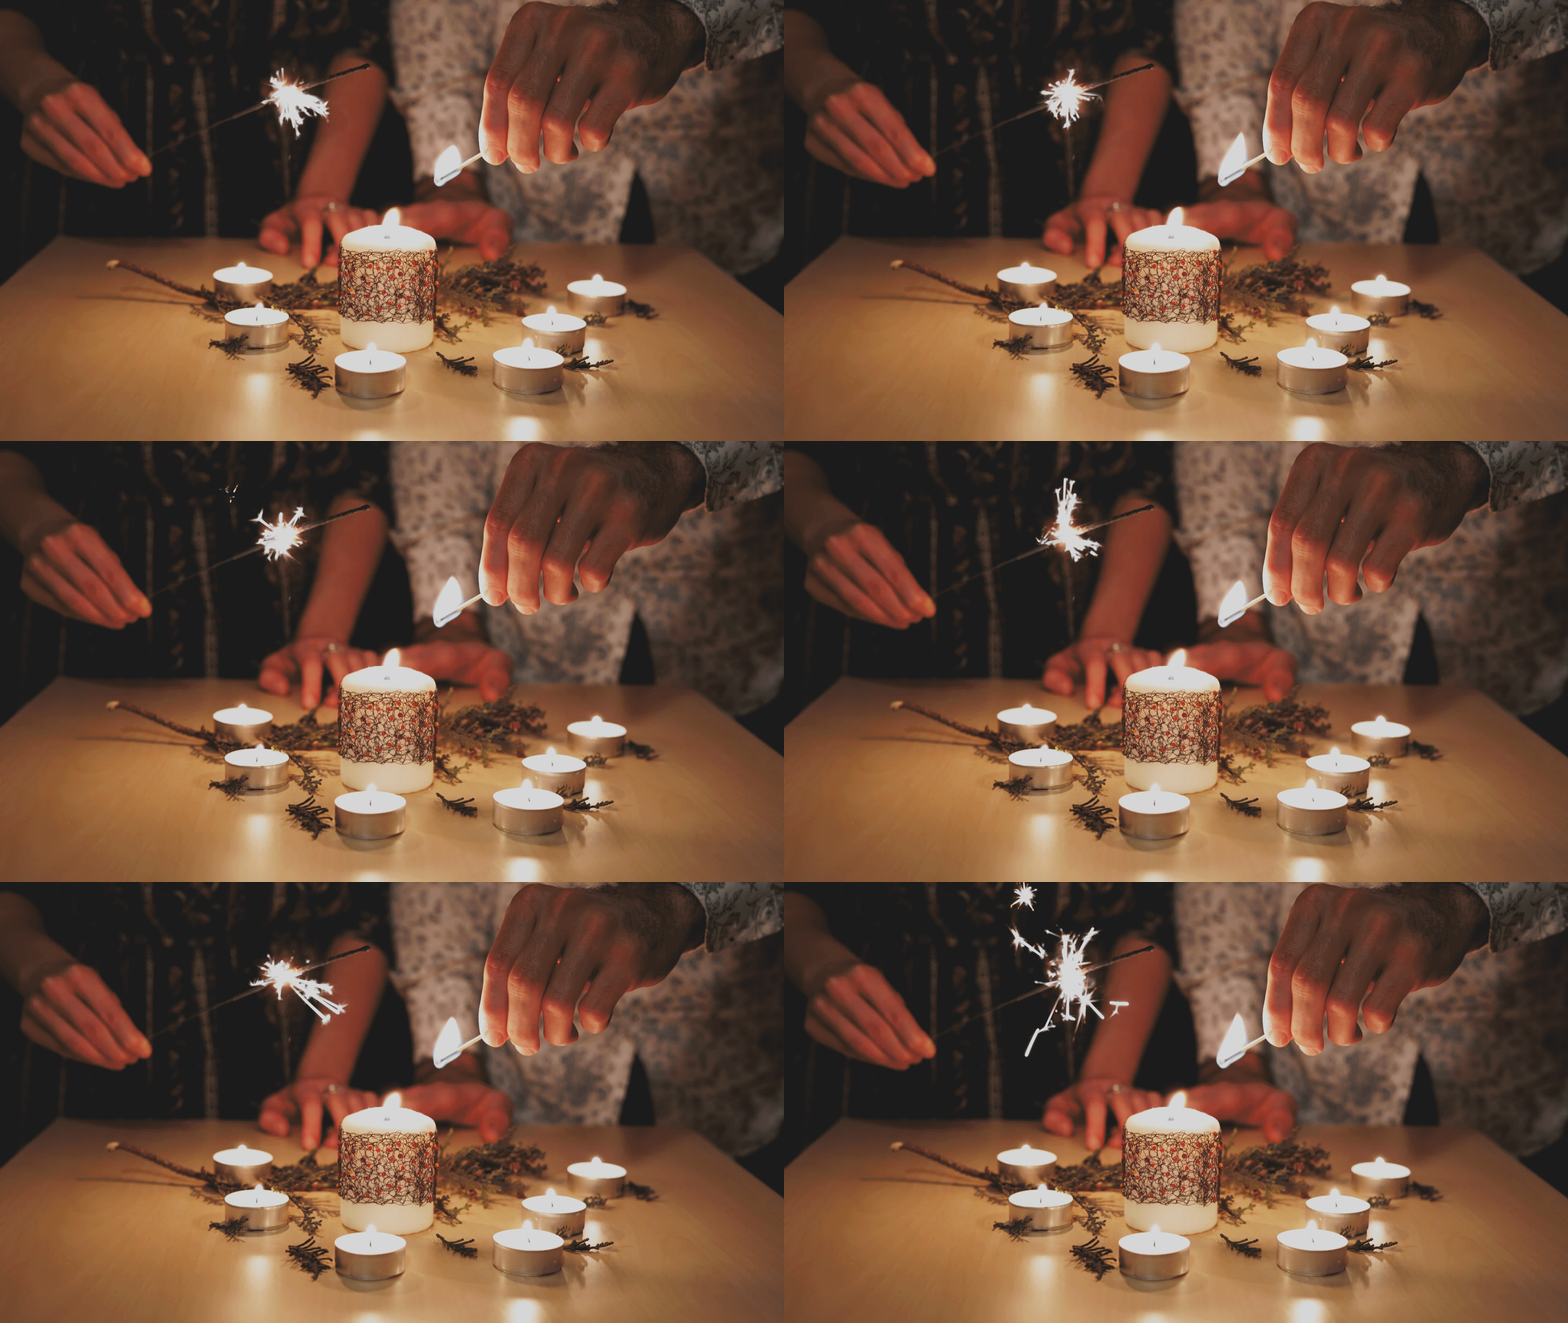
The difference between cinemagraphs and GIFs
After reading the basic description for cinemagraphs, you may confuse them with GIFs. However, cinemagraphs and GIFs are not one and the same. Although both involve looping motion, GIFs are low resolution and originated in the 1980s. More than anything, GIF is an image format.
Cinemagraphs, on the other hand, are more of a medium than a format, similar to a photography or video. You can save a cinemagraph as a GIF, but because GIF is fairly limited in quality, we recommend saving it in a standard video format like *.mp4.
How to make your own cinemagraph
A cinemagraph usually consists of a continuous loop, about 3-10 seconds long, where there is no clear beginning or end. We’ll demonstrate how to make a cinemagraph using the following example:

The basis of a cinemagraph is a few seconds of video footage, preferably shot on a tripod.
You can start editing after recording your footage. The editing process consists of combining the video footage with the still image you get from the video.
Your video makes up the base layer and the still image from the video is the top layer in the Video module of Zoner Studio. Then, you use selection tools to apply a mask to the top layer so that only the moving elements in your cinemagraph are visible through the mask. The most important parts of the editing process are masking and creating a video loop.
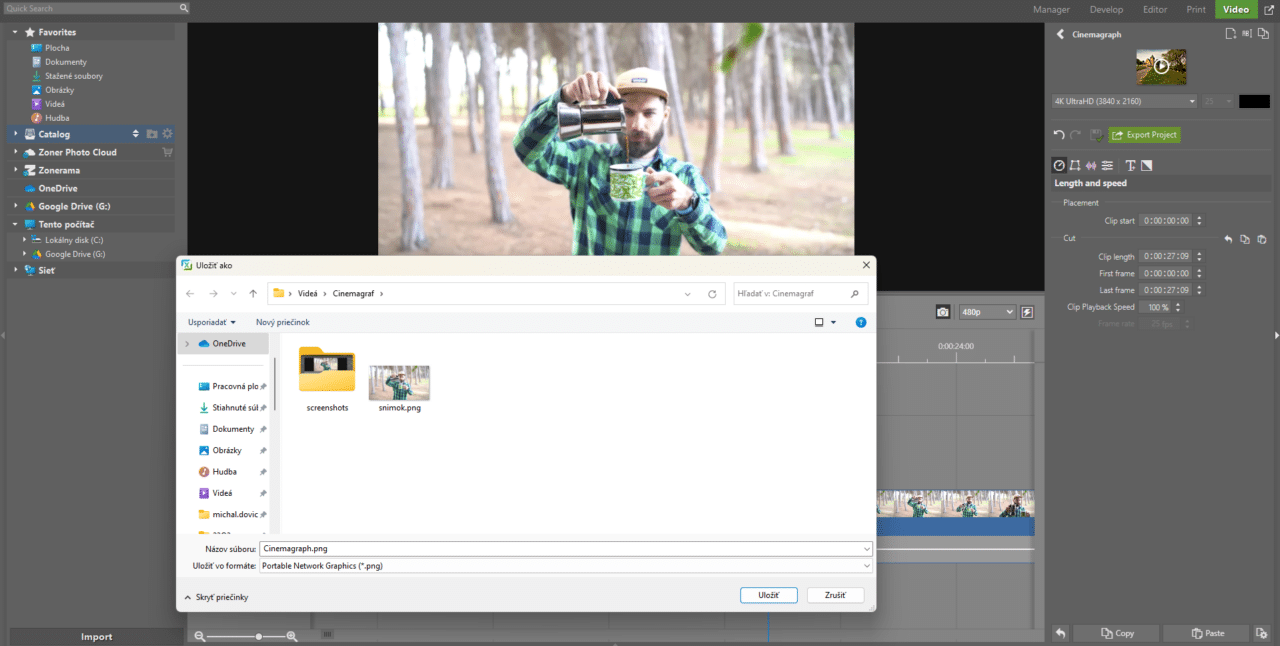
Find the desired frame that will serve as the base image for your cinemagraph in your video. Use the Export Frame function in the Video module to save the video frame as a PNG image.
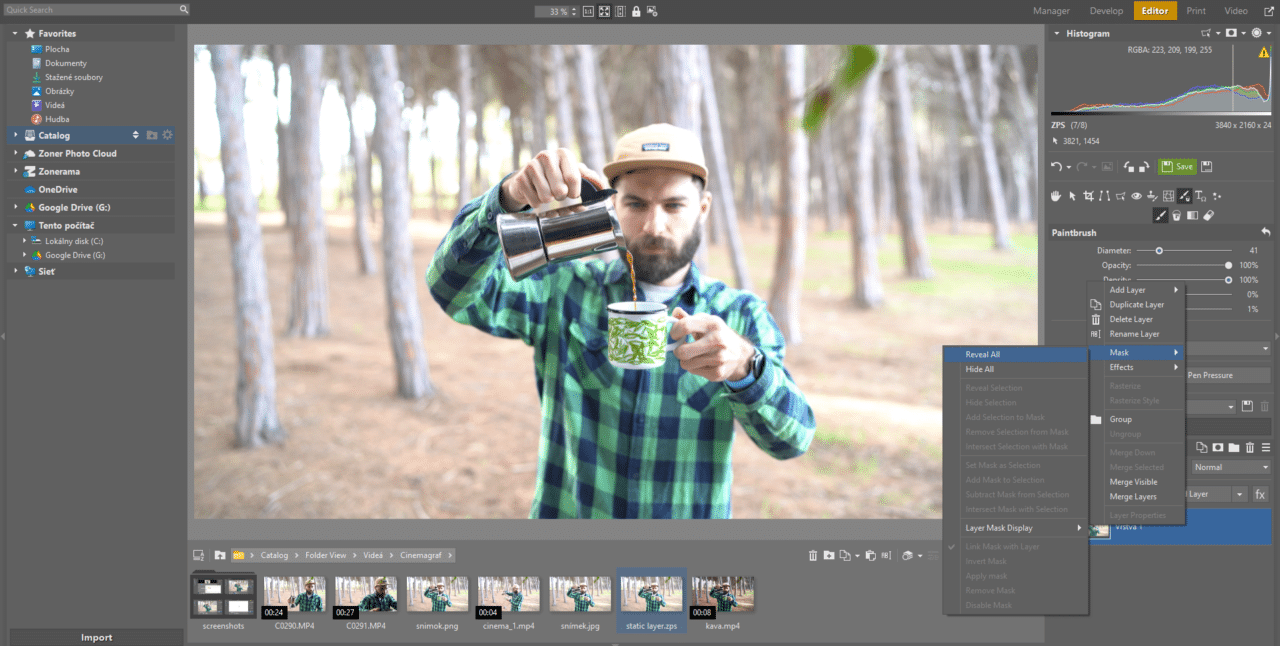
Open the screenshot in the Editor module and apply a mask to the section of the image you want to be in motion in your cinemagraph. Add a mask by right-clicking the image layer and select Mask and Reveal All.
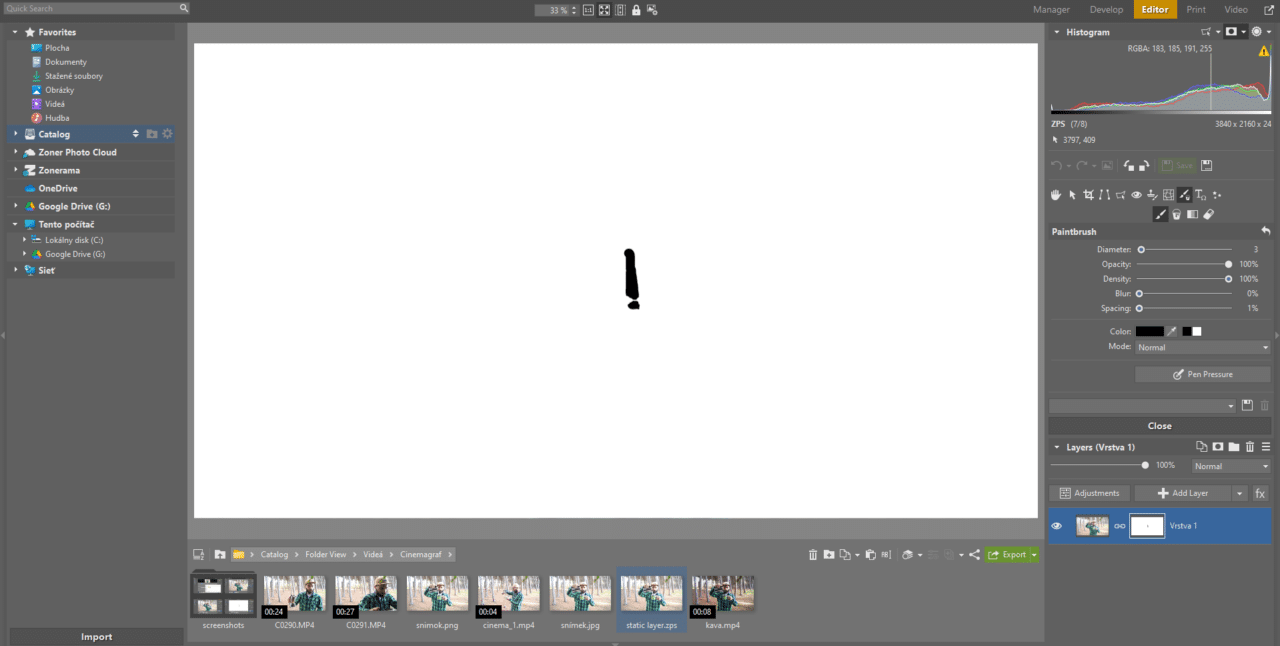
Use the Paintbrush (B) to paint black over what you want to be in motion. In our example, it’s the coffee that’s being poured. Leave the rest of the still image covered in white. The moving video will come out of this “black hole,” while the rest of the image remains still. The coffee will be poured from the moka pot into the mug. The hand, along with the rest of the scene, does not move.
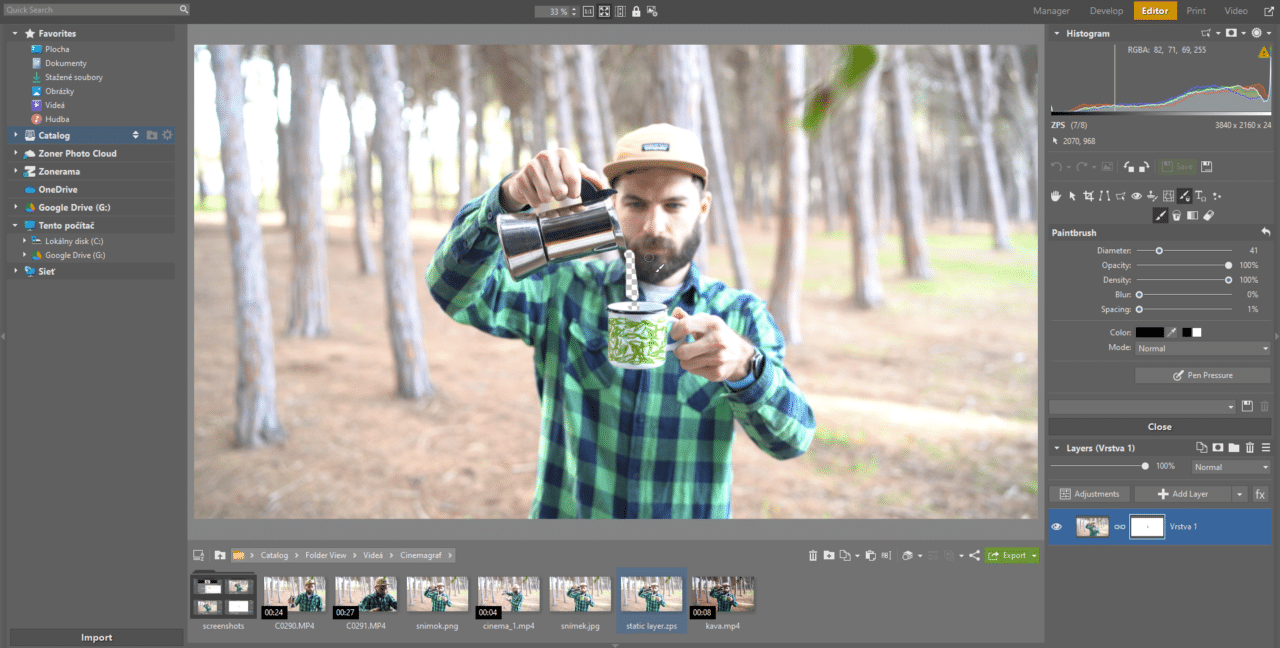
You can see the mask you’ve created in the layer list in the right panel. Or you can view the mask using the Mask Only option above the Histogram.
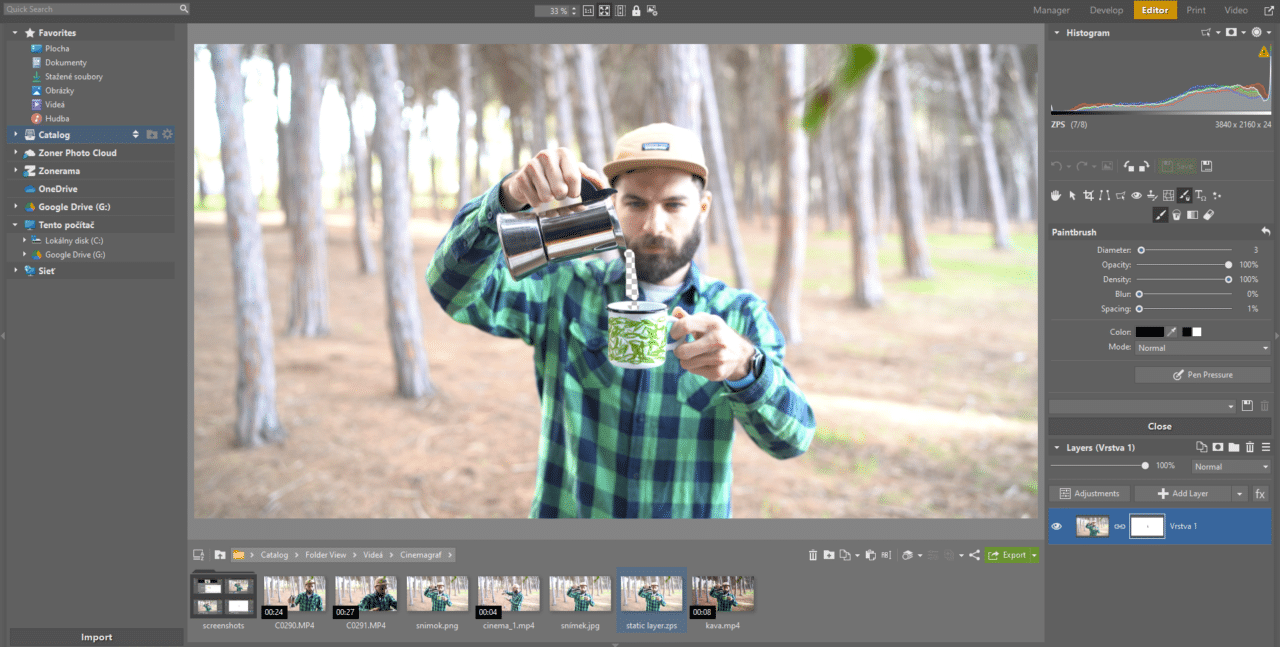
The image that results after masking the movable sections looks like this:
Save the file as a *.Zoner Studio or *.png file. The advantage of Zoner Studio format is that you can continue to edit it in the Editor module. You may want to fine-tune the mask or make other adjustments.
Combine the layers in the Video module
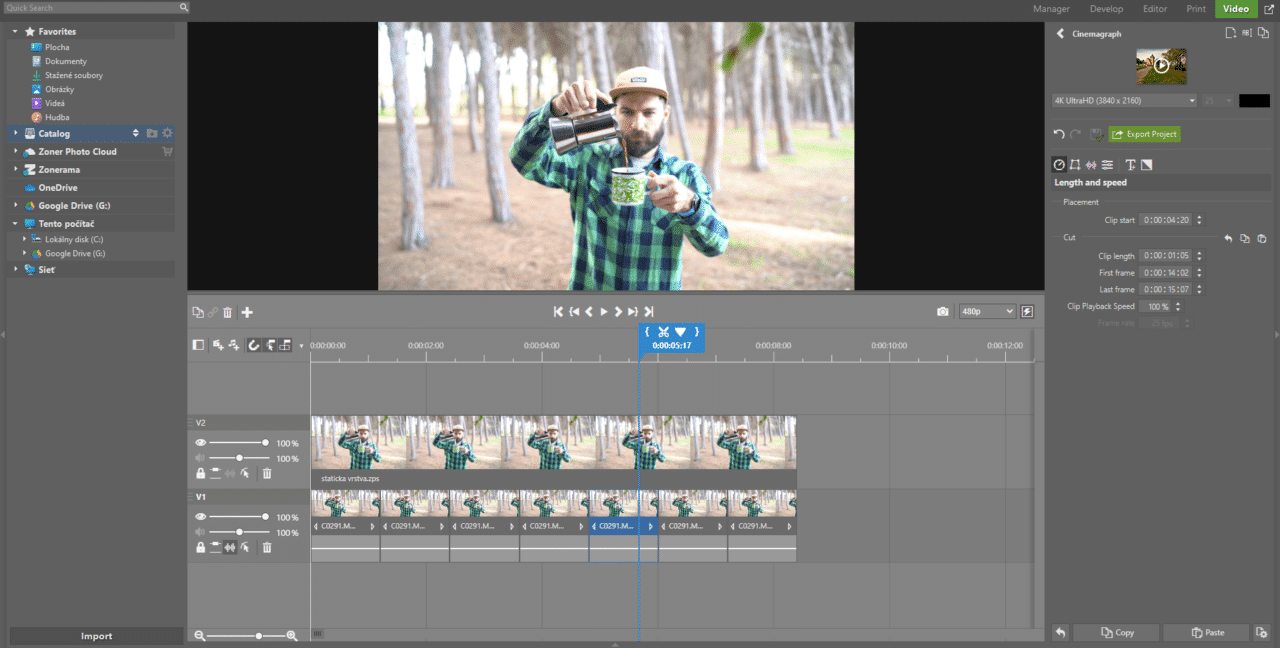
Create a New Project in the Video module. You need a total of two video tracks. Add a track by clicking the + icon and selecting Add Video Track. Drag your masked image from the filmstrip to the top track. Then, drag the video (with the sound muted using the slider) to the bottom track.
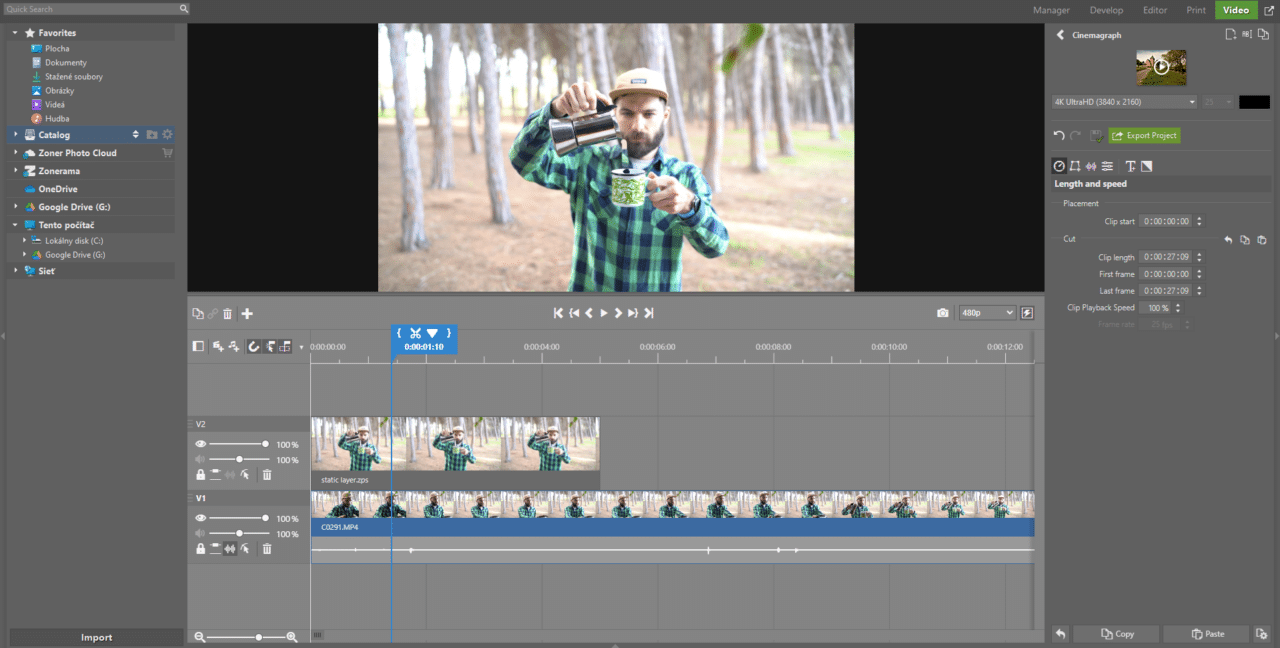

Cut the video to a segment of about one second. During your final edits, make sure your first and last frames look roughly the same. This gives you the most continuity of movement.
Not every video player can loop the videos, so just to be safe, copy the motion several times by holding Ctrl + dragging the mouse over the timeline. This creates a video that’s several seconds long.
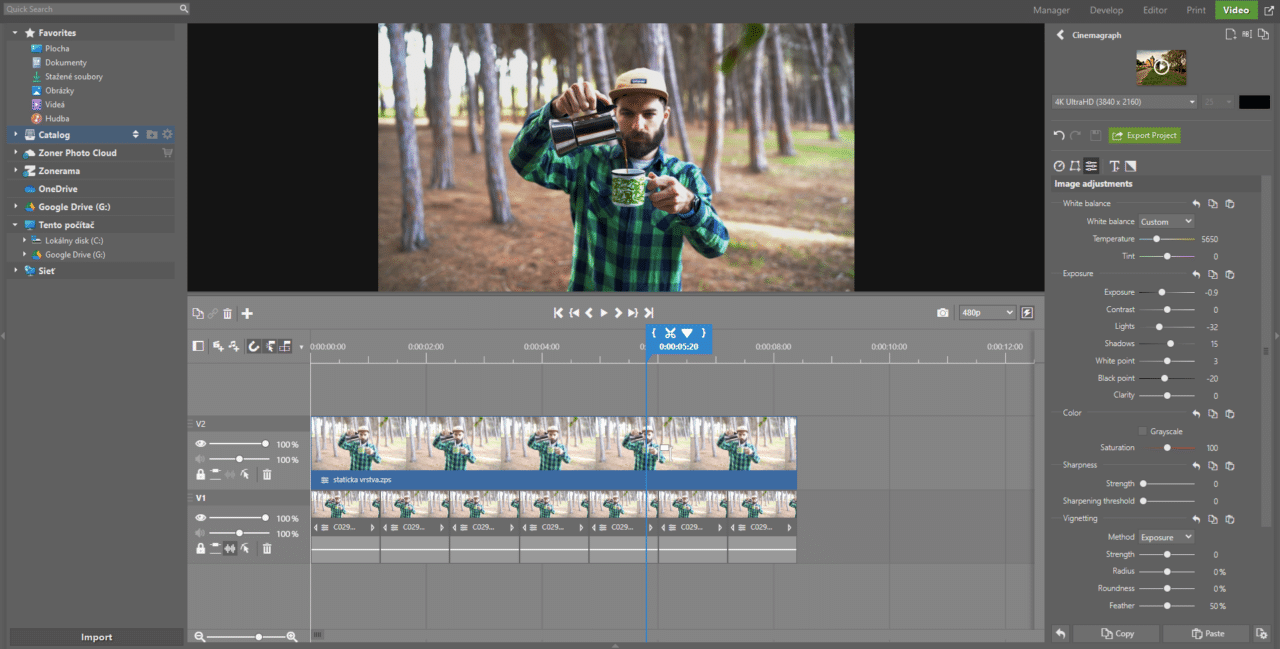
Finally, fine-tune how the video looks in the Image Adjustments tab. Make adjustments to the top layer (still image) and then copy all the color adjustments to the video clips in the bottom layer.
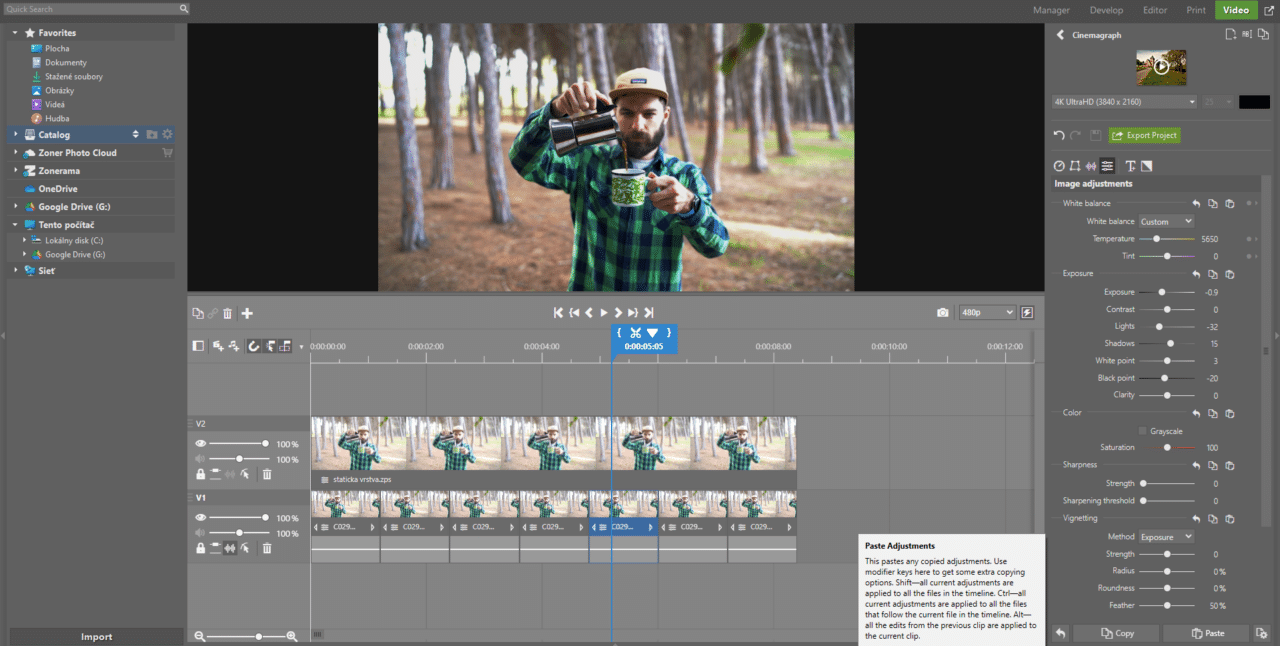
After you’re done making adjustments to the still image, copy them using the Copy button in the bottom right corner, and click Paste to apply them to the video in the bottom layer.
Once you’ve put the finishing touches on your cinemagraph, all you need to do is save the project. At the top of the right panel, click Export Project and choose .mp4 as your format.
Try creating cinemagraphs using your own photos and videos! Download Zoner Studio free for 7 days and gain access to all these features and more. Start editing your photos and videos today!
