Presets Done Differently—Create Your Own Presets

Almost every Zoner Studio user is familiar with presets. But you may think that you can only download ready-made presets and apply them to your photos. There are many other ways to use presets. You can create some yourself and save a lot of time. Let’s take a look at how you can use your own presets.
Creating your own presets is easy and can include practically any adjustment from the Develop module. Use presets to save time and simplify your workflow. Let’s look at some examples.
Studio photos
I use this method regularly for product photography or studio portraits. For these types of photos, I often want to get the same results, so why do the same adjustments manually for each photo? I create a preset that is tailored to my exact lighting and camera settings.

If I use the same camera settings and lighting each time, the results are the same after applying the preset.
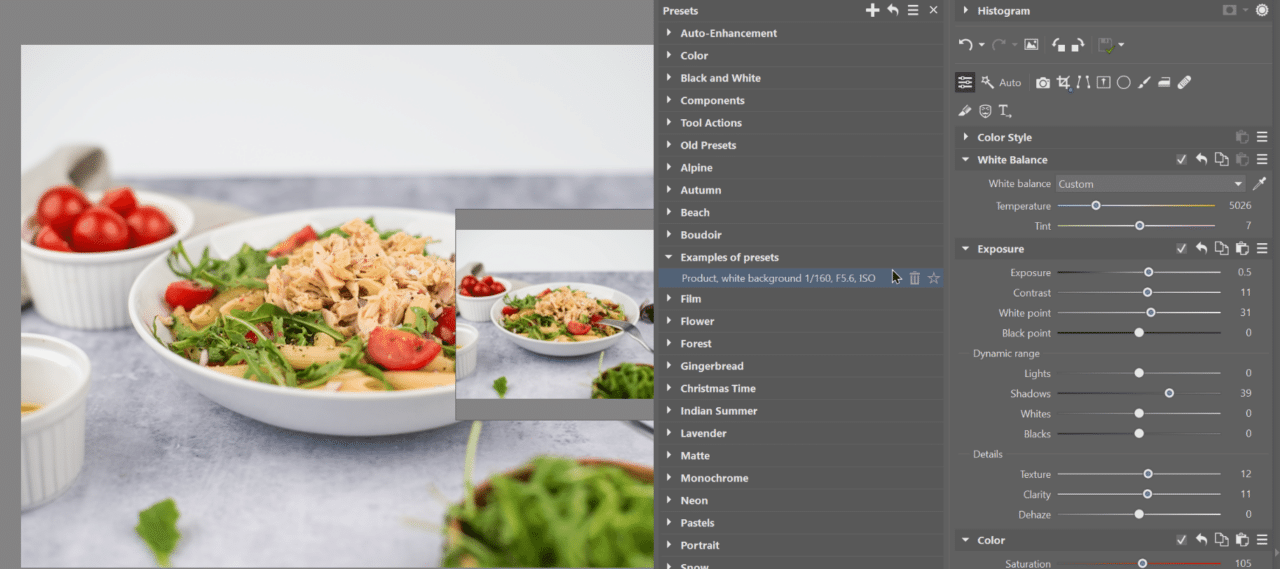
Example: I use two LED lights set to full power which are always in the same place for my product lighting. I adjust my camera settings accordingly. I use various combinations of settings to get a good photo, but I’m going to stick to just one so my photos are all the same. In my case, it’s 1/160s, f/5.6, ISO 100. This ensures my preset works every time without needing any major adjustments.
If I shoot product photography on a white background, I know presets can save me time. I use the same light and camera settings, and then apply my preset. Of course, there is some retouching that needs to be done each time, but my basic RAW editing is complete. I can also create a different preset for each combination of light and camera settings I use. It makes sense to create presets for your most common lighting setups.
Color style
Every photographer wants their photos to be eye-catching not only in content but also in form. This includes getting the right color for your photography. You can also save your color unique style as a preset.
The only issue is that one color setting doesn’t work for different lighting. If it does, it’s more of an exception than a rule. For example, if you tweak the colors on a nighttime prom photo, and save it as a preset, it won’t work on an outdoor photo from the next day. That’s why you should create “color” presets for the different lighting situations that you regularly shoot, such as night photography, golden hour, afternoon, artificial lighting, and so on.
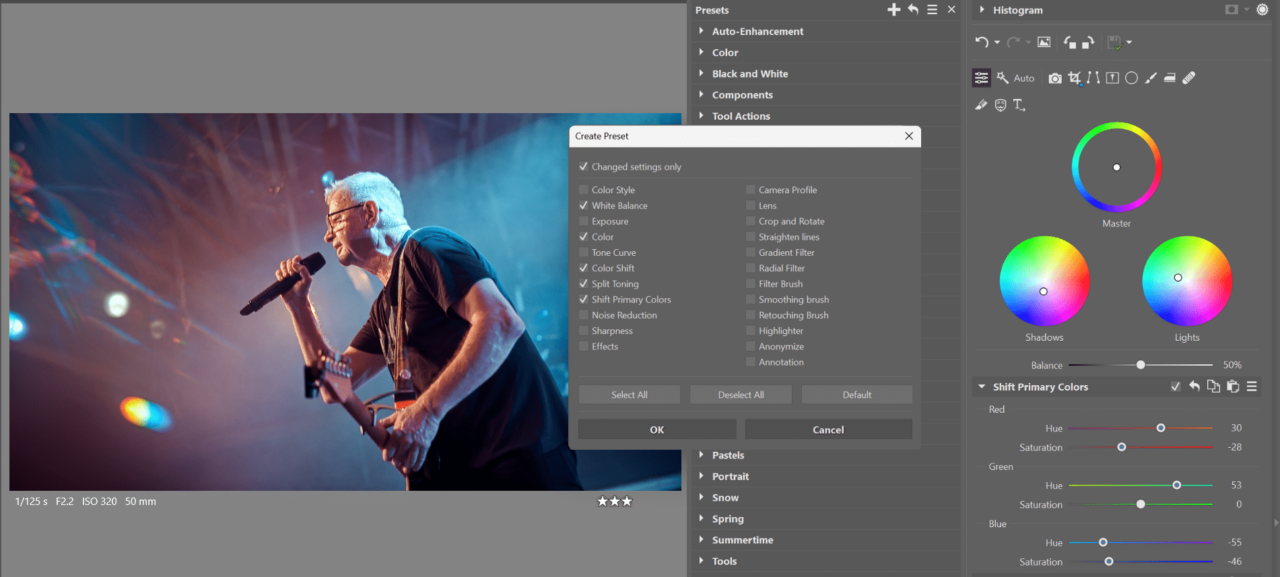
Use the checkboxes to save only the color tools to your presets. These are White Balance, Color, Color Shift, Split Toning, and Shift Primary Colors. By saving presets for multiple lighting situations, your presets will be more versatile and you just need to select the one that fits your lighting.

Correcting color issues
Let’s stay with color for a moment. Every photographer runs into problems with their photos’ color. Like when you take a photo of someone in the grass or by a green wall and the reflection of the light makes their face look green.
Or, if you frequently shoot in light that gives off strange colors, like fluorescent lighting or light bulbs that are too orange, etc. Photographers also often find that their camera doesn’t render some colors properly. The color rendition of the sensor varies from manufacturer to manufacturer.
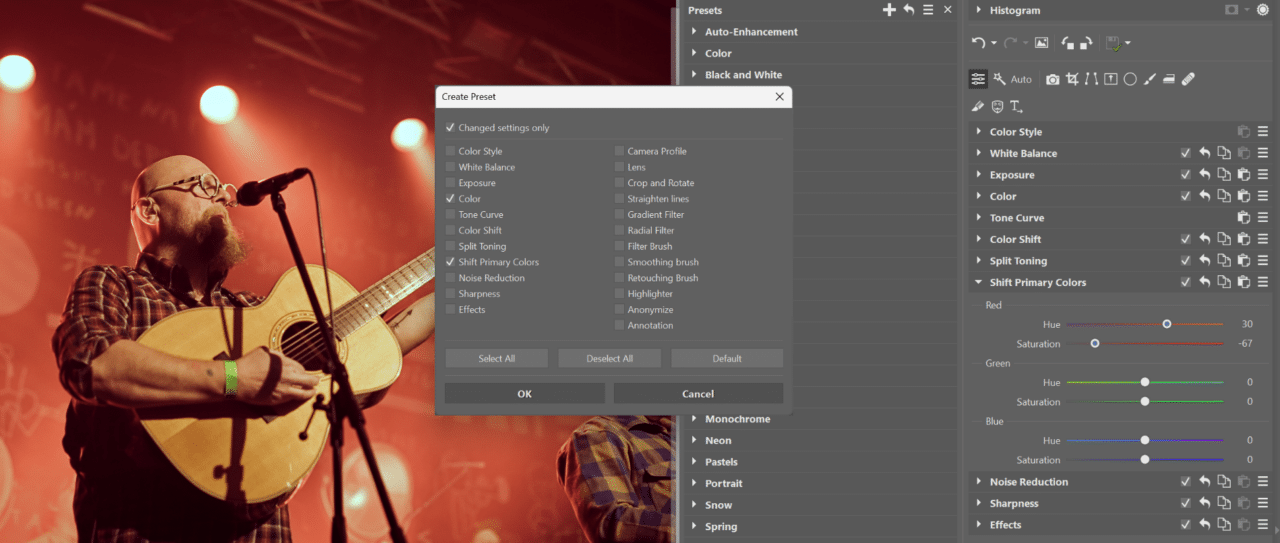
You can include a solution for some of these issues in your presets. Then, when the issue comes up, just use that preset. For example, my camera doesn’t have a very good red color rendition. When I shoot concerts with a lot of red lights, the photos tend to be problematic. I don’t want to correct the same mistake each time, so I saved the fix as a preset so I can apply it in two clicks and then tweak it slightly, if necessary.
I save the Shift Primary Colors settings group in my preset where I’ve decreased the saturation and adjusted the hue for the red color channel. I also saved my Color settings group, where I lowered the overall saturation. This way, I don’t have to readjust these two settings groups each time. All I need is two clicks to apply my preset.
Since I only save the adjustments to Shift Primary Colors and Color to my preset, I can easily combine this with other presets where I have saved adjustments from other settings groups, like Exposure.
Crop and center
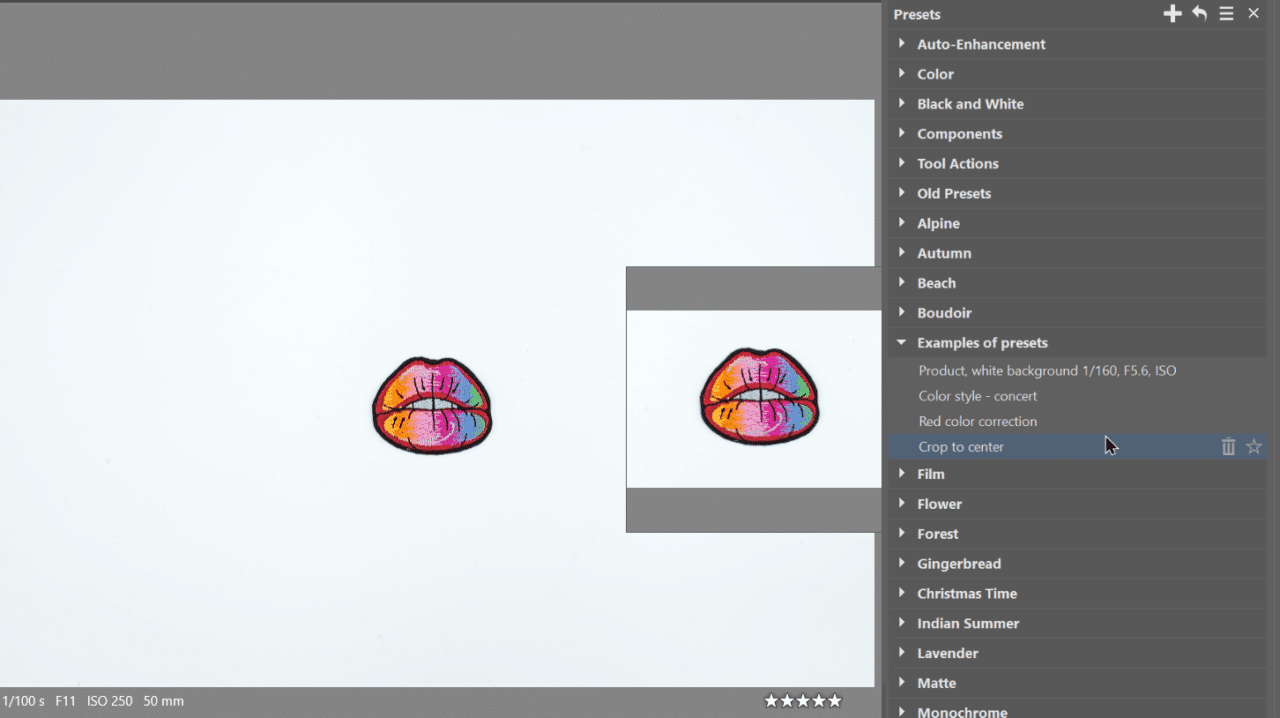
You can also save the Crop and Rotate (C) function to a preset. This is usually not useful because each photo needs to be cropped differently, but there are times when it comes in handy. For example, I occasionally shoot small products and want to create images with transparent backgrounds (PNG).
I want to center each product with a tight crop. I need to crop the photo because I can’t get close enough to the subject with my 50mm lens to fill a large enough area of the image (it focuses from approx. 25cm). I shoot with the product centered, then I apply my preset from the first example to the series, and then the second preset where I only have Crop and Rotate (C) saved. This saves me the time of cropping dozens of photos individually.

Create and download presets
Custom presets in Zoner Studio are a very useful tool that can simplify your workflow. In this article, I’ve shown just a few examples of how to use them, but you will find many more that work for you. You can save almost any adjustment from the Develop module to a preset, so the possibilities for speeding up your workflow are vast.
If you prefer ready-made presets that do the adjustments for you, you can download many directly from the Zoner website.

