Retouch Non-destructively With the Retouching Tools in Develop
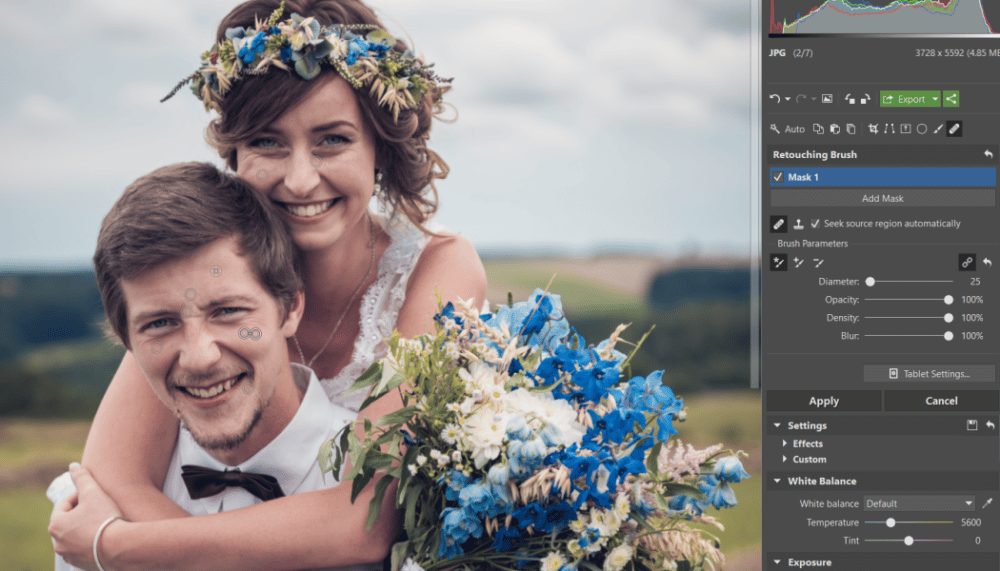
Retouching is very simple and effective editing that you can use to subtly improve portraits and more. So besides fixing skin defects, you can do things like clean dirty walls or eliminate distractions on clothing or around a photographed object. And meanwhile, you can also make all of these edits non-destructively. Take a look at how to do it.
The Develop module in Zoner Studio enables you to retouch pictures non-destructively. So once you’ve made any adjustments you need to a picture’s exposure, colors, and other overall elements, you can move on to retouching without having to switch to the Editor. You can adjust it all in Develop and then export the photo straight away.
Choose a Retouching Tool
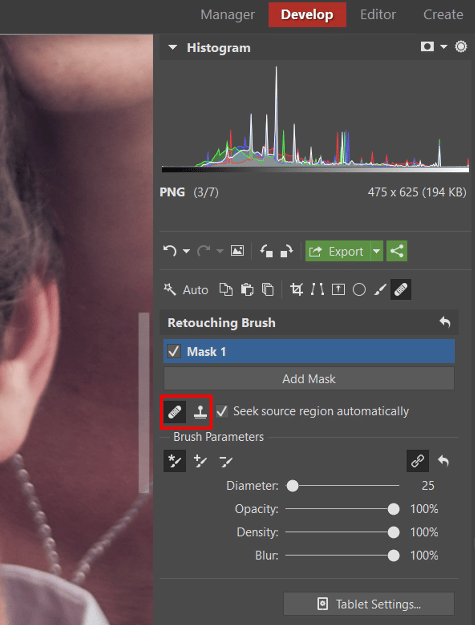
You’ll find the Retouching Brush (J) on the far right of the Develop module’s toolbar. It has two different modes.
The first of them is the Retouching Brush. It averages the surroundings, creating a smoother transition. So you’ll find it especially useful when editing skin and fine textures.
Meanwhile with the Clone Stamp, you’re copying material from one area in a photo to another area. So it’s useful e.g. for striking textures such as tiles or for retouching edges.
Adjust the Retouching Settings
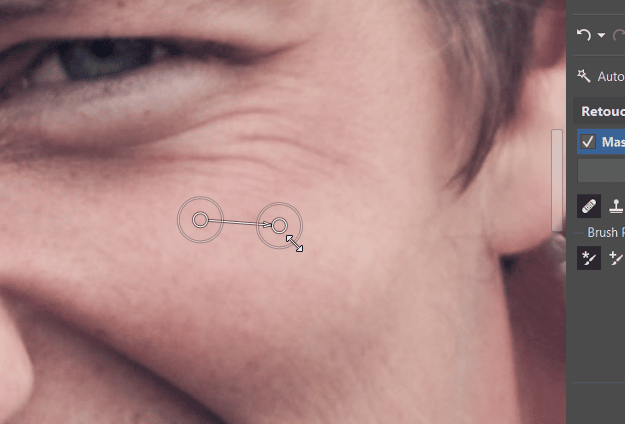
You can take advantage of automatic source region discovery for your retouching. The program selects a region that resembles the place you’re retouching and sets it as the source. If you don’t like its choice of source region, then you can easily grab it with the mouse and move it elsewhere.
If you want total control over retouching, you can select a source area manually. Just hold down the Ctrl key and click your choice of source area. Click the area to retouch after you’ve done this. The same approach applies if you turn off automatic source region discovery in the retouching settings panel.
For retouching you’ll always want to zoom in close, ideally to 1:1. That makes it easier to see the effects of individual edits.
After zooming in on the picture, set the retouching tool’s radius so that it’s a good fit for the places you want to adjust. Just hold down Shift and roll the mouse wheel, or use the slider in the right panel.
Easily Retouching Areas Large and Small
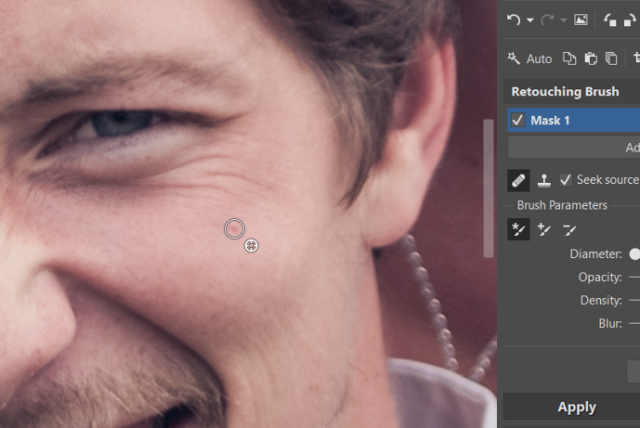
Retouching itself is very intuitive. For spot problems such as pimples, use clicking; for area problems such as wrinkles, click and drag.
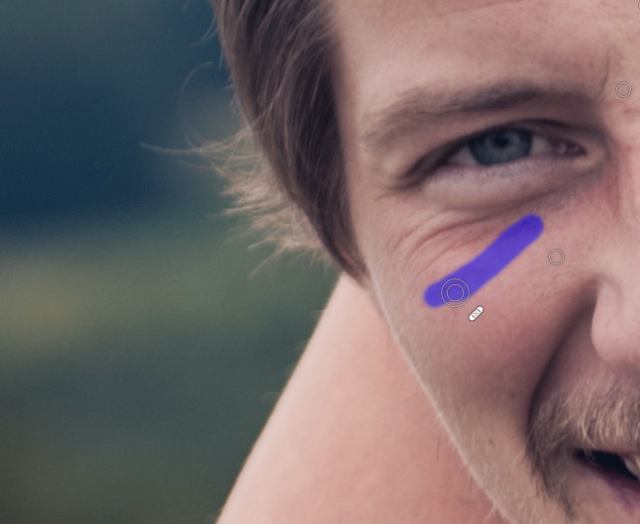
Hold down Shift and then click or drag to add further strokes to the ones you’ve made. If you hold down Alt instead of Shift, you remove strokes or reduce their effect instead.
For spot edits, you can also go back and increase or decrease their area of effect. Just click on the edge of such an edit and drag to adjust it. You can also drag the source or target position at any time to change them.
Fine-tune the Retouching Brush
If you don’t like how the brush is working with its factory settings, just change them. These settings are:
- Opacity – sets how visible the edit will be; it is set by default to 100%. That way it completely clears away the thing you’re retouching (e.g. a pimple). But if for example you only want to tone down some wrinkles, lower the Opacity.
- Density – sets how much the effect is applied during a single pass with the brush or stamp; it’s likewise automatically set to 100%. When you’re working with the mouse, you’ll want to leave this value, but if you use a tablet, feel free to lower it down to even single percentage points.
- Blurring – affects the smoothness of the transition between the retouched area and its surroundings.
Divide up Complicated Edits into Masks
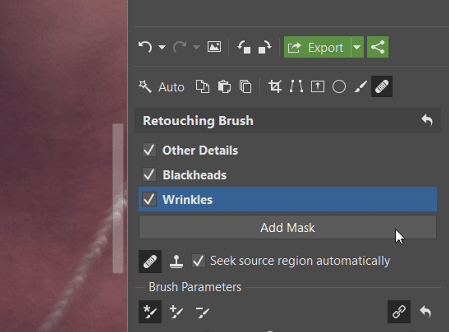
You can place retouching edits in different masks, which you can name so that they remind you of what each one “does.” To add a new mask, click Add Mask. You can then adjust the individual masks separately at any time later. You can also turn them on or off to help you compare the effects of different edits, for a better idea of which edits are best for a given image.
Zoner Studio is also the first photo editor in the world to let you later adjust both your non-destructive masks and the individual edits inside them. This aspect lets you conveniently fine-tune your retouching until it looks how you need.
Your Drawing Tablet Can Help Too
Zoner Studio also lets you do retouching work using a drawing tablet. Use the tablet’s pen pressure to control the individual settings for the retouching brush or clone stamp. You can set whether your pressure will affect only one of the values or any combination of them you like.
Test non-destructive edits on your photos. Download Zoner Studio, use it 7 days for free, and try out how these retouching tools can improve your photos.
