Shooting in the Dark and Low Light: Avoid Noisy, Blurry Photos

Shooting in the dark or low light is a challenge for photographers. Whether it’s a city at night, an interior, or evening portraits, these photos are often plagued by digital noise, blur, and a loss of detail. I’ll show you how to properly set up your camera for low-light and night photography, what to avoid, and how to use adjustments and the right equipment to get great pictures.
Some cameras and mobile phones can automatically adjust to lighting conditions. But that doesn’t mean they can guess your photographic vision. That’s why it pays to learn how to guide your camera using the right settings or gear.
Low light in photography
When shooting in low light, the camera must cope with a limited amount of light, and that doesn’t always go well. Three typical issues occur in low light:
- Blurry image
- Digital noise
- Loss of detail
Blurry photos occur when the camera uses a longer shutter speed to capture enough light. But our shaky hands can’t stay completely still for that long, and everything ends up blurred. It might only be a fraction of a second, but that’s often too long to shoot handheld. I’m not listing specific shutter speeds because it depends on things like focal length, sensor resolution, and how tolerant you are of slight blur.
Noise appears when the camera uses a relatively fast shutter speed but compensates by raising ISO. While this brightens the photo, it also increases noise.
Loss of detail is really just another form of noise. Many cameras and phones apply noise reduction by default, which is basically intelligent blurring. It reduces noise, but at the cost of loss of detail.
Camera settings for low light
To get the best photos in low light, you need to balance what’s known as the exposure triangle—aperture, shutter speed, and ISO.
The easiest way to do this is to open the aperture (use a lower f-number) to let in more light. But because every lens has its limits, the lowest f-number it allows, this only works to a point. Plus, lower apertures reduce depth of field, which isn’t always ideal, especially for landscapes.
The next option is to increase the shutter speed. But again, camera shake is an issue. A tripod or image stabilization can help, but if you’re shooting moving subjects, like dancers, they’ll still come out blurry.
If nothing else works, increasing ISO is your fallback. You can go a few stops up from base ISO without much trouble. For example, from ISO 100 to ISO 800. But pushing it higher, like to ISO 12800, can noticeably degrade image quality.
Equipment for shooting in the dark
There are several ways you can help yourself in low-light conditions. One solution is to use a fast lens, like an f/2.8, f/1.8, or even f/1.4. The lower the f-number, the more light hits the sensor. An f/1.4 lens lets in four times as much light at once as an f/2.8. But lens design is complicated, so these fastest lenses tend to be fixed focal length lenses (primes) rather than zooms.
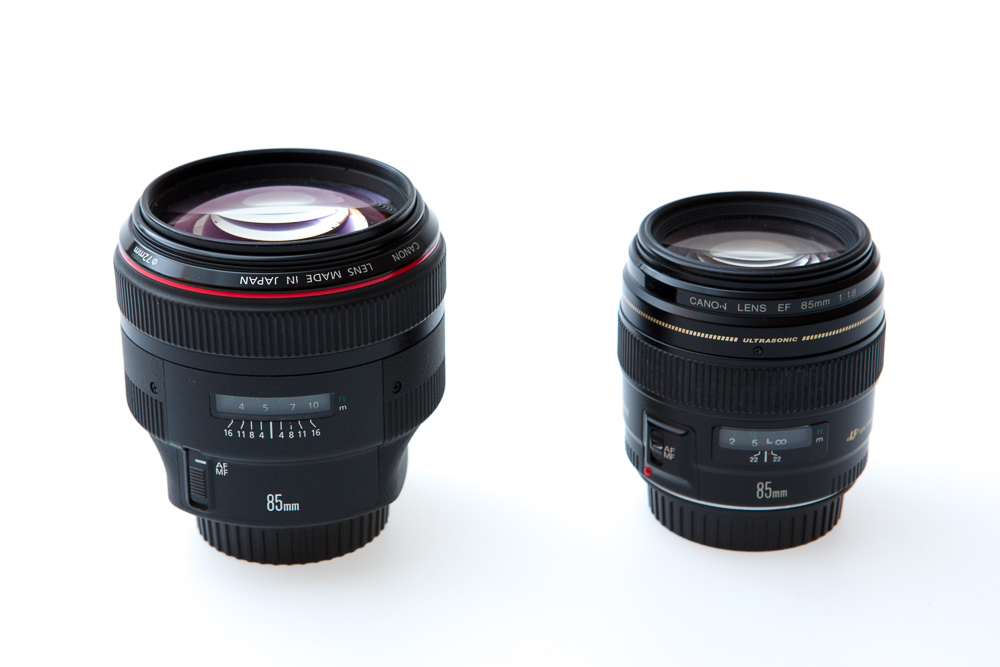
Image stabilization can also help. It’s usually built into the camera body or phone. Different models vary in how much they can increase the shutter speed. Some even combine in-body with lens stabilization.
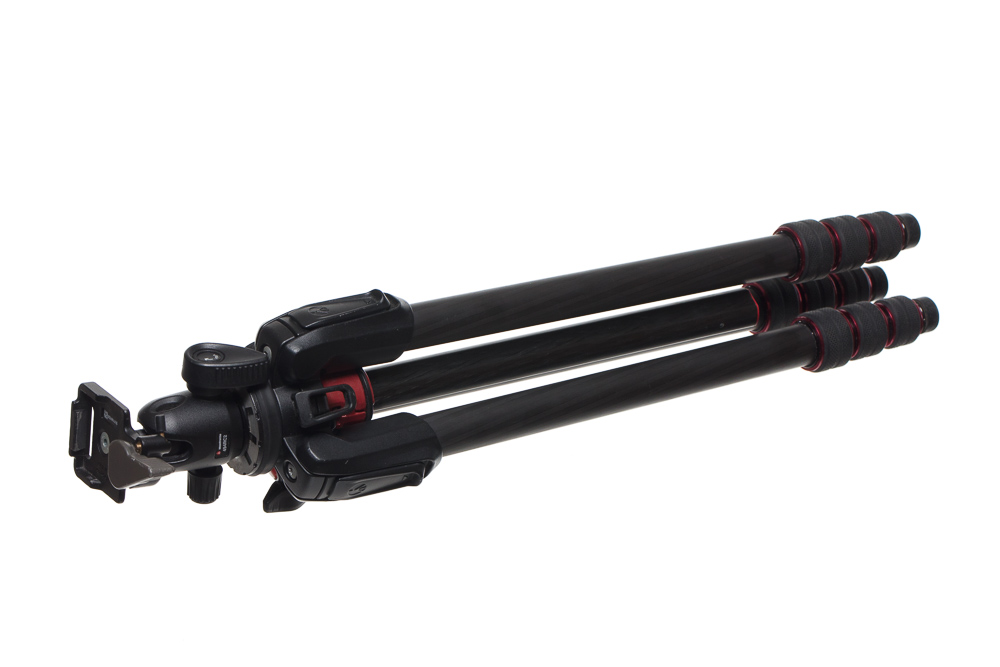
For very long exposures, tripods are essential. Landscape photographers often use them to shoot at ISO 100 and f/11 even at dusk, with shutter speeds over 10 seconds. For maximum quality, it’s best to trigger the shutter remotely, either by using a remote shutter release or your mobile phone. This avoids any unnecessary vibrations caused by pressing the shutter button. Another option is to set a time delay when shooting.
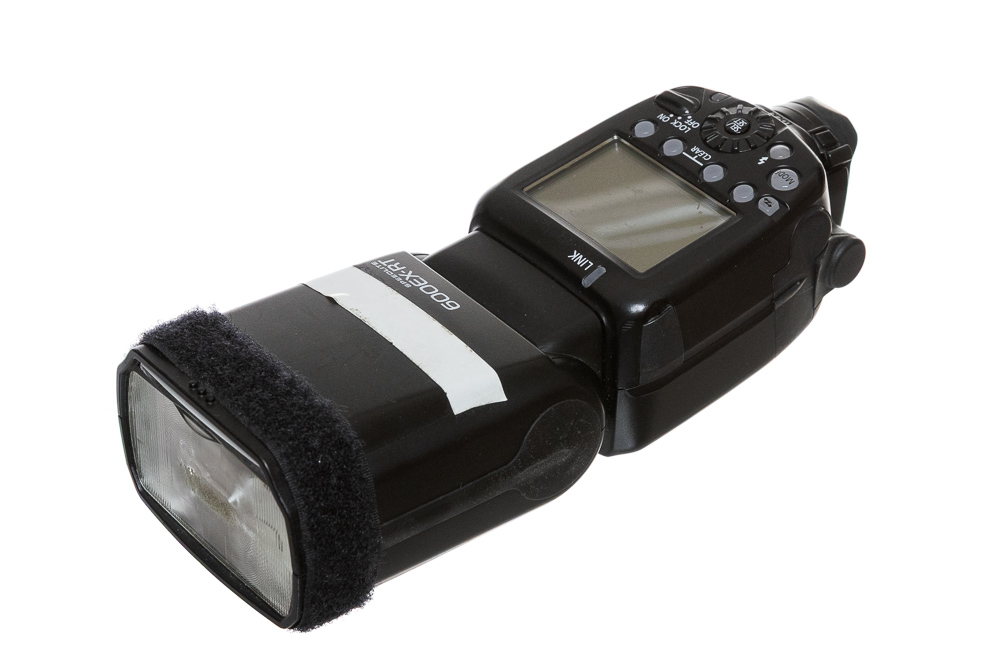
For portraits, a tripod usually isn’t practical. You’re more likely to use additional lighting like LED panels or flash. These let you shape the scene to your liking.
Tips for editing low-light photos
If you’re stuck with noisy photos, don’t worry. The camera’s noise reduction helps, but shooting in RAW format preserves more image data. Then, in Zoner Studio, you can reduce noise specific to the photo.
Sometimes previous adjustments cause the image to be slightly out of focus, so sharpening might help.
It’s also common to misjudge brightness. This is where shooting in the dark gets tricky. Your camera’s automatic exposure may be inaccurate, and your screen can mislead you by making dark images appear brighter. Fortunately, RAW files store enough data to recover those areas while editing them in Zoner Studio. JPEGs are much harder to fix.
Your guide to shooting in the dark
There are many different types of photography that take place in low light.
Night city photography can be stunning, especially from a higher vantage point where you can see the lit-up streets and sights. Some cameras in-camera image stabilization can handle it well handheld. But for top quality, use a tripod or steady surface. These scenes have both very dark and bright areas at the same time, resulting in high dynamic range. Advanced photographers often take multiple exposures and merge them.
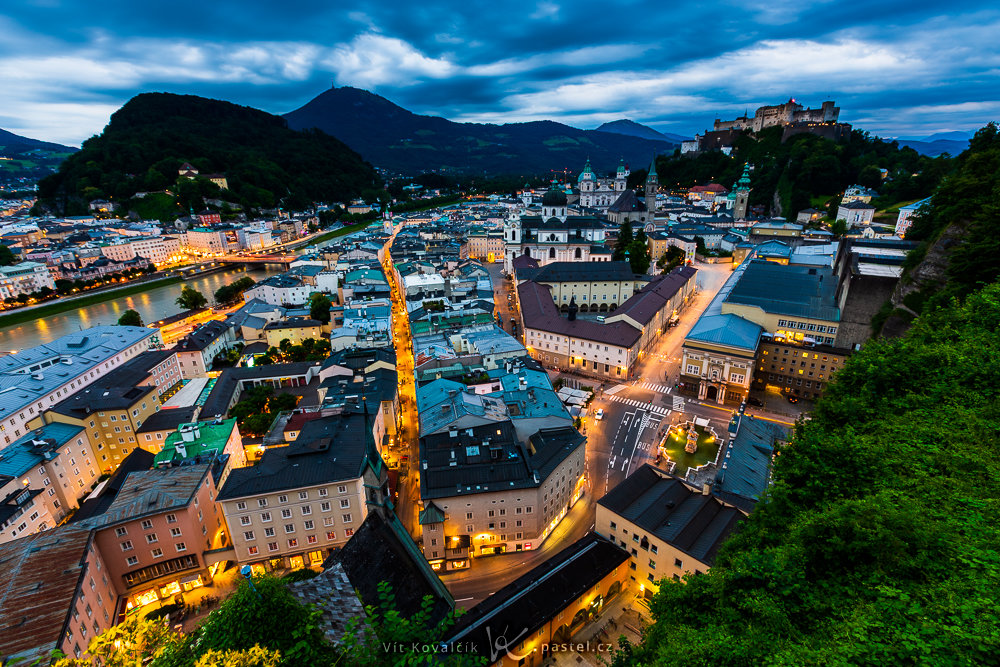
Canon 5D Mark III, Canon 16-35/2.8 II, up to 5s, f/8, ISO 100, focal length 16mm
Morning or evening landscapes are similar. Light is still scarce, so again a tripod and merging multiple images is a common approach.
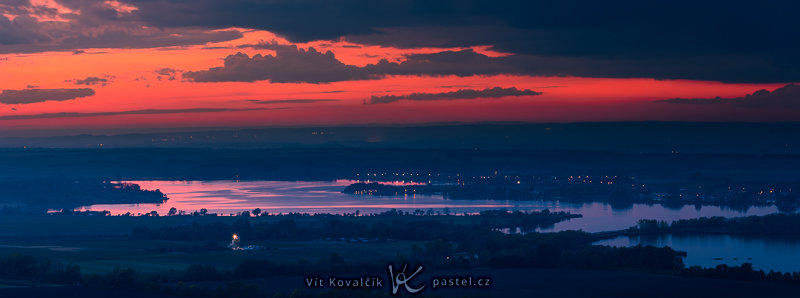
Canon R5, Canon 70-300/4-5.6L, 25s, f/9, ISO 100, focal length 170mm (panorama of multiple photos)
Stargazers would be upset if I didn’t mention astrophotography. Although beautiful photos can be taken with exposures of several seconds, true experts leave their cameras in the same place for up to a half an hour. The images themselves are still a few seconds long, but several hundred of them are taken, always with the stars in a slightly different place. They then combine everything using specialized programs and the result is spectacular.
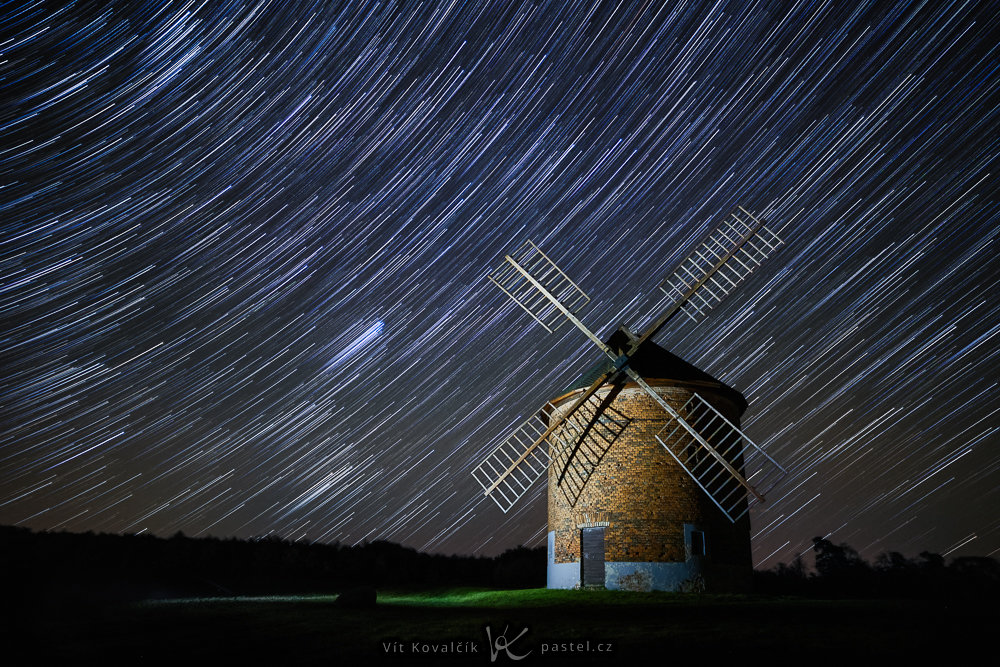
Canon R5, Canon 16-35/2.8 III, each image 4s, f/2,8, ISO 6400, focal length 20mm
With the right equipment, you can also photograph people in the dark. Advanced photographers experiment with remote flash for dramatic lighting.
Canon 5D Mark III, Sigma 50/1.4, 1/125, f/1.4, ISO 1600, focal length 50mm
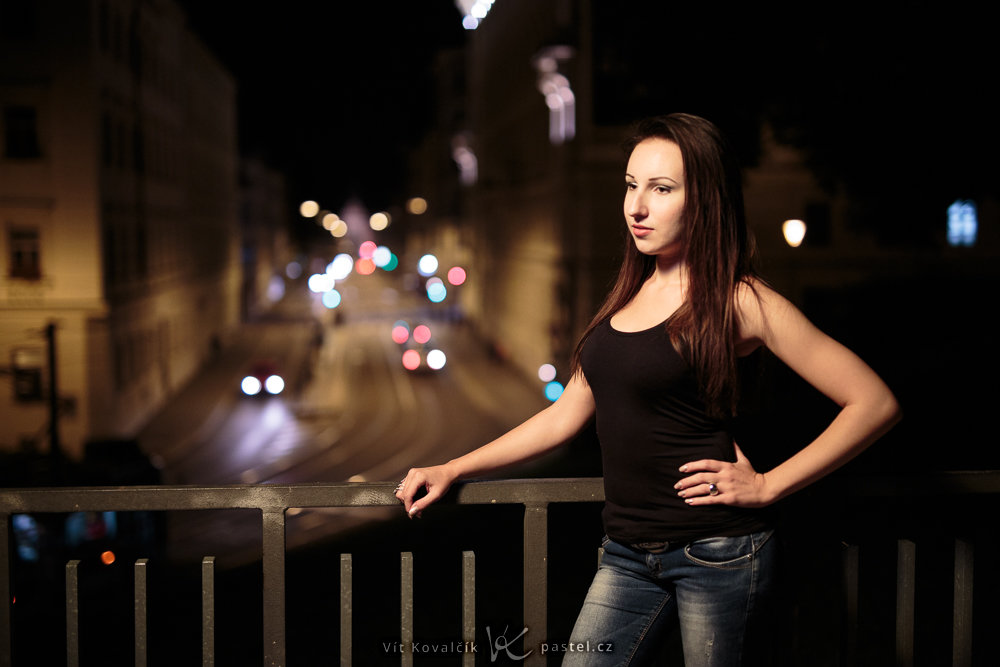
But with skillful use of your surroundings, other types of equipment may not be needed. For example, the model is intentionally illuminated by the light from a nearby shop window in the following photo. Nevertheless, fast lenses are very helpful in these types of situations.
Canon 5D Mark IV, Sigma 35/1.4 Art, 1/125, f/1.4, ISO 2500, focal length 35mm
Don’t be afraid to take photos in the dark
Don’t be afraid of low-light photography. It’s actually a chance to capture photos that aren’t possible during the day. With a bit of practice, even your night shots can turn out great.
Frequently asked questions
- Can I shoot in the dark without a tripod? Yes, but you need a steady hand, image stabilization, and a fast lens. Leaning on a sturdy surface can also help.
- What is an acceptable ISO? It depends on the camera, but ISO 800–1600 is manageable for most without much loss of quality. Higher ISO values may result in noise.
- Is RAW really necessary? RAW is useful. It lets you better fine-tune brightness, colors, and noise. It’s perfect for editing in Zoner Studio.
- What should I do if my photo is blurry? Use a faster shutter speed or tripod. Or, increase ISO or open up the aperture.
- Which lens is best for the dark? A lens with the lowest possible aperture, ideally f/1.8 or lower. The faster the lens, the better.