Turn 4 Pictures Into 1 With Multiple Exposure Technique
The term multiple exposure or “multi-exposure” is fairly broad. It means joining multiple photos into one, no matter why or how. The ability to join multiple exposures into a single picture can be put to many uses. I’ll show you one of those uses in today’s article.
The “Multi-exposure features” in Zoner Studio are mainly there to help you get rid of moving objects, reduce noise, and straighten pictures. But this feature can be used creatively as well. For example, you can use it to multiply moving objects so that you have the same person four times in one picture.
A Quadruple Self Portrait
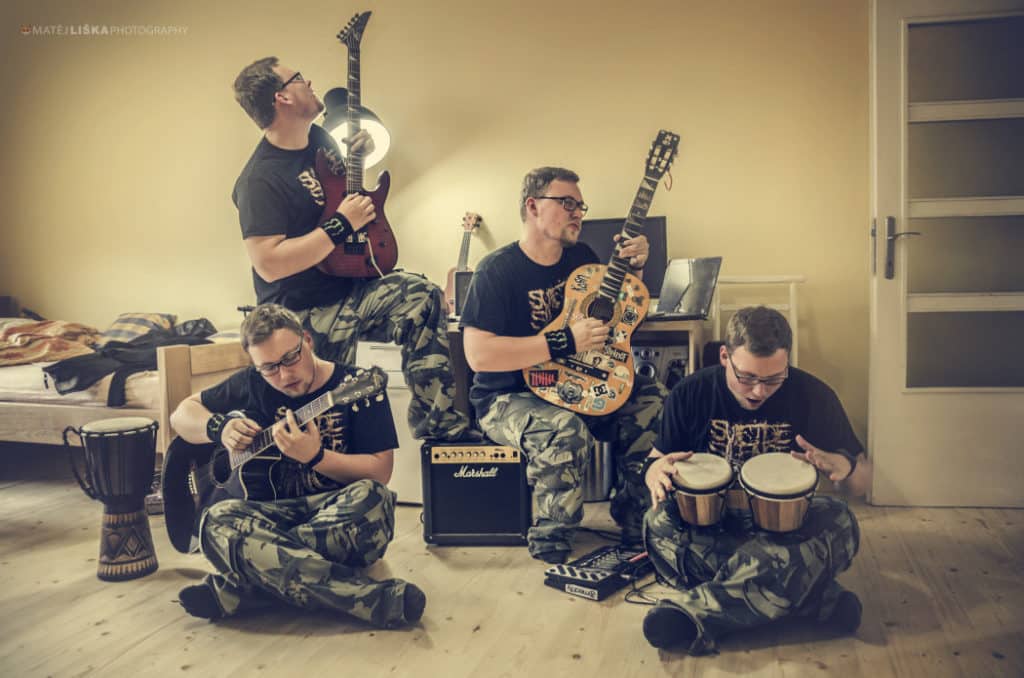
I’ve always wanted to play in a band alongside myself. I don’t have that band yet, but thanks to Zoner Studio I can at least imagine how it would look. I take four pictures of myself playing on different instruments, and then I join these exposures into one to get a single picture where I have four different roles in my imaginary band.
Tripod Required
To pull off a trick picture that’s this complicated, I need for all of my source pictures to sit exactly on top of each other. I can’t get that without a tripod. If you go on and do a picture like mine—where you’re photographing yourself—then you’ll appreciate a self-timer or a remote trigger.
Be careful to avoid changing the camera settings or the scene’s lighting, so that all of your source pictures have the same white balance, etc.
My “1.jpg” photo with nobody in it may have been “useless,” but then again, I wanted to try out my composition right at the start. If you too take a picture like this and include it in your multiple exposure, you won’t do any real harm.
I took these five pictures with my tripod-mounted camera, and then I joined into a multi-exposure in Zoner Studio.

Creating the Multiple Exposure
To join these five photos into one, I use the Remove Moving Objects function.

Next, I need to select the photos I’ll be using for the multi-exposure. Since I have them all together in a folder with no other pictures in it, this step is very easy.

Then Zoner Studio aligns and crops the pictures. However, since I took all the pictures from a single spot and used a tripod, this has practically no effect. (But if you have a very, very steady hand, this step can give you the opportunity to start from pictures shot without a tripod.)

The next step contains the key bit of magic that makes my trick picture possible: the Duplicate objects option. If this option were turned off, then instead of keeping all four of me, the final picture would have none of me.

The four copies of me overlap, and so when Zoner Studio merges them automatically, a couple of things aren’t completely right. So now I need to manually fine-tune the picture. I click the Manually correct regions in the picture button, I frame the parts Zoner Studio got wrong, and I tell the program which version to use.

Fixing Details in the Editor
Sometimes even manual correction while putting a multiple exposure together isn’t quite enough. This was one of those times. But I have a secret weapon: the Editor’s Place Image tool.
I open my creation in the Editor and paste in the part of the picture that needs to be fixed. It’s the shining buttons on the hi-fi, which should be hidden by my leg, but aren’t.

I use Place Image to re-add the source photo where I have my leg in front of the hi-fi, and then I use the Selection brush to select the part that I want to cover. I adjust the mask display settings to get a better idea of exactly what I’m selecting. That’s why the illustration here shows so much red—the part that’s not red is the selected part of the picture.

Here’s how my final picture looks:

More Exposure Experiments
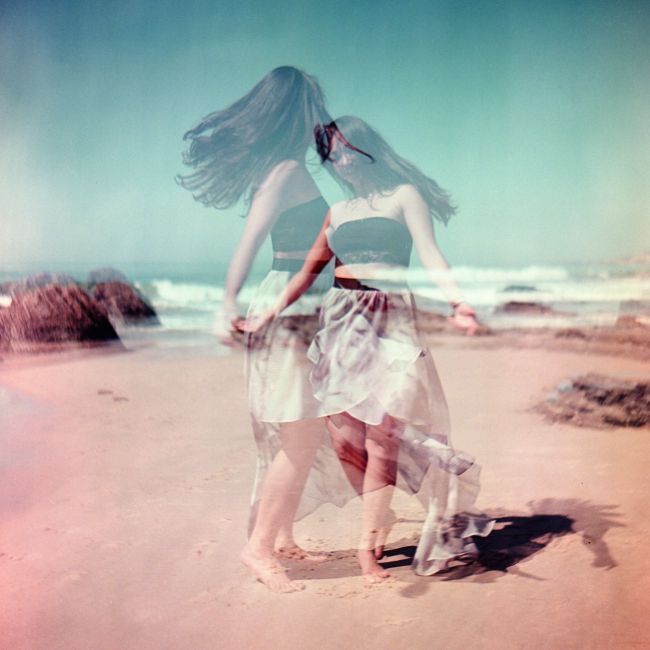
To wrap up this article, here are a couple more pictures I produced using variations on the same technique.
This photo here comes from a couple of years ago, when I still thought that using HDR automatically made me a professional.
Working without a tripod, I took a total of 15 source pictures, and I turned each group of three into an HDR image. I only went on to make multi-exposures after that. That’s why you can see so many flaws in this picture. (My recommendation, if you’re going to do HDR, is to work from just one RAW instead of three JPEGs—that way, misaligned source pictures can’t even happen.)
If you’d like to know more about doing HDR in Zoner Studio, see our article on exactly that.

This photo has similar origins:
You can find some similar pictures in this Techradar article.
Did these techniques catch your eye? Download Zoner Studio and try it for free for 7 days to explore multi-exposures and much more.