Two Ways to Add Grain to Your Black and White Photos

When it comes to technically perfect color photos, digital noise is viewed as a blemish, and camera manufacturers are constantly improving their sensors to minimize it. And in fact we’ve published a number of guides to removing noise from your photos. But things are different for black-and-white photos—in these, “grain” is an element that’s not just tolerated; it’s downright desirable. Here’s how to add it to your photos easily.
Photographers often add noise to their black-and-white photos on their PCs as a creative element. This gives the photos a look similar to traditional film photographs—for which grain is typical. Zoner Studio has tools that make it easy to add grain to your photos. We’ll show you two ways to do it—the first is in the Develop module, while the second is in the Editor.
Adding Grain in the Develop Module
This is probably the easiest way to add noise to a photo. In the right panel of the Develop module, you’ll find a tool that’s made for precisely this job. Just expand the Effects section of the panel, and scroll down to the effect named Add Grain.
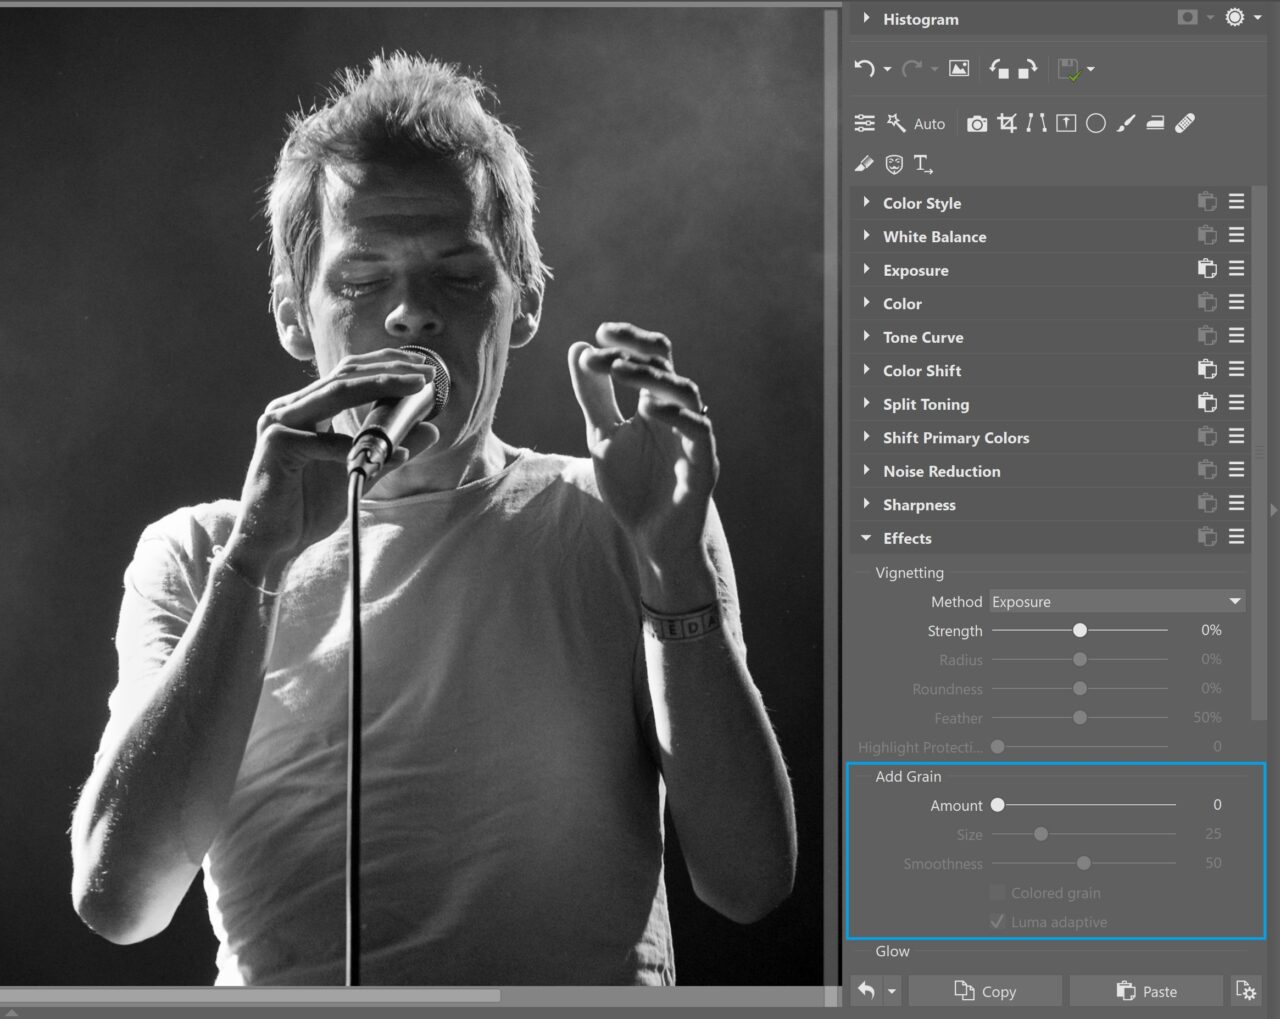
Expand the Effects section in the right panel of the Develop module. You’ll be working with the effect named Add Grain.[/caption] Work with this tool is very simple. The Amount slider sets how much grain is added to the photo. Use the Method list to set the size of the added grain. The best choice for this will differ from photo to photo and will depend on how strong an effect you want to achieve.
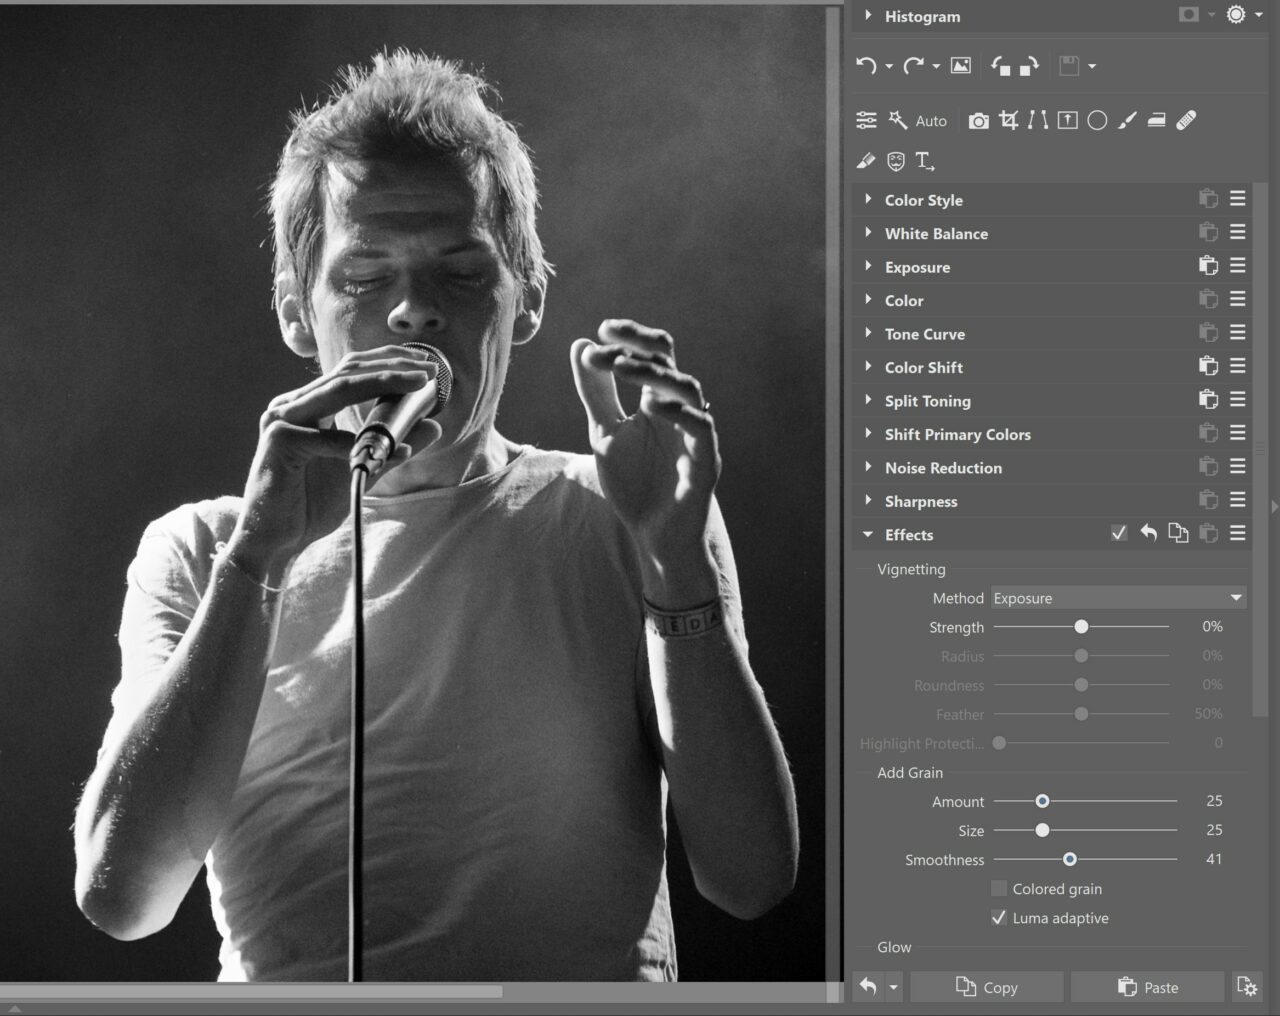

TIP: If you are working with a color photo, turn on Colored Grain. This option adds realistic-looking colored noise.
The photo before and after the edit in the Develop module.
Adding Grain Using Layers in the Editor
Zoner Studio also offers another way to add grain to a photo. This method is for true connoisseurs—what you do here is add actual grain from a real film photo to the photo in the Editor. Here we’ve acquired the grain by scanning in a photo taken on ILFORD PAN 400 film.
Download our scanned high-resolution grain and try adding it to a photo yourself!
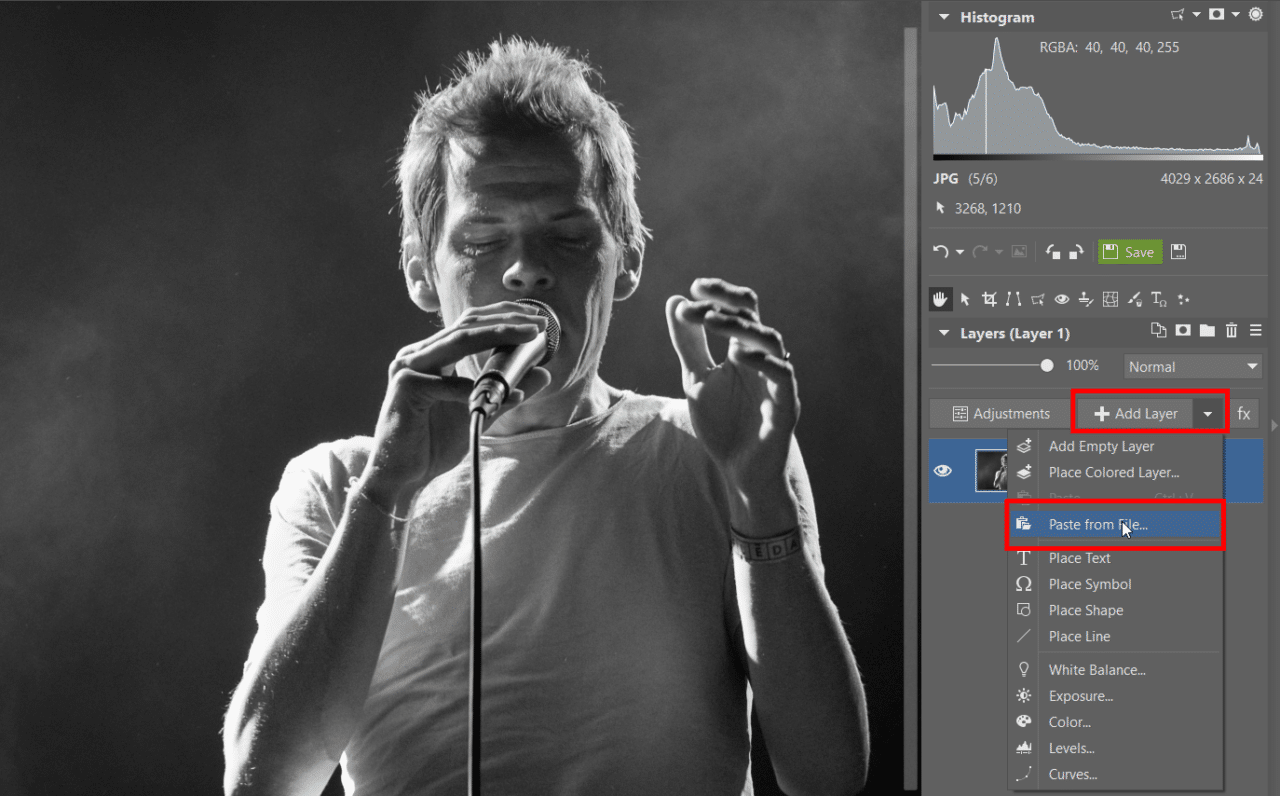
We’ll be working with layers here. In the Editor, open the photo you want to edit, and then paste in the grain picture as a new layer. To do that, click the Add Layer button and use its Paste From File option. Then pick the grain picture. This creates a new layer.
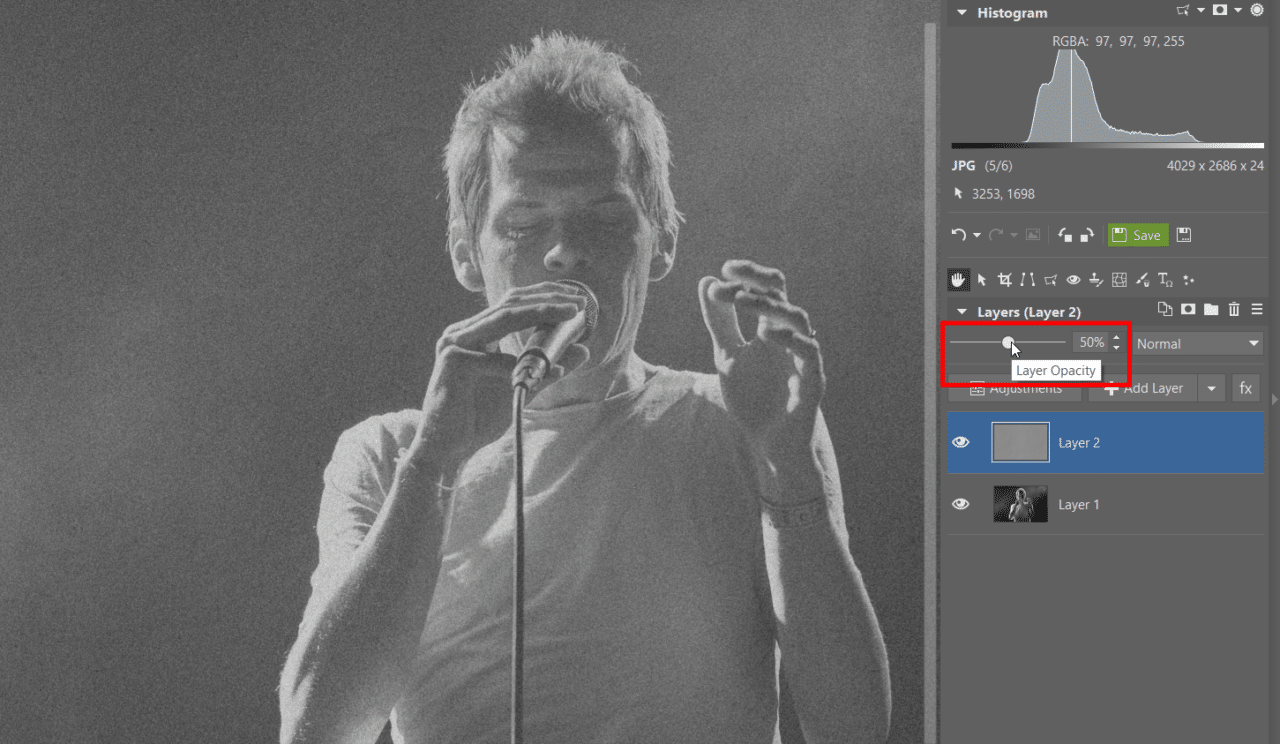
Right after the grain layer has been added, it hides the original photo completely, which is definitely not what you want. So set a Layer Opacity level that leaves it only lightly covering the picture. Once you’re happy with your opacity setting, you can save the results or keep going.
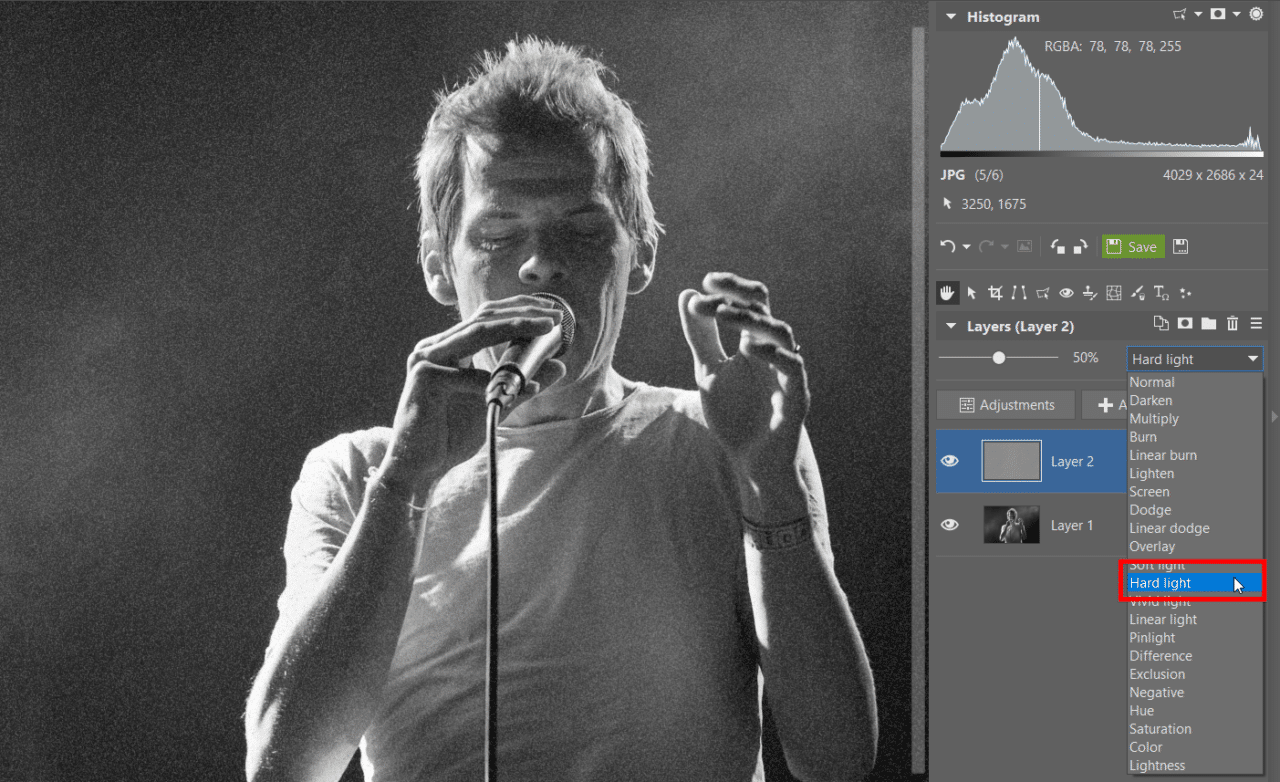
I decided to continue my editing work because I wasn’t satisfied with the results from the Normal layer blending mode. After all, Zoner Studio offers different ways to blend in layers, and some of them may be a better fit. Here I managed a more interesting effect using the Hard Light mode. Try for yourself and see which blending mode is best for the particular photo you’re editing.
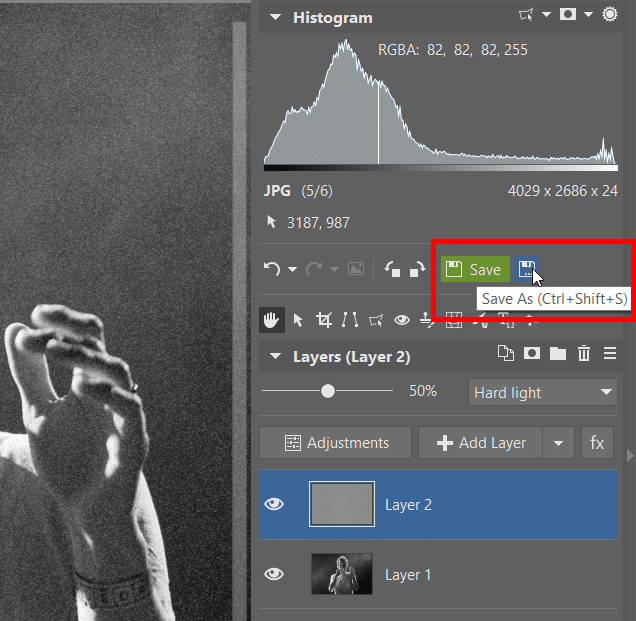
Once you’re happy with your edits, click on Save As… and choose where on disk to save your picture and in what format.
And you’re done! You’ve put realistic-looking film noise into your picture.
Like the idea of adding a grain effect to your black-and-white photos? Download Zoner Studio, try it free for 7 days, and get started!


