Decoding EXIF: A Guide to Photos Metadata and Its Uses
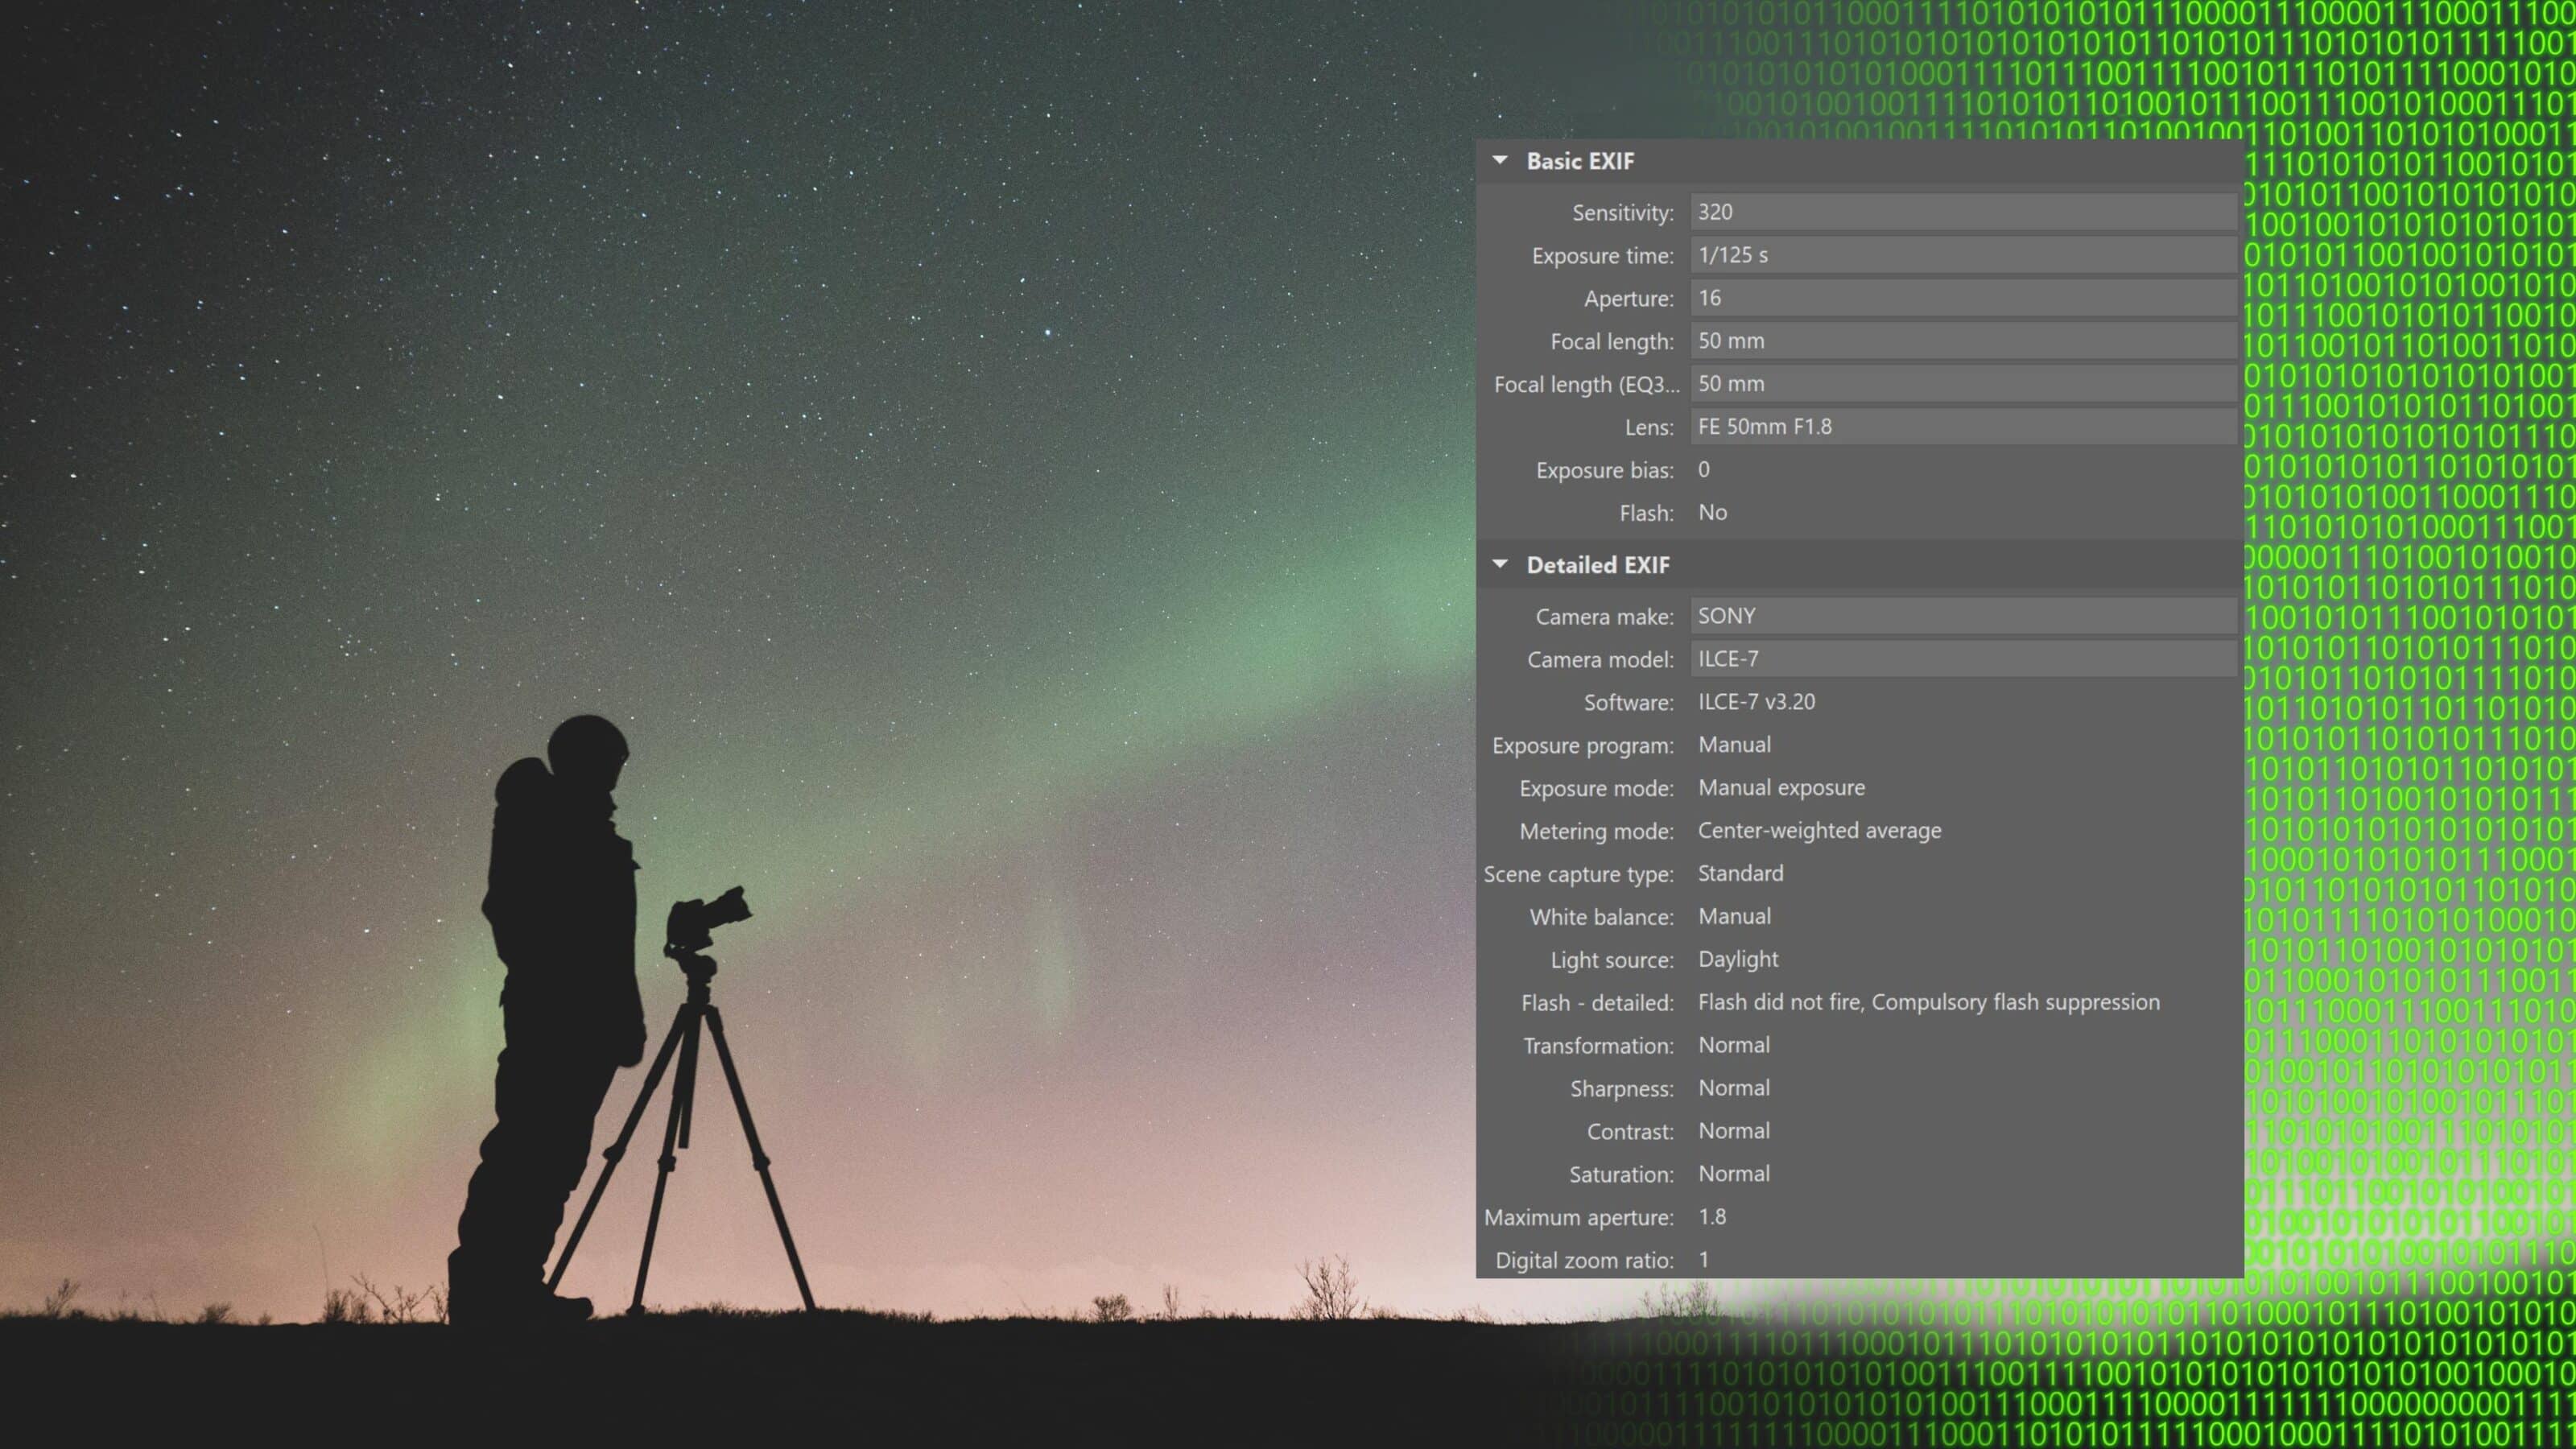
Getting your photos organized, easily finding the pictures you need, and improving your photography skills—metadata will help you with all this and more. Take a look at what EXIF, IPTC, and XMP metadata can show you, and how to get the most out of it.
Metadata is information about digital files. For digital photographs, there are three different basic types of metadata:
- The software directly inside of the camera adds basic metadata (EXIF).
- Extended data (IPTC) is usually added to photos by the user themselves in a photo editor.
- Data containing information on how the photos were processed in a photo editor (XMP) is produced during image editing and may be saved in a separate file.
EXIF (Exchangeable Image File Format) information is stored automatically by the camera when you take a photo, and it is an integral part of the photo. EXIF includes this photo information:
- information on the camera model that you took the picture with, and on its manufacturer,
- the photo’s exposure values (shutter speed, aperture, ISO),
- data on the lens and focal length used,
- flash setting information,
- the date and time when the picture was taken,
- data on the photo’s resolution,
- information on the white balance setting,
- GPS coordinates,
- a photo preview,
- and other data (which varies among manufacturers).
IPTC (this abbreviation comes from the name of the consortium that stood behind the birth of this metadata type—International Press Telecommunication Council) goes beyond the basic data that’s in EXIF. Directly inside your camera (we’ve confirmed this on Canon DSLRs), you can add information on the copyright (the name of the photographer). Typically in a photo editor, you add other IPTC information such as:
- photo description,
- keywords,
- photo rating,
- colored labels,
- and other data (which again varies among manufacturers/photo editors).
How Can You View Metadata?
Although you can display metadata in the Windows file explorer, in the picture properties, photo editors such as Zoner Studio provide better and clearer displays. Zoner Studio supports the latest EXIF version and offers the ability to edit photos’ metadata.
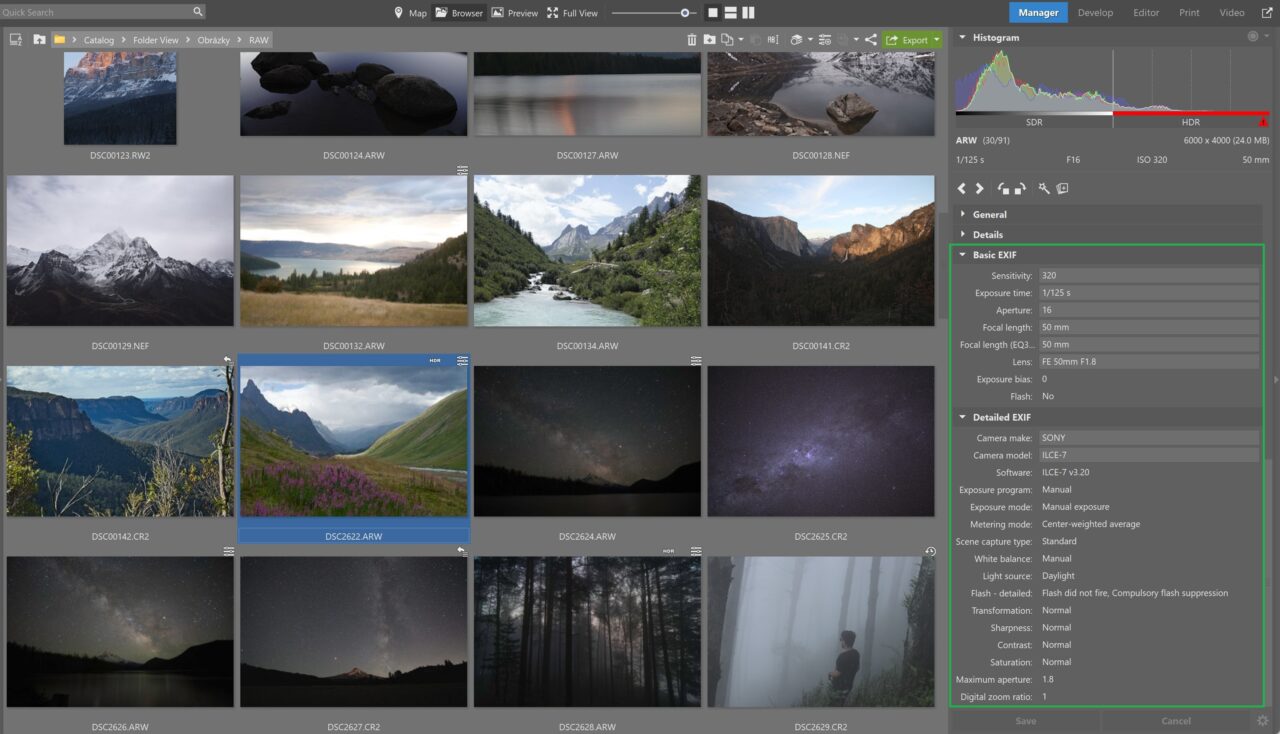
For a basic overview of your photos’ metadata, go to the Manager, where you’ll find it in the right panel in the Basic EXIF and Detailed EXIF groups.
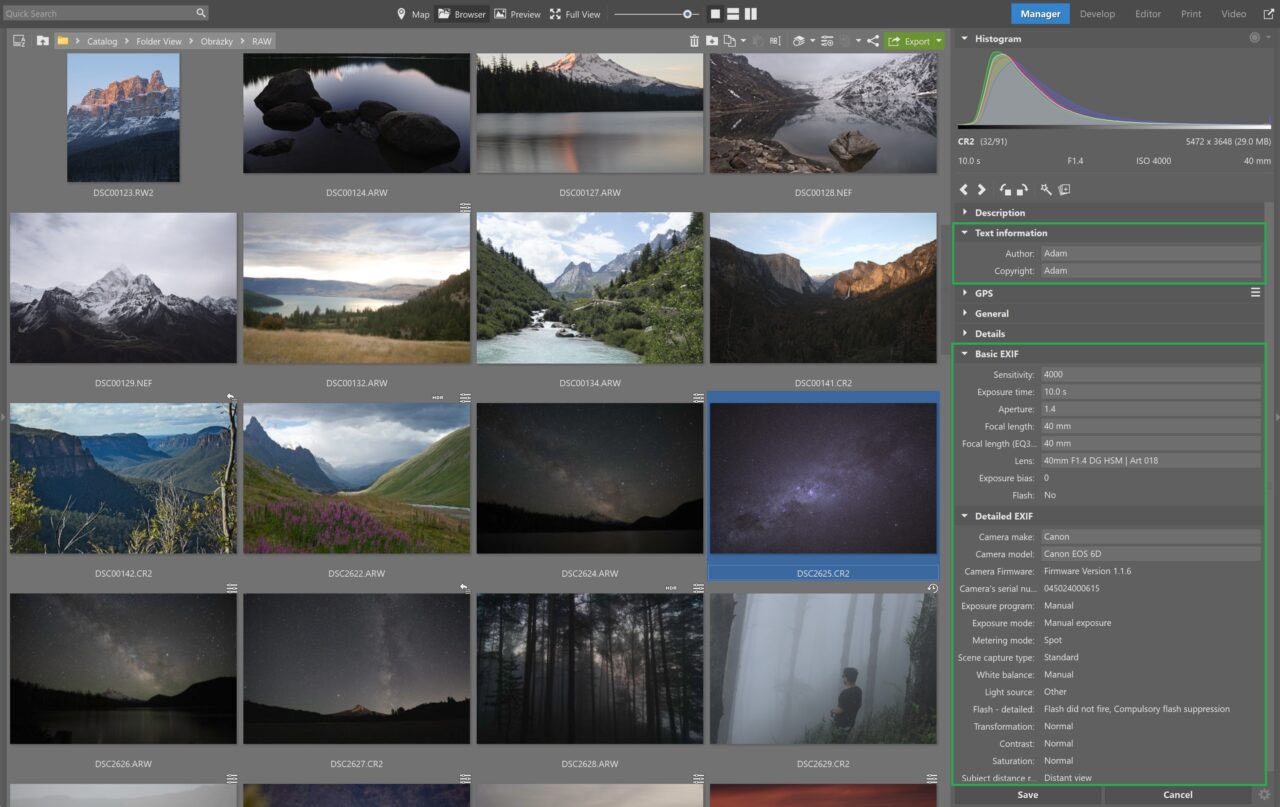
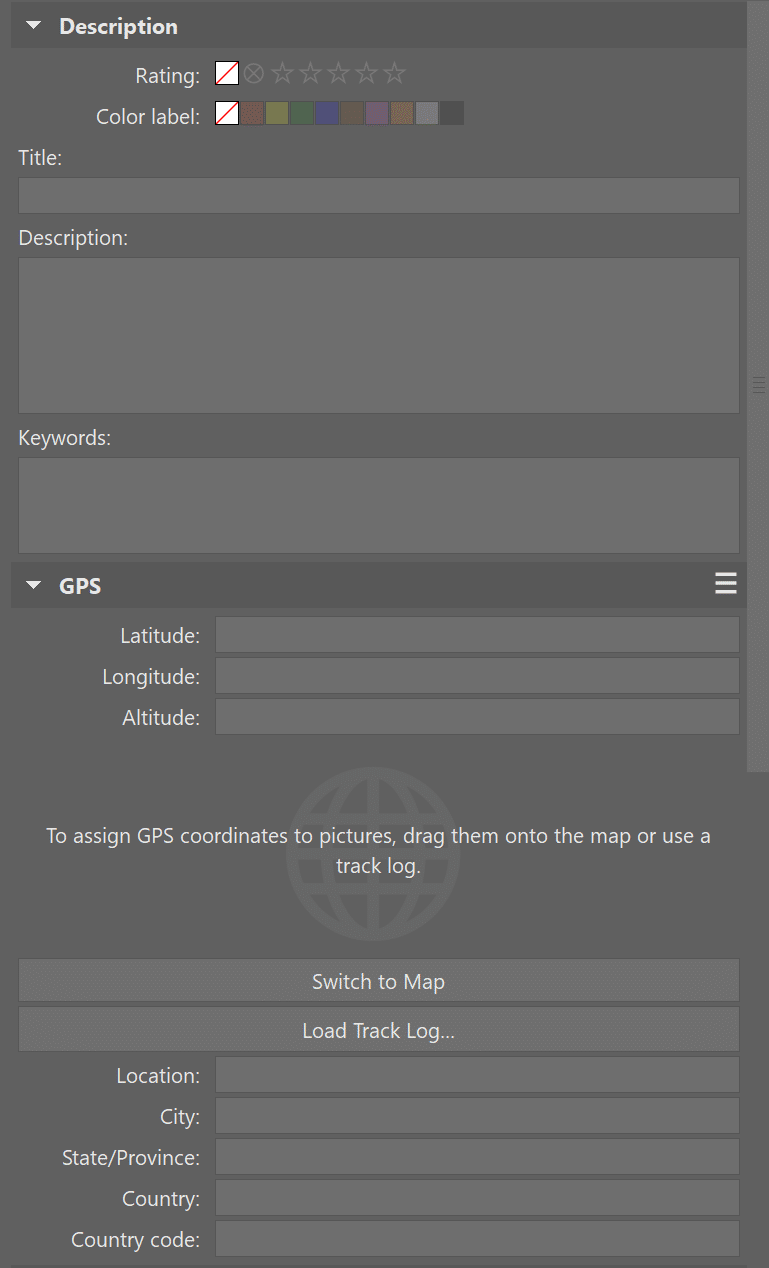
The other information that you can add to photos directly inside of Zoner Studio is:
- photo names,
- descriptions,
- keywords,
- photo ratings,
- colored labels,
- and GPS coordinates.
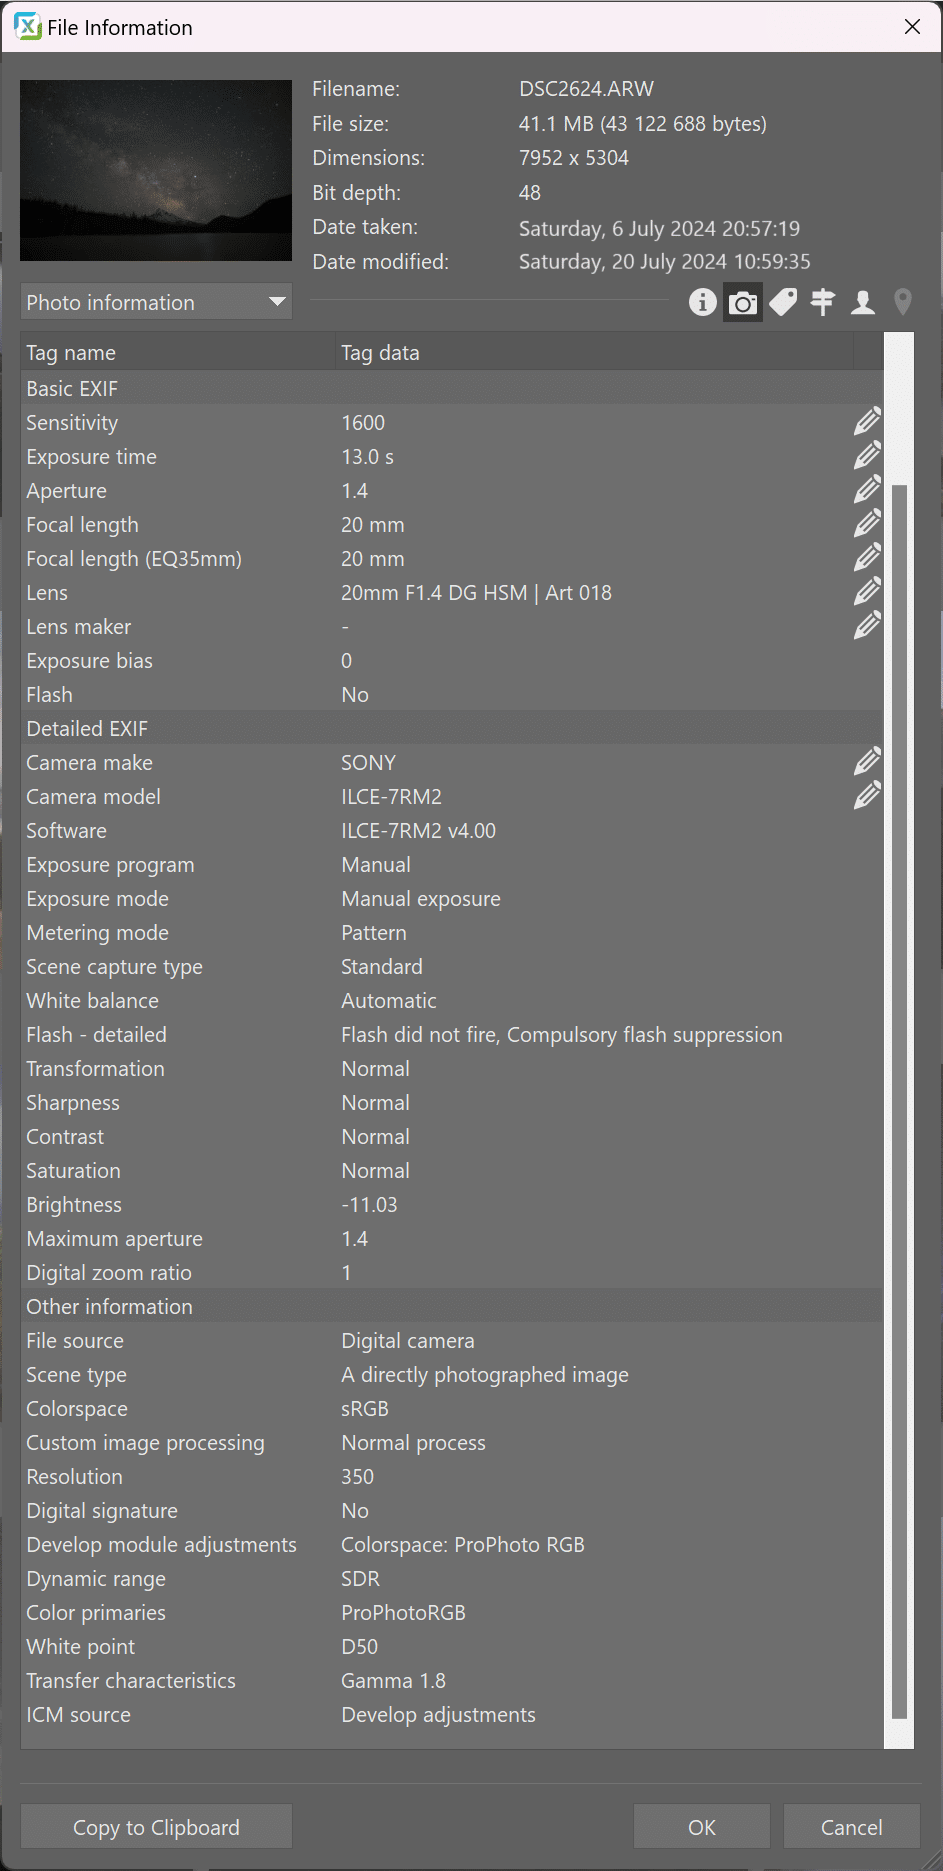
Besides the Manager, you can also show metadata in the Editor, by using the Image Information command (Shift+Enter).
What Can You Use EXIF For?
There are a number of practical uses for the data in EXIF when you’re working with digital photos. For example, you can use it to determine why a picture didn’t turn out well, or what tricks were used by an experienced photographer. Metadata that you add to pictures yourself (such as keywords) can make it easier to organize your photos.
You can also take advantage of it when printing from your camera or memory card. That’s because EXIF contains the data your printer needs to properly understand your photos. It can then set optimum print settings for them.
It’s also useful for correcting optical lens defects in a photo editor.
Now let’s move on to a closer look at some specific uses of metadata.
Filtering Photos by Metadata
Metadata makes it easy to filter and find your photos. It’s all up to you whether you prefer to use the data stored in EXIF or IPTC for this job. Zoner Studio lets you work with both of these types of data, and in practice, it doesn’t require you to care which is which.
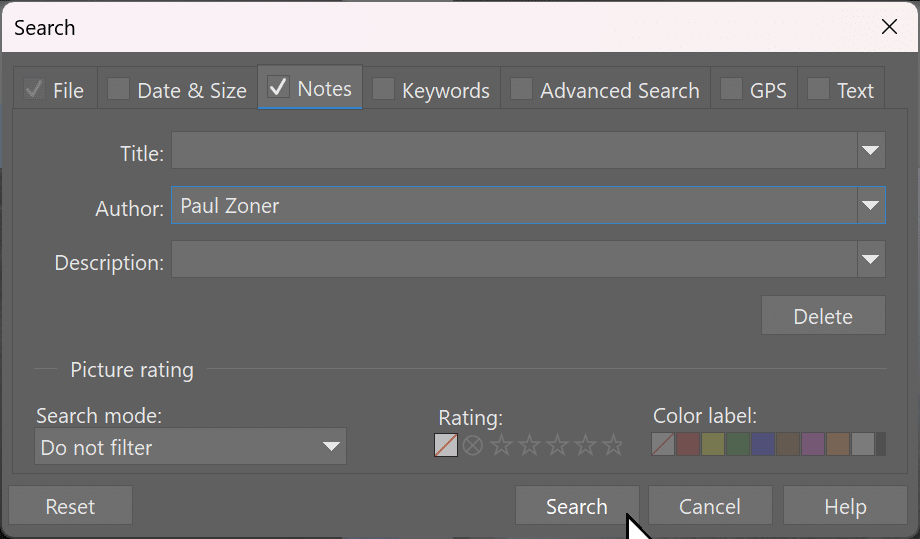
Just go to the Manager, then to the Menu, then to Organize > Filter Display. To filter photos by EXIF data, use the Advanced tab. Use the Notes, Keywords, GPS, and Text tabs for filtering by data you’ve added in Zoner Studio.
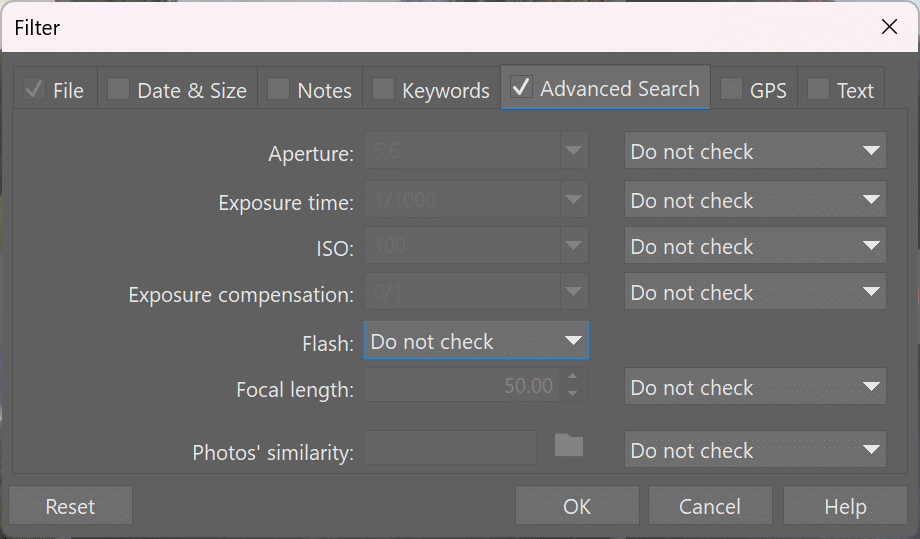
One good example here is filtering photos by their number of rating stars. These stars are added by you in Zoner Studio, and they make it easier to work with large photo batches because you can use these ratings to indicate how important each photo is.
To filter out photos, you then use the Filter Display command and then activate the Notes tab. Then enter the conditions you want under the Rating option.
You can use this method to view, for example, only photos that you want to edit in detail, print out, and include in your portfolio (e.g. 3 stars or more), or more-or-less the opposite: photos that you only plan to archive (1 star).
So this is a quick way to see just the photos that you want to work with, without having to go through a whole folder.
Metadata Will Help You Find Your Photos
You can also find specific pictures by their metadata. So in just a few clicks you can show photos from last year’s vacation, pictures of your children, or for example all your panoramas. Just give the picture labels, ratings, or keywords, and you’re ready to go.
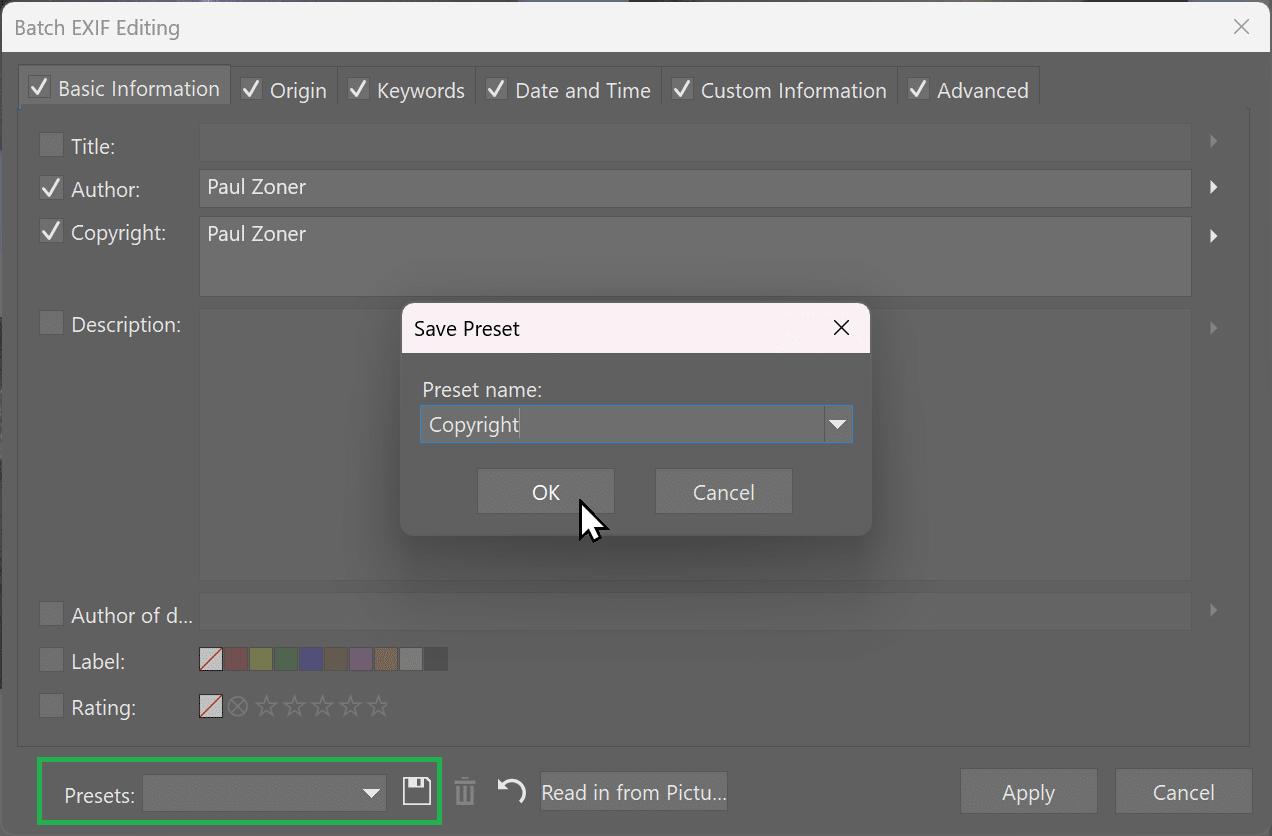
You can either add these to pictures one by one, or add them in batches; that’s useful for example when you’re tagging all the pictures that you took in one place.
The simplest technique is to tag your pictures right when you’re importing them onto your computer. But you can also do it at any time later. Just go to the Manager, select the pictures to which you want to add the given kind of metadata, go to the Menu, and use Information > Batch Edit EXIF (Ctrl+K). Then just add the data in question.
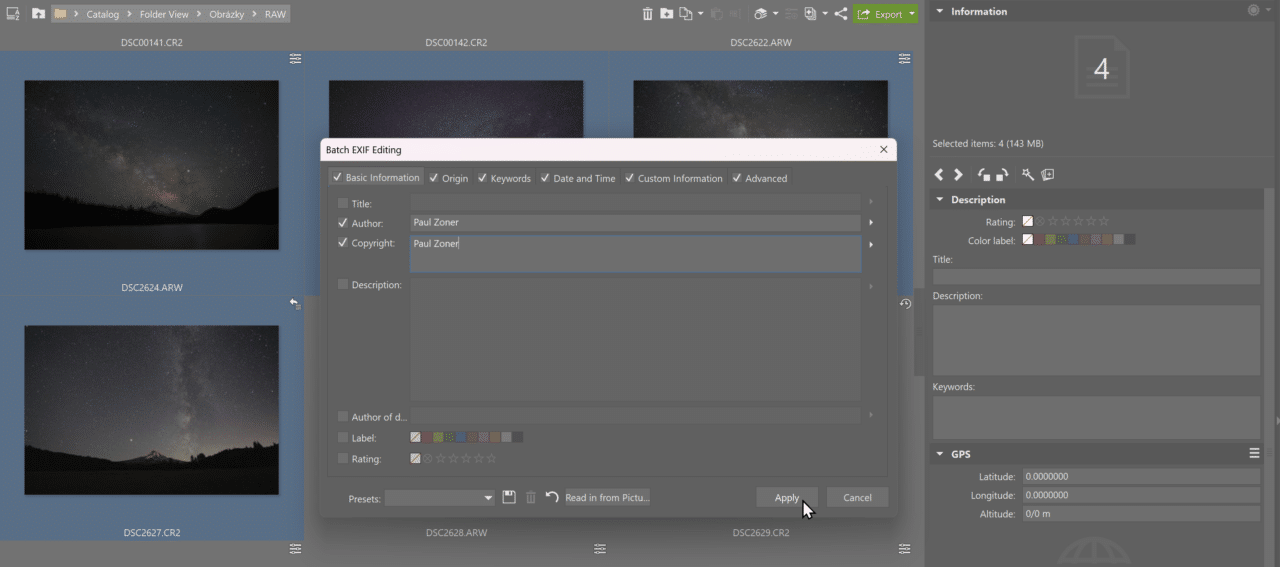
If there’s a certain set of data that you add quite often, use the diskette icon to save it so you can later reload it.
To find photos based on their metadata, use the search box at the top left of Zoner Studio, or go to the Menu and use Organize > Find…. Both of these methods will help you find your photos easily.
EXIF Will Lead You to Better Photos
Basic EXIF data will also help you catch technical problems in your photos.
For a blurry image, it will reveal whether or not the problem was due to a long exposure and camera tremors from your hands. And whether the other exposure parameters would have let you use a shorter exposure, or whether what you really needed was a tripod.
All this will let you learn from your mistakes and improve your skills.
EXIF will serve you similarly when it comes to other peoples’ photos. It will tell you what technique the author used to get the results they got. And then you can try out similar settings for yourself.
Fixing Defects Using EXIF Data
A picture’s metadata also contains information on the camera and lens used. And this information can help you to fix defects that are typical for that camera and lens combo.
For these fixes, you use lens and camera correction profiles (LCPs and DCPs). Modern photo editors such as Zoner Studio can take advantage of these profiles to automatically fix barrel and pincushion distortion, chromatic defects, and vignetting.
You can also use it to set camera profiles that simulate individual manufacturers’ original color profiles.
So EXIF data and other metadata offers numerous ways to make your work with photos earlier. Learn to love them!