White Balance, Vignetting, and 3 Other Common Edits That Make Winter Landscapes Shine
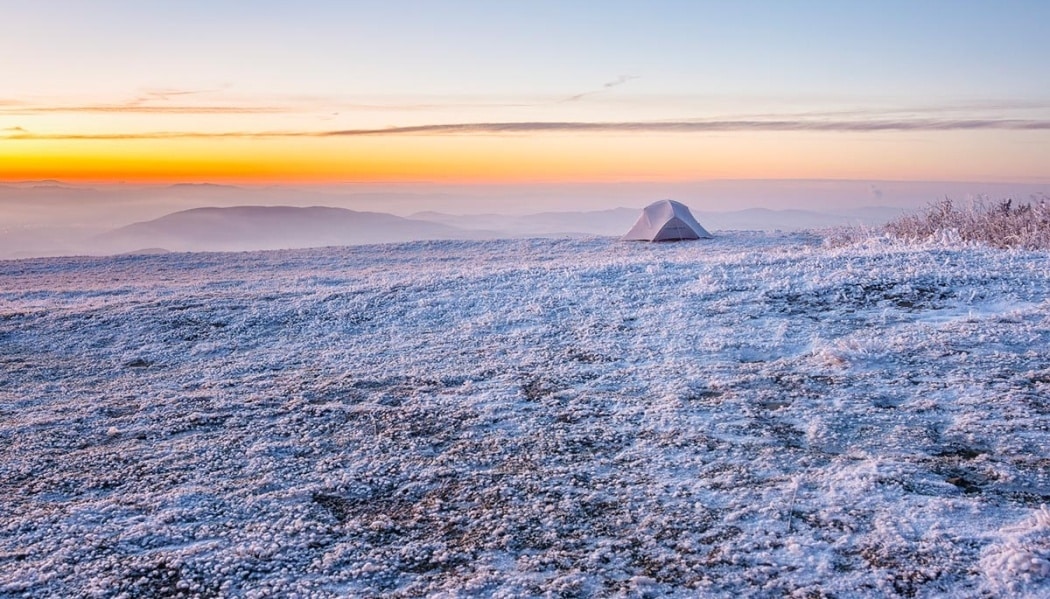
Winter landscapes are at their most beautiful when frost is drawing patterns in them and the flying snowflakes are forming a white down. Then all you have to do is grab your camera and head out to take magical pictures. But taking them is only the beginning. Few winter photos get by without edits such as white balancing, vignetting, or increasing contrast.
They say that every photo needs slightly different edits. But for certain picture types it always pays to repeat the same basic steps. This applies for example for photos with winter landscapes.
For these, you generally need to set the correct colors, emphasize the subject, and make the picture more dynamic—or maybe dreamlike instead. Fortunately you can manage all of these edits in just minutes.
How to Adjust Their White Balance
Most winter photos are full of white, which many cameras are incapable of exposing correctly. So the snow in them is gray—or maybe blue-tinted—instead of white.
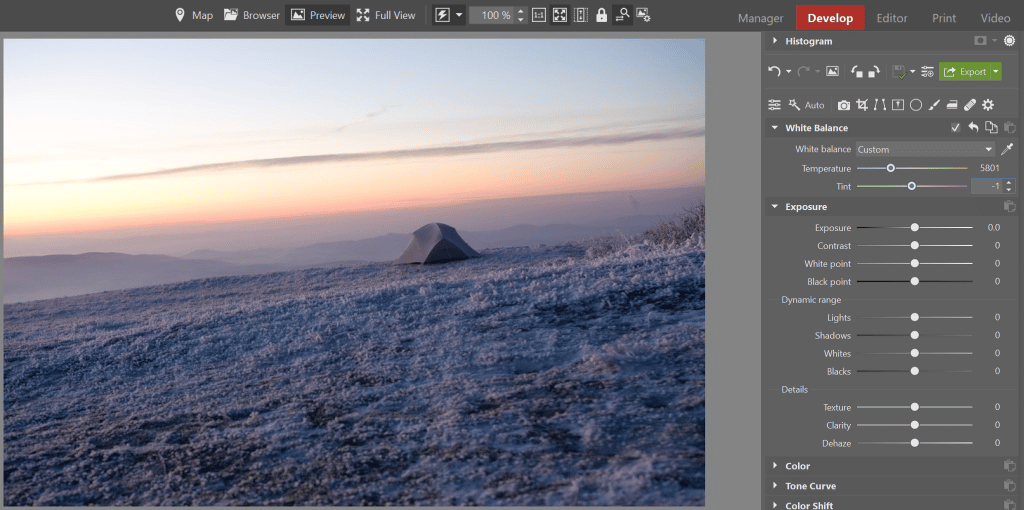
But you can take care of this easily. Just go to the Develop module in Zoner Studio and then to its White Balance settings.
Use the eyedropper to correct the picture’s white balance by clicking on a neutrally-colored spot. That is, one with a white or neutral gray color. So for a winter photo, click on the snow for example.
Then use the sliders to fine-tune the white in the picture. If you want to make the picture look colder, stick to cool tones.
Emphasizing Your Subject Using Vignetting
To lead your viewer’s eyes to where you want them, take advantage of vignetting. Classical vignetting, however, is black, and is too striking for winter photos. So try the white version. On pictures of winter landscapes it looks much more natural, while still retaining its function.
To add Vignetting, use the Effects group. Just set its strength and the radius in which it will appear.
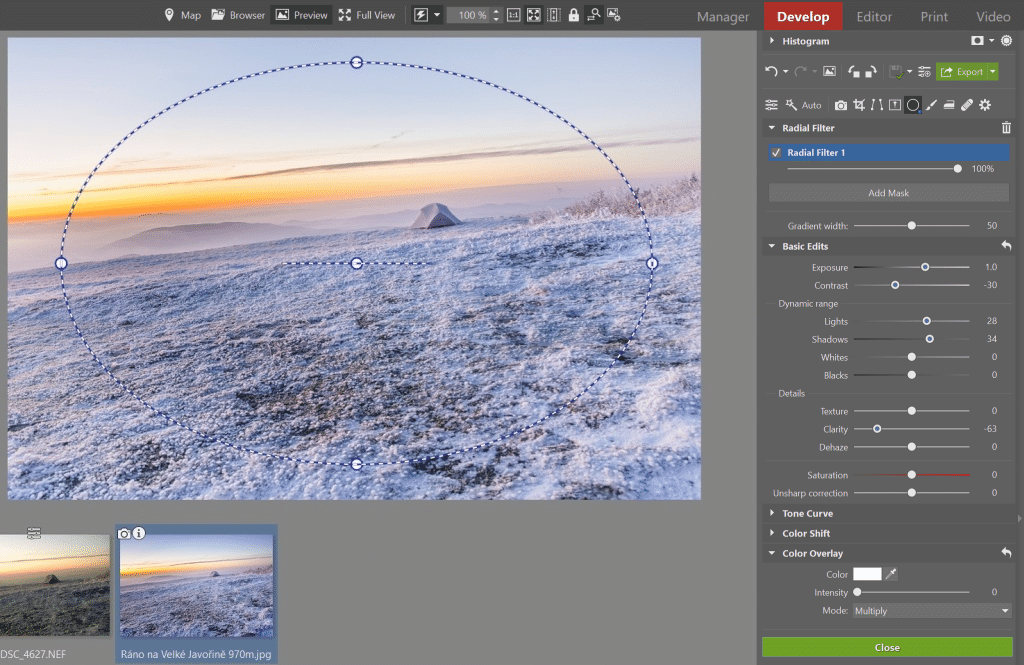
You can also reach for the Radial Filter (R). For this edit, first mark the part of the picture you want to emphasize. Then invert your selection and set up the filter’s parameters as needed. Typically useful changes here are increasing Exposure, adding Lights, brightening Shadows, and reducing Clarity.
If white vignetting is a bad fit for a given picture, you don’t have to apply it at all. Or you can use the classical black.
Mysterious Landscape? A Black and White Conversion Will Help.
A high-quality black and white photo of a winter landscape can be enthralling. A black and white winter landscape with footprints in the snow, for example, will look mysterious. So try this conversion on your photos.
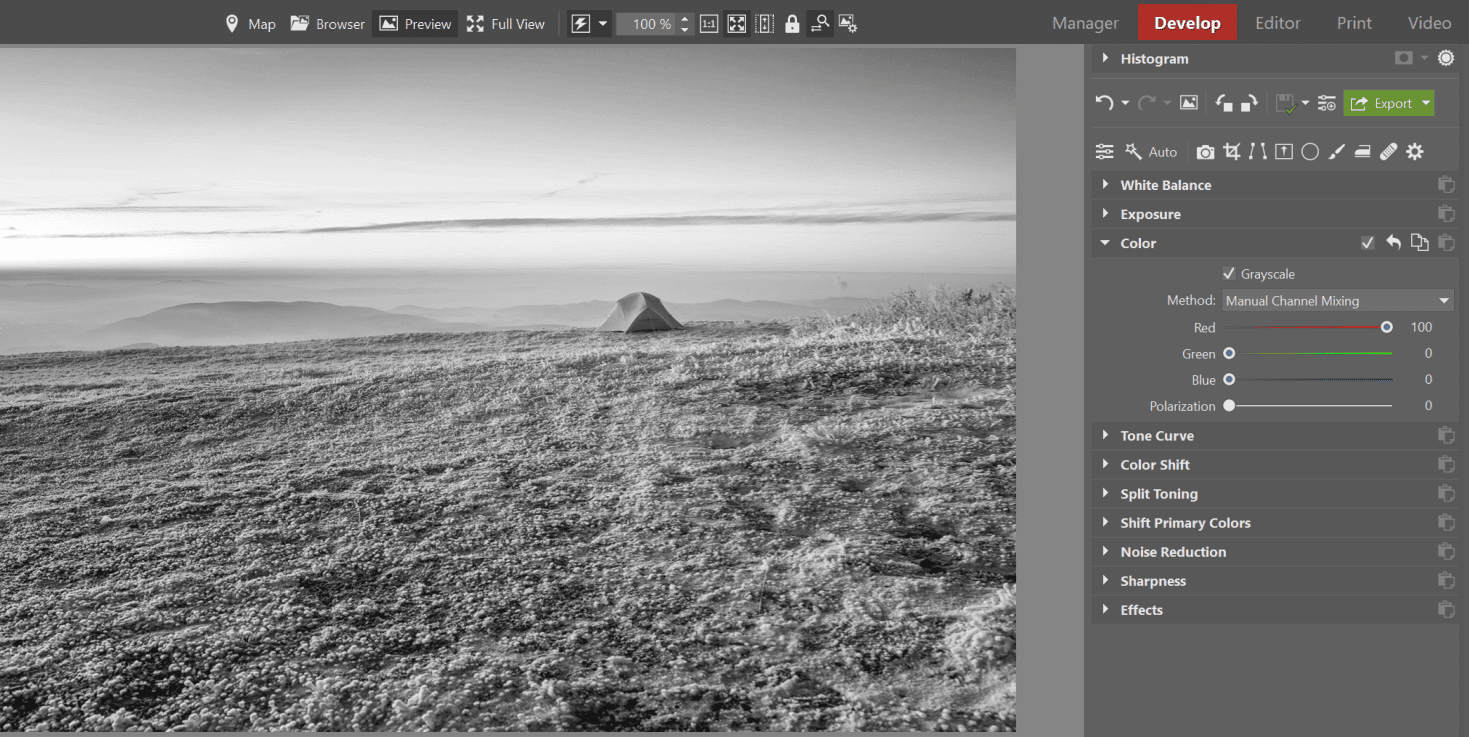
To do it, turn on the Grayscale option in the Color group. Meanwhile, after converting the photo, try playing with the influence of the various color channels in the photo using the Manual Channel Mixing controls.
Also, don’t hesitate to even convert photos that are dominated by the red channel. In this situation you just emphasize the other channels using the sliders, or use Polarization. You’ll see that you can get the result you want.
Mist Magic
Zoner Studio really has a lot of functions, and it’s not a bad idea to occasionally try out some that you don’t know yet. Dehaze might be among these. It removes, or on the other hand adds, mist in a picture. Using this effect, you can even get a very “instagrammy” look for a photo.
3 Ways to Increase Contrast
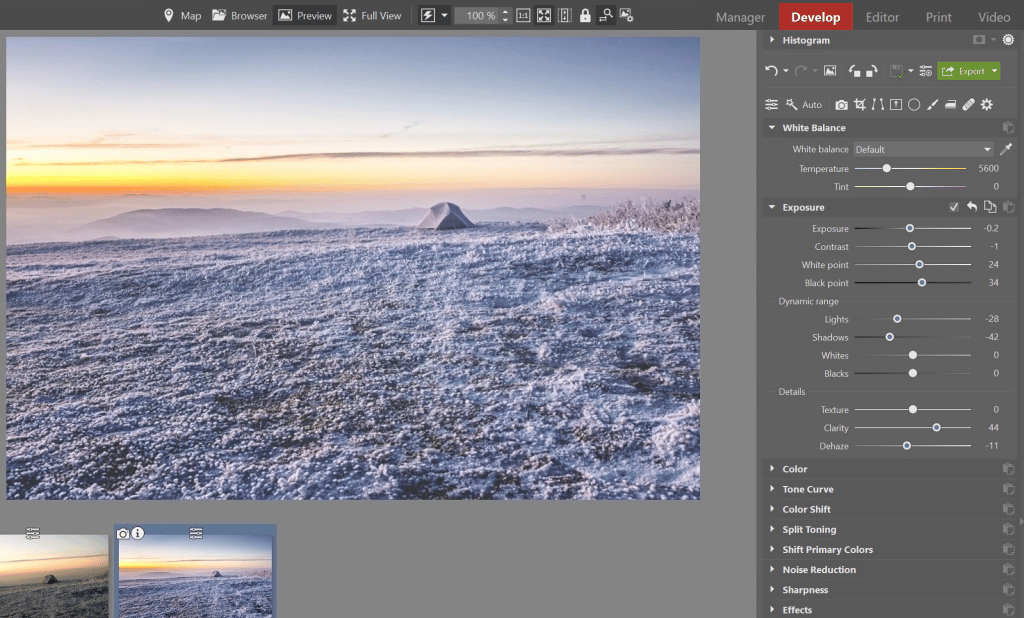
If a photo seems too faded, don’t be afraid to add contrast. You have several options for doing so—specifically:
- Curves,
- Levels,
- and the Contrast slider.
Each of these has a slightly different effect. So it’s good to play with them separately and gradually fine-tune the picture to meet your expectations.
Watch the Histogram
One of your last actions here should be to check the histogram and the picture’s detail. After all, winter photos often lure unwary photographers into blowout and loss of detail. So be wary—check the histogram in the bright parts of the photo as you’re editing.
Wrap things up by exporting your photo. And if you resize it during the export, don’t forget to then resharpen it. Otherwise your reduced-size photo can look blurry.
Now you can publish the photo if you’d like. And just for the feeling you’ll get, now compare it with the original. You’ll vividly see how just a few quick and basic edits can significantly improve a winter landscape photo.
So go ahead—try all this out on your pictures too. Download Zoner Studio, try it free for 7 days, and give your winter photos just the right magic.
