Do You Really Need All That Gear for Landscape Photos?
There’s lots of tools out there for landscape photography, but not everyone wants to carry them all on a hike—or even buy them. If you’re not sure what equipment you’ll need for your nature photography, read on and learn what makes sense to take.
Great lenses and filters and a solid tripod definitely serve your pictures well, but unless you’re selling your pictures for posters, you can make do with more modest equipment. Below I’ll start from a spartan foundation and explain which extras do or don’t make sense for landscape photographers, and why.
But first, the question we all must ask ourselves:
Where Will These Photos Be Used?
Your equipment almost directly depends on how you plan to use your photos. If you just want to put them on Facebook, then practically any gear will do. In this situation a little extra noise or an imperfect lens are insignificant.
Phone and small compacts lack dynamic range, and so you may find that the sun or a piece of the sky is overexposed and melts into one white mass. But there’s a solution—to take underexposed photos and then digitally brighten them. This will give you more noise, but at such low resolutions, nobody will notice.
I found a picture I snapped eleven years ago with what’s now a museum piece: a Minolta G400. It was JPEG-only and had a resolution of just four megapixels (nowadays I only shoot to RAW). And yet, after minor edits like raising the contrast and saturation, I’m ready to publish the photo. But keep in mind that even if you “click through” the picture below, you’ll still only see 0.75 mexapixels (1000×750 pixels).

Konica Minolta G400, 1/200 s, f/8.3, ISO 50, focal length 16.8 mm
If you’re planning to print your photos, things are more complicated, because picture characteristics aren’t just about pixel count; they’re also about noise, lens quality, and the quality of computer processing. I don’t want to lay down sweeping judgments about resolution, but the rule of thumb is that that 4 megapixels should be enough for good printing at sizes around A5 (20×15 cm; around one folded Letter-size sheet).
Of course the larger your print, the greater the demands on the camera and processing. Also, it’s always good when your picture has quality to spare, in case you’d like to crop it or make some other major edit that will lower its technical quality.
Lenses Get Heavy on Long Hikes
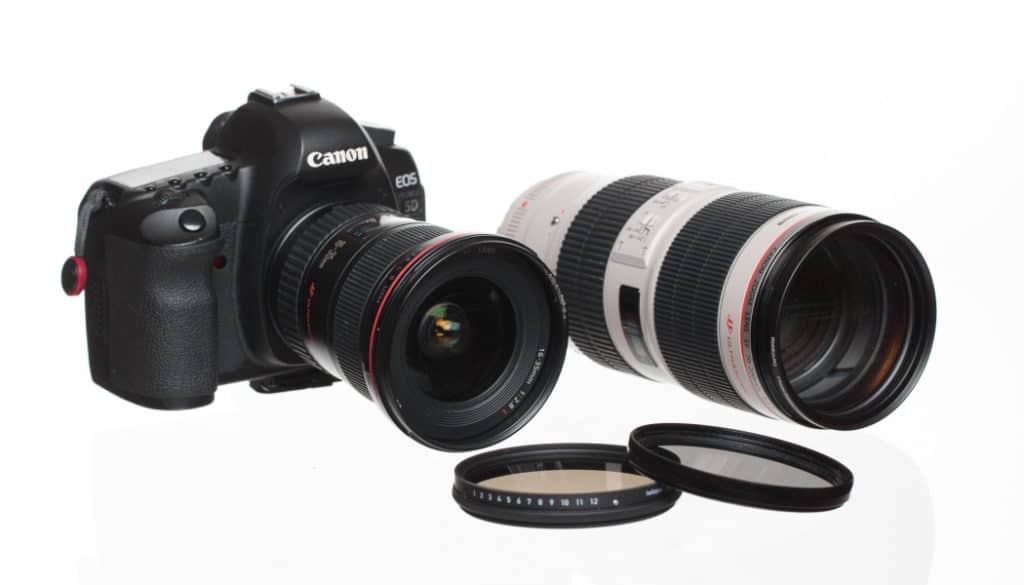
Even if you have a camera with interchangeable lenses back home, they can stay at home instead of ruining your back. I have a lot of lenses myself, as a professional photographer. I could easily carry the “holy trinity” from Canon (16-35/2.8 II, 24-70/2.8 II, and 70-200/2.8 II IS) nonstop—these are all top-of-the-line lenses, and with them, I can cover everything from ultra-wide to medium telephoto lengths. But the thing is: add them up, and they weigh over six pounds. Along with the two-pound camera body (a Canon 5D Mark III), bottled water, some small items, and my backpack itself, they really get heavy.
And yet meanwhile I don’t actually have to cover every millimeter of focal length. So I leave my middle lens at home (two pounds less), and almost never miss it.
I’ve started going even further, and on my last hill hike, I only carried a 16-35/2.8 and an 85/1.8. So I also left my heavy zoom lens at home, and saved another kilogram.

Notice how I now only have a couple of lenses available, and yet it’s almost never a problem. Some things I can tweak on a computer, so e.g. by cropping away 15 percent of a photo I shot with an 85mm, I actually get a 100mm length without anyone noticing the quality loss.
My choices block certain shots, but I can still take others that are just as good. If you have great pictures, no matter what lens you use, nobody will care about imaginary other pictures you didn’t take.
Polarizing Filters
Many photographers have heard by now that polarizing filters can somehow magically add saturation and contrast. Far fewer have a real idea of how they work.
The comparison below illustrates this. The picture on the right was taken without a filter. You can notice white leaves in various places that are at an angle where they directly reflect the sun’s light. The picture on the left was taken with a polarizing filter. The reflections on the leaves are suppressed, and so they are darker.

The great advantage of polarizing filters lies precisely here: they have an effect that would be difficult to recreate via computer edits. The original all-white leaves can’t simply be saturated to make them green again. So overall a picture can be “robbed” a little if you don’t use a polarizing filter.
However, these filters aren’t useful everywhere. Under cloudy skies they do nearly nothing. And even on sunny days their effect varies in strength depending on where you’re pointing and where the sun is. Also, when you come out of the outdoors, you’ll want to take these filters off, because they darken the image.
If you don’t want to have to spend time on them, then don’t—though personally I find them attractive enough to screw them on and back off several times a day.
Gradient Filters
Ever since the dawn of landscape photography, people have been confronted the clashing of light skies with dark landscapes. Cameras still can’t handle it today, and that usually means facing a choice of two bad options:

A graduated neutral density filter will solve this problem. This is a piece of glass that is clear in one half and slowly transitions towards a dark shade starting from the middle. Used right, it darkens the sky so your photos don’t suffer blowout.
But there are also some problems with these filters: they’re expensive, and also, just one won’t cover every situation; there are variously dark filters with variously sharp transitions. You then have to pick one that fits your situation… and lens! So: sure, they give great pictures, but you might want to choose an alternative.
The first alternative is to take a dark photo and then brighten it on a computer using a software gradient filter. Your edits will make your camera’s quality apparent, because they’ll add noise. If you own a good camera, this increase won’t matter, and what’s more, today’s full frame models (the Sony A7R II, the Nikon D810) have enormous dynamic range, so you can print photos at large sizes even after these kinds of edits. But you’ll still be paying for your comfort with some loss of quality.
The other option is to take several shots and combine them into one on a computer. The abbreviation HDR means that we’ve made our way back to a high dynamic range. In this case your costs for not using a graduated filter are time spent editing on a computer and also some awkwardness in your pictures—it’s hard to photograph details well (you need a tripod and calm wind). Also, you need to be careful if anything in the landscape is moving.

Despite the downsides of the alternatives I’ve described, I use them both, and so I don’t carry graduated filters. Those only help when you want absolutely uncompromising picture quality or, paradoxically, when your camera is so bad that you wouldn’t be able to use HDR effectively.
Neutral Density Filters
ND filters exist purely to dim the light entering your sensor—usually so that you can use longer exposures. In this photo I used an ND filter to get an exposure of 30 seconds under direct sunlight.

Canon 5D Mark III, Canon EF 24-70/2.8 II, 30 s, f/16, ISO 100, focal length 58 mm
You don’t need an ND filter if you’re shooting at night, or even for ordinary daylight shots. It’s purely for special effects like blurring water. But even there it’s partly replaceable, if you minimize your ISO and maximize your f-stop. Some lenses even let you go out to f/32. That’s such a small aperture that you’ll get some pixel-level diffraction, but you will get an extended exposure, even if it is a bit shorter than with a filter.
If you don’t plan to take pictures that need them, ND filters are one more thing to ignore.
Tripods
Tripods—a typical tool for landscape photographers, but not as useful as it seems. A tripod is practically essential if you want to do special effects like blurring flowing water or taking pictures at twilight.

Canon 5D Mark III, Canon EF 16-35/2.8 II, various exposures, f/8, ISO 400, focal length 16 mm
But in daytime it’s not very needed, and if you’re try to produce HDR compositions from bracketed shots, well, it all depends on your camera and the stability of your hands. For example if you just need three photos with varying brightnesses to capture the whole breadth of the scene, and your camera can manage six per second, that means that you can shoot the whole series you need in half a second—short enough that you won’t move much.
There are compromise tripods out there, including low-weight tripods and also minimalist ones like the Gorillapod. But once again I personally don’t usually carry a tripod without a specific reason. When I know there’s a waterfall at the end of my trail, I go ahead and make room in my backpack.

Canon 5D Mark III, Canon EF 16-35/2.8 II, 1/4 s, f/16, ISO 100, focal length 16 mm
Some Final Details
UV filters are also worth a look, although I must say I’ve stopped using these as well. They’re only good for protection, and if you’re also using polarizing filters, swapping them is annoying. Also, today’s lenses can handle some rough treatment. But everyone has their own approach, and in risky situations, a UV filter really is a good idea.
Some texts on landscape photography also mention remote triggers, for when your camera is on a tripod and pressing the trigger might make the image shake. Good idea, but a timer in your camera will give the same benefit, by delaying a shot until a few seconds after your trigger press.
I won’t say much on replacement batteries or cards—here it’s all up to your judgment on the risk of being without them at the wrong moment. Because these are small items, I carry one extra of each just in case.
Do What You Need
There are lots of photographers’ aids out there, but with a little practice you can do without some of them. So personally, I usually carry just two lenses and a polarizing filter to go with them… but your road is up to you.
Just remember that no tool out there is more valuable than an interesting landscape or a breathtaking setting sun—so I wish you luck in finding both!