Get Longer Exposures With ND Filters
ND filters are neutral-gray filters that can come in handy for producing a variety of special effects and for taking photos that otherwise would be out of reach.
Nowadays, with all the effects you can achieve on a computer, you might think that there’s no point in putting a special filter on your lens. But there are some exceptions, and ND filters are among them.
What’s an ND Filter?
ND stands for Neutral Density. These pieces of glass are dark, and nothing else—they don’t distort colors or any other aspect of a picture.
ND filters come in various strengths. The weakest let through only half of the incoming light (ND2). The strongest let through only one thousandth (ND1000)—or even less. The naming system above with ND2, etc. is unfortunately only one out of at least three that are used for these filters. But there are clear ways of converting among these systems.
Darken? But Why?
At first glance, it may seem senseless to strip away valuable light, and it’s true that in “normal” shooting, you don’t want to. But there are some special cases where it’s welcomed.
Broadly speaking, these are cases where you want to use an exposure time to blur motion. Although you can prolong exposure a little by using the right aperture, that’s not always enough, and also this approach sometimes isn’t desirable, or even available.
The Main Reason—Water
By far the most common use of ND filters is in connection with water. Blurring moving water gives you a calmer, more ethereal photo than otherwise.
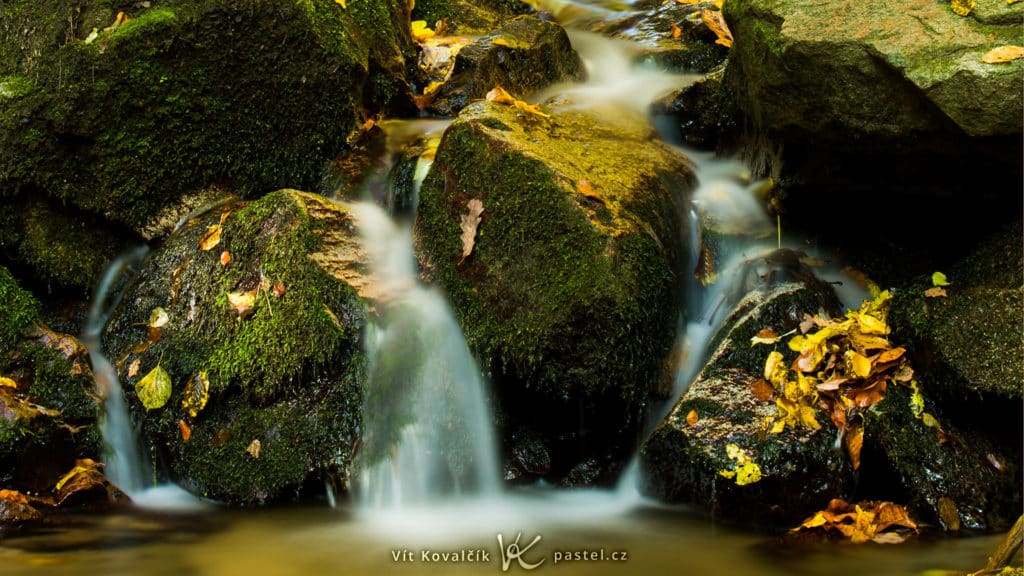
The first shot below shows what you can (sometimes) do without an ND filter, using just a high f-stop. Since the whole scene is inside a forest, it’s fairly low-light, which enabled an exposure time of a full 15 seconds:

Canon 5D Mark III, Canon EF 70-200/2.8 IS II, 15 s, F22, ISO 100, focus 70 mm
Still, it took the use of an ND filter to let us bring our f-number down from F22 to F2.8 (that is, it let us use a 64× larger hole) while still keeping roughly the same exposure time:

Canon 5D Mark III, Canon EF 70-200/2.8 IS II, 10 s, F2.8, ISO 100, focus 75 mm
If the waterfall weren’t in such a dark location, then we would have needed the ND filter even to just blur the water at all (no matter what our f-stop).
Perhaps the very most classical use of ND filters can be found in seaside photos. Here’s an example where an ND1000 filter was used in order to enable an exposure time of three minutes. This transformed the breakers into a thin fog and dramatically blurred the sky.
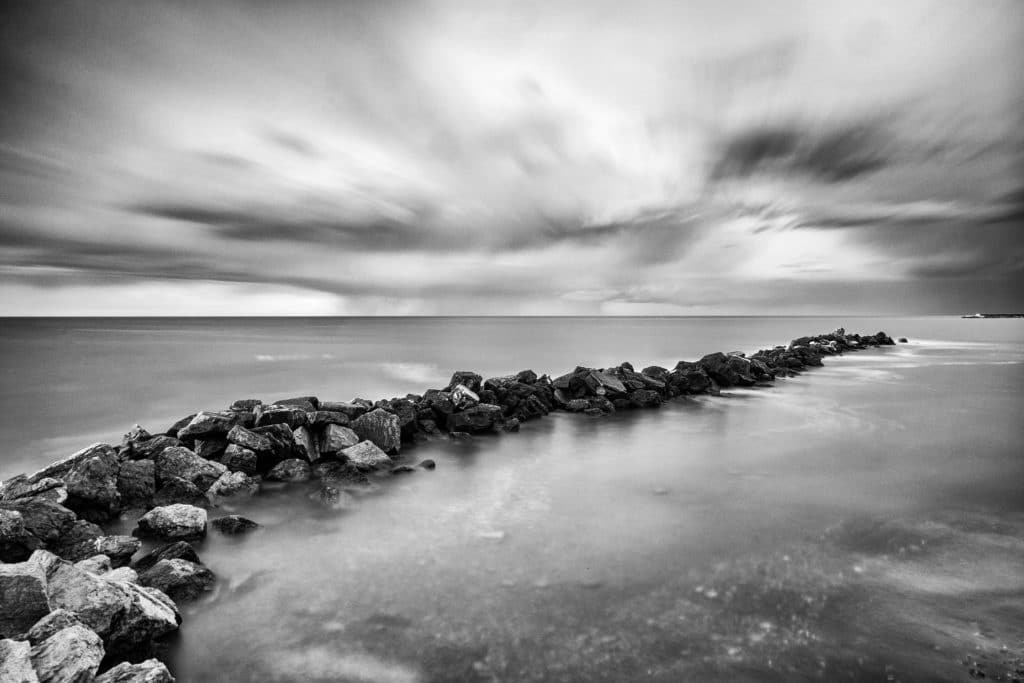
Fuji X-T1, XF14mm F2,8 R, 3 minutes, F22, ISO 200, focus 14 mm
Tripods and Tricks
The above exposure times should make it clear that you won’t be taking these shots by hand, and that you’ll need high-quality support.
Because these tend to be nature photos, you can’t rely on just placing your camera on a low wall. A tripod is essential.
It’s good practice here to turn off image stabilization, which, in combination with a tripod, could actually destabilize the image. For best results I also recommend using a delay on the trigger, to prevent trigger-press tremors.
What Filter Strength
As mentioned above, there are many ND filter strengths. The ones typically used in practice range from ND8 to ND1000. But how can you choose the strength that suits you the most?
Unfortunately, it’s not easy, because different filter strengths fit different occasions. If you want to strongly blur water or the sky under daylight via minutes-long exposures, then an extremely dark variant may be for you. But if you’re doing flash photography outdoors, then all you want to do is raise your exposure time up to a mere 1/200 to overcome certain technical limitations in flash photography—for which strength of around ND8 is enough.
You can buy a specific filter or two, but my favorite solution is to buy two polarizing filters and place them on top of each other (note that the one farther from the lens must be linear). This combination works together to create an “ND filter” with variable strength, that you can change just by twisting the lenses relative to each other.

Variable ND Filters
Recently manufacturers have begun producing filters that already contain both polarizing lenses, making for a variable ND filter that’s more compact and generally gives higher-quality pictures than the two-filter composite above. (Some brands also claim to reduce the polarizing effect.)
For these polarized approaches, “ND filter” really should be in quotes, because there’s nothing neutral about them. Besides darkening, they also reduce various reflections, which change the picture. On the other hand, you often actually want this change, so these “variable ND filters” tend to be very good replacements for the real thing.
What’s less benign, though, are the effects of using very high rotation. When the two polarizing filters are almost at right angles to each other, they let almost no light through. The small amount that does get through is distorted: its colors are so strongly altered that such pictures tend to be unusable. So you should avoid these extreme positions (despite the fact that they enable tempting extreme exposures).

Canon 5D Mark III, Canon EF 70-200/2.8 IS II, 1/10 s, F16, ISO 100, focus 75 mm

Canon 5D Mark III, Canon EF 70-200/2.8 IS II, 4 s, F16, ISO 100, focus 75 mm

Canon 5D Mark III, Canon EF 70-200/2.8 IS II, 8 s, F16, ISO 100, focus 75 mm
In my opinion, a variable ND filter is a good universal choice for a variety of situations, while a real ND filter is something to get when you specialize in a certain type of photo (sea photos, etc.) and want to get the absolute maximum image quality.
People
As you could see in the preceding pictures, neutral gray filters are also useful for blurring people in motion. While there’s probably not much point to blurry marketplaces, this accessory can be very practical for photographing urban landmarks that have tourists walking by them. Long exposures can blur tourists’ presence so thoroughly as to make them practically invisible. The only problem here is your fellow photographers—they’ll stay a long time in one place, and so not even long exposures will banish them from the scene.
Special ND Filters
Besides simple and variable ND filters, there are also graduated neutral density filters, which are clear on one side and transition towards a dark shade somewhere in the middle. These filters are available both in ordinary round versions and as rectangular pieces of glass or plastic.
The bottom part of a graduated ND filter lets light through, while the top part darkens the scene. You can use a filter like this e.g. when photographing landscapes where the sky is too bright and the foreground is too dark—the ND filter is a simple remedy for excessive dynamic range.
We’ll cover the use of graduated filters in more detail in a future article.
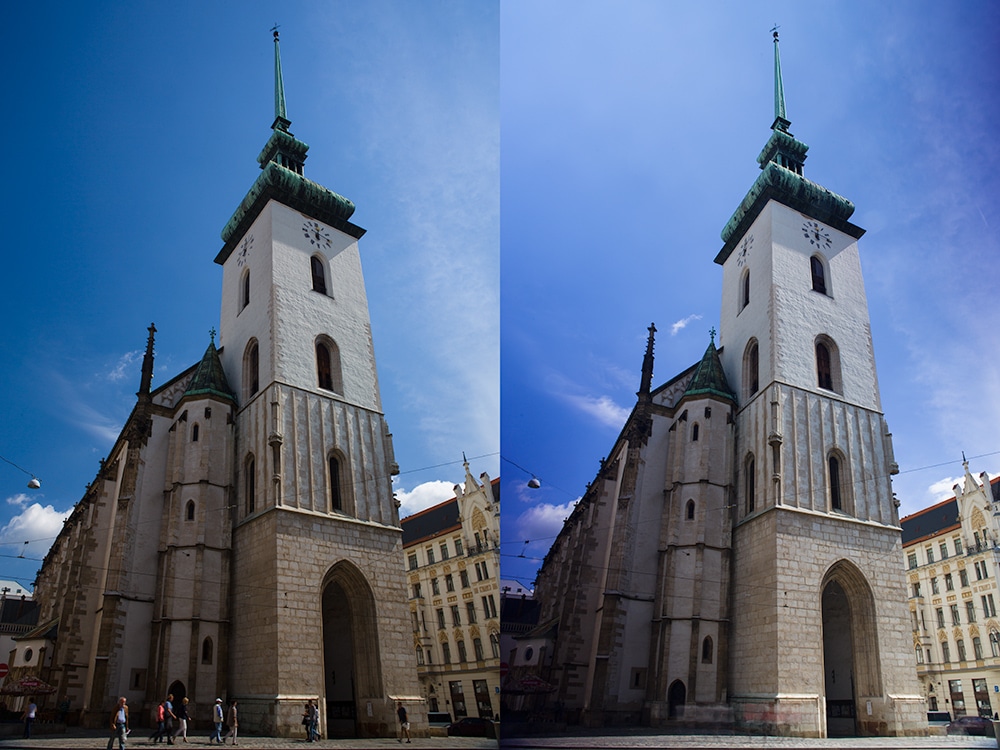
Canon 5D Mark III, Canon EF 24-70/2.8, 1/20 s on left and 2 s on right, F16, ISO 100, focus 25 mm