How to Place One Photo Inside Another: Create Your Own Photo Montage Using Layers
Sometimes you need to place one photo inside another and make the result look as realistic as possible. And there’s a very simple way to do that. You can use it for example when you’re making invitations… or when you just want to play around a little. So take a look at how to put one photo inside another and create your own photo montage or photo collage.
Creating large photo collages, and for that matter even just placing one picture inside another, requires some patience, but it’s not actually complicated. To put it simply, you just open one picture, select the part of it that you need, and then transfer it to the other picture.
But if you want your result to look at least a little realistic, you can’t just start from any two pictures. The pictures have to each have a similar exposure and a similar light direction. And they should also both be shot from a similar height.
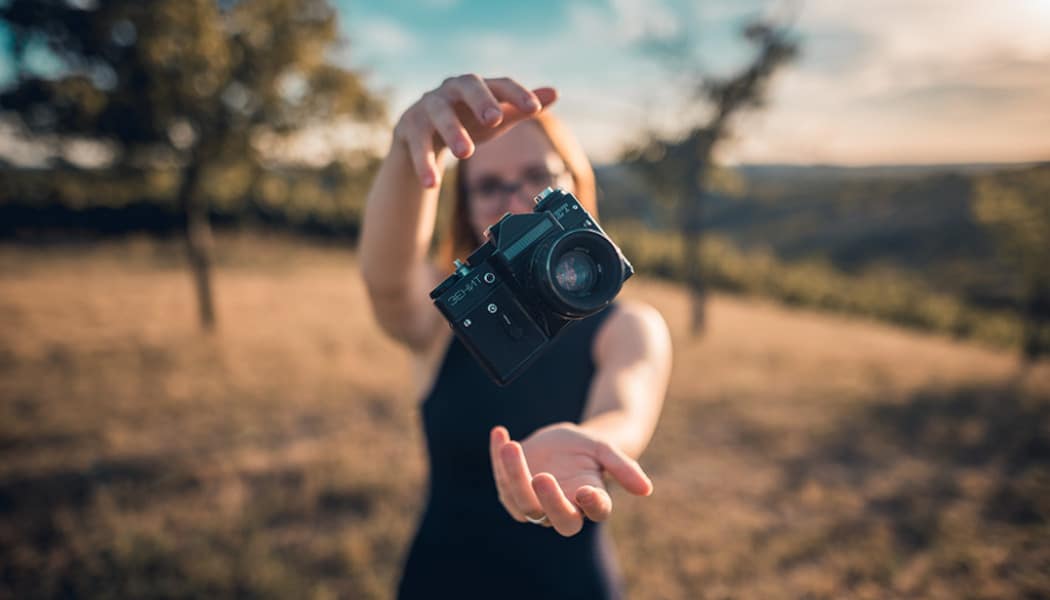
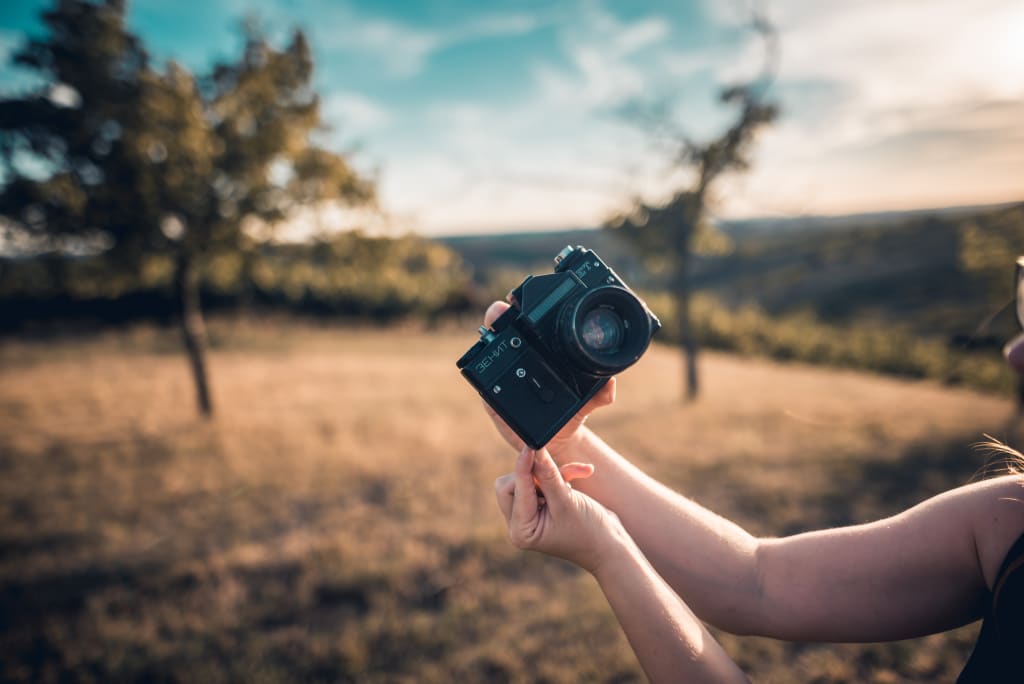
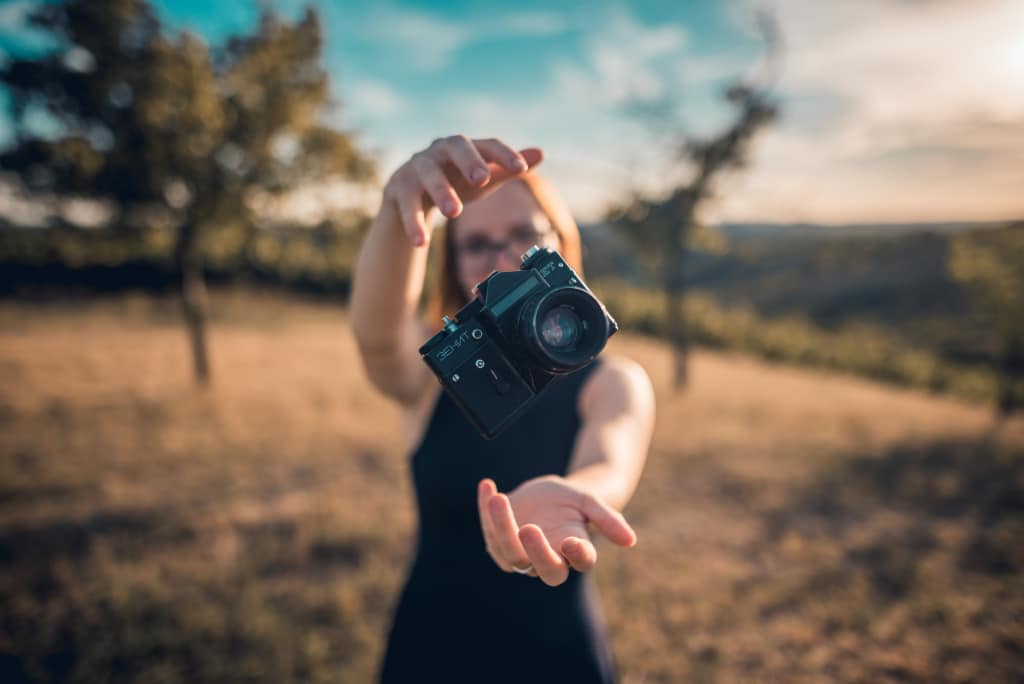
Once you’ve got two photos like that, get right to work. We’ll use the following two pictures to illustrate the process of placing one picture inside another. We’ll take the camera from the second picture and put it into the first to create a levitating camera.

Preparation Is the Foundation
It’s important to edit the photos using the same exposure settings and color tools so that they look as similar as possible. Here it can help to use the same Presets in Zoner Studio’s Develop module.
It’s also good to start from photos taken under similar or identical lighting conditions.
How to Place One Picture Inside Another
The actual process of putting one picture inside another takes just a few clicks in Zoner Studio. Here are the steps:
- Open the “background” picture in the Editor.
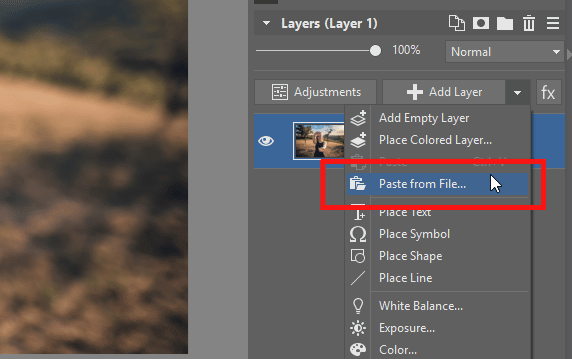
- Click the arrow next to the Add Layer button.
- Click Paste from File.
- And choose the file for the “foreground” picture.
In our example, the only part of the “foreground” picture that we need is the camera. So use one of the selection tools to select it. In this case the best choice is the Magnetic Lasso (A): it finds and catches onto the edges of the nearest object, helping you select it as precisely as possible.
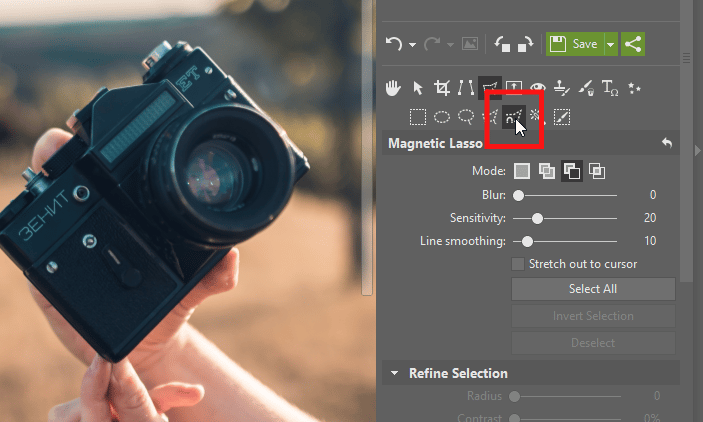
Zoom in on the picture, by rolling the mouse wheel. (This lets you select the object more easily and precisely.) Then draw around the camera with the lasso, and connect the two ends of your selection once you’re done.

Refining Your Selection
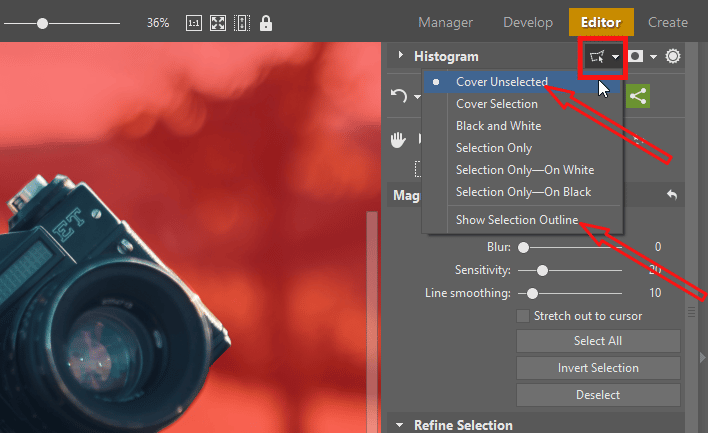
Now it’s time to refine your selection. So roll down the Selection Display options in the right panel and click on Cover Unselected. You’ll immediately see how precise you were. Then, once again in Selection Display, turn off Show Selection Outline. This gets rid of the distracting moving lines around your selection, so you’ll be able to see everything even better.
Keep in mind that no matter how hard you try, your selection will never be 100% precise. Luckily, the Refine Selection feature is here to help. Its settings are always below the settings for a given selection tool. Try moving one its three sliders a little, and you’ll see how the selection become more precise.
For fairly complex objects, you’ll sometimes need to refine the selection a little more by using the Selection Brush and then using Refine Selection again. But this will mainly happen when you’re selecting fur or hair.
Once you’re satisfied with your selection, click Apply to confirm it.

Create a Mask
Now it’s time to hide the unselected parts of your “foreground” photo. You’ve got two ways to go:
- For quick and simple collages, it’s enough to click the Invert Selection button and then press Delete to remove the background.
- But it pays to use a mask instead, since that will let you work more precisely. Additionally, you’ll be able to change the mask and adjust your selection at any time. So click the Mask icon for the foreground layer and then use Reveal Selection.
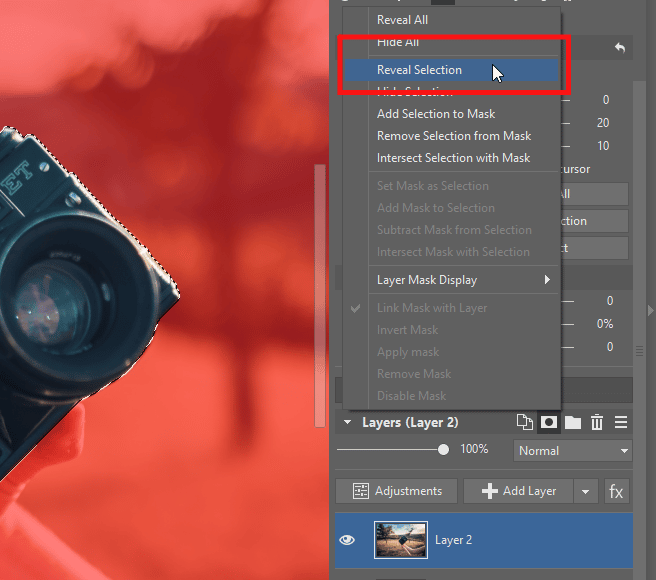
Everything except for your selection will disappear, and a black-and-white mask will be shown for the layer. It determines and shows which parts of the layer are visible (white) and which are hidden (black).
You can then cancel the selection by pressing Esc.

Adjust the Object’s Location and Size
To make your pasting job feel realistic, you’ll also need to fine-tune the pasted object’s size and location. So always consider its proportions and placement well. And keep depth of field in mind in the process.
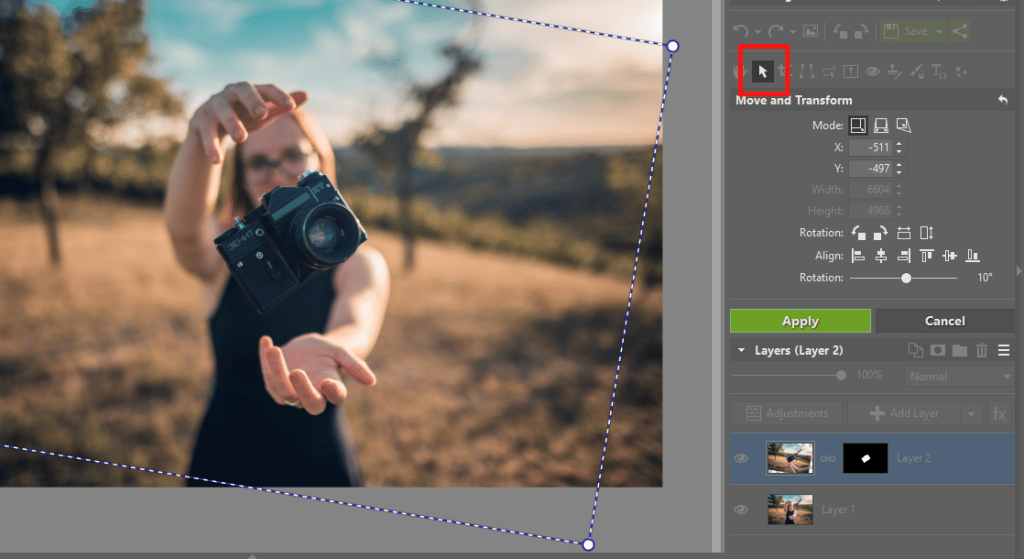
Use the Move and Transform (V) tool for these edits. With this tool active:
- click and drag a corner of the layer to resize the picture,
- click and drag outside the layer to rotate the picture,
- click and drag inside the layer to reposition the picture.
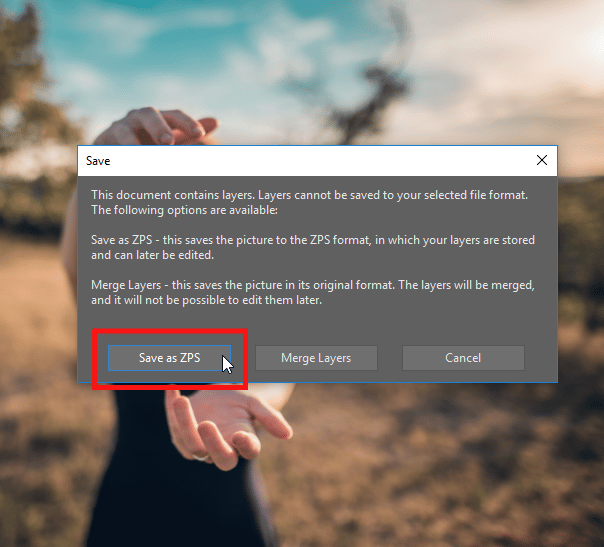
With this, your photo-pasting job is done. Now save the resulting picture—first to the .Zoner Studio format, and only then to the .jpg format. Saving it to the .Zoner Studio format preserves its individual layers and masks. That way you can go back to your edits at any time.
Create Your Own Photo Collage
Layers open up many new creative possibilities for you. You definitely don’t have to stop at just levitating cameras. How you use Paste from File is all up to you.
Just download Zoner Studio X, try it free for 7 days, and get started with your own photo collages.