How to Retouch Away Wires, Trash, and More in Your Photos
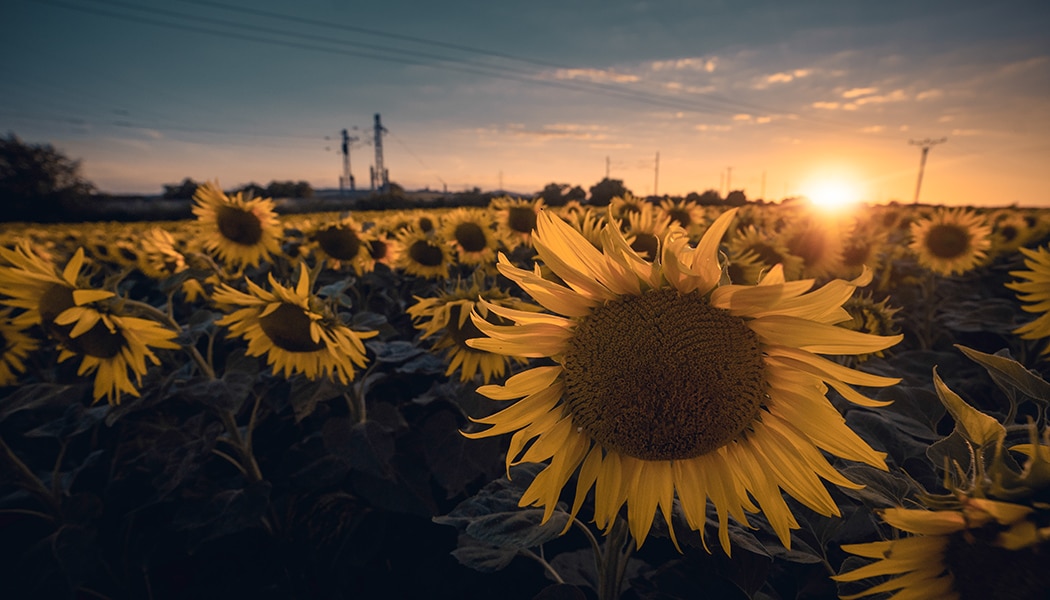
When you’re taking pictures outdoors, sometimes you’ll run into a composition that’s great except for a few things that are in the way. Usually some signs of civilization. Electricity wires, trash, and other visual pollution are guaranteed to ruin the impression from an otherwise good photo. But with the right edits, you can solve this problem easily. Take a look at how to do this basic retouching.
Removing unwanted objects from photos via retouching is an everyday part of photo work. And while you might at first think this kind of edit is too complicated for you, actually, it’s easy and takes just minutes.
Which Tools to Choose for Retouching
Naturally you’ll need the right software for your photo retouching. Try Zoner Studio, for example. It offers retouching in two of its modules: Develop and the Editor. They each have their advantages and disadvantages.
Develop:
- Adjust exposure and colors and retouch too.
- Here you’re working non-destructively—your edits don’t alter the original file. However, your work is also a little slower because of this.
Editor:
- This is useful for the more complicated edits.
- Layers will help you with your work.
- Your photo editing goes faster.
Ideally you’ll want to want to combine the use of these two modules based on the situation.

Retouching Photos in Develop
Just like when you’re retouching skin, you’ll use the Retouching Brush (J) to retouch away wires in the Develop module. Below I’ll be assuming that you’re retouching the sample photo shown here. You’ll find the Retouching Brush in the right panel; it offers three brush types:
- Healing Brush
- Clone Stamp
- Structure Cloning
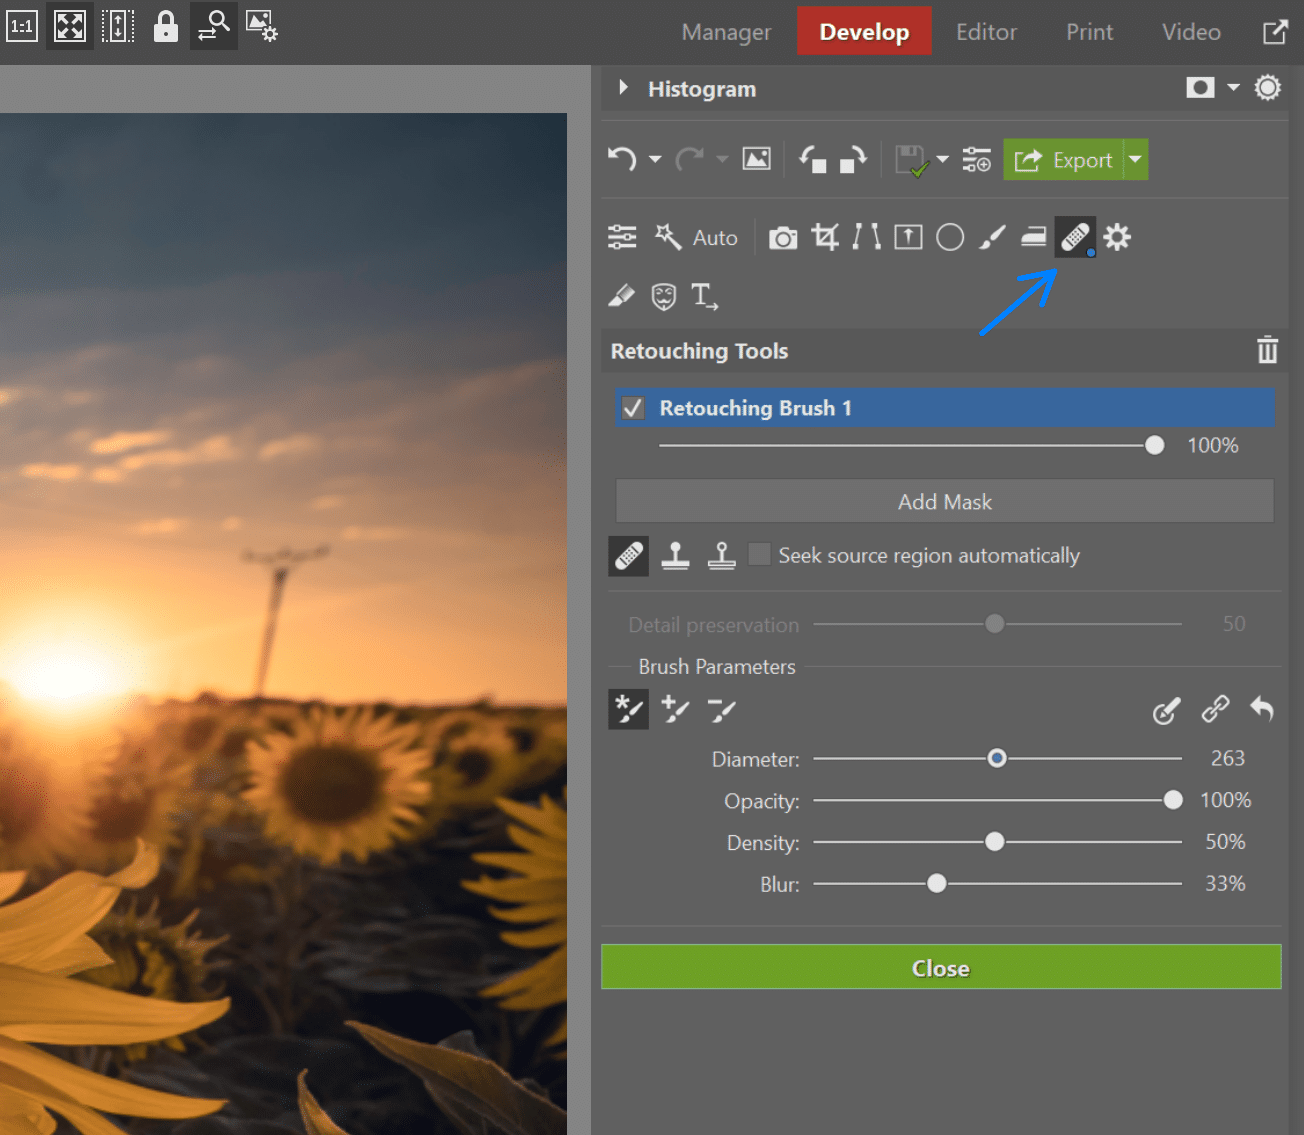
Start with the first of these tools and draw over the pole. Meanwhile avoid the part that touches the horizon. Retouching in that spot would leave a mark.
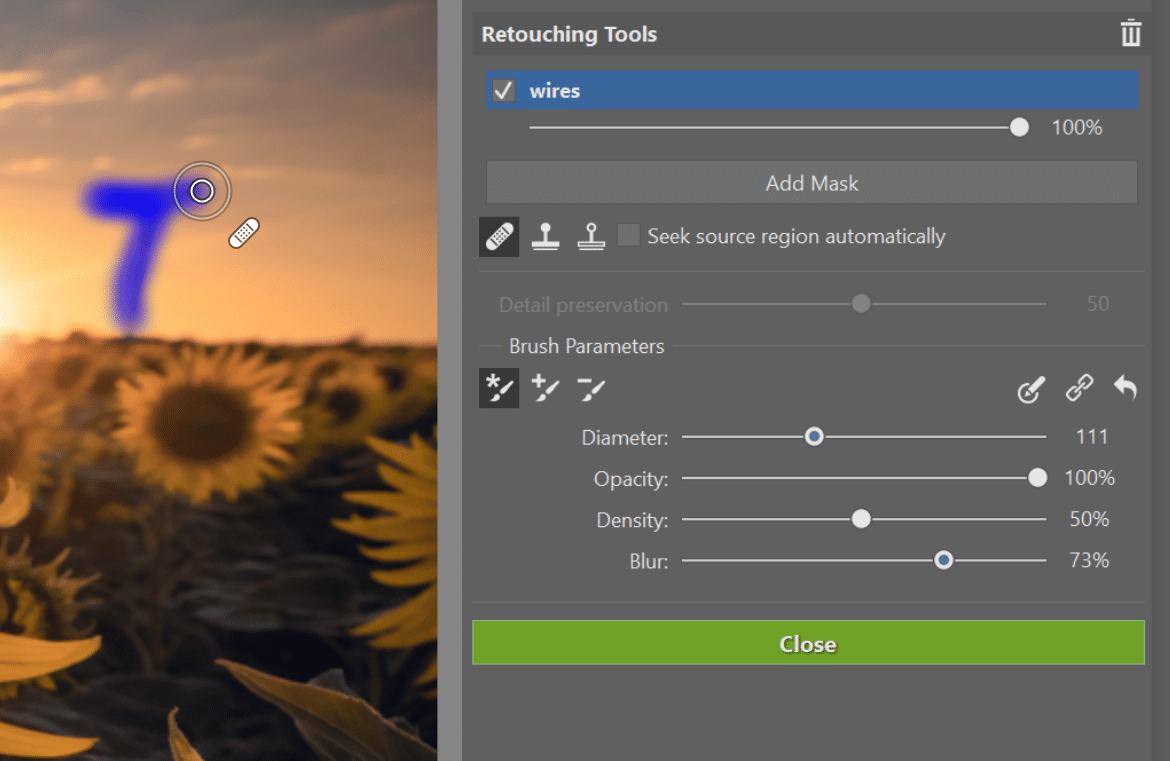
For the part right next to the horizon, meanwhile, use the second brush type—the Clone Stamp.
First click the Add Mask button. This creates a new mask for the changes to be stored in. Then each tool will have its own mask. You can use different settings for each tool, and things will be clearer overall. You can also give the masks different names. This will keep your work much better organized.
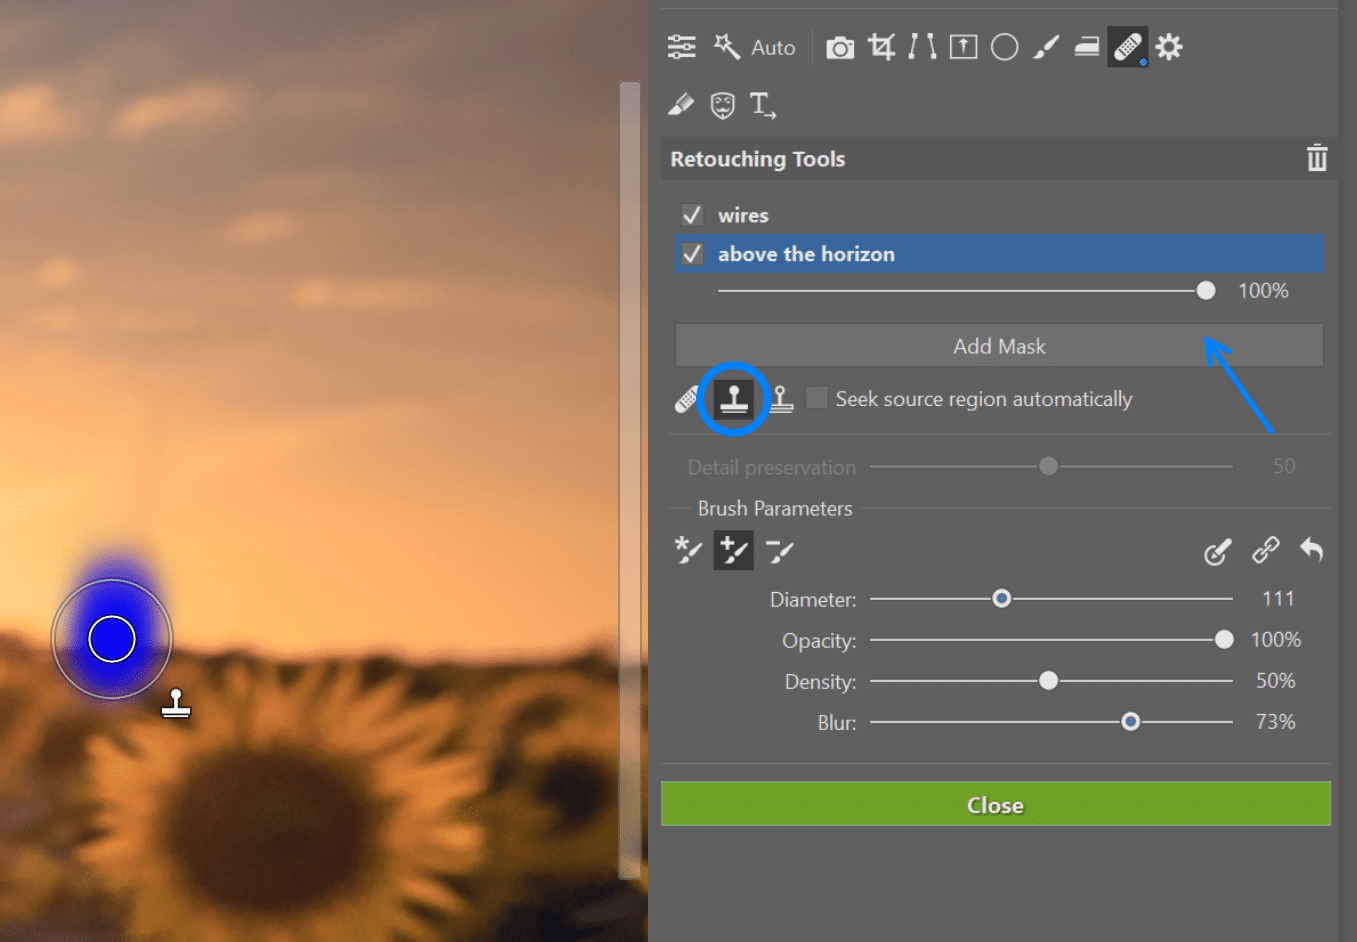
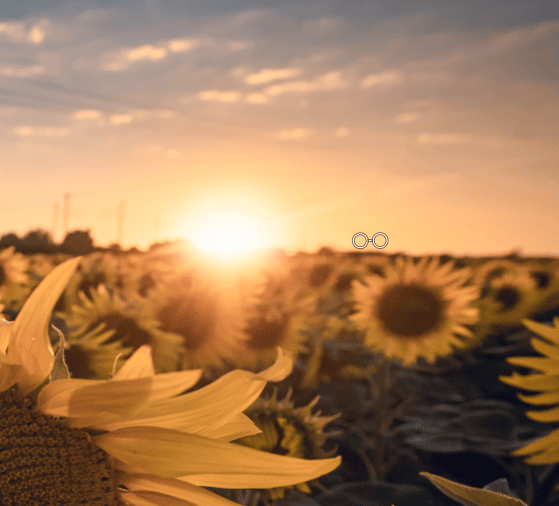
Then move the stamp’s source so that it ties in to the place you’re retouching. The horizon then stays untouched.
When you’re retouching the wires, switch back to the mask for the brush. Set the brush settings to Add Brush Stroke if they’re not already set to that.
That way, even though you’ll stay within the mask for retouching the wires, each new click will create a new stroke, for which you can adjust the source and/or use different settings. That gives you more control over your edits.
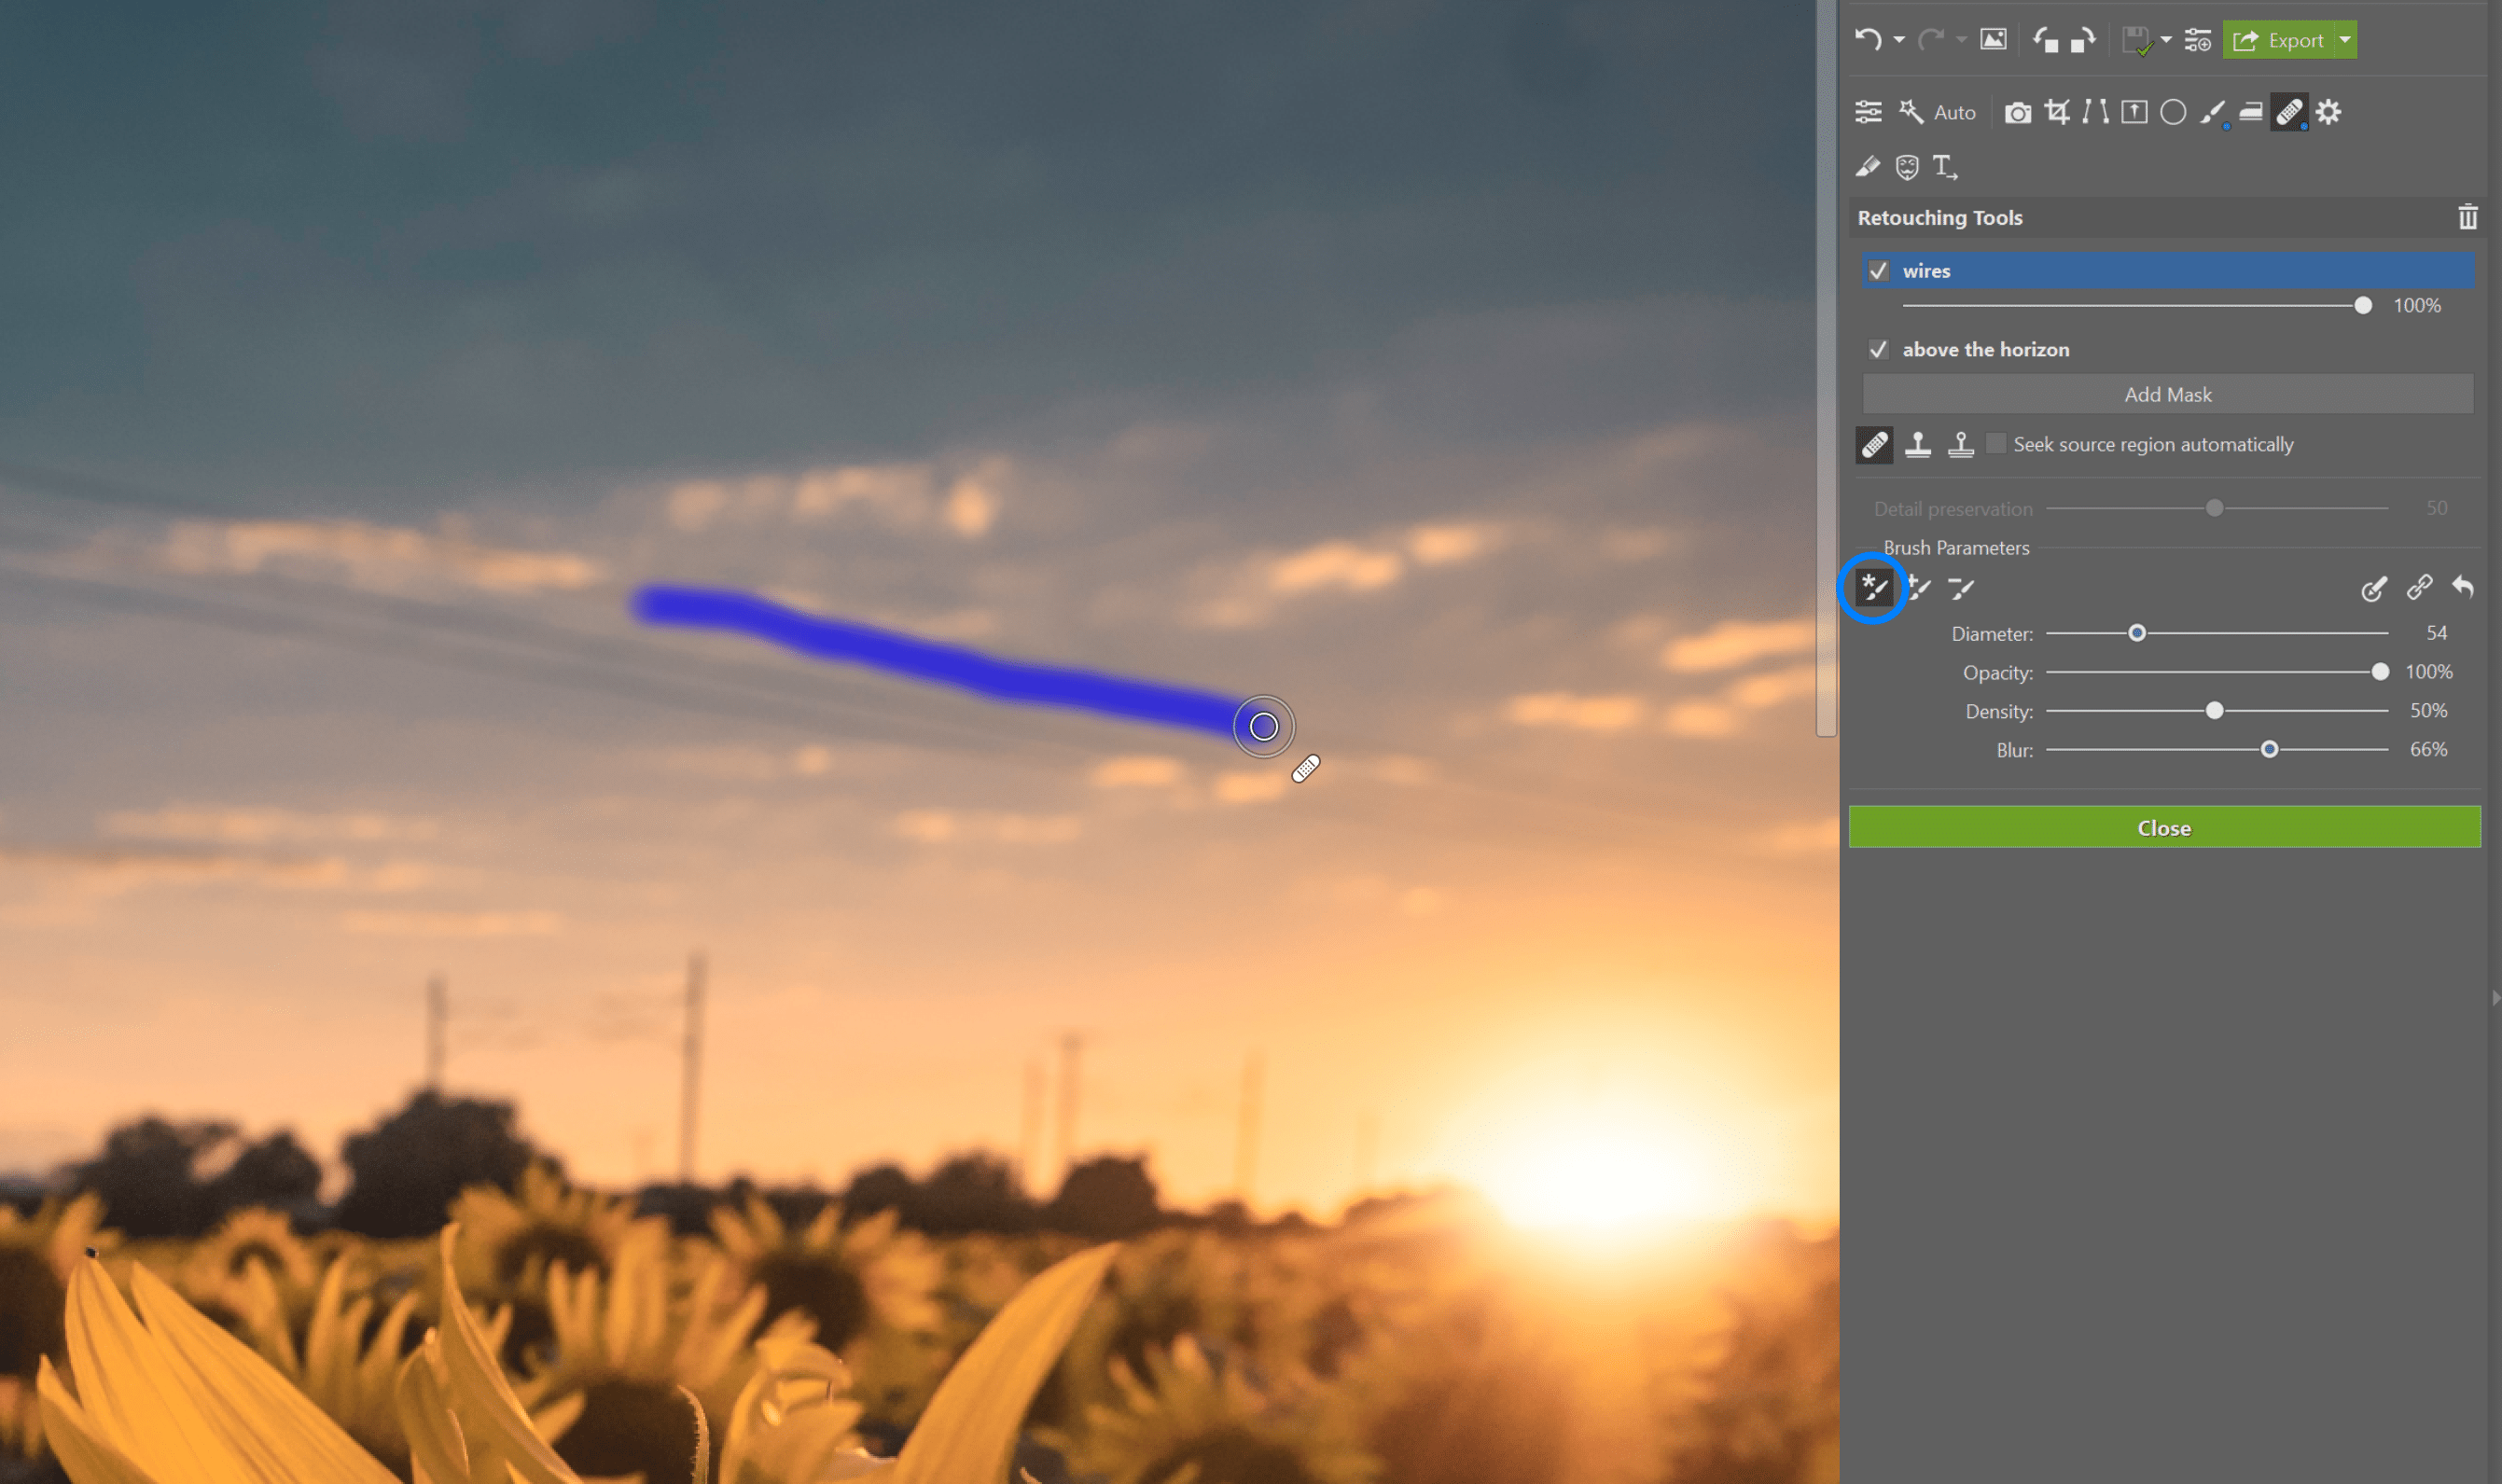
In the previous image, you can see how hard it can be to draw as straight a line as you’d like for retouching. To overcome this in Zoner Studio, switch into the Editor and use its selection tools.
Retouching Photos in the Editor
Most of the tools in the Editor are the same as in Develop. The only difference is that you’re not working non-destructively. But actually, thanks to layers, even here you can retain your original image. So take advantage of that: always duplicate the original layer before you start with your edits, so that you can go back to your original image.
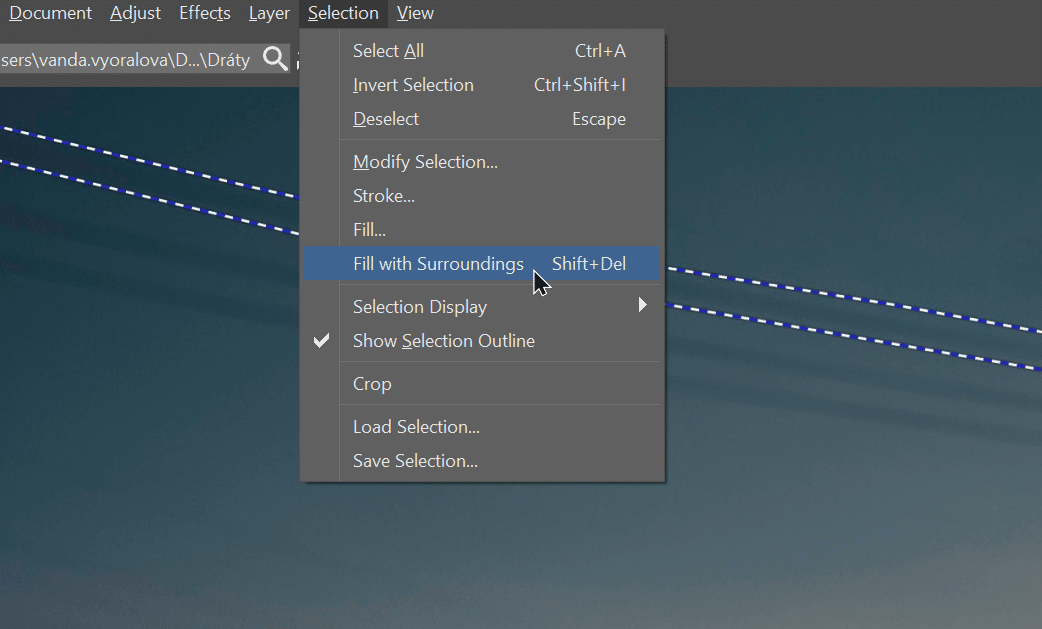
Then select one of the wires using the Polygonal Lasso (N), which you’ll find among the Selection Tools. If they’re close to each other, you can select several at once.
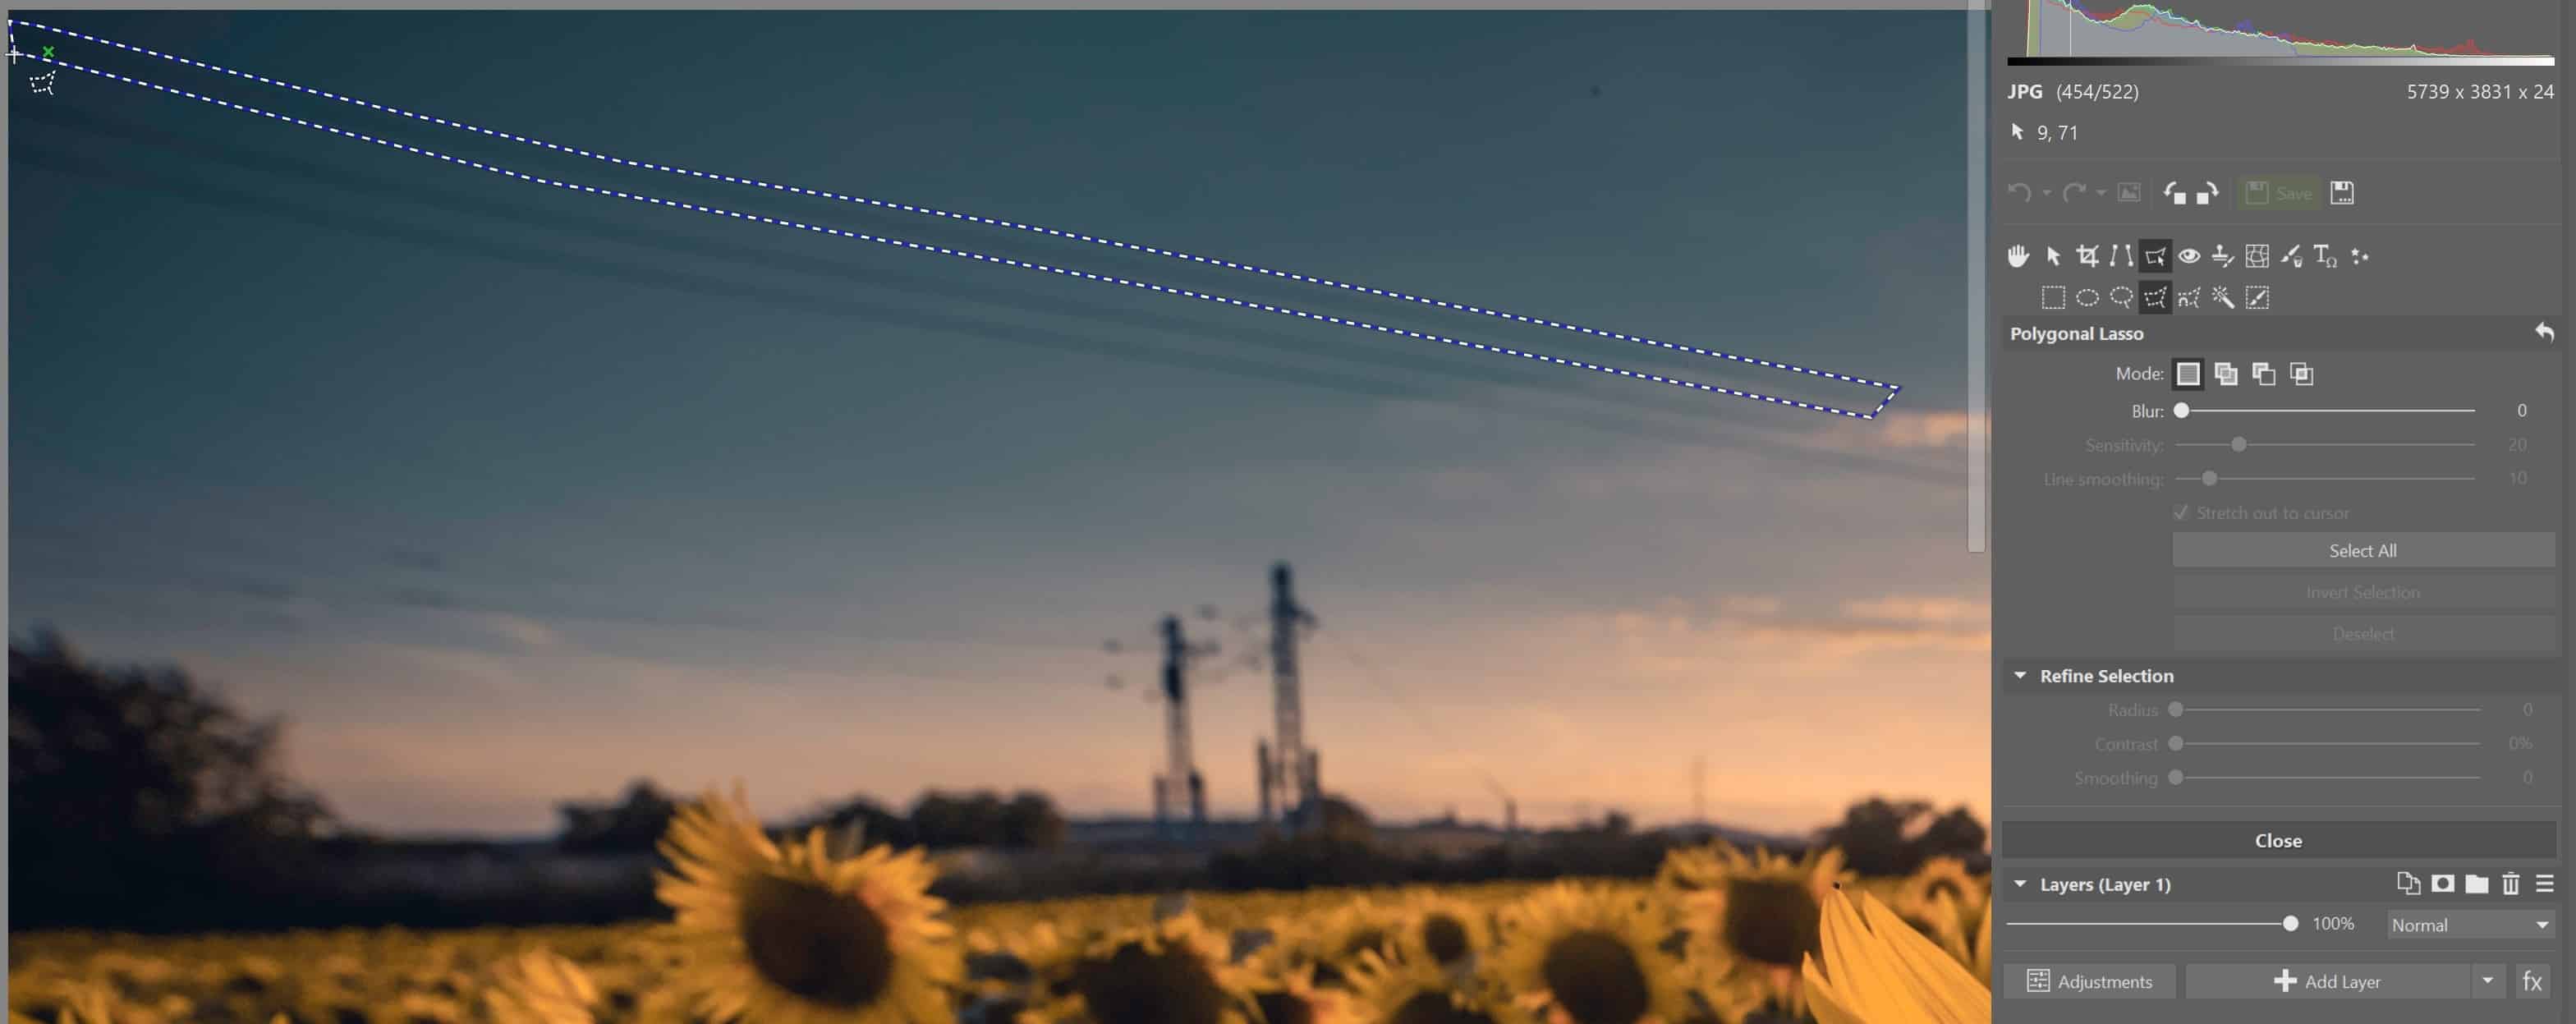
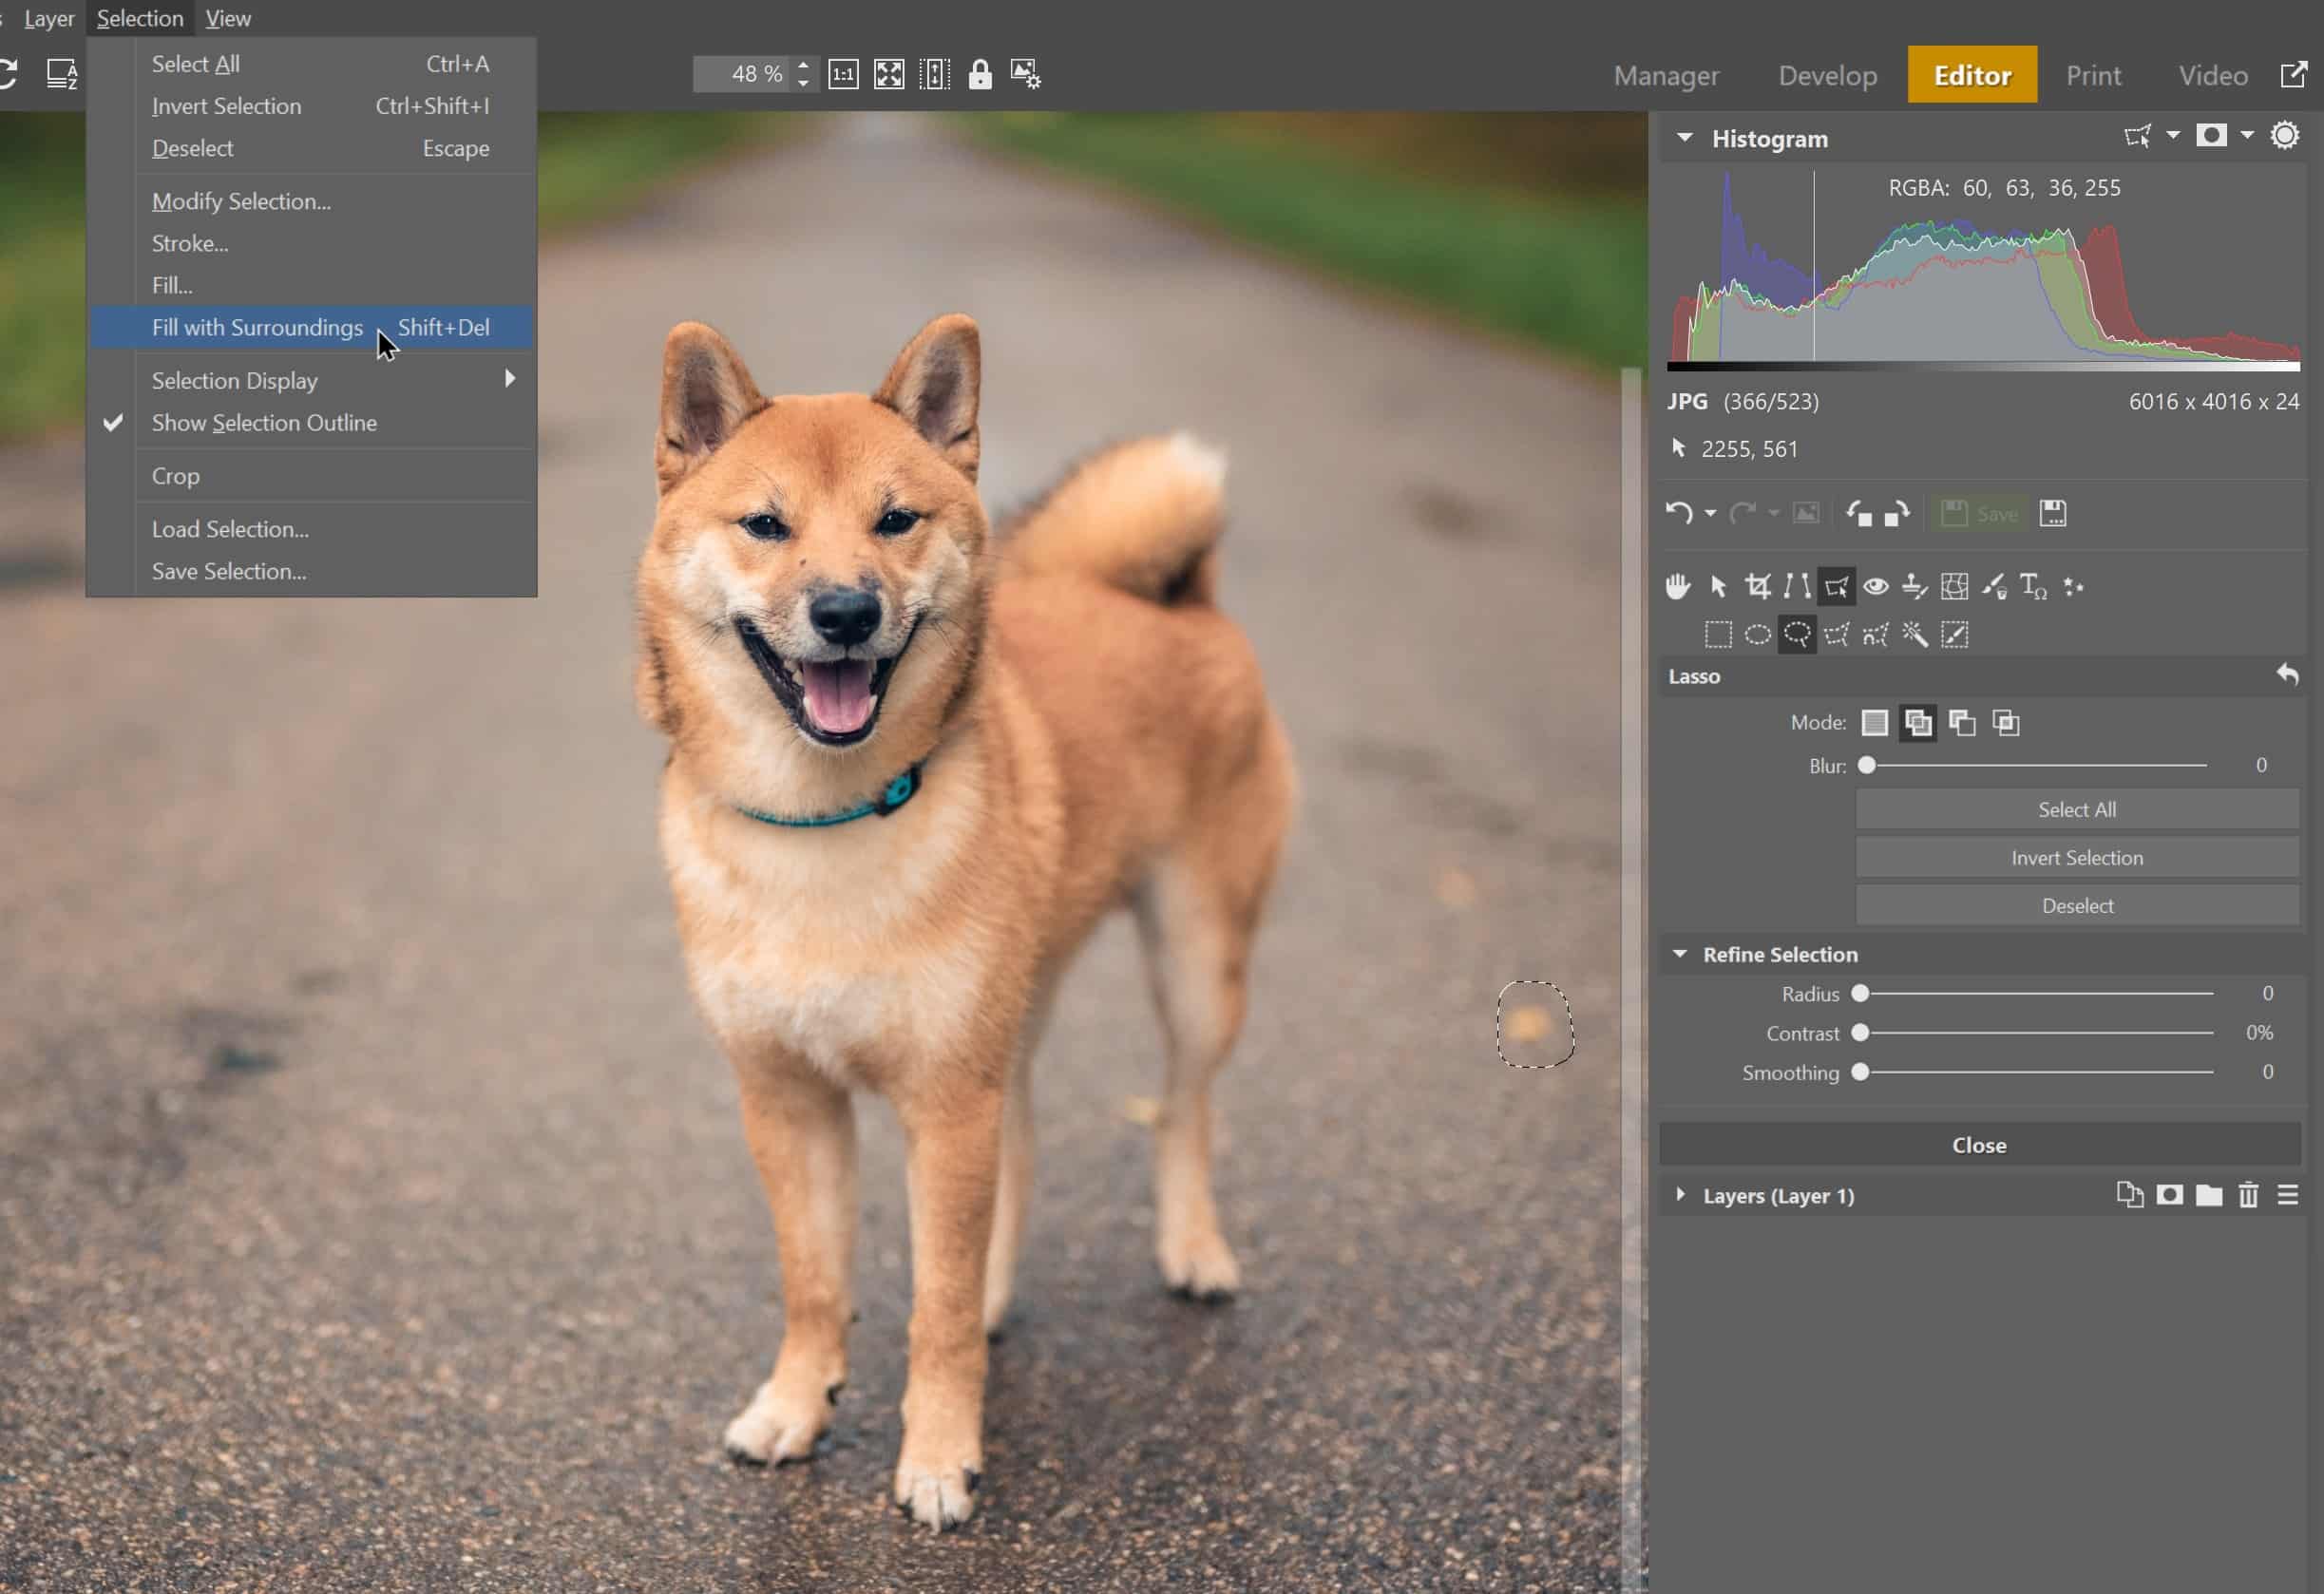
Then click in the menu on Selection -> Fill With Surroundings (Shift+Del). You’ll get the best use out of this function in places where the background is simple (sky, grass, roads, etc.). Zoner Studio then analyzes the selection’s surroundings and calculates the most likely image behind the thing you’re deleting.
The photo before and after the distracting electric wires are retouched away.
Signs of Civilization Are Everywhere
There are lots of beautiful places and views out there that are spoiled by signs of civilization. But don’t let that ruin your day. You can usually retouch them away in Zoner Studio. Just download it and try it free for 7 days and get started editing.
