Digital Panning in Zoner Studio

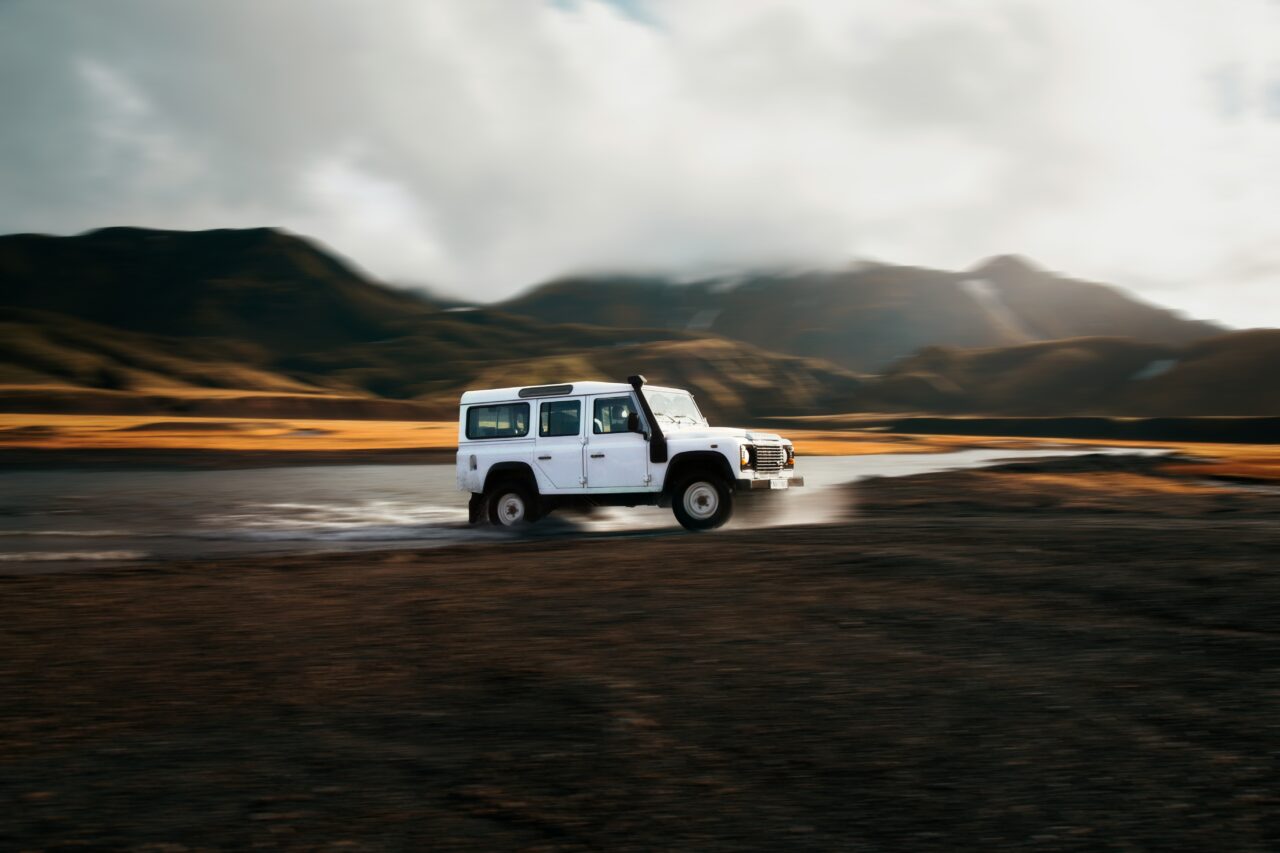
Panning is an effect photographers use to emphasize movement. The photographer tracks the moving subject and then presses the shutter button at the exact right moment. The main subject remains sharp, while everything around it is blurred. Let’s take a look at how to recreate this effect in photos with a static background.
In the article How to Photograph Bike Races and Other Sporting Events, you will learn how to capture motion in photography without the need for digital editing—and much more. In this article, we focus on the opposite—how to digitally simulate the panning effect using Zoner Studio.

Digital panning
Nothing is more rewarding than pressing the shutter button and getting a photograph in its final form. This also saves you a lot of work when editing. It’s the same with panning—it just takes some practice, and you won’t have to do the time-consuming process of simulating it digitally.
However, you may not have time to switch your camera settings and instead of a slow shutter speed, you freeze your moving subject using an extremely fast shutter speed. Then you have no choice but to repeat the shot or recreate the panning effect using photo editing software.

Select your subject
A very important step is carefully selecting the subject that you want to be in focus. Separating it from the background must be precise so that the photo editing is not very noticeable, ideally not at all.
The editing process involves directional blurring around the main subject, as well as rotational blurring for the wheels of the moving vehicle.
Open the photo in the Editor module of Zoner Studio and duplicate the layer.

Zoom in to at least 1:1 (asterisk key on the numeric keypad). Use a combination of selection tools, including Lasso (L), Magnetic Lasso (A), Selection Brush (Shift + Q), and others in the right toolbar. Carefully select your subject that will be sharp in the final photo.
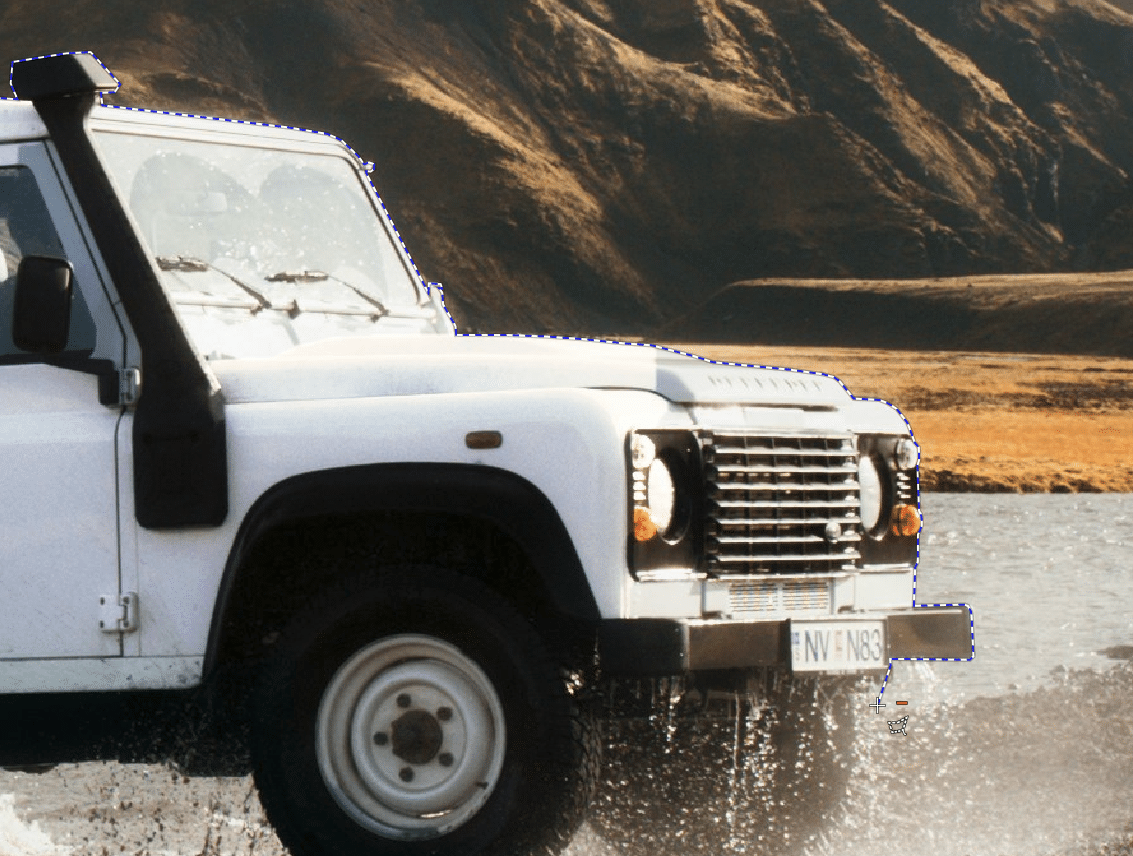

Use the Shift and Ctrl key to add to or remove from the already-existing selection.
Invert Selection
Next, invert the selection by clicking the Invert button in the right side panel, or use the keyboard shortcut Ctrl + Shift + I.
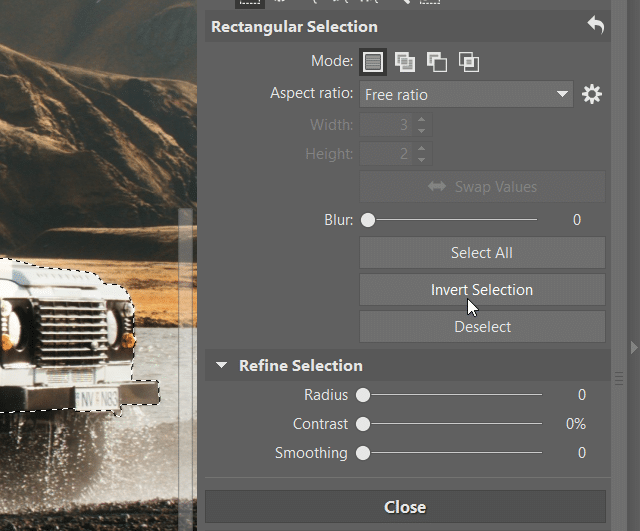
In some cases, it’s a good idea to use the Modify Selection function under Selection. The option to Stretch/shrink the selection may be useful, or Blur for blurring the edge between the selected and unselected area.
Blur the area around the subject
In the Adjust menu, select Blur (Ctrl + 6). In the drop-down for Type, select Directional blur. Adjust the blur’s Strength and Direction as needed. In our case, we chose a Strength of 50 and 85º for direction. Don’t forget to check the Blur only selected area box.

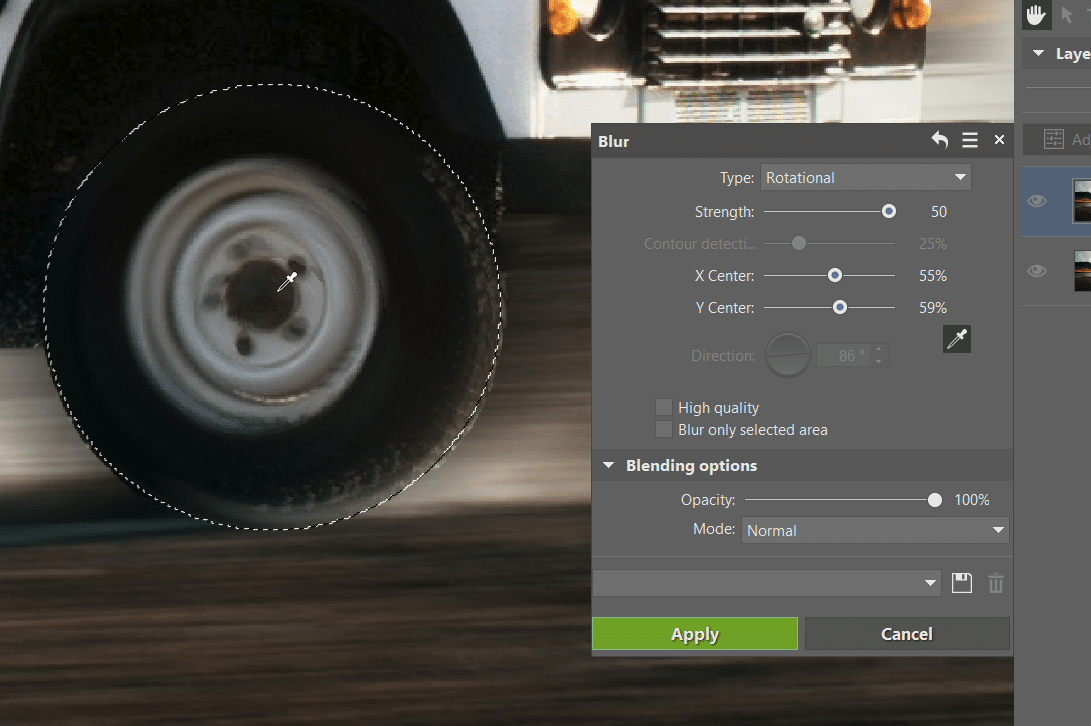
Don’t forget the wheels
The main part of the editing is done. Next, focus on blurring the wheels. This is achieved by following a similar process to blurring the surroundings. Use Elliptical Selection (O) to select the turning wheels and the Blur function to make the static wheels appear to move. This time, in the drop-down for Type, select Rotational.
You need to specify the center of rotation to make the effect look realistic. There’s an eyedropper icon in the Blur window for this purpose. Click it and then click the center of your selection (i.e., the center of the spinning wheel). This determines the center point around which the rotational blur is created.

Ready to save
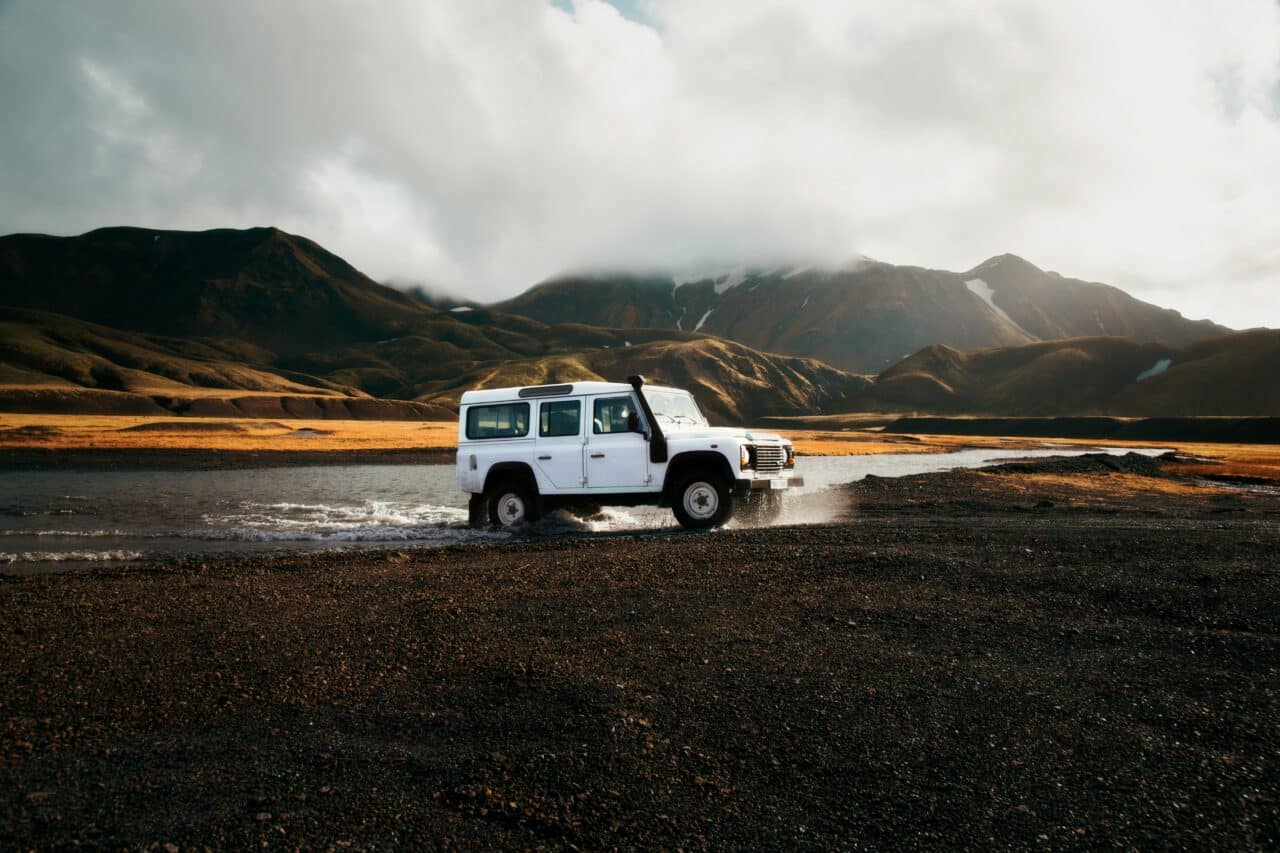
Now you know how to do digital panning in Zoner Studio. Once you’re happy with how your photo looks, you’re ready to save.
Ready to give digital panning a try? Download Zoner Studio with full support for all these features and more, free for 7 days. Try digital panning on your photos today!