There’s No Need to Fear RGB Curve Editing. Here Are 4 Practical Examples of How to Use It.
Colors that are just right, an impressive atmosphere, a personal photo editing style… RGB curves are a powerful tool for getting what you want from your pictures’ colors and overall mood. Even though it may not seem so at first, working with Curves is easy, and the results are worth it. We’ll teach you to work with them and give some examples to show you how to use them to achieve your photography goals.
Curves are a great way to give photos the right atmosphere and fine-tune their colors. And in Zoner Studio you can handle them fantastically. You’ll find Curves in two places:
- in the Develop module under the name Tone Curve,
- and in the Editor, where you’ll find them after clicking the Adjustments button and then Curves.
Generally it’s better to work in the Develop module, since it enables non-destructive editing. That means you can go back to your edits at any time.
Start by Dividing up the Curve
Start your edits by adding three nodes to the curve, dividing it up into quarters. Each node represents one tonal aspect of the image:
- the left node marks its shadows,
- the middle node marks its midtones,
- and the right node represents its lights.
Then edit the photo by shifting these nodes.

TIP: To remove a node, right-click it.
How does the Curve Work?
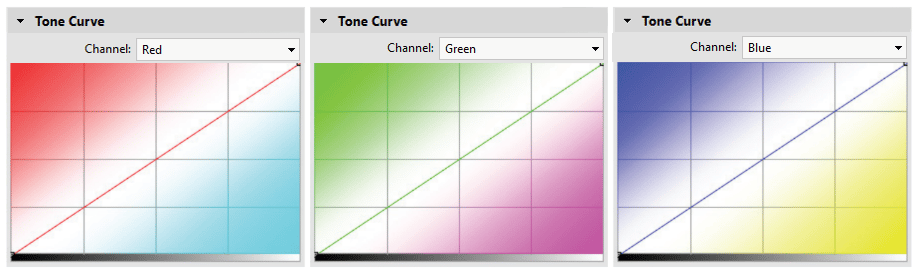
By default, the Curve is shown in RGB mode. To edit individual color channels, choose them under Channel. For example the Red channel.
When you add one node in the middle of the curve and raise it, you’re increasing the value of the red channel for every pixel in the picture. The whole photo is then tinted red.
When you move the node downwards, you’re decreasing the value of the red channel, strengthening its opposing color. Thus the whole photo is tinted turquoise.
The individual channels work as follows:
The Red curve tones the picture either towards red or towards its opposite, turquoise.
The Green curve tones the picture either towards green or towards its opposite, magenta.
The Blue curve tones the picture either towards blue or towards its opposite, yellow.
The RGB curve changes the photo’s overall brightness and contrast.
Download this and print it out as a cheatsheet. [PDF]. If possible, try out work with curves on a black-and-white photo. That lets you see your changes more easily.
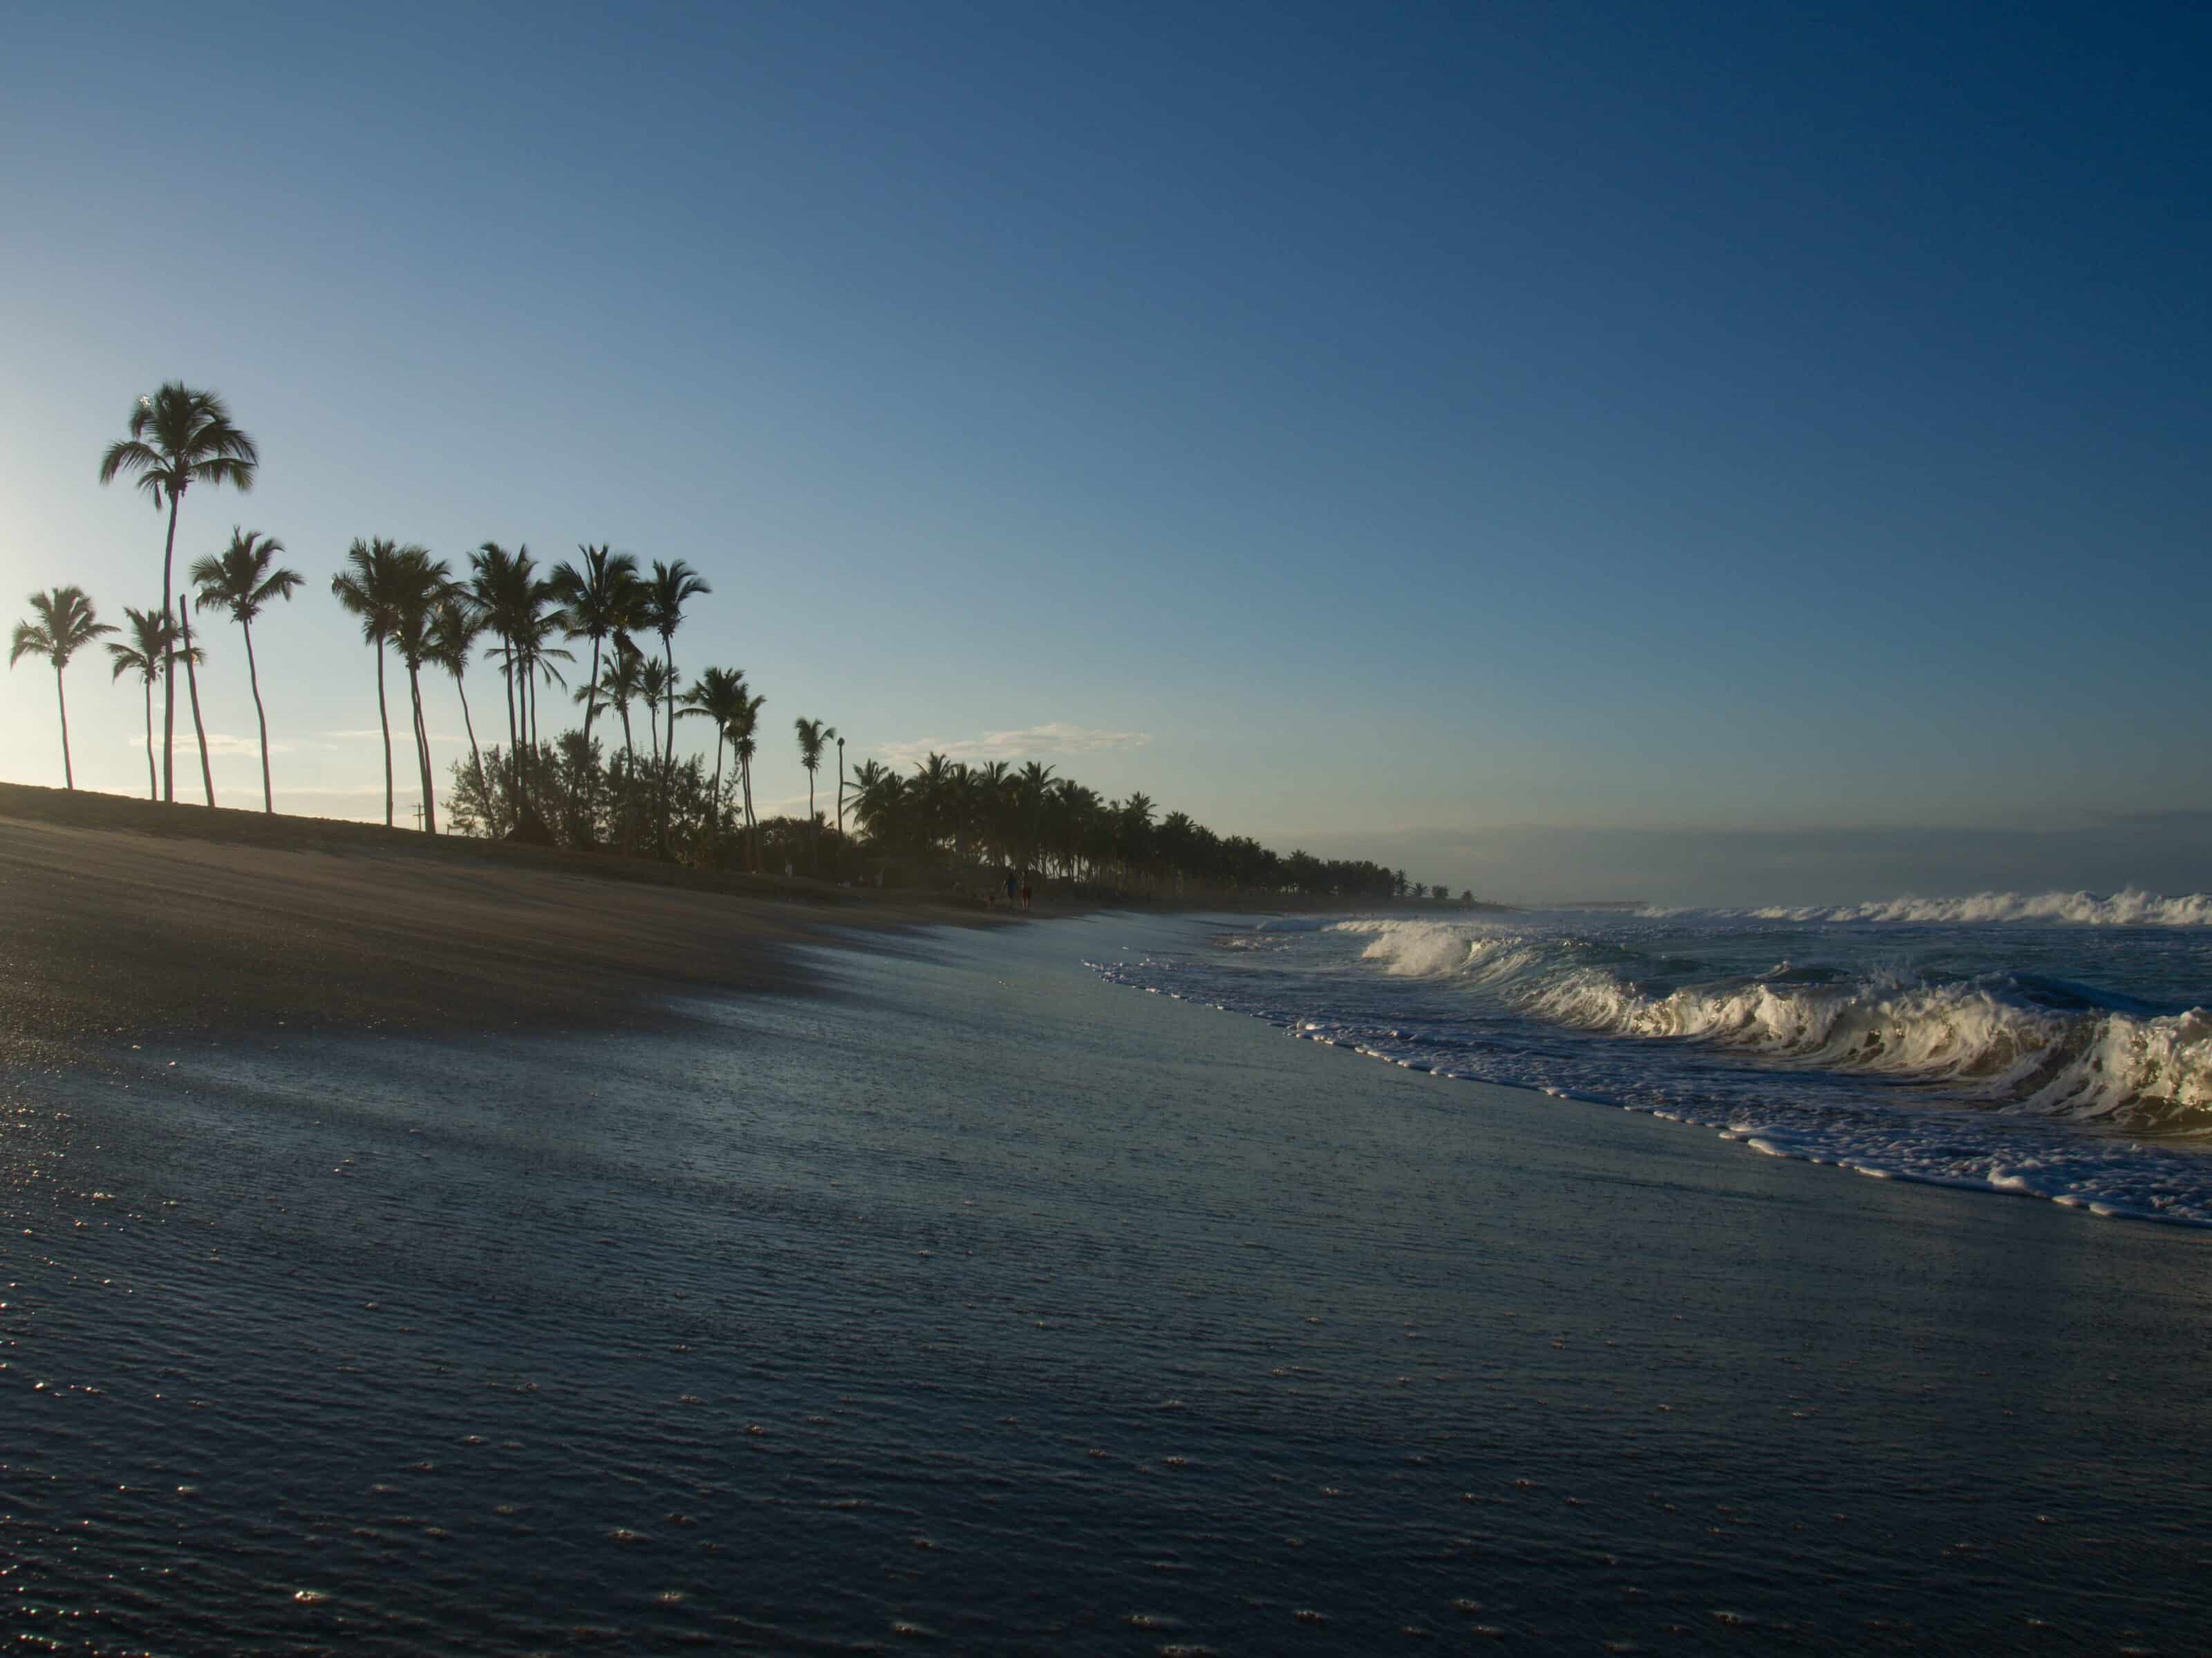
To see how curves work, take a look at the simple (basically black and white) photo below.


How Should You Use Curves in Practice?
Editing RGB curves changes a photo’s atmosphere and colors. Decide in advance what you want to achieve through these changes. There are basically three goals you can have here:
- Highlighting a photo’s atmosphere and color. The edit still looks natural; it just adds pizazz to the final picture. For example in a photo with a sunset, you can enhance the picture’s atmosphere by going for a warmer white balance and tinting it towards red or orange.
- Changing the picture’s atmosphere by changing its overall coloring. For example when you’re taking pictures in cloudy weather, but you want them to have warmer colors and more sun. Or when you want to dive into creative edits and for example turn silver jewelry into gold. But always be careful with such striking edits; it’s very easy to produce failed and fake-looking photos.
- Creating a personal visual style. Curves give you practically unlimited possibilities for creating your own style. Once you’ve found one that you like, save it as a preset. That makes it easier to apply it to any picture you’d like later on. You can also create multiple versions of presets for use in other photos.
Now let’s look at some examples of using curves in practice.
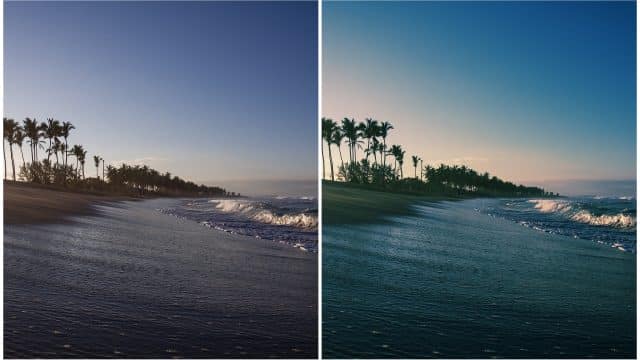
On the Beach—Highlighting a Sunset


The picture after our edits to white balance and exposure.Once you’ve got the picture ready, edit its RGB curves to fit the effect you’re trying to achieve. Here we’re trying to highlight the sunset and increase the photo’s contrast. The following edit will help us with this:

- Red channel: In the shadows we’ll move the curve downwards. This gives the photo’s dark parts a turquoise tint and highlights the blue of the water. On the other hand, we want the light parts of the photo, such as the sky and the white foam on the waves, to be warmer so that they highlight the sunset. So we’ll increase the lights. That applies a red tint.
- Green channel: No changes.
- Blue channel: We’ll make the biggest changes in the light. We drag the curve downwards and tint the lights yellow. This highlights the sunset even more.
Adjusting the lights using the red and green channels has shifted the picture’s tonality towards red and yellow. That’s given us orange.
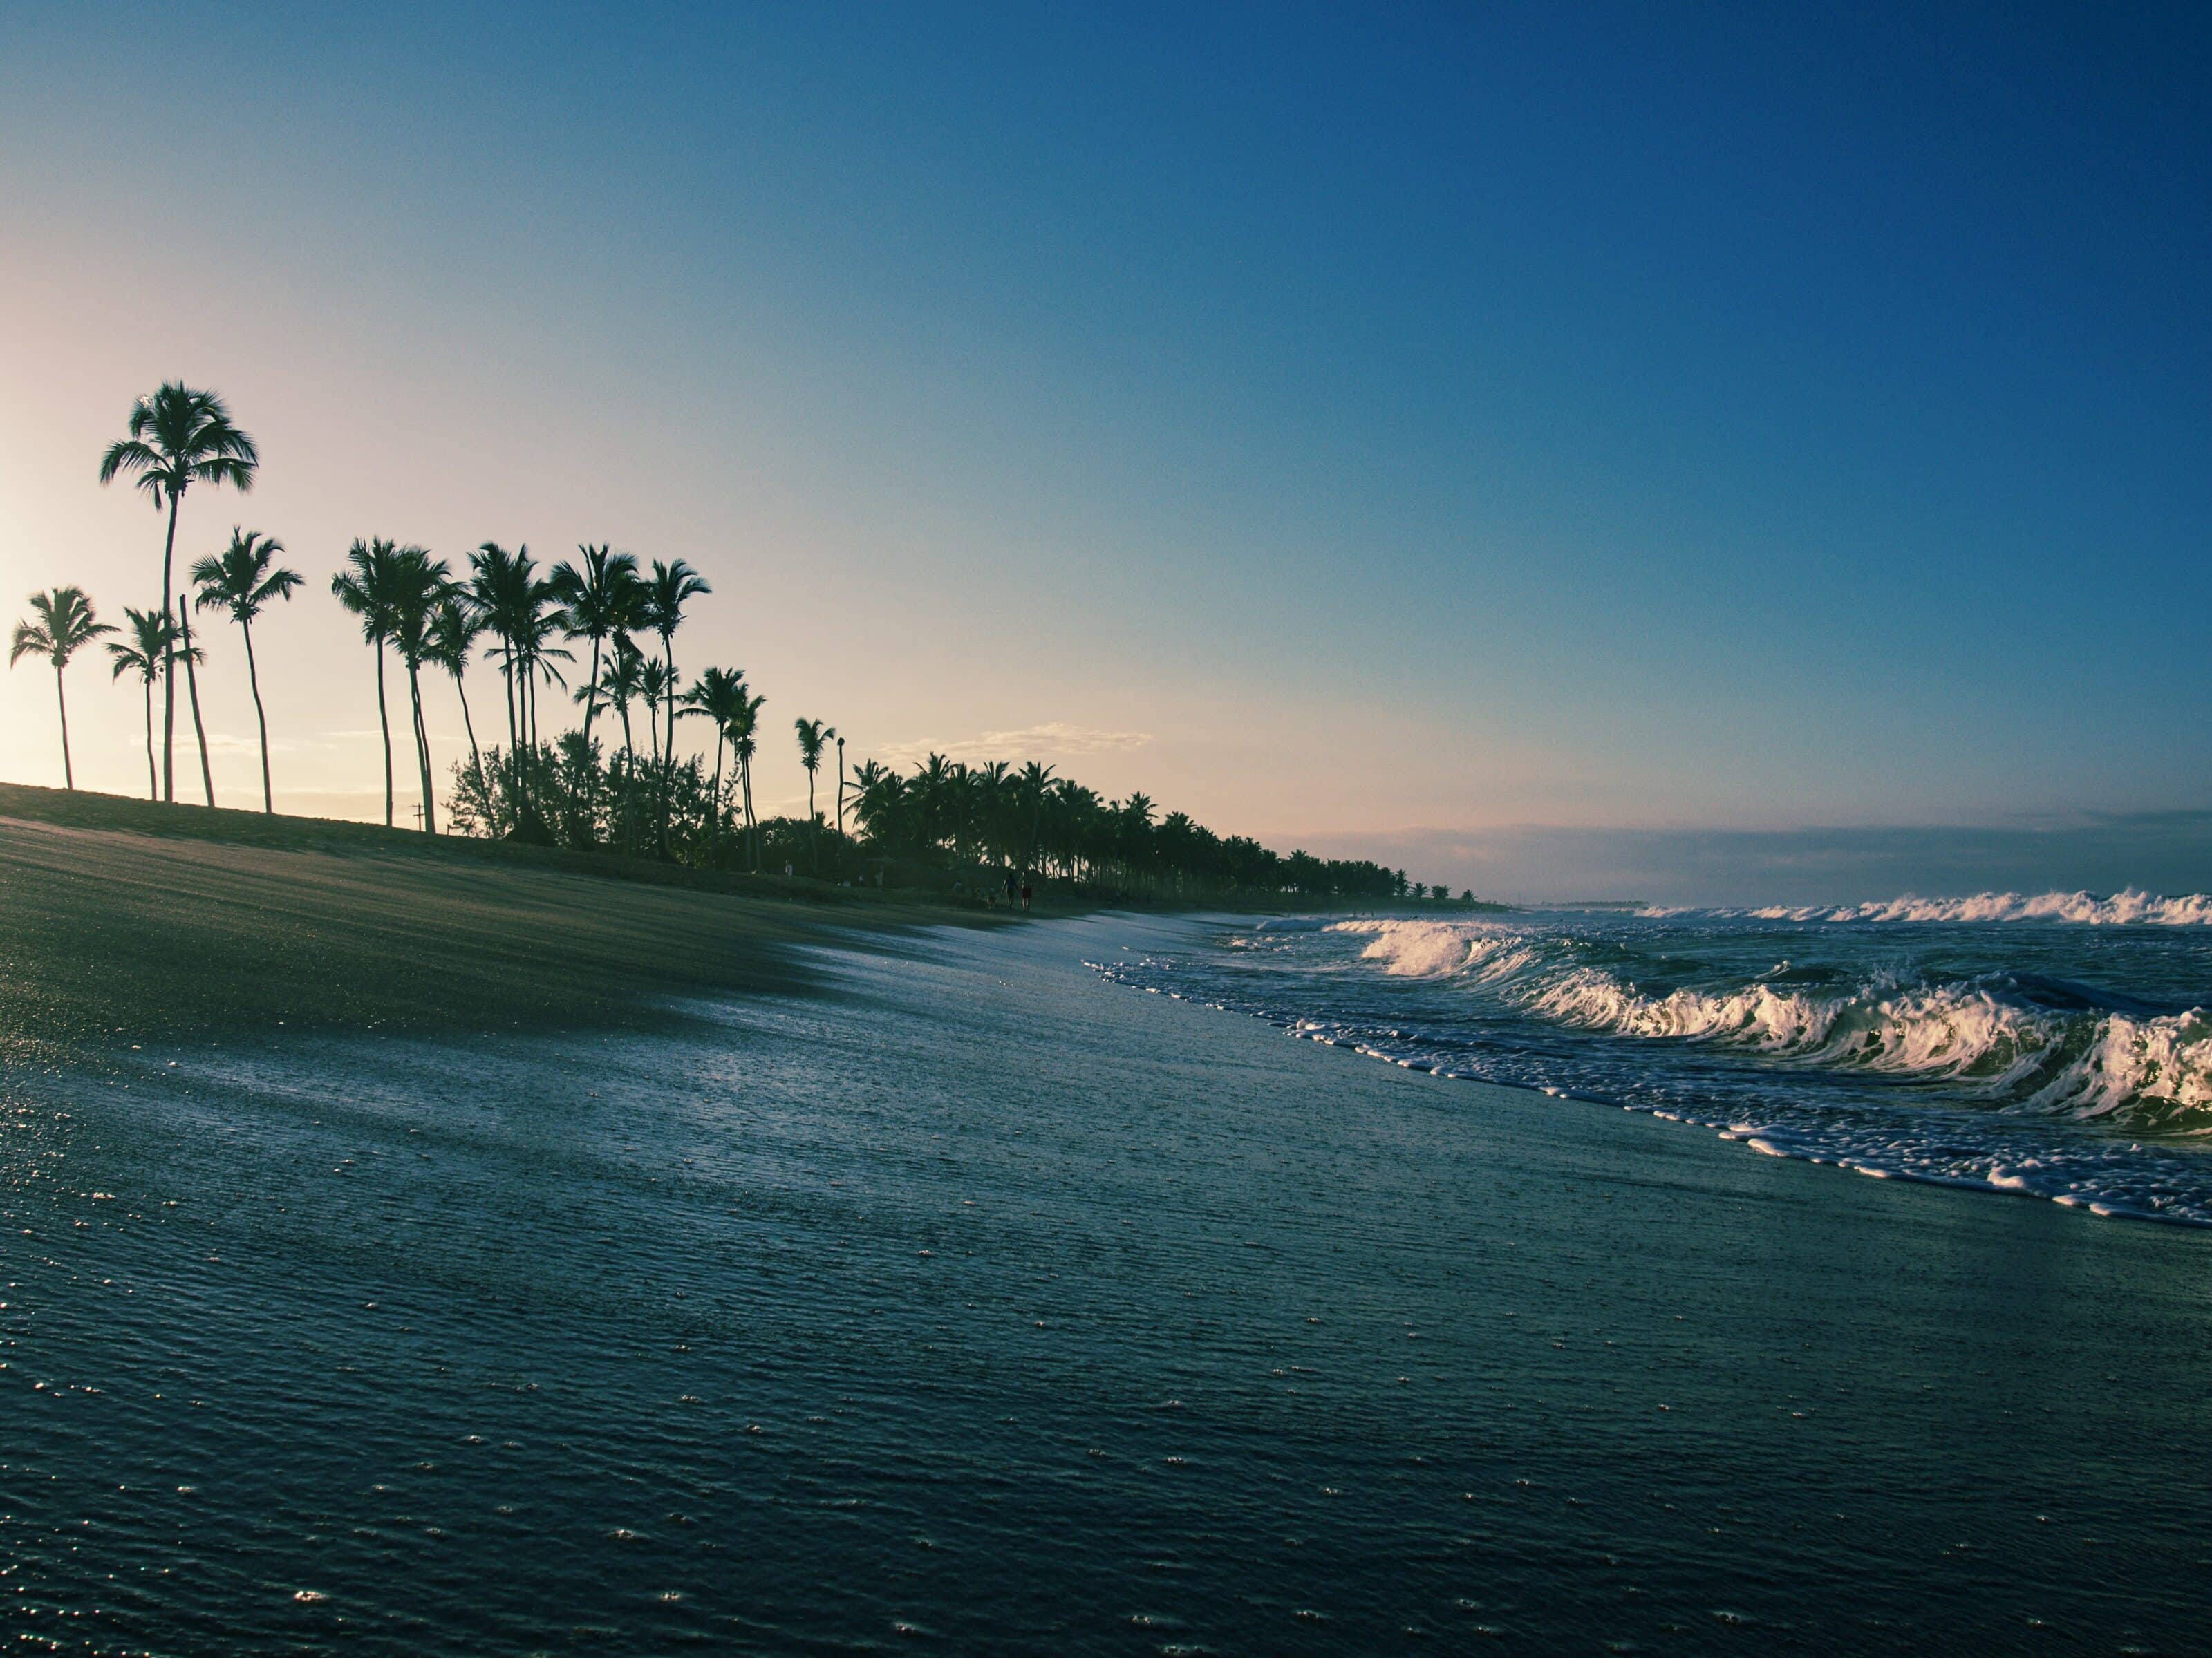
Compare the original with the edited photo.
Shopping—Making Use of a Photo’s Environment and Colors
The man in the next picture is selling coconut oil as a cosmetic. The pink of the wall is very interesting here. So we’ll try giving the wall a light pink tint and a matte vintage style.


To get the effect that we have planned, we’ve edited the photo as follows:
- The RGB Brightness curve: We’ve dragged the end of the shadows curve upwards. This have given the photo a matte look. The midtones are shifted upwards. That has brightened the man’s face. We’ve moved the lights downwards, correcting the light parts of the photo—above all the overexposed window.
- Red channel: We’ve increased the shadows, midtones, and lights, all of them very slightly. By doing this, we’ve give the photo a very light red tint.
- Green channel: We’ve added one node to the middle of the curve and moved the curve downwards. This has given the photo a light magenta tint in the whole range from the shadows to the lights.
- Blue channel: We’ve increased the end of the shadows curve, thus re-emphasizing the matte vintage look and giving the shadows a light blue tint. We’ve shifted the midtones downwards. This has given the picture a yellow tint, brightened it, and made its colors feel warmer.
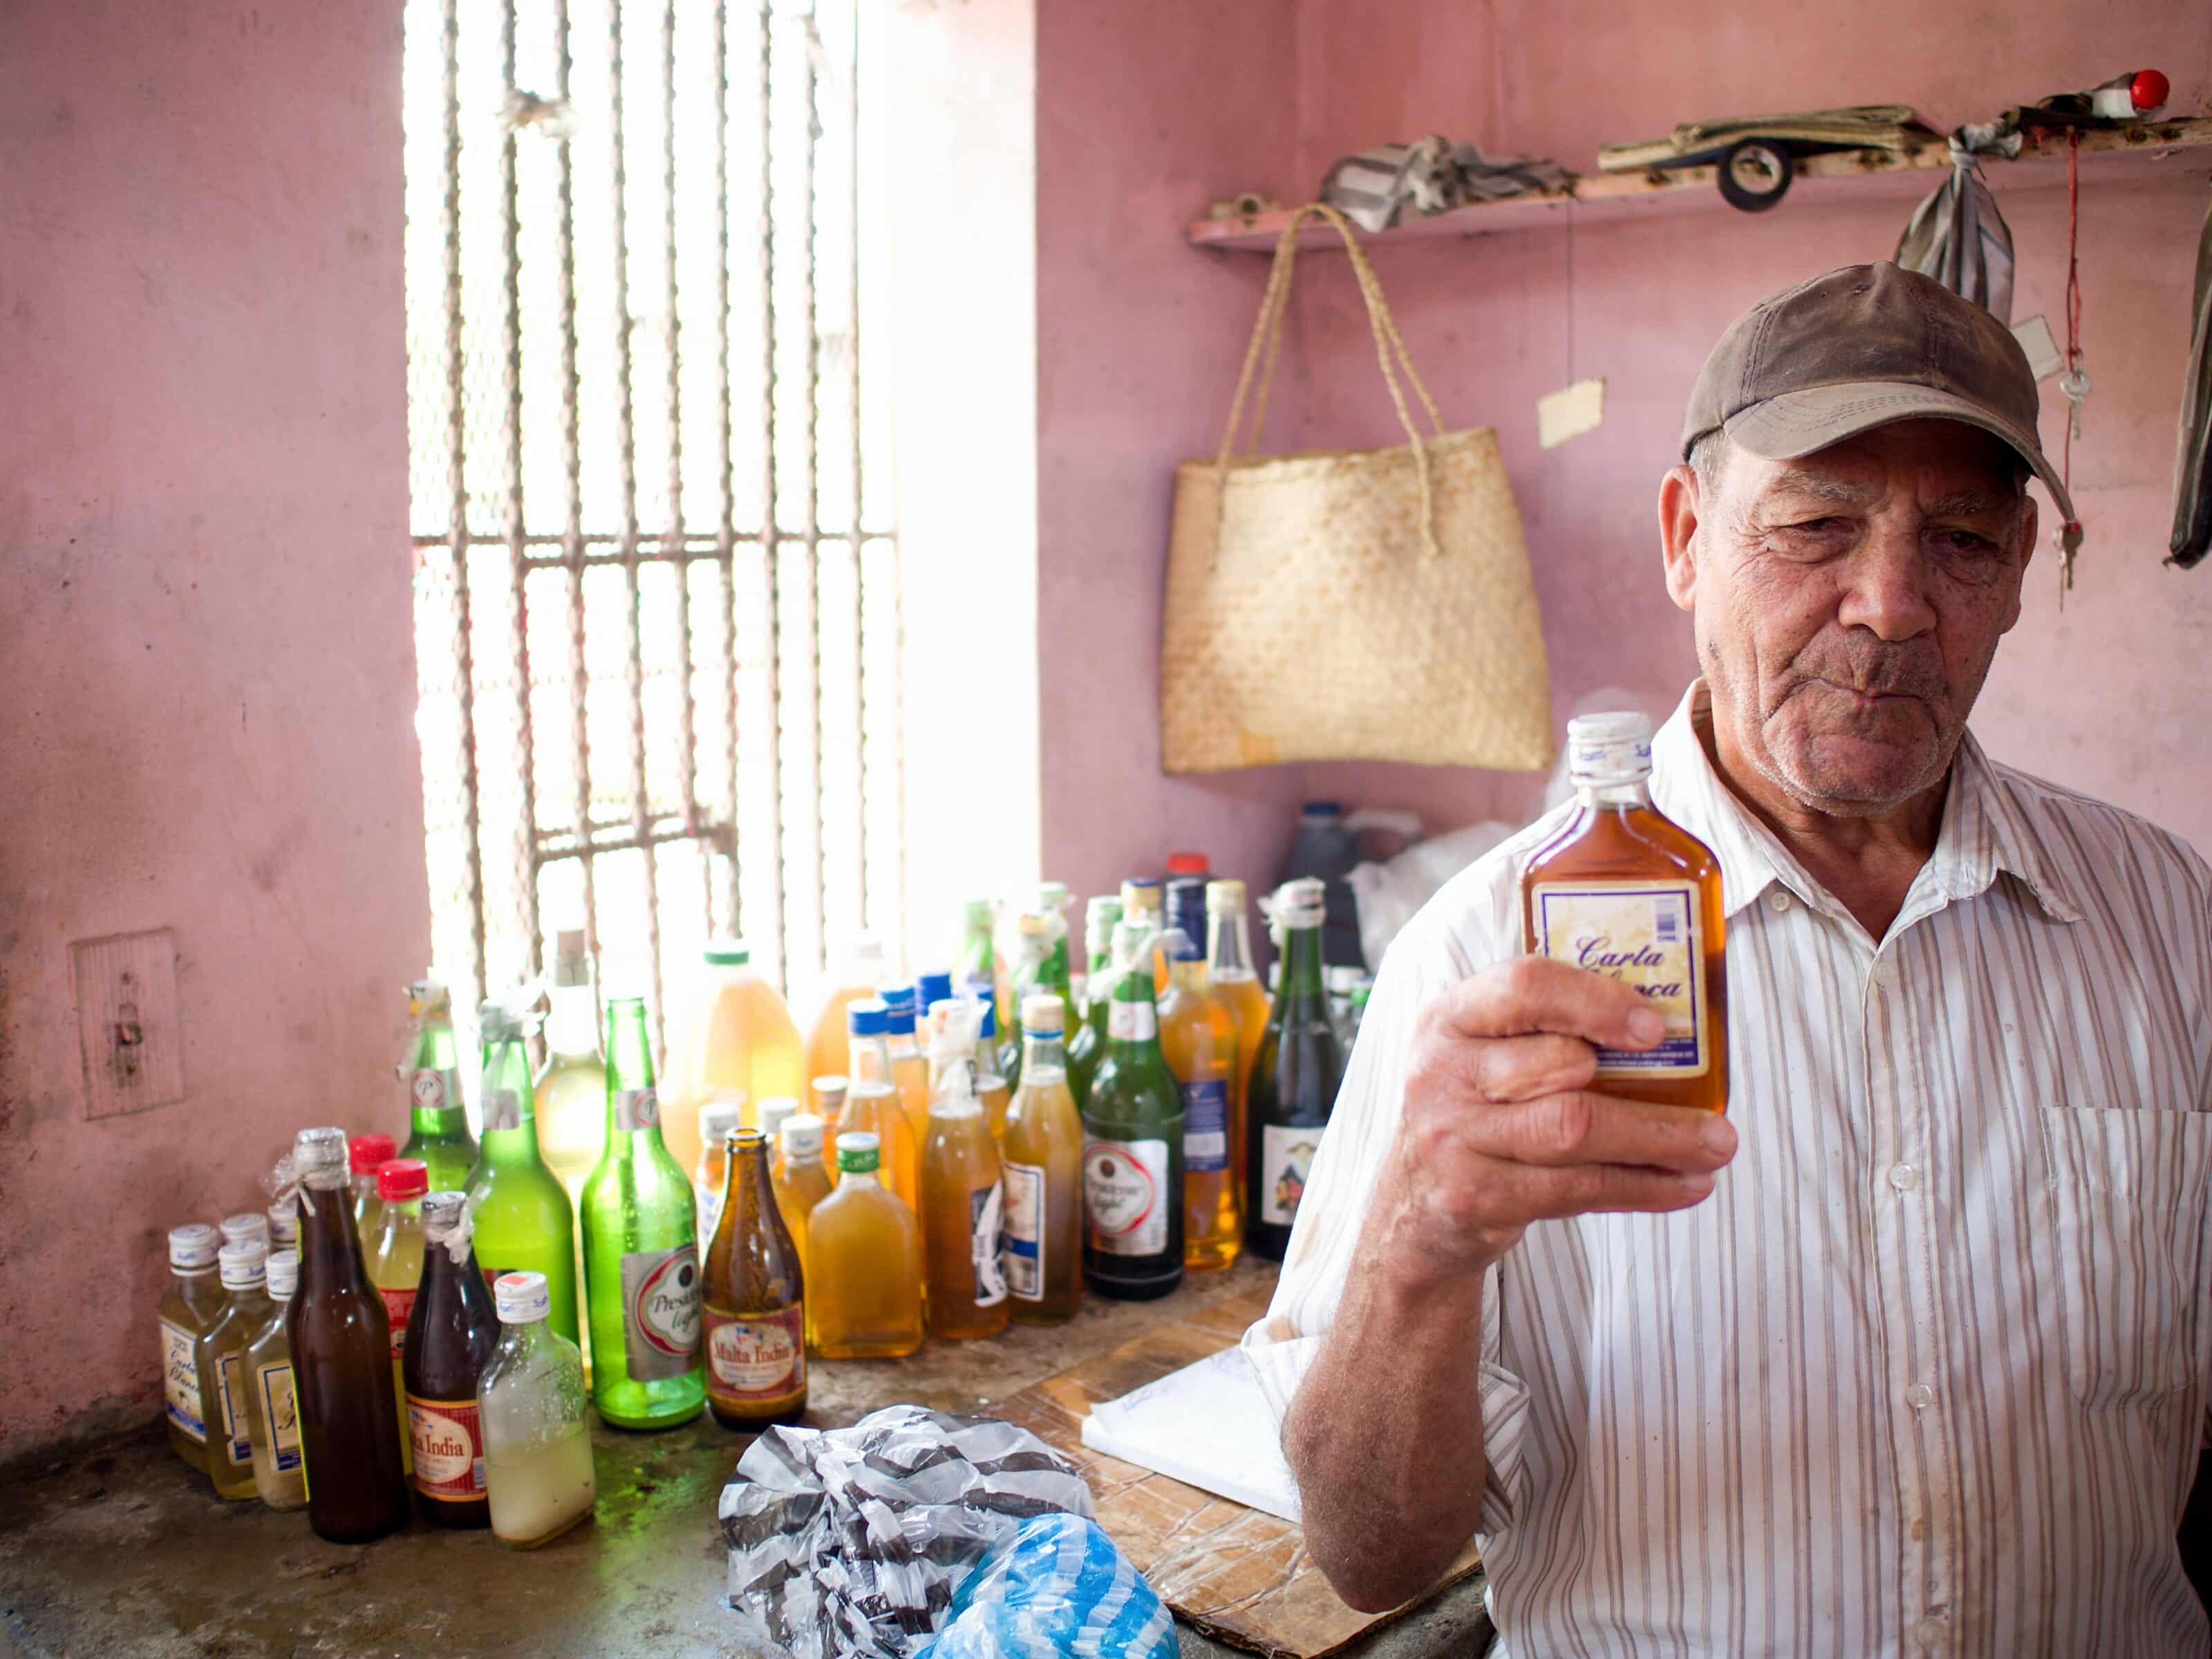
Compare the photo before and after the RGB curve edits.
Before the Storm—Highlighting Bad Weather
We’ll be using Zoner Studio to highlight the next picture’s atmosphere as well. We’ll be aiming to give it a tropical feel.

As always, the rule here is that you first have to prepare the picture for work with curves by doing white balancing and making exposure adjustments.


Now we’ll emphasize the storm and the bad weather by tinting the picture towards cooler tones—blue and turquoise.

- Brightness RGB curve: By raising the end of the curve in the shadows, we give the picture a matte vintage look.
- Red channel: Now we move the shadows downwards, tinting the picture turquoise.
- Green channel: No changes.
- Blue channel: We shift the shadows upwards and add a blue tint. Meanwhile we reduce the lights. This shifts the color values in the lights towards yellow.
Through this edit we’ve given the cloudy skies an even more threatening look.
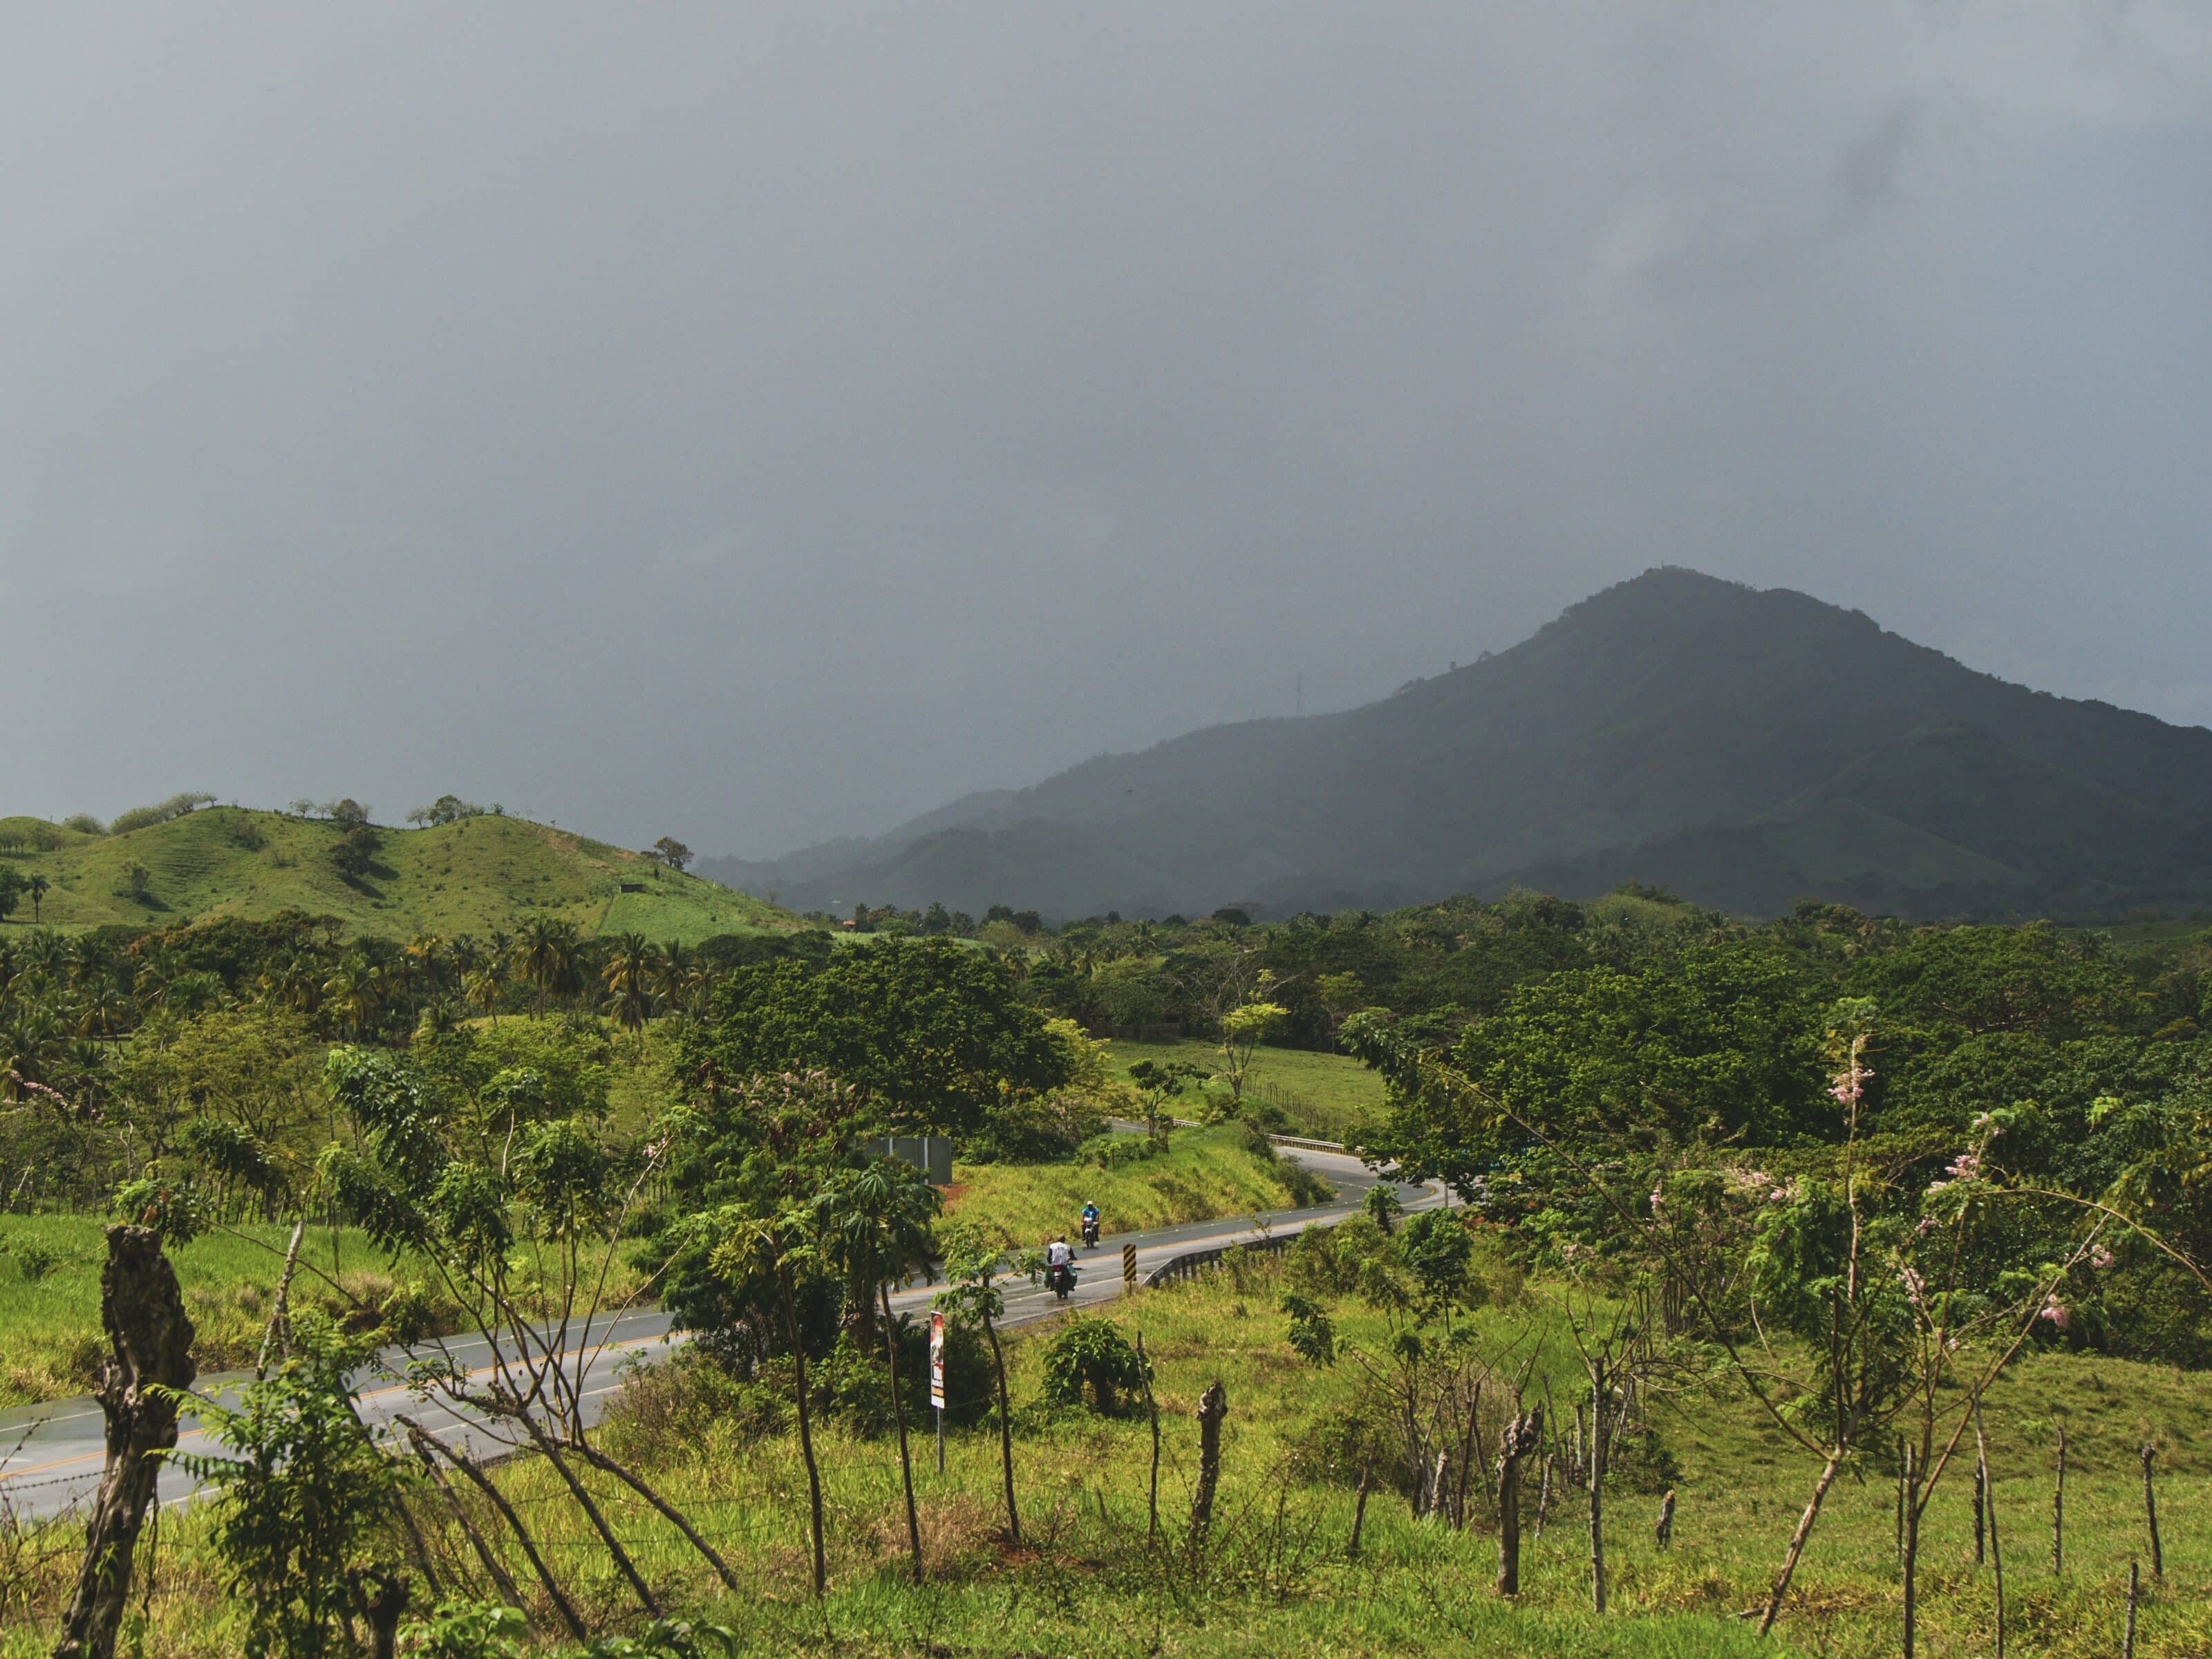
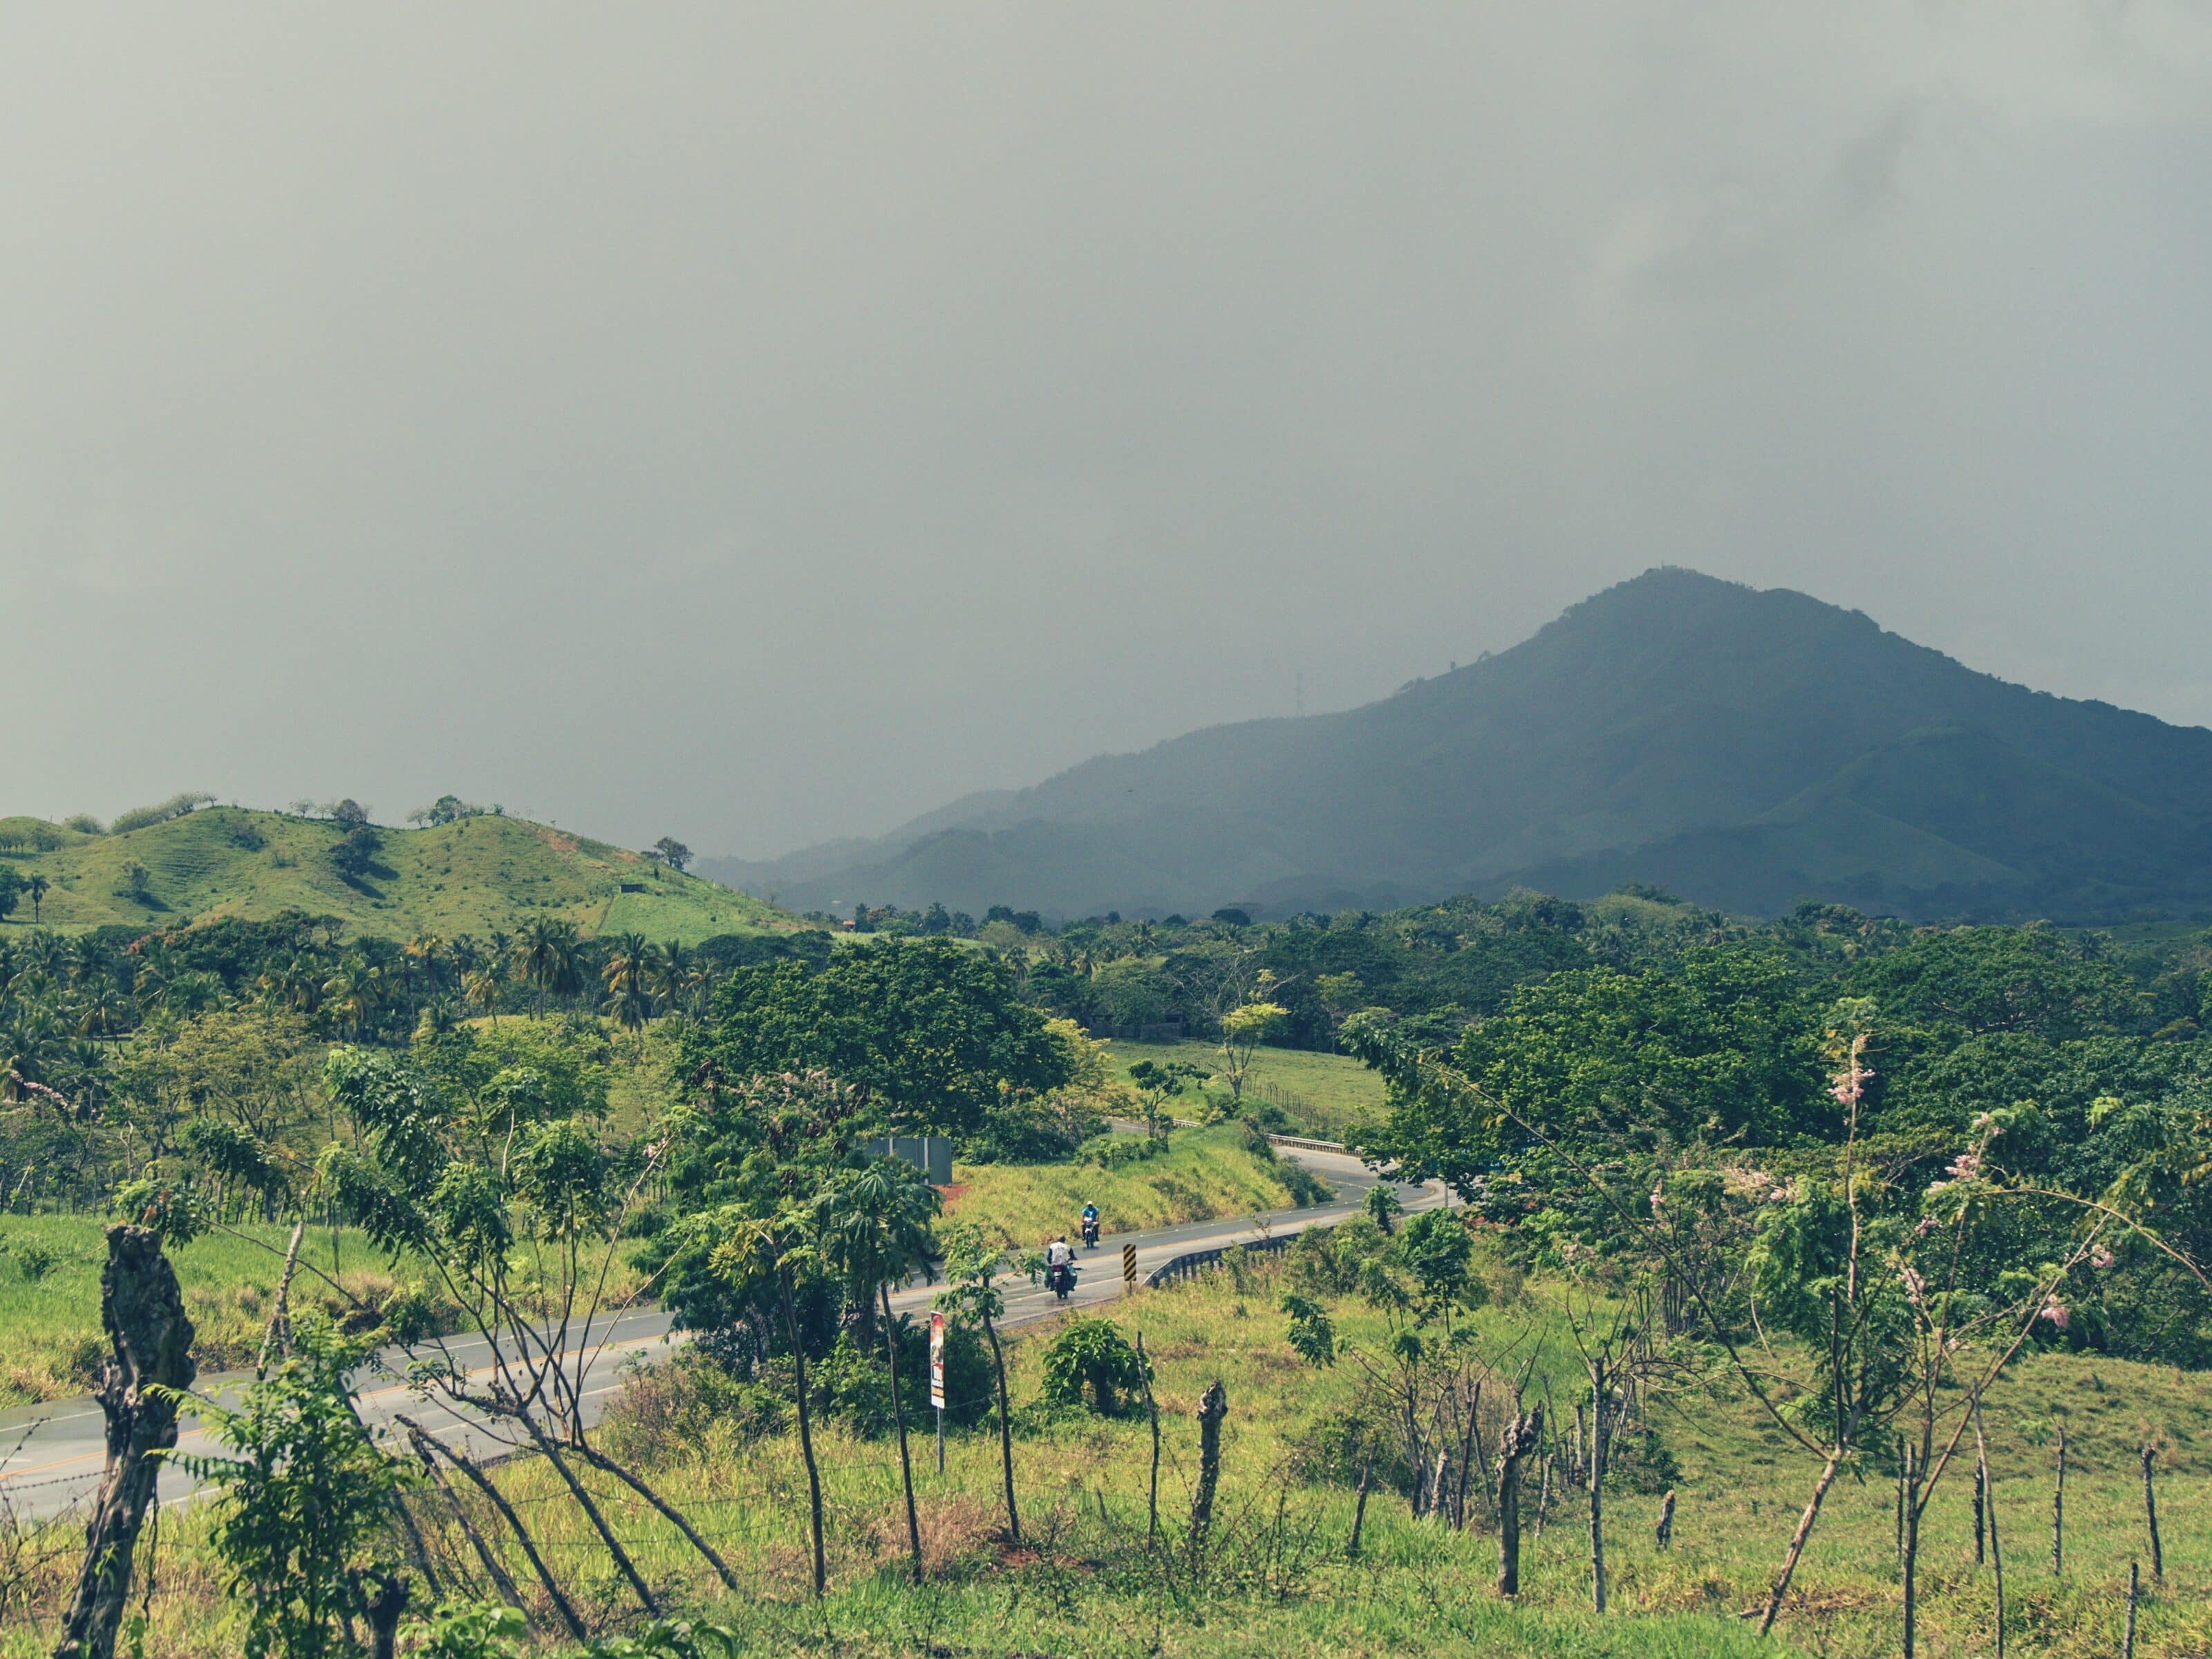
Compare the photo before and after the RGB curve edits.
Intensifying the Sunset in a Street Photo
Highlighting sunsets is a very popular effect. We’ll use this snapshot to illustrate how to do it.


- Red channel: We move the shadows curve upwards, tinting the shadows red.
- Green channel: No changes.
- Blue channel: We draw the shadows and midtones downwards. That gives the picture a yellow tint that highlights the sunset and adds warmth to the photo overall. We move the midtones less, since in portraits they usually include the skin tone, and here we don’t want any drastic skin-tone changes. They would leave the skin looking unnatural.

After our edits, we can see that we’ve ended up highlighting the red reflection in the lens. It’s distracting.
But that’s easy to fix by going to the Colors group, rolling out Color Shift, and using its Saturation section. We just move the point in the magenta and red section downwards. Here it pays to slightly fine-tune the exposure and increase the Contrast and Vibrance.
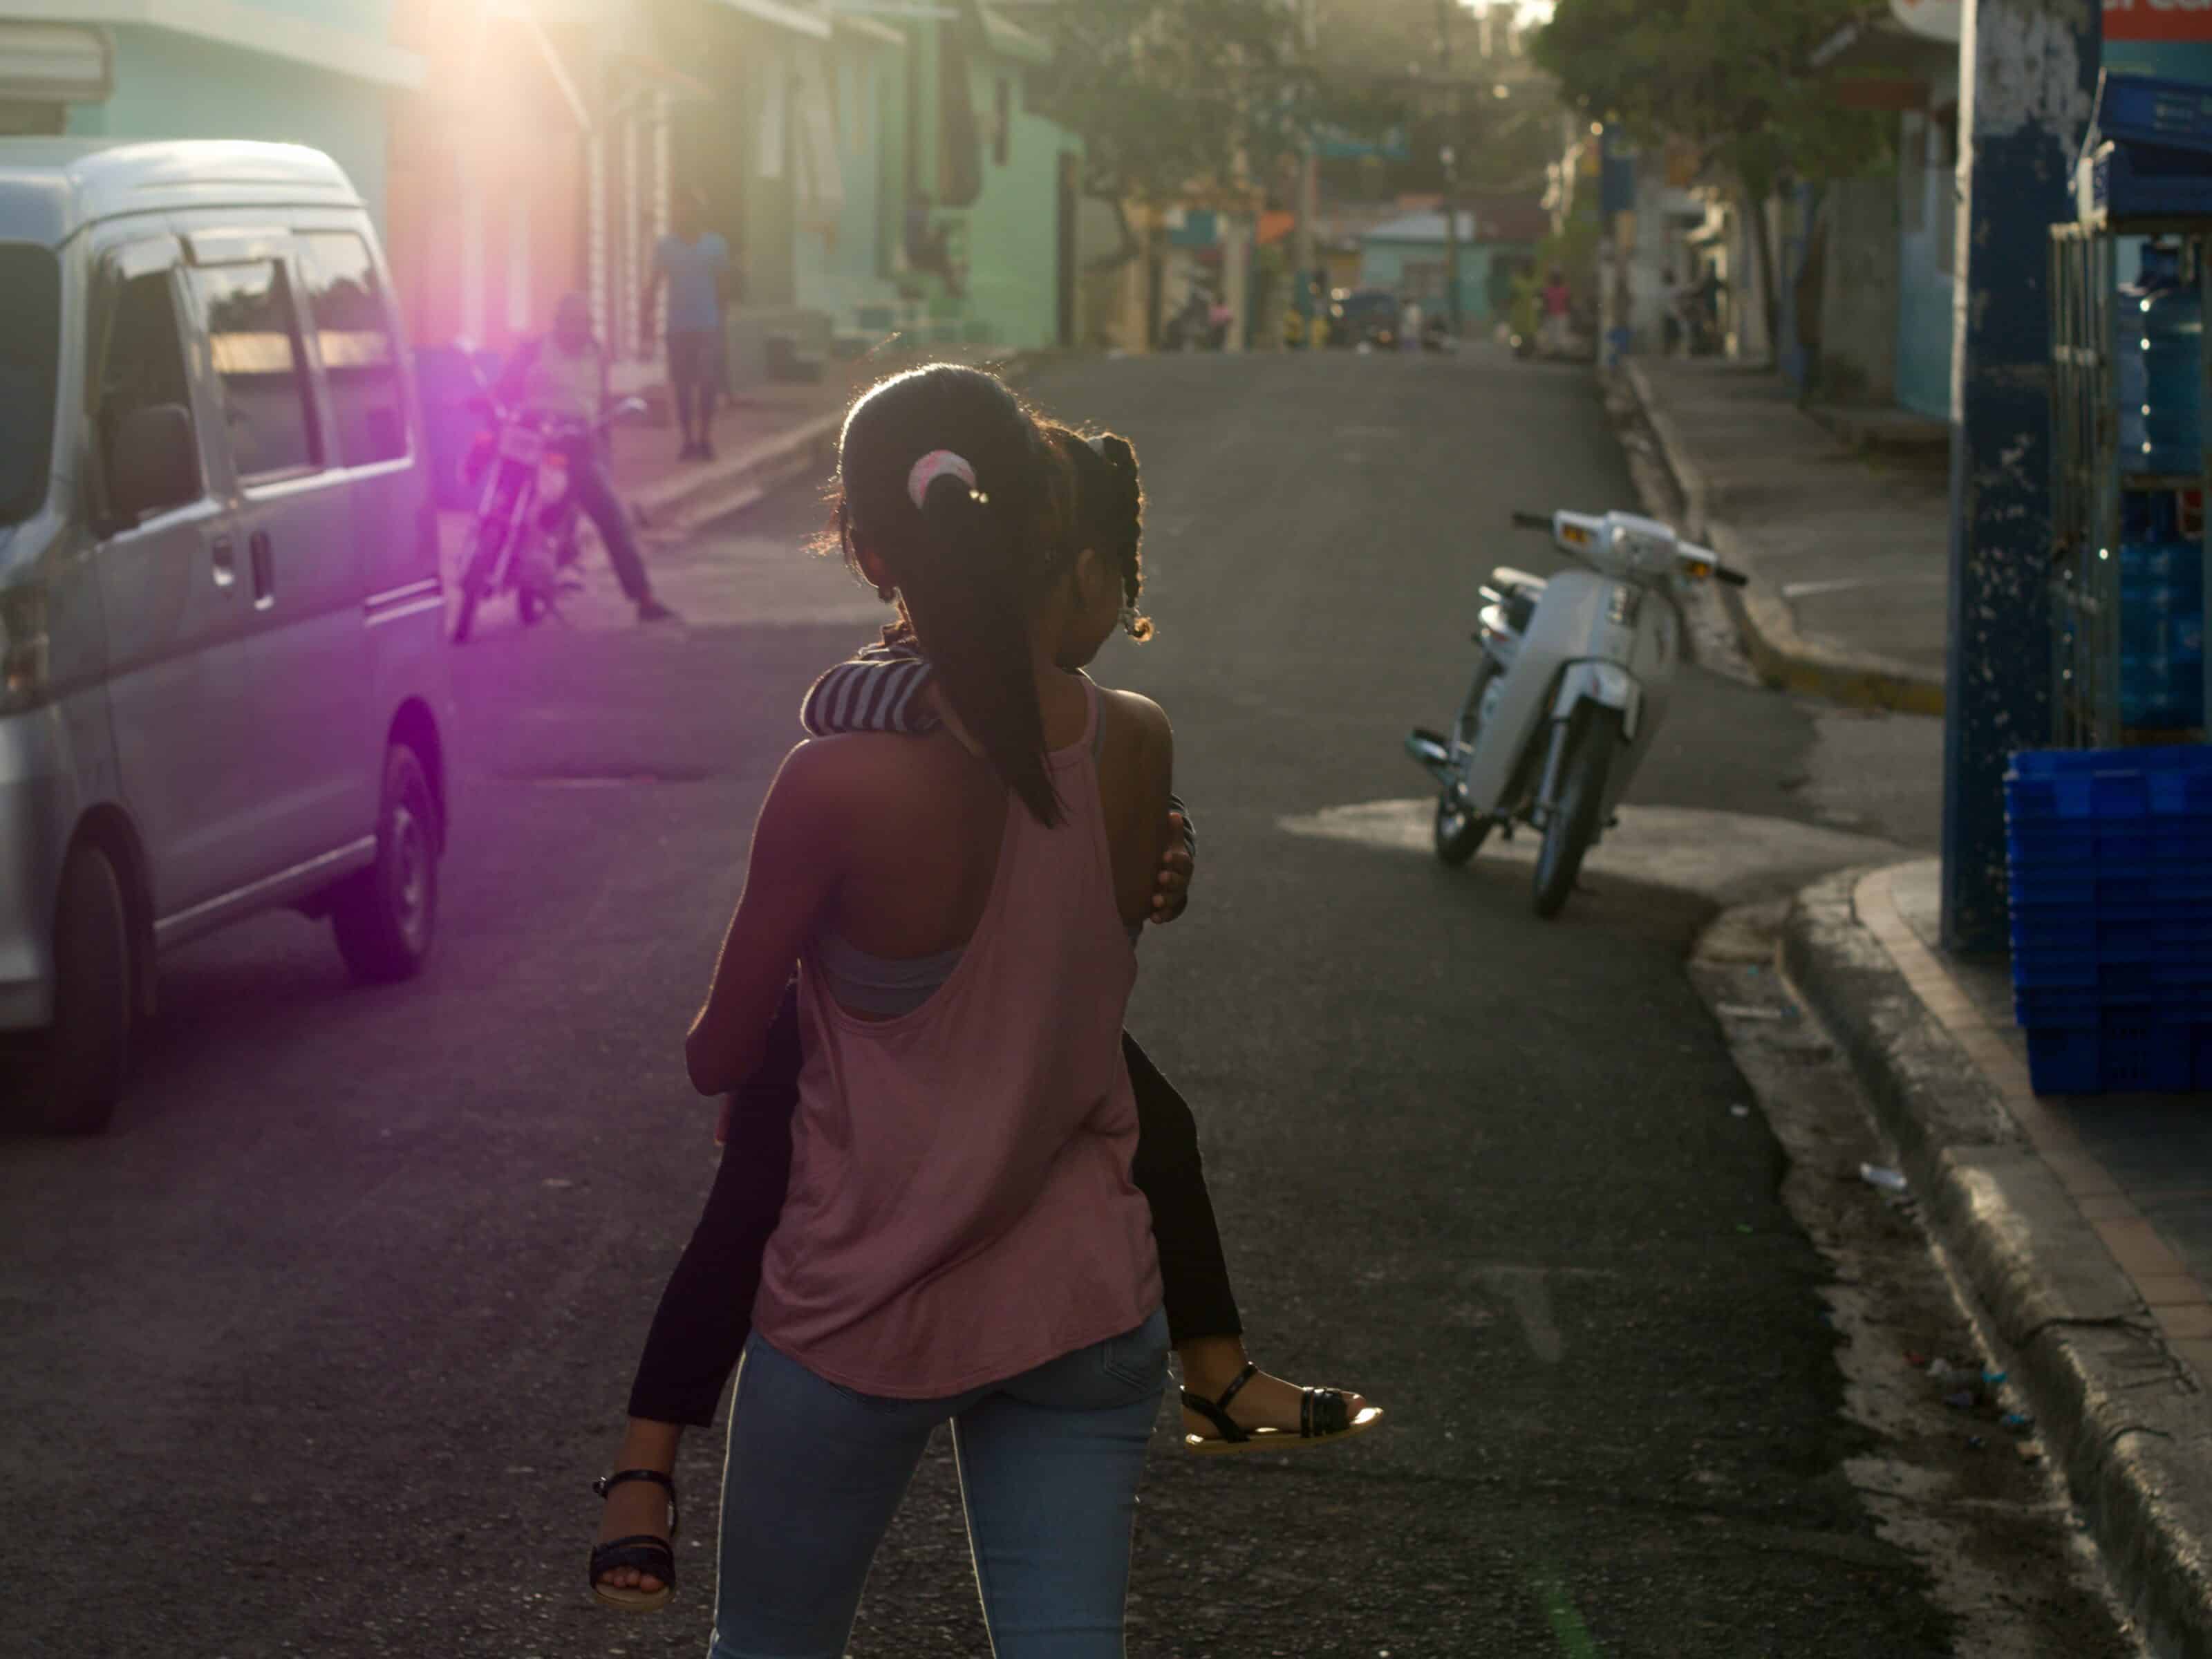
Compare the original with the edited photo.
Some Tips in Closing
Even though some of these edits can seem complicated at first, all they really take is a little practice. (In fact, we can recommend going back through this article and following in our footsteps.) After that, Curves will become an invaluable aid for you.
Just never forget to do your exposure adjustments first. And only make your color corrections after that As you can see in the examples, the curve shifts involved are truly minimal. So work with caution, and remember that less is sometimes more.