White Balance: Why It Matters, What to Do

Every light source has its own temperature. There’s a big difference between the sun and an incandescent bulb. The human eye and brain can join forces to convince us that whites are white under every light, but a camera needs to be told. How?
Under normal circumstances, a camera’s automatic white balance (color temperature correction) settings give perfectly balanced colors. But sometimes they’re “off,” and instead of balanced colors, they give a slightly tinted picture. This is most common under cloudy skies and weak sunlight in general and in pictures with multiple lighting sources (like mixed incandescent and fluorescent lighting).
When White Balance Matters
You don’t need to worry about white balance settings when you’re shooting to RAW. That’s because you don’t have to set the white balance for RAW images until you’re developing them on your computer. This conversion is lossless. But when you’re shooting to JPEG, any changes you make to correct white balance will damage the picture a little, due to the nature of the JPEG format. And it might not be worth the effort. Not to mention that fixing white balance on a computer takes time.
Where to Look, What to Seek
In your camera’s menu, look for the item marked White Balance or WB. Most cameras have several white-balance presets available. Typically these include sunny, cloudy, shadow, incandescent, fluorescent, and flash, and perhaps some subcategories. They are usually shown using icons (the sun, a cloud, etc.).
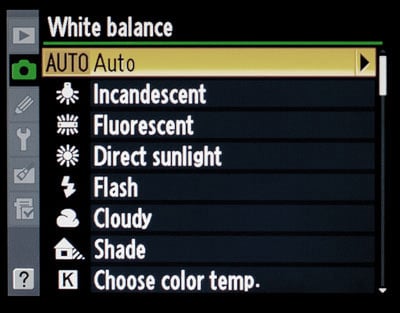
Advanced cameras also let you set a color temperature directly by entering it in degrees Kelvin. Typical lighting situations each have their own typical Kelvin temperature; e.g. a sunny day is about 5500 K, while cloudy days will exceed 6000 K. But when you’re starting out, you don’t need to enter these values by hand. You can just use the presets mentioned above.
Pay special attention when you’re walking from sun into shadow or vice versa. Always check your results on your camera display and change the white balance immediately if needed.
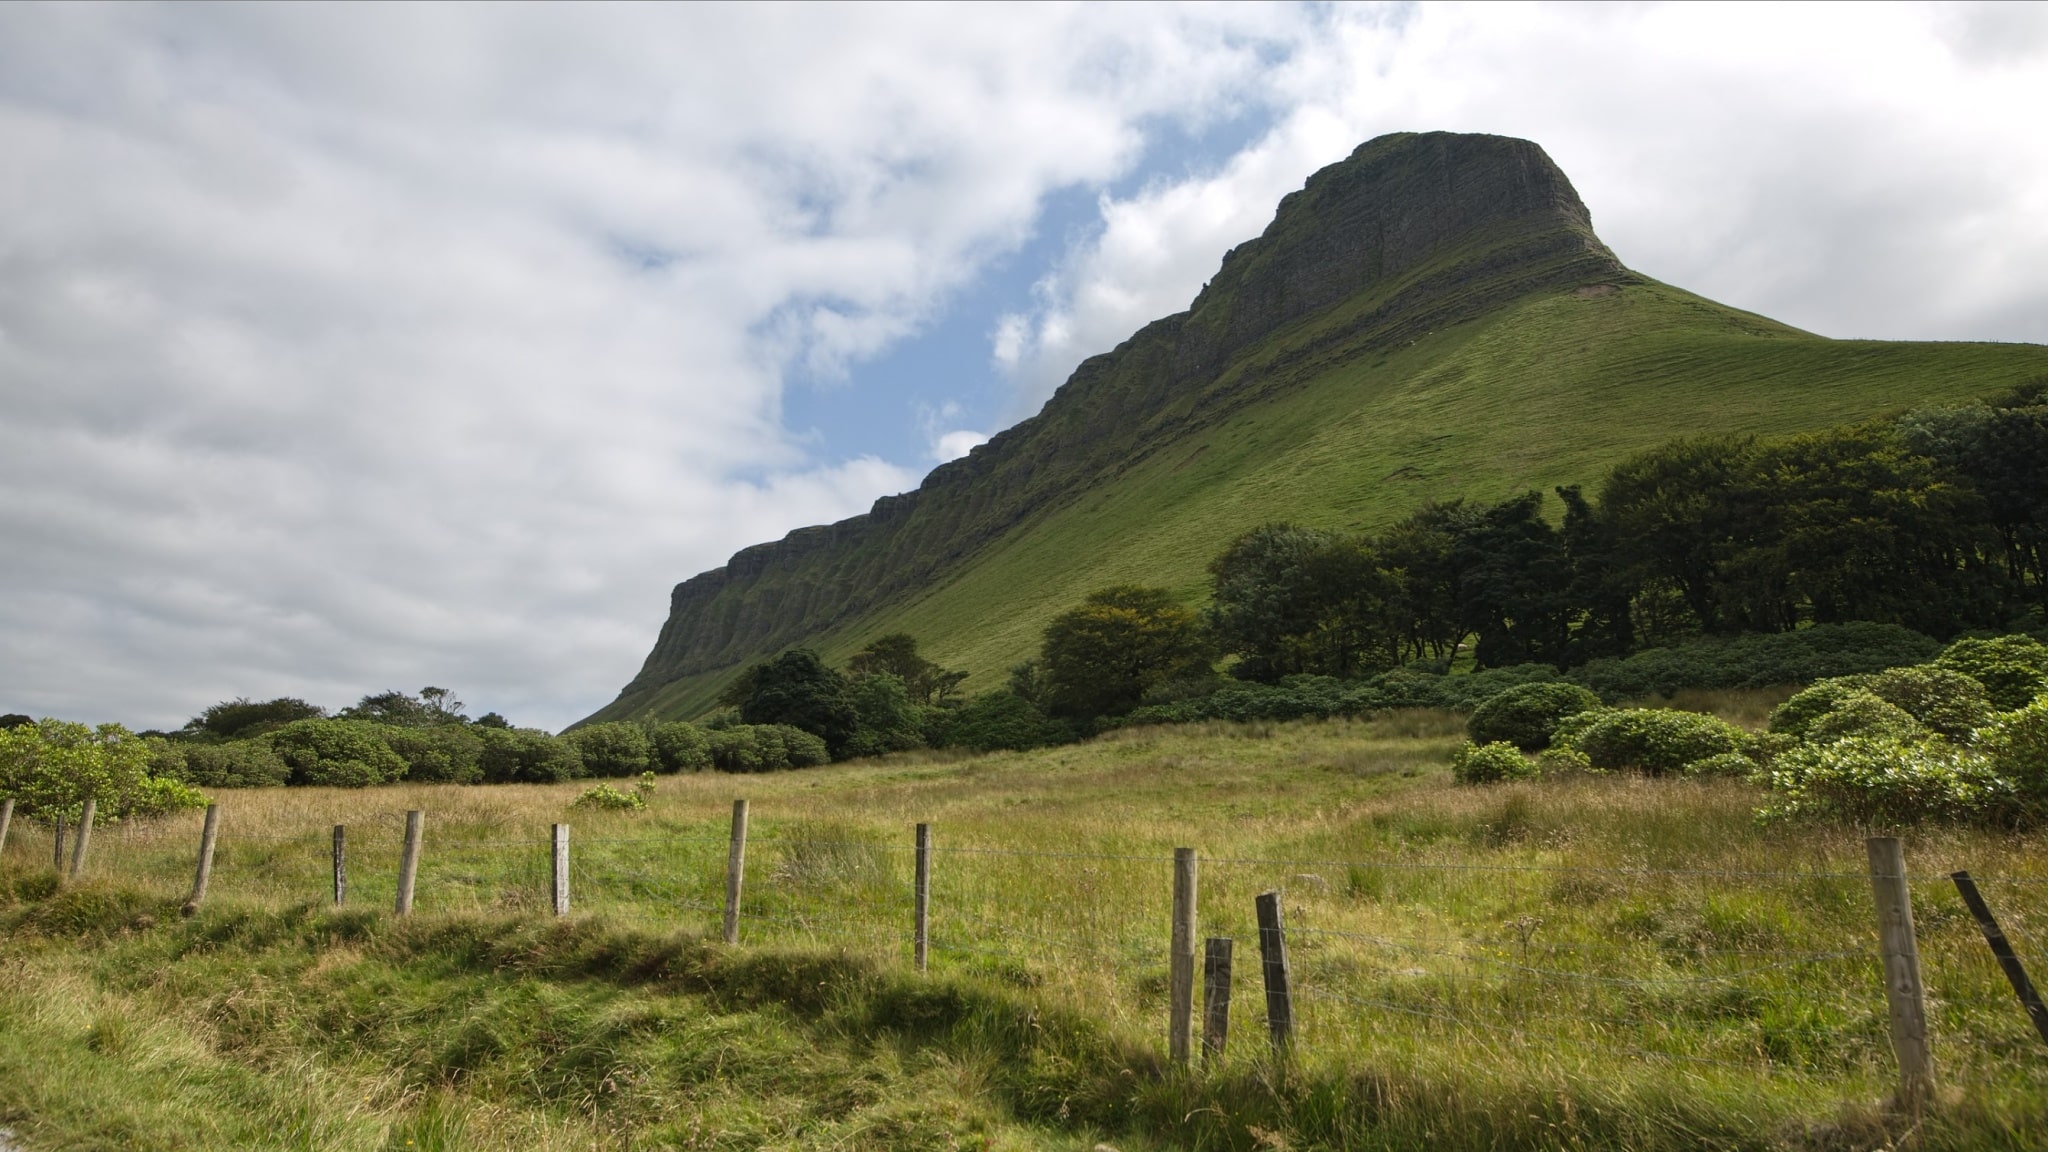
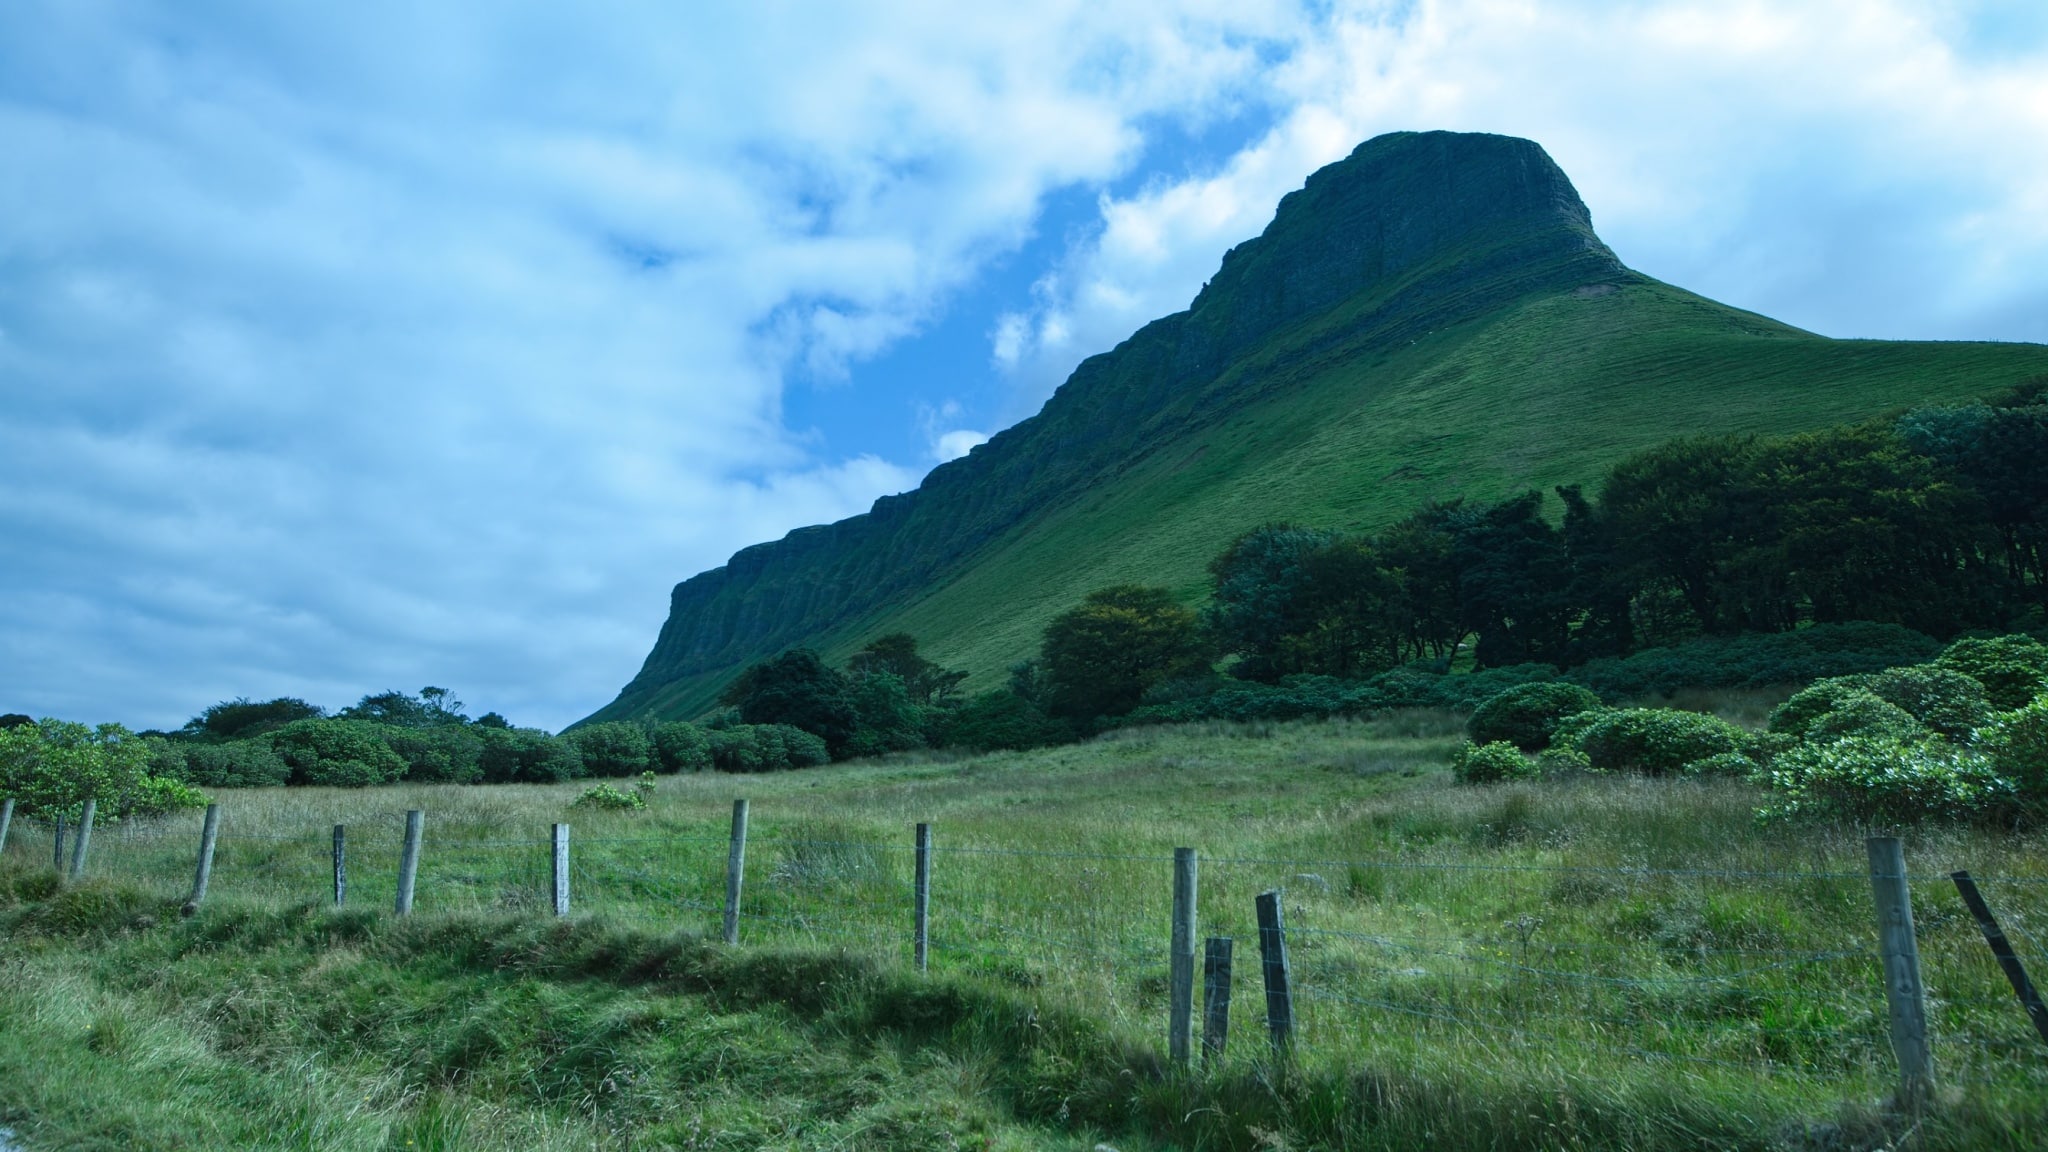
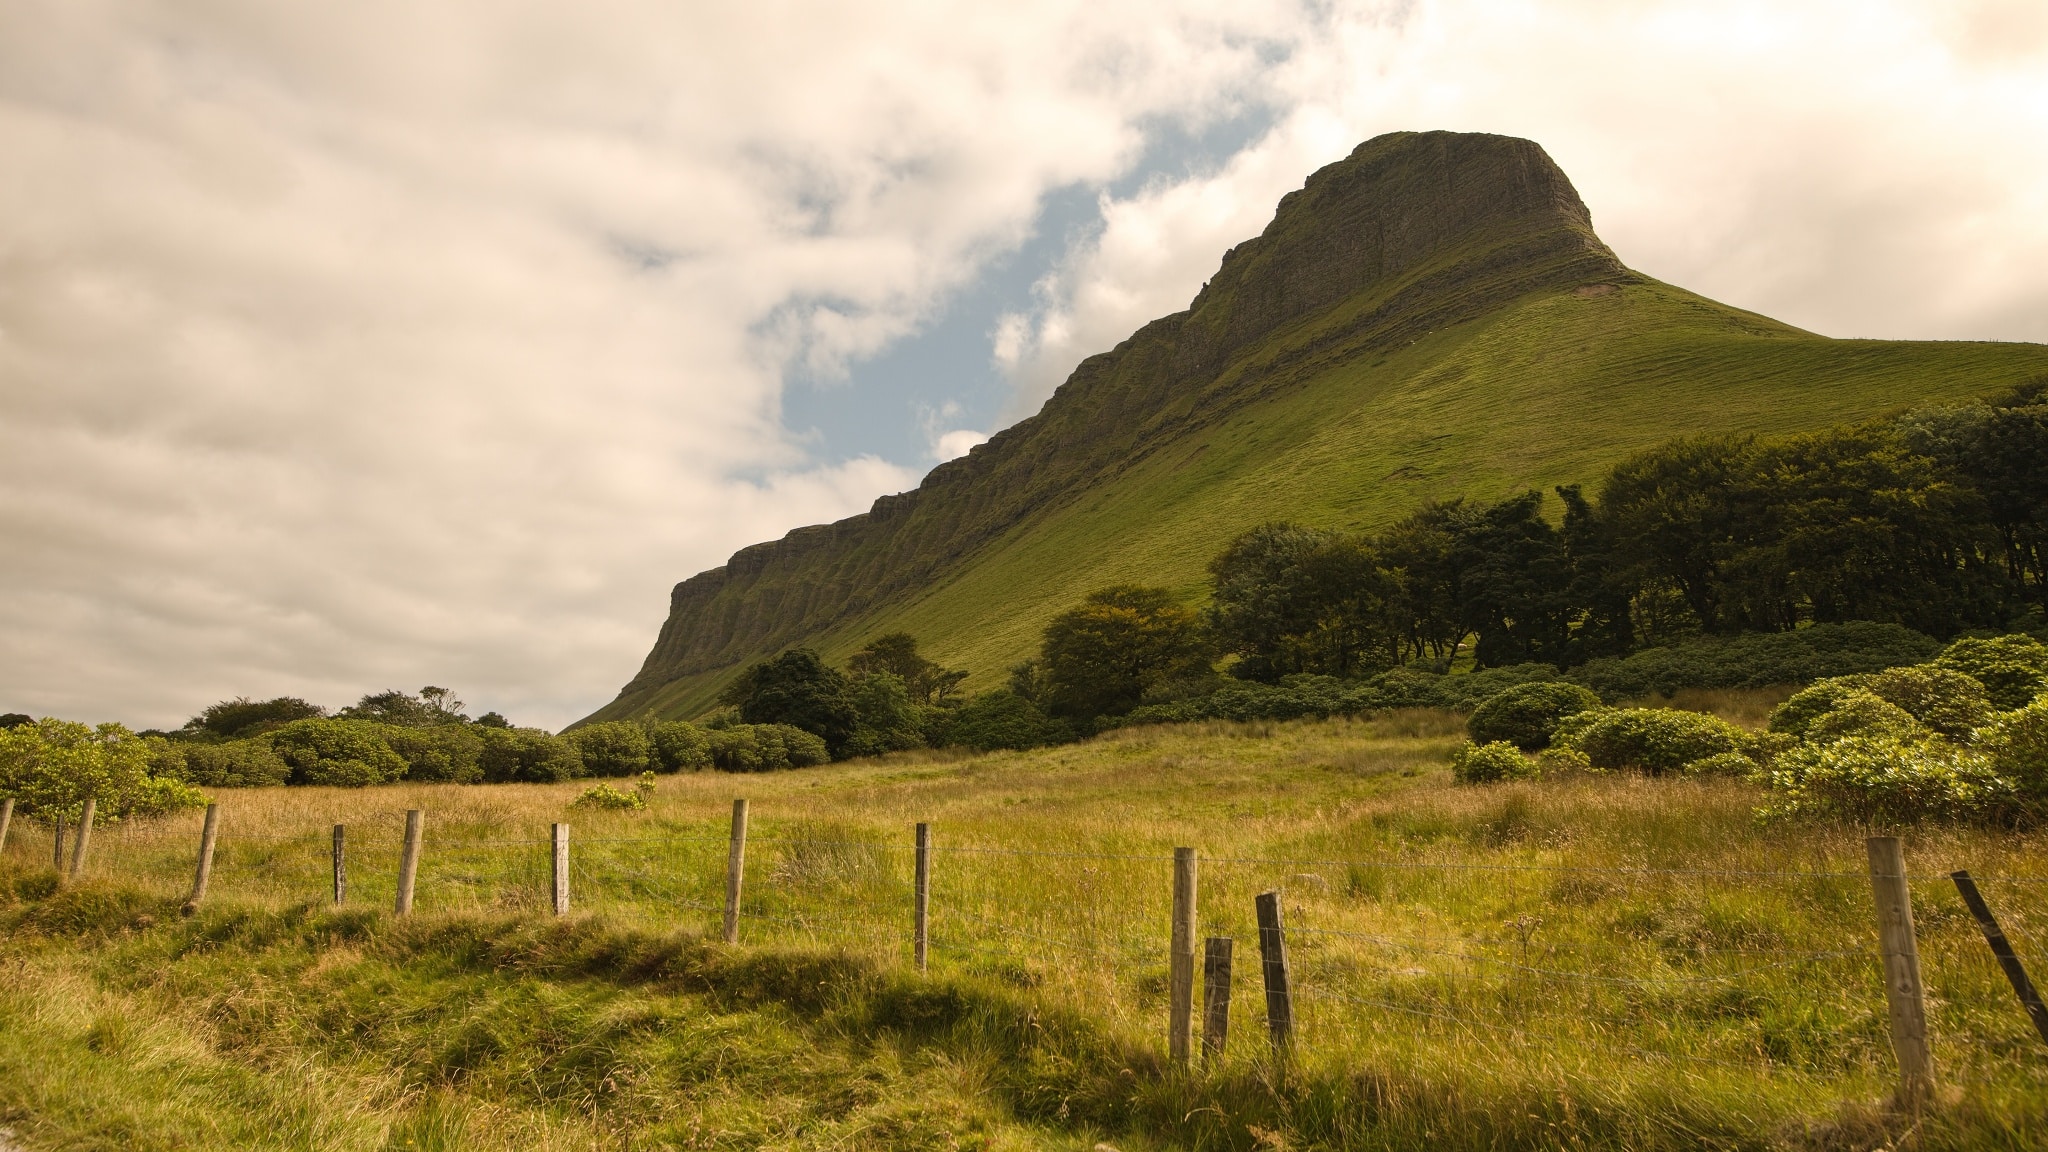
Here are a few examples of good and bad white balance settings:
Rescue It on a Computer
Got the shot wrong? It’s not yet time to throw in the towel. Try fixing the photo in software like Zoner Photo Studio, which has a feature made specifically for repairing bad white balance.
We’ll illustrate it now using the “accidental Cloudy setting” example shown above. Click on your badly white-balanced picture in the Manager, and then switch to the Develop module, so that you can make these changes while always being able to go back to the original.
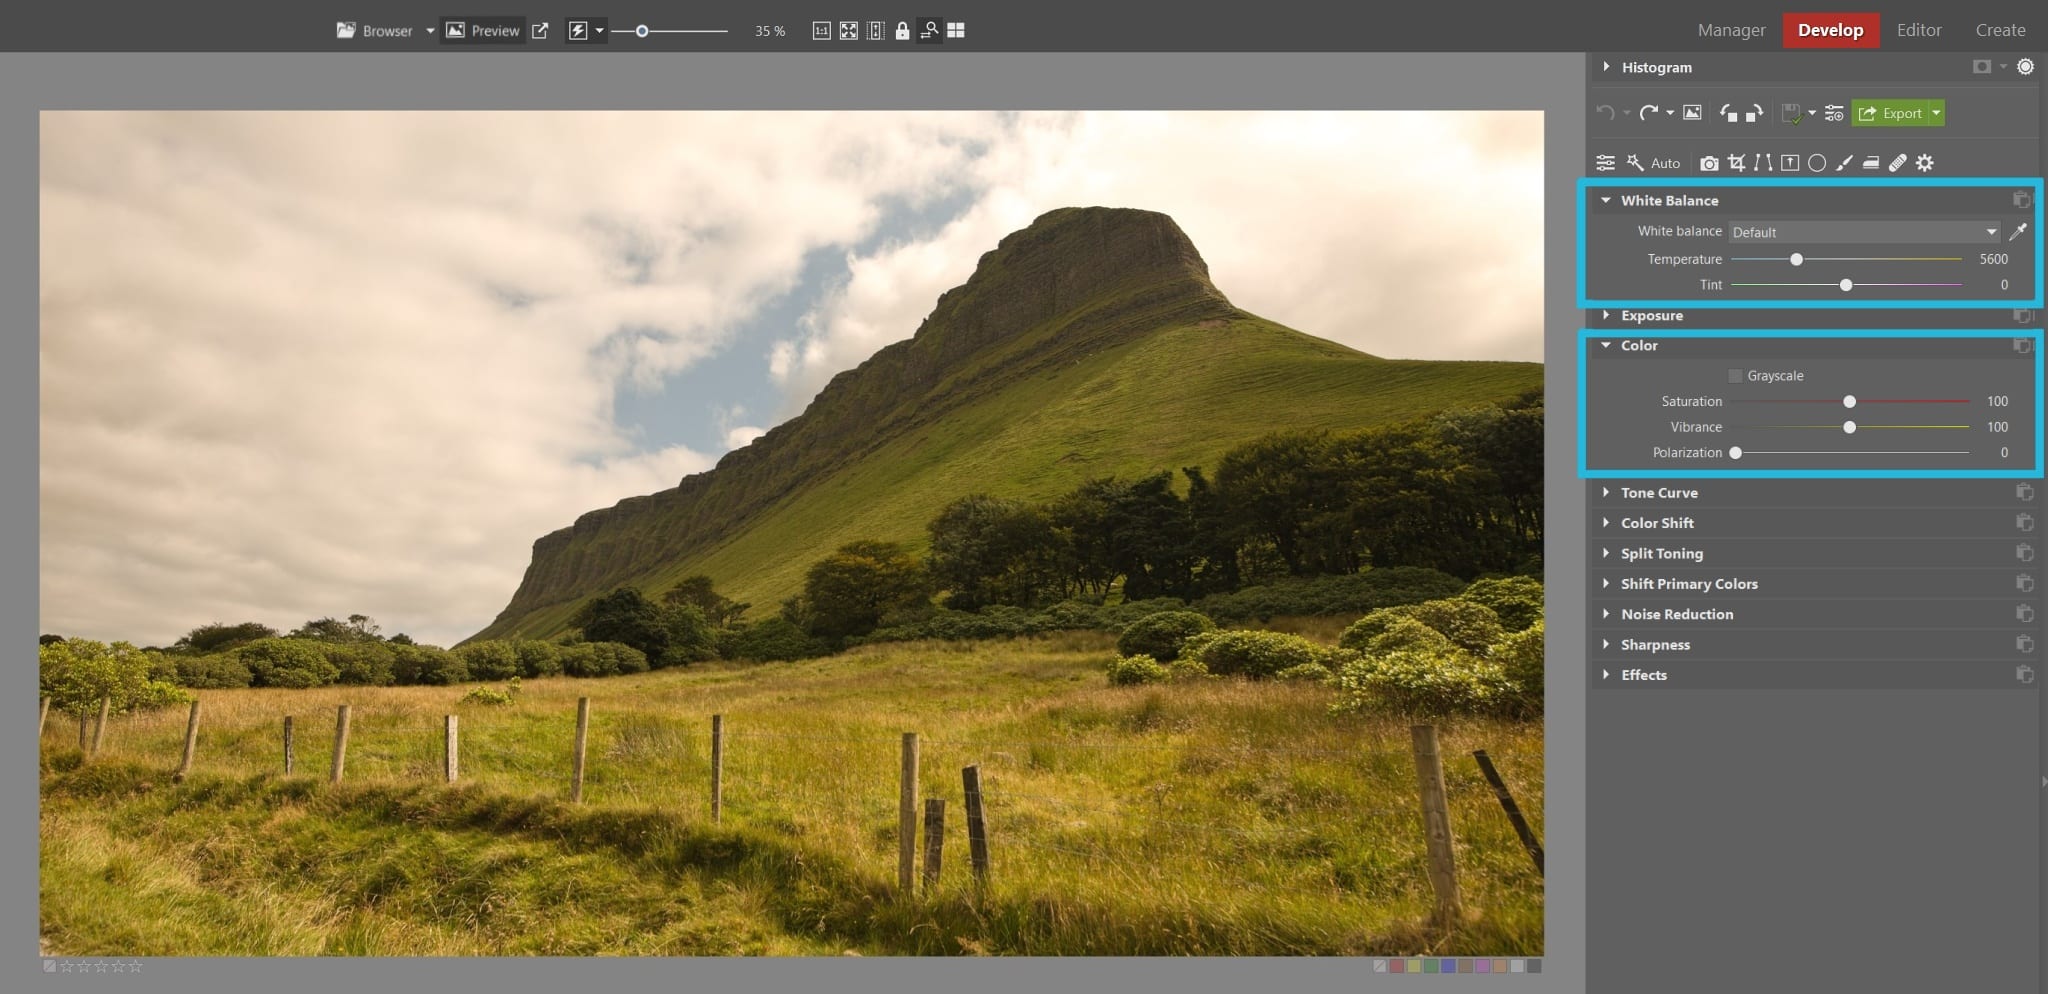
The Develop module gives you two main options for correcting white balance: correction by clicking with an eyedropper on a neutral color, and correction by setting the old and new lighting temperatures via two sliders.
This picture is a little trickier to balance than most, because the cloudiness has really sucked the color out of it. So for our balancing, we’ll both click with the eyedropper on a spot that should be neutral gray, and make some changes to the Colors sliders. We pull the Tint down to -35, and raise the Vibrance all the way up to 120.
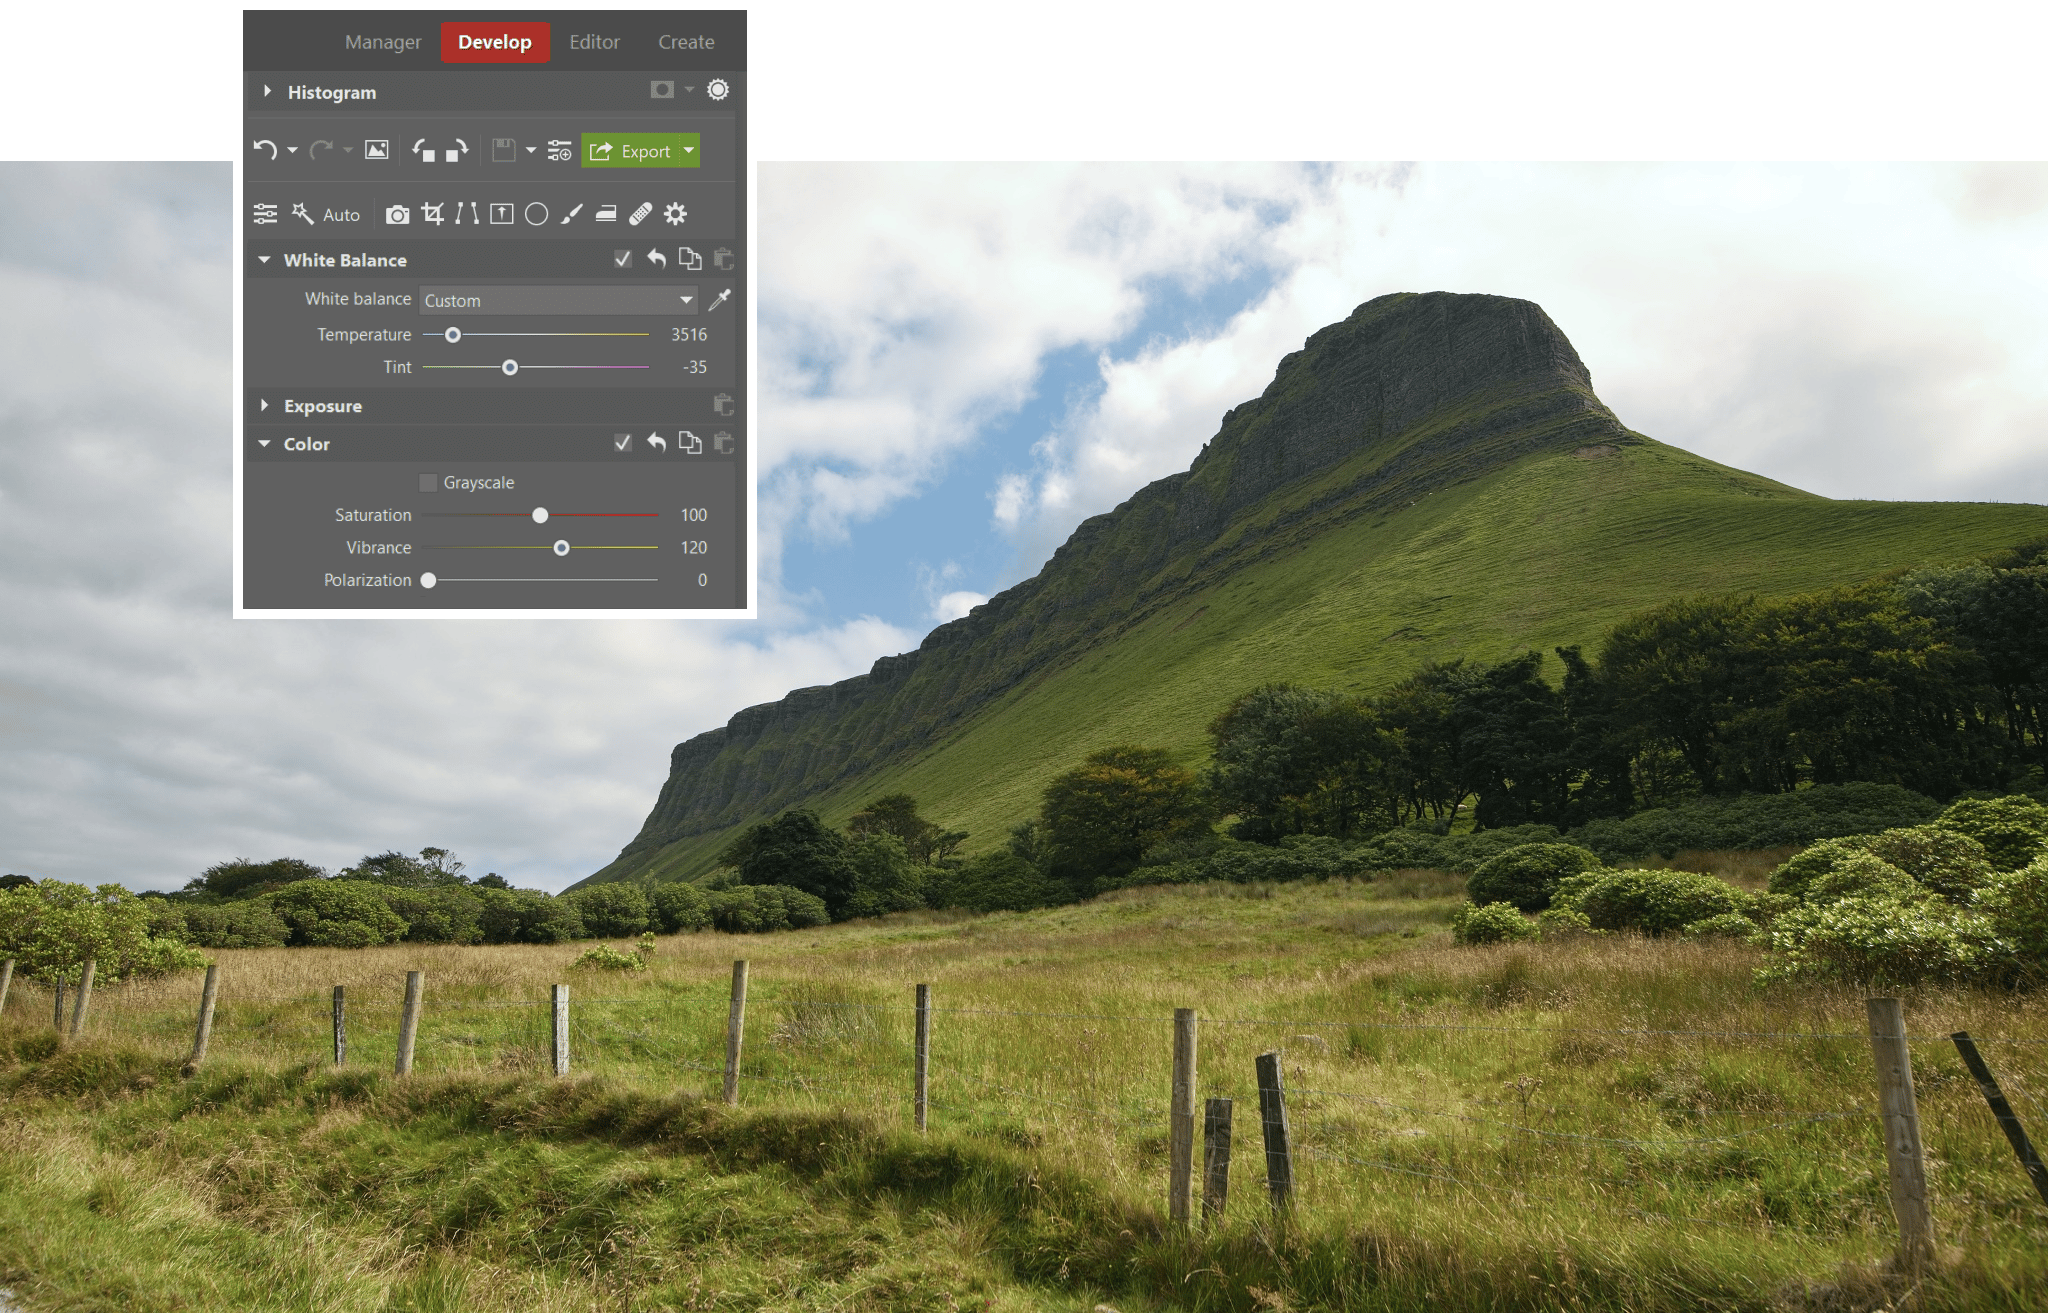
Once we’ve done, we click Export do create a new, separate file containing our changed picture.
Ready or Not, Here I Come
Even if you aren’t prepared for the light conditions when shooting your photos, there’s a way for you to make sure that your final pictures still look good. If you need to handle the situation on a computer, use the tips above, and nobody will ever know you made a mistake!

There are no comments yet.