Photography Exercise—Composition in Practice
Reading articles about photography is fun, but how about putting theory into practice? Here’s a simple composition exercise with a few rules to help you think more intentionally about what’s in front of your lens and how to work with the scene. Join us for this photography “homework assignment” and sharpen your composition skills!
Just like in the article about basic composition rules, this exercise is based on an assignment I give my photography students. I’ve simplified it a bit for this article, and left out a few extra rules that I added to keep students from cutting corners. Since I can’t share their work, I’ve modified the example photos to suit the article.
The assignment
The task is simple:
- Imagine you’ve been asked to provide photos for a local magazine article about a small subject.
- You need to submit at least five images, including a wide shot showing the surroundings, a full shot, and a close-up.
- Each photo should adhere to basic composition rules.
The goal is to encourage you to think about the scene rather than just snapping a single shot with the subject in the very center without considering the background or composition.
To ensure students take fresh photos and not just dig up old travel pictures, the subject should be something ordinary—nothing that would be considered a major tourist attraction. Details from everyday life, like street signs, trash bins, etc. That said, you’re free to test your skills on something more eye-catching, like a nearby church.
If you follow this approach, here’s one tip: Avoid signs mounted on the wall. Their viewing angles are limited, and the results often look repetitive. It’s better to find something freestanding in the space you’re photographing in.
Let’s break down each of the shots for the assignment.
Wide shot—Context matters
The first photo should show where the subject is located.
A wide focal length works best, but don’t just point and shoot. It’s easy to capture a random street scene, but if there’s no recognizable landmark, the setting may be unclear. If there’s something distinctive nearby, include it in the shot along with your subject.
Try walking around and trying different angles to find the most interesting perspective. Composition rules can help. Consider using leading lines, the rule of thirds, or the golden ratio.

Sony A7R V, Tamron 35-150/2-2.8, 1/250, f/5.6, ISO 250, focal length 35mm

Sony A7R V, Tamron 35-150/2-2.8, 1/250, f/5.6, ISO 160, focal length 43mm
Full shot—The subject itself
This image should clearly show what the article from the assignment is about. It should not be too far away or cropped.
Finding a strong composition can be tricky, but always check the background. Avoid distractions like trash cans or passersby in colorful clothing. The less chaotic the background, the better.

Sony A7R V, Tamron 35-150/2-2.8, 1/250, f/5.6, ISO 250, focal length 55mm

Sony A7R V, Tamron 35-150/2-2.8, 1/250, f/5.6, ISO 250, focal length 55mm
A telephoto lens can help blur the background and isolate your subject.

Sony A7R V, Tamron 35-150/2-2.8, 1/250, f/2.8, ISO 200, focal length 150mm
With some effort, you can find another object that can be used for framing the subject and drawing attention to it.

Sony A7R V, Tamron 35-150/2-2.8, 1/800, f/2.2, ISO 100, focal length 44mm
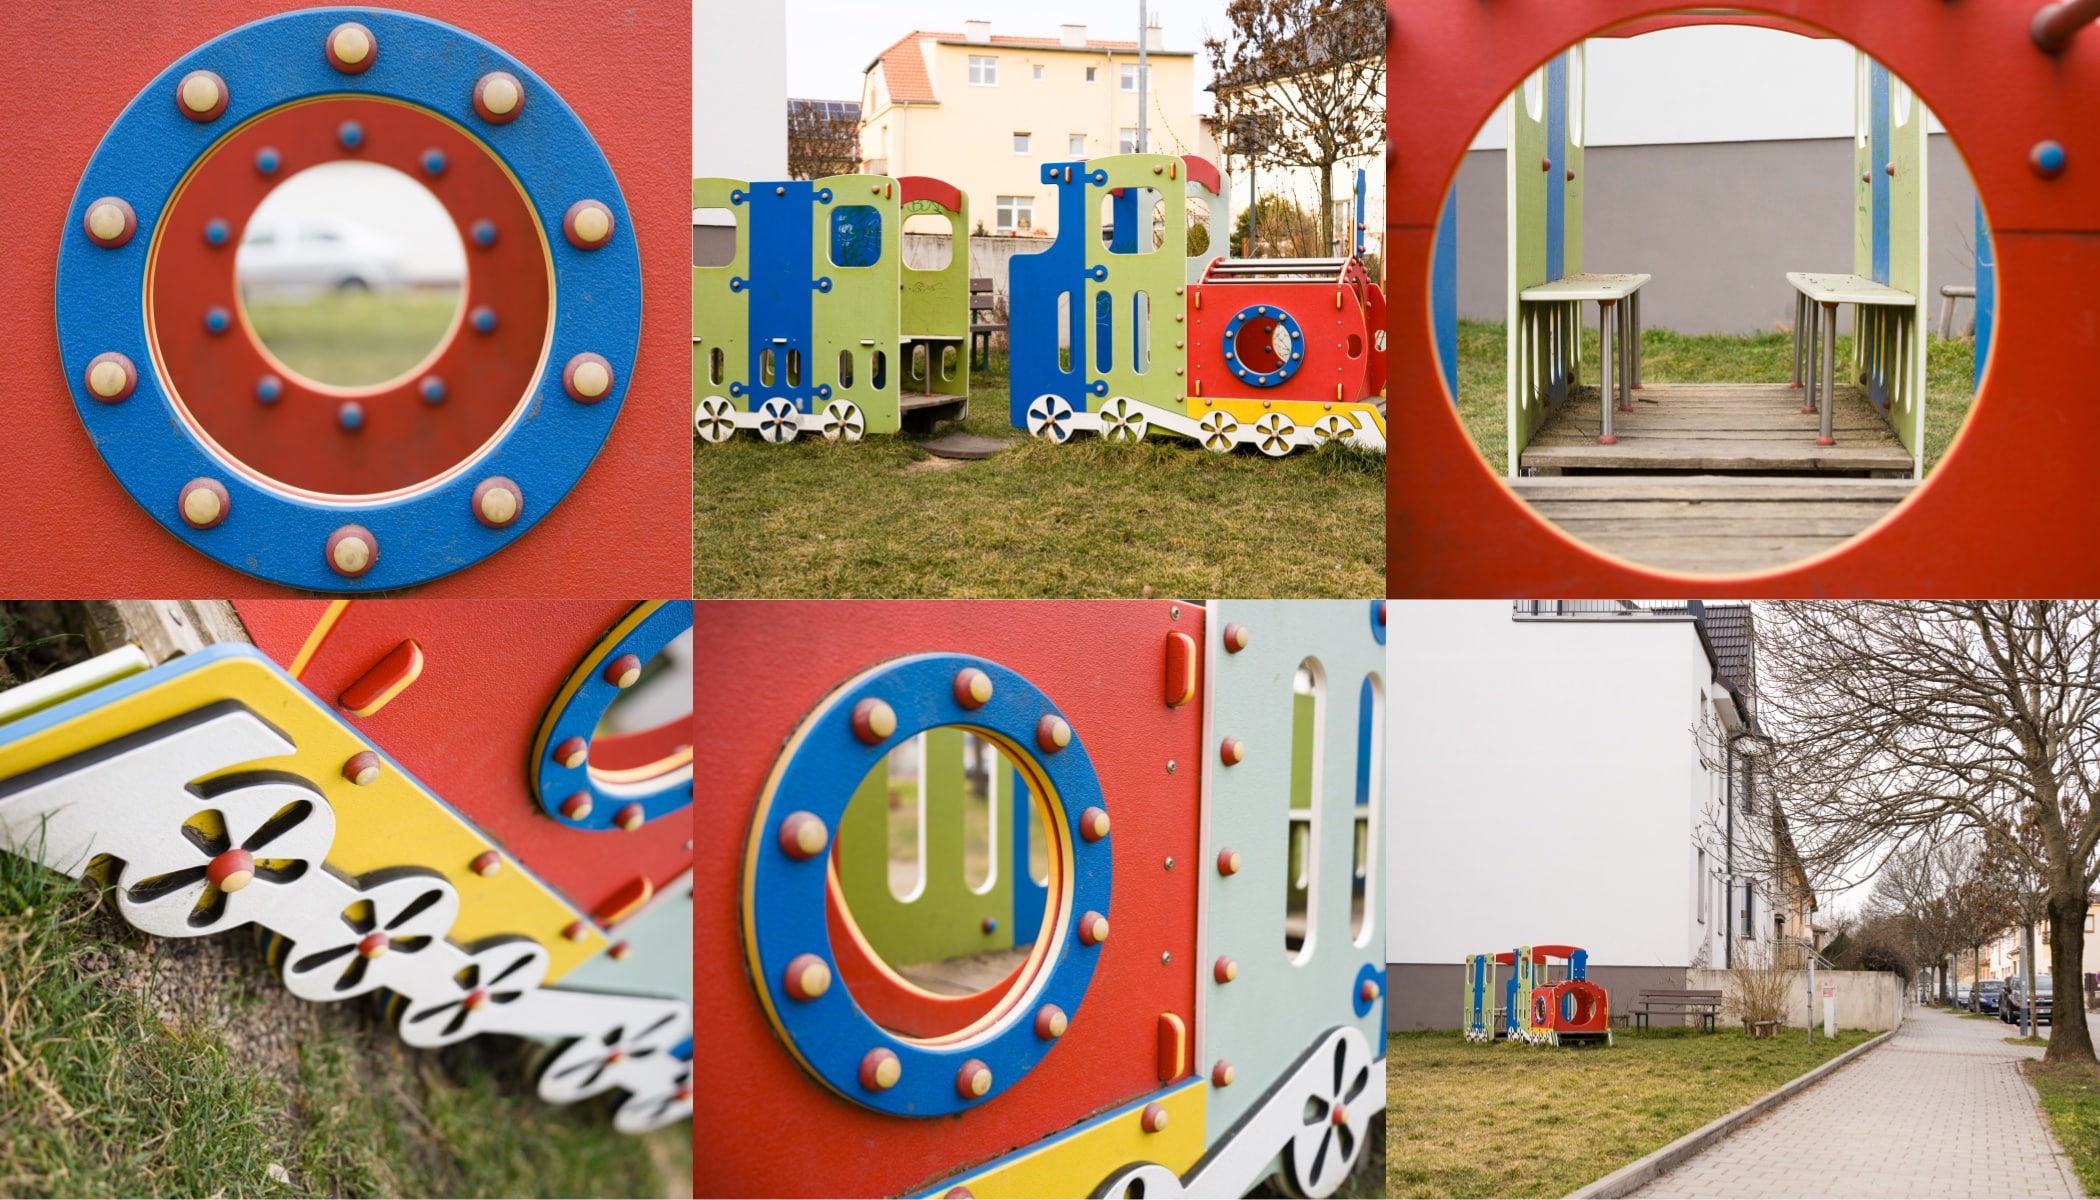
Close-up—details matter
Find an interesting part of your subject and capture it in a unique way. The close-up should feel distinct from the full shot and shouldn’t just be a cropped version.

Sony A7R V, Tamron 35-150/2-2.8, 1/320, f/2.8, ISO 100, focal length 150mm
Use diagonals or interesting angles to make the shot more dynamic. It’s a good idea to experiment with different positions and get close to other parts of the subject or shoot along the subject.

Sony A7R V, Tamron 35-150/2-2.8, 1/250, f/2.8, ISO 250, focal length 102mm

Sony A7R V, Tamron 35-150/2-2.8, 1/250, f/5.6, ISO 400, focal length 55mm
The thought process is similar to the full shot, but on a much smaller scale.
Common pitfalls
- Flat, boring photos
For some photographers, the assignment will be a piece of cake and they won’t even need the information from the previous paragraphs. But for beginners, this is a whole new world. Many beginners take static shots from eye level, placing the subject in the center without considering composition.
If any composition rules happen to be applied, it is by pure chance.


On the other hand, even if the photographer focuses on shooting from different distances, they can still make a mistake if they miss an important part of the subject. I’ve also seen a series of shots where the front of the subject was completely missing.
It’s best to walk around the subject and shoot from various distances and heights.
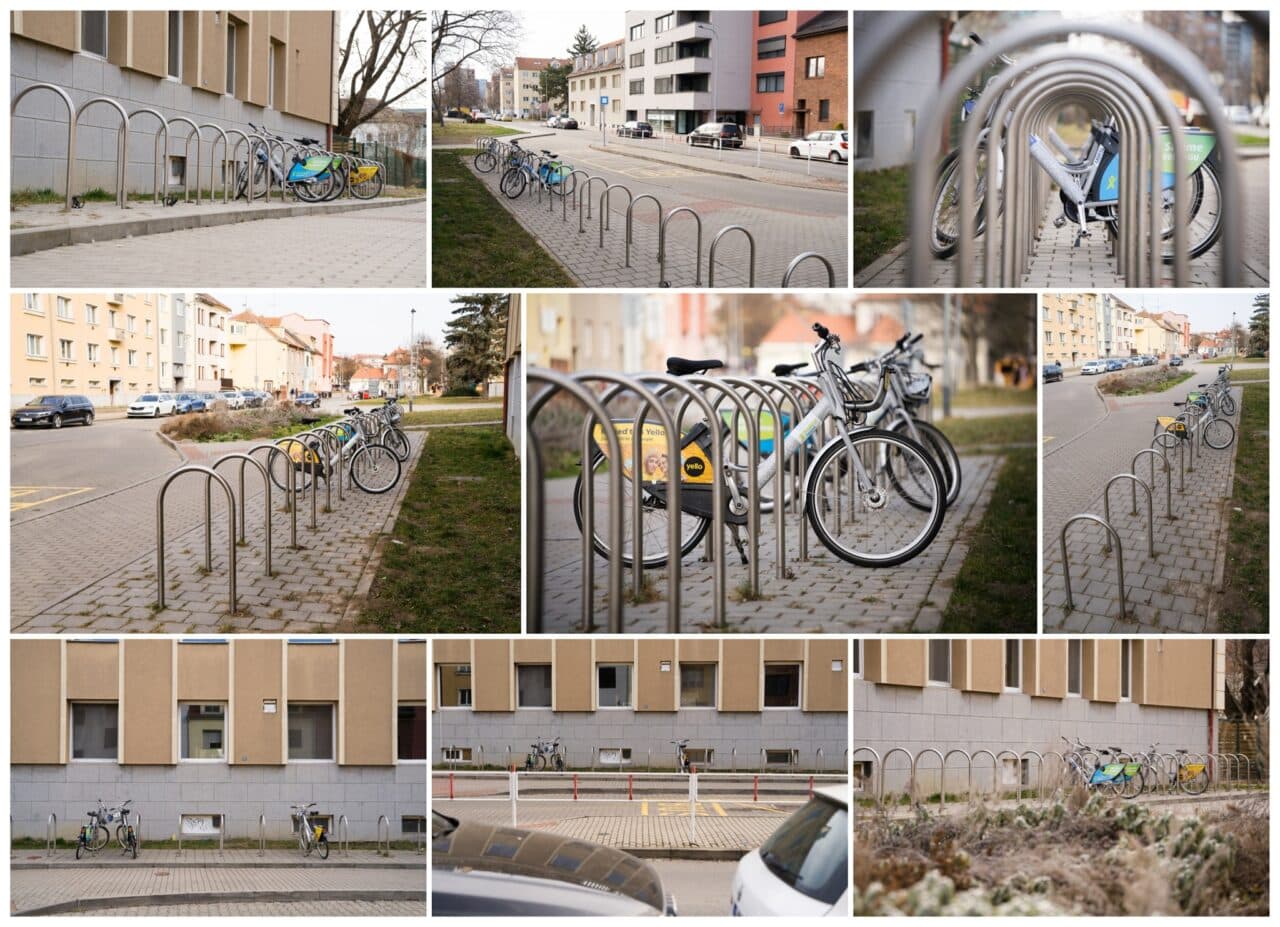
- Lack of variety
This happens mostly when the subject is something very simple that looks the same from all sides.
Even if the photos themselves are fine compositionally speaking, they are not varied enough. If the best one is used for the imaginary article in the assignment, all the others are copies and there is no point in adding them.

- No clear context
More often than you’d expect, I get a series of good photos, but it’s unclear what the subject is. Typically, everything is shot on a telephoto lens with the subject spread across the photo with a blurred background. These types of shots are also useful, but they need to be accompanied by some shots with context.

- Overuse of portrait orientation
This depends on the purpose of the images. For this particular assignment, I specify that all shots shouldn’t be taken using only portrait orientation. However, if the images are only viewed on mobile phones, it probably is the better format.
However, the problem is that many people don’t think to take photos any other way. Portrait orientation often gives beginners composition issues. If you’re not careful, you end up with all your photos split into thirds with the sky on top (useless), the ground on the bottom (useless), and a small strip in the middle for your subject.

Sony A7R V, Tamron 35-150/2-2.8, 1/250, f/4.5, ISO 100, focal length 35mm
Practice makes perfect
Even if your photos won’t actually be used in an article, this exercise helps you develop stronger composition skills.
The next time you’re on vacation, you’ll be able to capture a variety of compelling shots instead of three nearly identical ones.
- What if there’s nothing interesting nearby?
Change your perspective. Look for interesting textures, patterns, or contrasting light. Ordinary objects can be surprisingly photogenic! - How do I know if I captured enough context?
Show the photo to someone unfamiliar with the location. If they understand where it was taken without further explanation, you’ve succeeded. - Can I use my phone instead of a camera?
Yes! Good composition isn’t about gear, but rather how you frame the shot. A phone with a good camera works just as well. - What if all my photos look the same? Vary your focal length, angles, and shooting height. Experiment with perspective and try to find interesting details.
- Can I take all my photos in portrait orientation?
Technically speaking, you can, but landscape orientation is often more versatile. Alternate between the two depending on what works best for your scene. - How strict are the composition rules? The rules are a good guideline, but the most important thing is that the photo works well. Don’t be afraid to break the rules sometimes if it benefits the image.
- How can I avoid distracting backgrounds? Change the angle or focal length. Telephoto lenses can help blur the background. Or, try placing your subject in a quieter area.
- What if the lighting is poor? Try a different angle that gives you more light. Experiment with a longer shutter speed or higher ISO—modern cameras can handle this better than you’d expect.
Do you have more questions? Write them in the comments and be sure to share your results! 📸
There are no comments yet.