5 Tips for Photographing Star Trails
Fascinating photos of stars passing through the sky and leaving shining trails behind them. Pictures like these are an enticing aim for everyone who has ever tried photographing the stars. Meanwhile they’re easier to create than it might at first seem. Take a look at how to photograph the night sky and capture the motion of the stars—star trails—within it.
Star-trail photography is a technique that could be described as time-lapse imaging of the stars’ motion in the night sky. The best time for it is between dusk and dawn. And the best personality traits are not a keen eye or improvisation, but patience and preparation. Keep in mind that photographing the motion of the stars will take you a couple of hours. So keep your available time in mind.
Prepare Well
A lot of work awaits you before you even start assembling your tripod. For example it pays to map out and photograph your chosen site in advance. Ideally at night, when the whole scene is unveiled including all of its luminous details, which you might not notice during the day. This will also help you determine the exact location of the North Star. (This article is tailored for the Northern Hemisphere—but we’ll be pleased to read your notes on star trail photography in the Southern Hemisphere in the comments.) All the other stars will be spinning around it.
Don’t forget to also check the phase of the Moon. It’s generally not very welcome when you’re photographing star trails. Sometimes, though, it does resolve the issue of the scene’s lighting for those times when you’ve got more than stars in the shot. But one way or the other, it shouldn’t get into the frame.
Have Things Under Control
One basic prerequisite for photographing star trails is good weather. However, just a clear sky is far from enough.
You need to not only see the stars, but also have them over your head throughout the exposure. Otherwise isolated, broken lines will appear in your picture instead of solid lines. With a little exaggeration we might say that you should awaken your inner amateur meteorologist, capable of predicting the situation for the next several hours.
But you should start by working with the weather currently prevailing at the site.
Acquaint yourself with the latest forecast models or satellite photos as well; they will make your guesses more precise. Meanwhile keep in mind that cloud cover isn’t the only thing that can unpleasantly surprise you—there are also temperature swings, local haze, and bursts of wind.
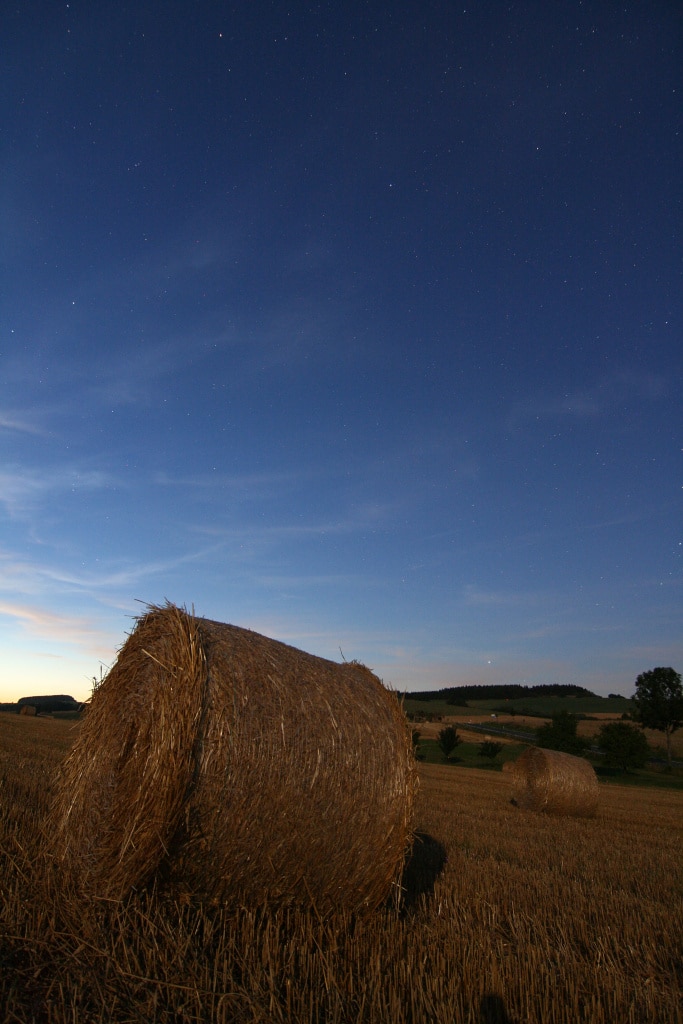
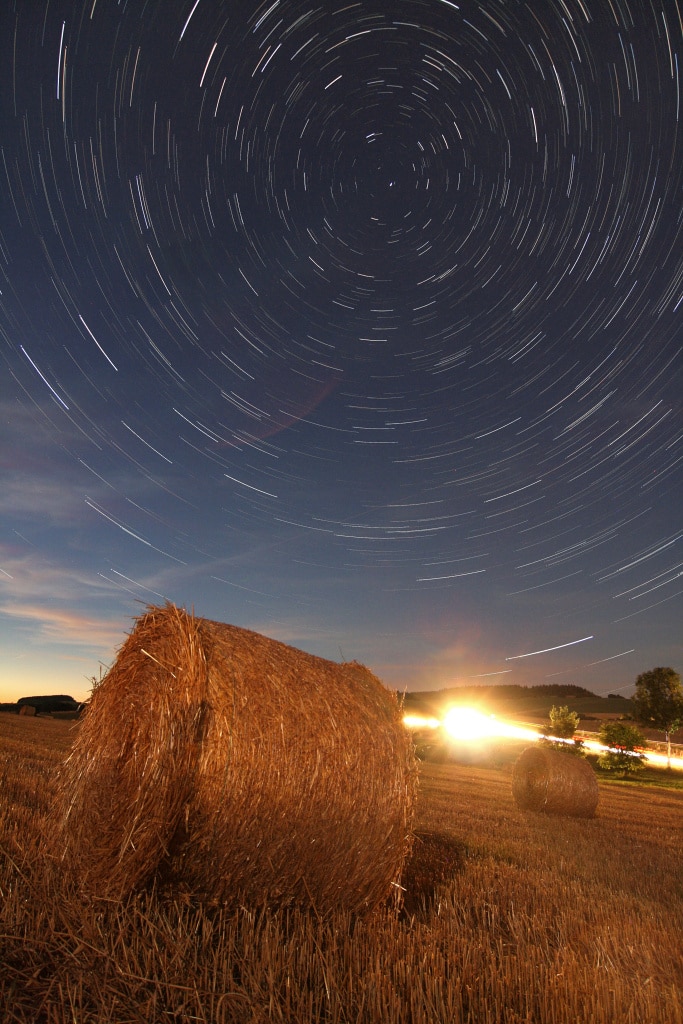
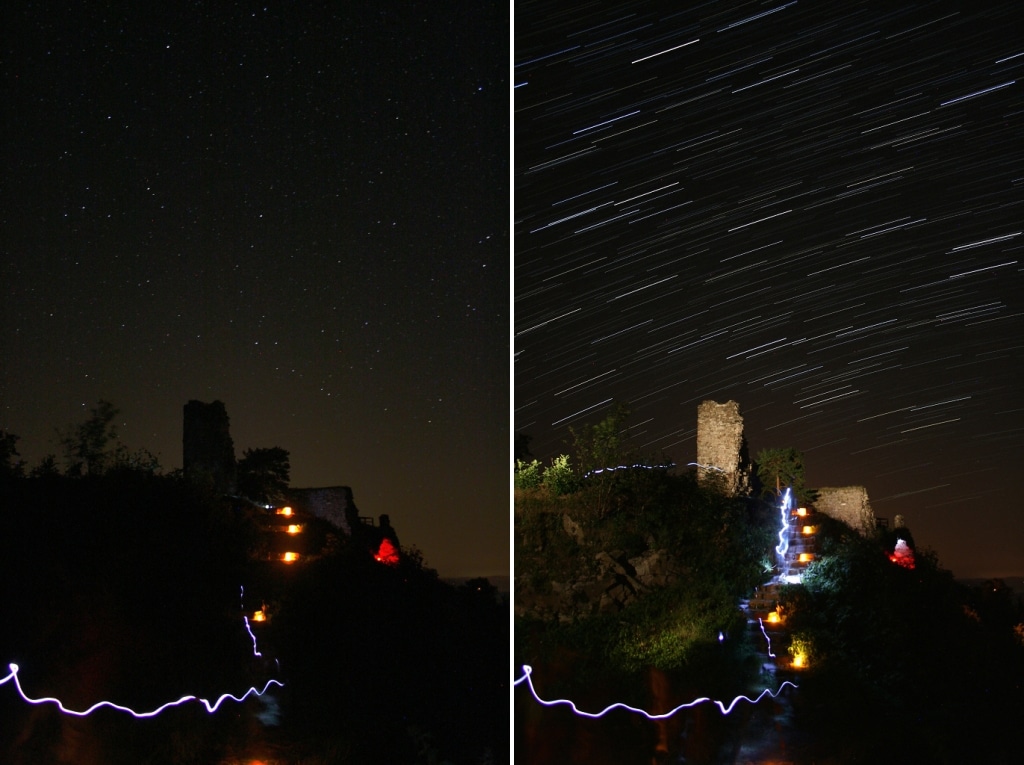
Preparing the composition; the final result. Canon EOS 400D, Tokina 12-24 mm f/4.0, 80×30 s, f/5, ISO 800, focal length 12 mm (EQ 35: 19 mm)
Shot Location is Fundamental
If you’re thinking about how to make the stars look as bright as possible in your photos of the night sky, avoid the lights of the city. Improper and above all unneeded outdoor lighting is a significant barrier for photographers just as it is for astronomers. The further away you get from distracting light, the brighter your starry background will be.
Meanwhile don’t assume that a better camera or editing software will fix light-pollution problems.
Altitude is equally important. Mountains are a popular choice here for the crystal-clear air and reduced light pollution. River valleys, on the other hand, are often a problem—you face an increased risk that after dusk, the fog will roll in.
The Right Equipment for Capturing Star Trails
The contents of your camera bag tell a lot about what results you can get and what your limits will be. So prepare everything in advance and make sure that all the individual parts of your gear are working right.
Your bag should be holding:
- A high-quality tripod—the stability of your setup is key when you’re photographing the stars. During long exposures you’re placing high demands on your tripod, and a bad choice of tripod will show through more than it does in ordinary photography.
- The right camera—to photograph star trails, you’ll need a manual mode that enables times of longer than 30 seconds, or to B (bulb) mode. So if you own a DSLR, you’re all set.
- Remote trigger—this prevents the risk that your touch will set your camera shaking.
- Proper clothing—you can only photograph star trails at night, so take the cold temperatures into account. Even in summer it likely won’t be warm enough for you to spend all night outside comfortably in just a T-shirt. So you’ll typically appreciate having a blanket or gloves packed with you.
- A battery grip with an extra battery—since you’ll be using your battery in cold weather for up to hours at a time, your built-in battery may not be enough. So pack a battery grip.
- A compass or a smartphone with a star map—if you’re just an amateur observer of the night sky, then you should make especially sure to bring this. You need to be able to find your bearings among the constellations at least well enough to be able to point to the Big Dipper and find the North Star based on it.
- A red diode—the darkness around you will tempt you to reach for a pocket flashlight. But a red diode works much better here. Although it doesn’t shine nearly as brightly as a traditional flashlight, it’s invaluable for these conditions.
Also keep in mind that viewing a display or other light source is not pleasant at all for eyes that are used to the dark. So don’t check your camera display more than you need to.
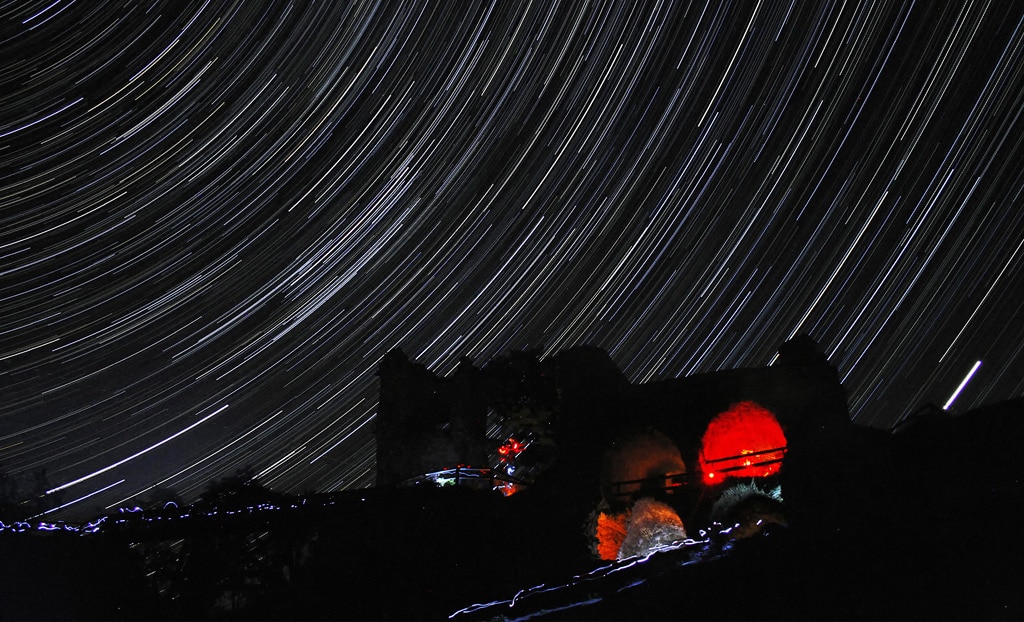
Star Trail Compositions Are About More Than Just Stars
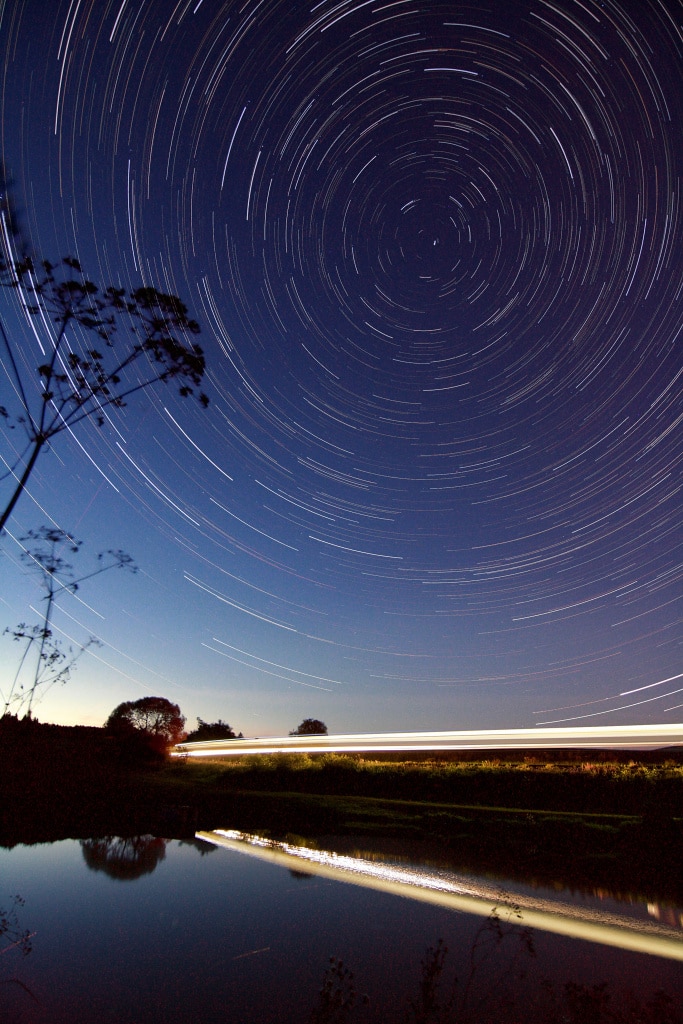
When you’re photographing the stars, their motions in the heavens will doubtlessly be the dominant element. But it’s likely that in the majority of your pictures you’ll deliberately be showing only one of the celestial poles. Working this way gives you a picture that looks good and has relatively concentrated circles.
Keep in mind that lens distortion produces deformation that’s especially amplified around the edges of the picture. Also in general the shorter the focal length (the wider the shot) you use, the more visible an oval effect you’ll get.
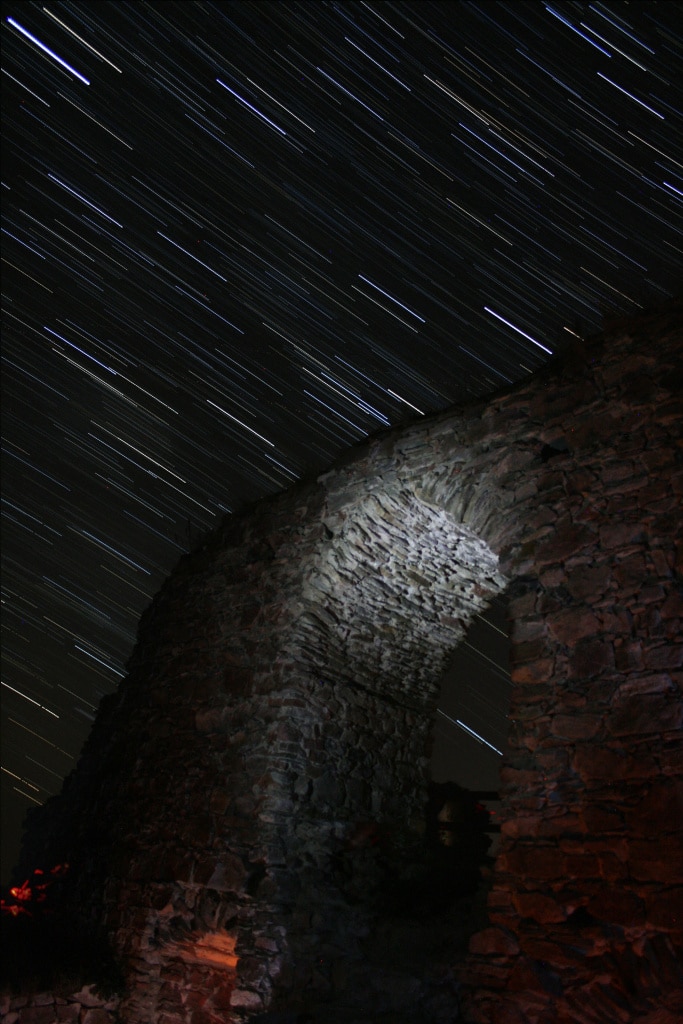
Also don’t forget about overall composition when you’re working with star trails. That also means a suitable foreground.
Keep in mind that you’re focusing to infinity, and so you may not get good detail on objects that are only a few meters away. Far away from the cities there also will not be a lot of light, which can complicate things if you’re aiming to include a dark object in your picture.
You’ll have to add light to the scene. Meanwhile you’ll also have to add it sensitively so that you don’t lose brightness up in the sky.
Proper Camera Settings
Think through and check your camera settings carefully. Focus is truly fundamental. Switch the selector to automatic, seek out a clear point in the distance, and lock the focus to that point. Then you need to go back to manual focusing without accidentally changing focus. If you’re not sure, take a few test pictures and check everything over.
It’s easy to ruin your picture of the stars’ motion before you even start creating it. The moment when you press the camera trigger is key. The mirror snaps and the shutter opens immediately after that.
To keep the camera from shaking, use a remote trigger or a self-trigger. Every modern DSLR also offers a feature called Mirror Lock-up that’s useful here. If you don’t know how to set it up, check your camera’s manual. Owners of compact and mirrorless cameras don’t have to worry about this issue, of course.
Since you’re shooting from a tripod, turn off the image stabilization feature. No matter whether it’s integrated into the lens or the camera body. Its small corrections can shake the camera instead of stabilizing it.
2 Ways to Expose When Photographing Star Trails
Handling exposure when you’re photographing the stars is naturally far from easy. This topic alone would be enough for a separate article. But to simplify things we can say that there are two main methods you can use:
- Taking a single shot in B mode.
- Taking multiple shots with shorter times (still in the dozens of seconds) and then joining them.
Both approaches have their advantages, but as things always tend to be, neither one is a clear winner. Nonetheless the single-shot method is far simpler.
Not even an exposure meter—so reliable at other times—will help you with exposure settings here. Because you need to gather as much light as possible onto your camera’s chip, your ideal settings might look for example like this:
- f-stop—Unless you really need to do otherwise (bad optical qualities, depth of focus), choose a wide-open aperture.
- ISO—This is a compromise between the amount of noise and the brightness level; typical values are ISO 800–3200.
- time (overall)—A star’s apparent motion covers 1/24 of a circle every hour, which is not a lot. So I recommend shooting for no less than one hour—which really is the absolute minimum—when you’re creating wide-angle views with the North Star. With focal lengths above 100 mm, however, shorter times will suffice.
The magic of photographing the motion of the stars lies in gaining new experience and in being able to take inspiration from similar pictures by other photographers. So give everything a try and share your experience with us too. Here’s wishing you lots of clear nights.
There are no comments yet.