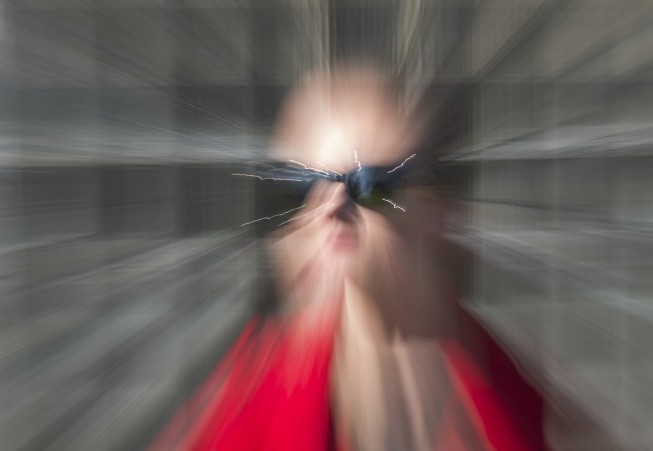
A Little Trick That Roars

Computer editing can give a photo a sad atmosphere or a happy one, or help you to emphasize part of a picture. But if you want for an effect to look good and realistic, then you need a solid grasp on how to work in your editor… and not every photographer does. So let’s take a look at how to achieve one interesting effect “analog-style,” without using an editor. All you need to do is break the rules a bit and use a lens that lets you manually change the focal length.
Imagine a situation where you’ve just taken a shot and you can tell from the display that this static scene could really use some motion. If you want a more dynamic photo, but not much is moving in front of the lens, then there’s nothing more simple than to supply motion by changing the focal length.
This trick in 10 words: you change the zoom just as you’re taking the picture. What’s great about this is that you can double-check the resulting effect immediately, right on your DSLR’s display. I mention DSLRs here on purpose: for this trick you need a lens that not only lets you change the focal length, but also lets you do so manually, via twisting or “pumping” (depending on the lens type).
Of course there are also compact cameras out there whose lenses have manual (mechanical) zoom, and yes, you can use this trick on these as well.
Time for Some Theory
The best way to grasp this “zoom” trick is to know the principles behind a lens with a transfocator—that is, a lens where you can change the focal length. The changed focal length is expressed in the lens by the lens’s focus moving towards, or away from, the sensor.
Ultimately it’s all there right in the name—“changing the focal length.” Focal length is really about the distance from the lens to the plane where the sensor lies. The higher the focal length, the higher the zoom, and vice versa. Practically speaking, zoom “crops” the edges and the framing of the photo, and that’s what’s most fundamental for this trick.
Time for Some Practice
Now that you know how lenses with transfocators work, you also know that changing the focal length most affects the edges of a photo, while leaving the center almost unaffected. And so you know how to approach this trick. Break the typical rules of composition, and in the viewfinder, frame the subject of the photo directly in the middle.
The exposure time is also important, because you have to manage to manually twist the lens during the exposure. But if you are not using a tripod, the exposure can’t be too long, or else the photo will suffer from motion blur due to the whole setup moving (including you, the photographer). Keep in mind that you are also “zooming” during the exposure, and so you should “overshoot” a little on the old exposure guideline of “1/focal length.”
The best lenses for this manual trick are the ones with the “basic” focal length (generally 17 mm at the wide end). This trick is hard to do with a telephoto lens, because you need to use a tripod. Any exposure time short enough to make the center of the photo sharp is too short for the effect to really be visible in the picture.

Rules Are for Fools
You can make this effect weaker or stronger by varying how quickly you change the focal length and how much distance this change covers. You can also create an impression of zooming in or zooming out, by decreasing the focal length (to zoom out) or increasing it (to zoom in). the focal length. There are no rules or borders here; what you do is up to you.


There are no comments yet.