Aviation Photography: Take to the Sky for the Biggest Adrenaline Rush
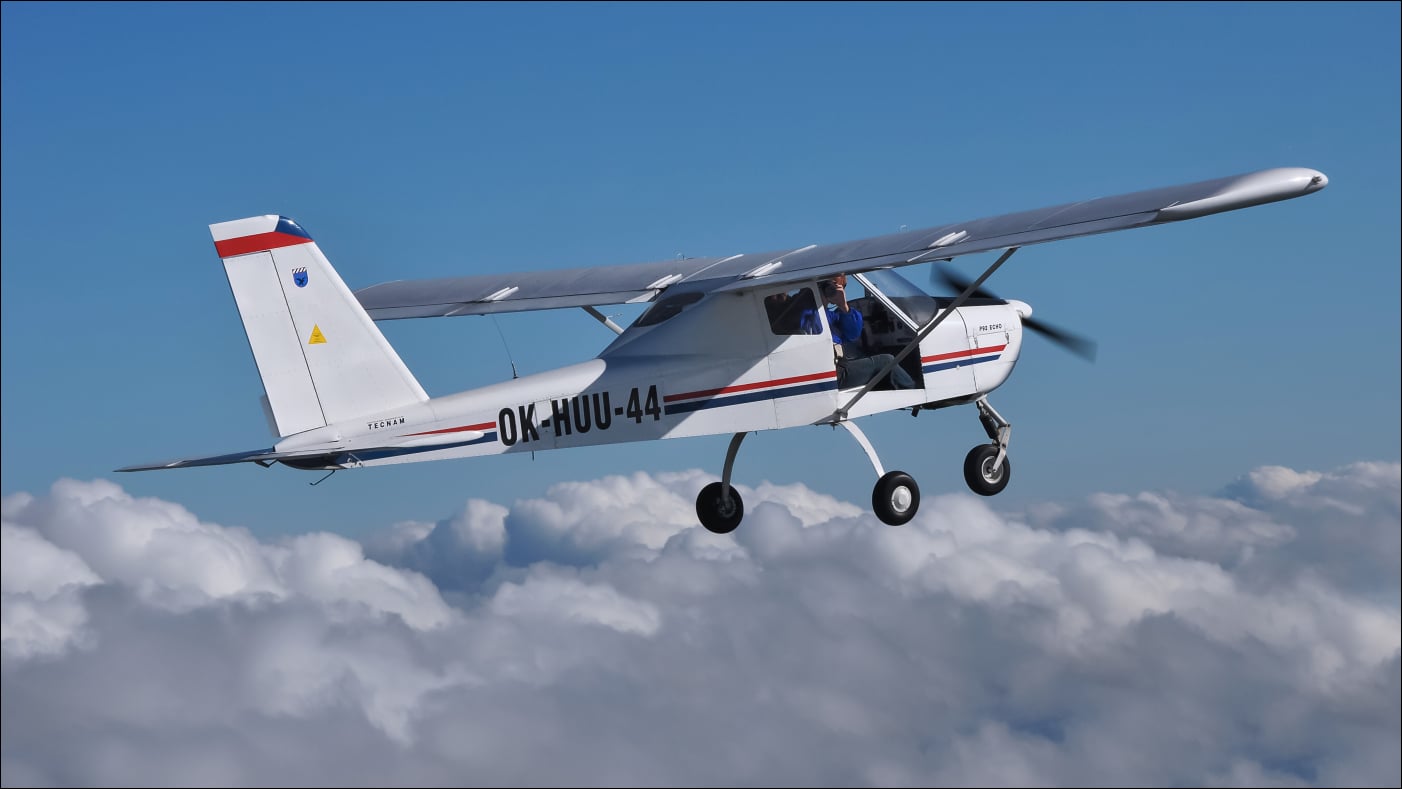
Welcome to my office. It may be a bit cramped, drafty, and there’s no Wi-Fi. Come and learn how those seemingly simple aerial images of landscapes, different objects, and even planes in flight come to be. We’re ready for takeoff—Buckle up, it’s going to be a bumpy ride.
Long long ago, in a kingdom far far away…these fairy tale beginnings are always beautiful. Let’s skip right over them and fly into a mythical land filled with legends about forces and great heights.
The cover photo was taken by our fellow pilot, Luboš Baramov, in a second plane during an aviation photography flight over the Orlík Dam. The planes got quite the workout and climbed to heights of around 2.5km.
Wind in the plane, wind in your hair, and a hole in your wallet
Aviation photography can be divided into three types:
- Photography of airplanes from the ground
- Photography of ground objects and landscapes from the air
- The most challenging—Air-to-air (A2A) photography or photography of an airplane flying next to you
I mainly shoot from a P 92 Ultralight Echo with no side doors. It’s a modern, sophisticated machine, and renting it is more affordable than renting slightly larger and more comfortable planes like a Cessna. These larger planes are two to four times the price depending on the type. However, the lower price of the P 92 will cost you in terms of comfort, awkward positions while shooting, vibrations, prop wash (wind from the propeller), a very tight cockpit, an obstructing wing strut, etc. If you decide to accept these challenges, you can take to the air.
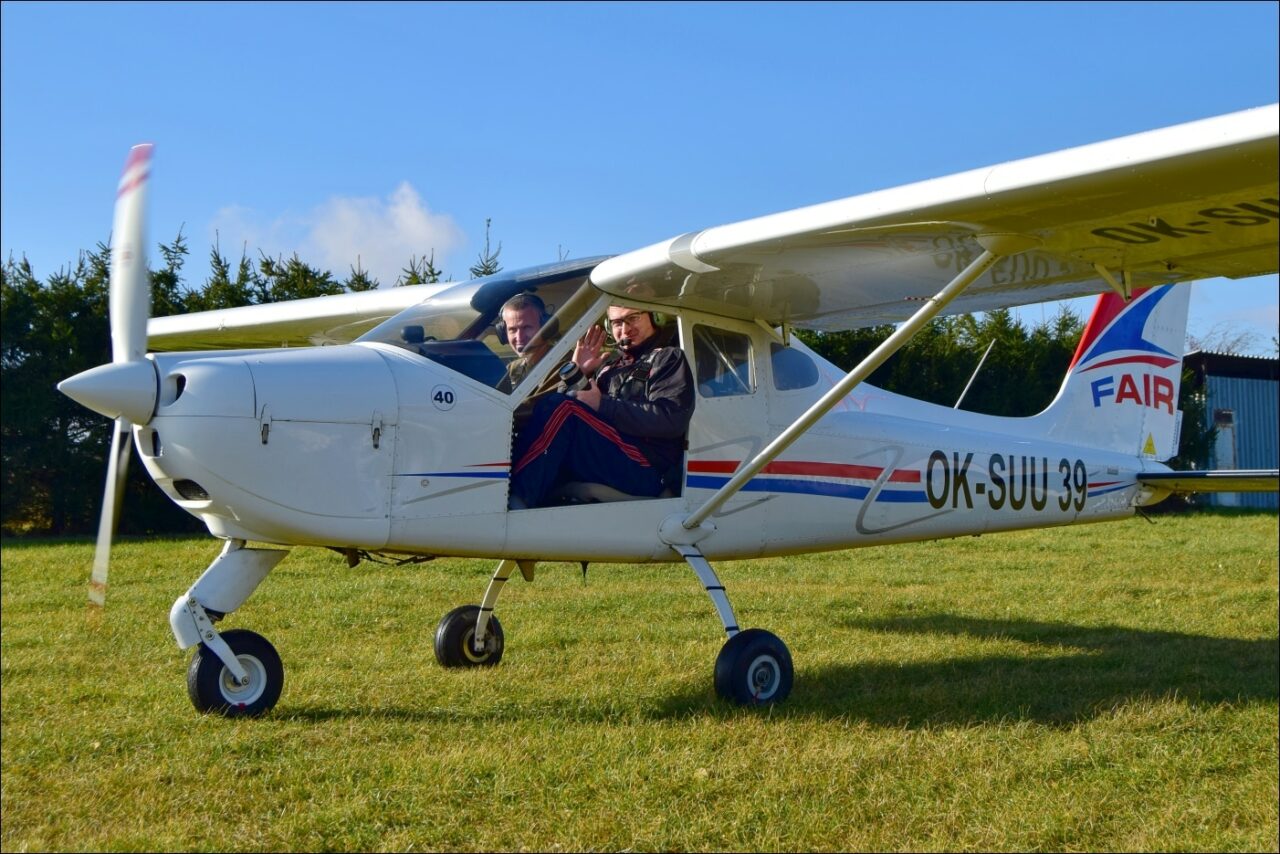
Many people, including pilots, think aviation photography is very simple. You fly somewhere, press the shutter button, and done. We can’t forget that even when shooting from a plane, the rules of composition, exposure, and other rules apply. Due to the unique conditions aboard, following these rules is hard, even for the pilot. The pilot is the one at the controls who can help you with a correct flyover of a chosen subject, in addition to the sun and composition.
Before the flight, you need to know the exact position of the sun for a specific location. If possible, adjust your flight time accordingly. With the help of new mobile apps, this is no longer a problem. If you’re trying to get the best possible pictures, it’s a good idea to discuss if it is possible to fly over your chosen location and how with the pilot beforehand. You need to plan for the altitude, speed, direction, etc. Aviation regulations are extremely strict. Another issue is the structure and cost of the aircraft. Despite some discomfort and no side doors, I prefer high-wing ultralight (ULL) planes.
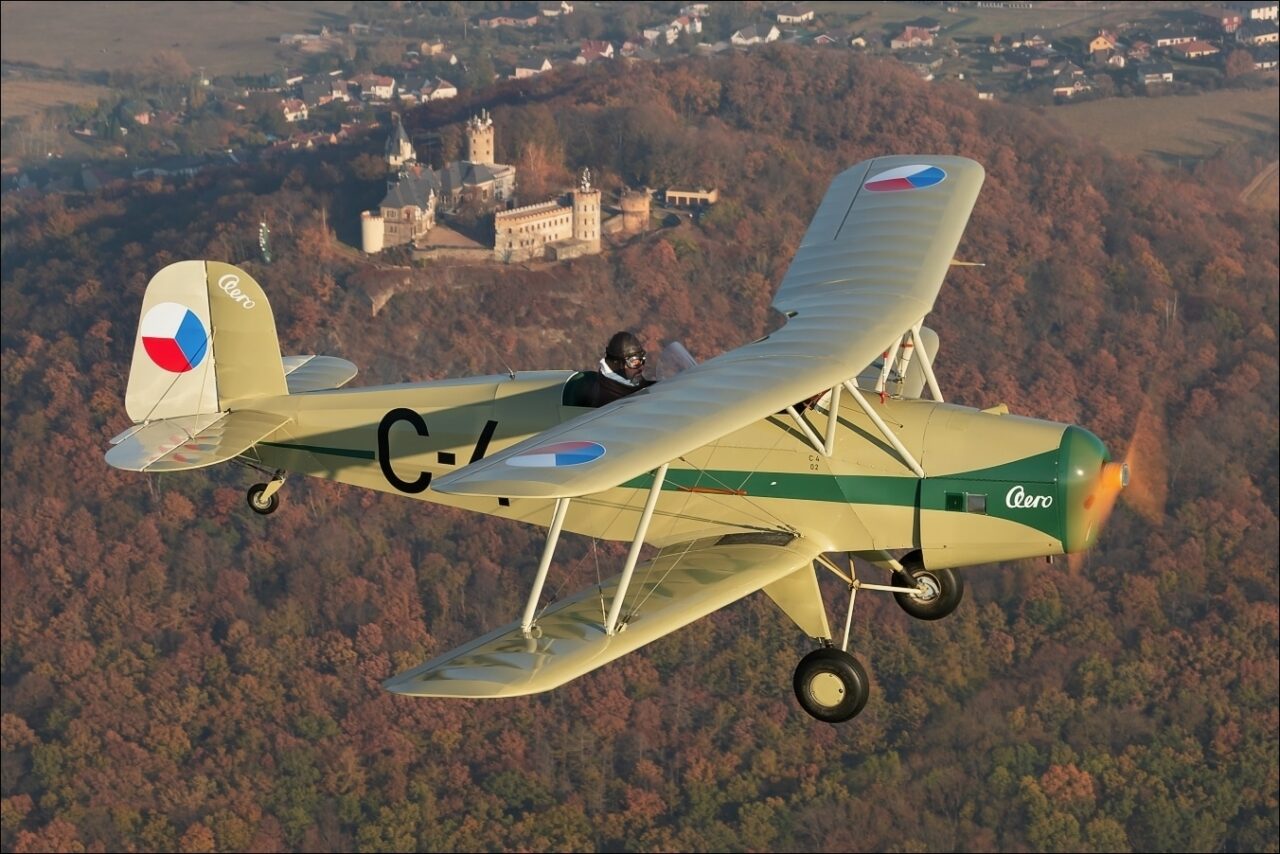
With a replica of the famous C4 biplane over the Doubravka Castle near Chomutov. The photo was taken on Nov. 29 when the temperatures up high were already very cold. The photo doesn’t show the temperature inversion which made flying difficult that day. We had to zigzag and fly around large white areas where the gaps revealed the ground and hilltops peeked out at us.
There are issues with glare and image distortion in closed-cockpit airplanes because you have to shoot through plexiglass. The trend toward tinted glass eliminates any chance of quality photography. You may be able to occasionally snap something, but an “occasional something” is not good enough. For aviation photography, we need a specific subject in an exact location.
When you’re in the air, you can’t simply move a few meters to the left or right and wait for the sun. You have to be ready and sometimes improvise on the spot. If you miss a shot, you can’t repeat it even if you try. Prolonging your flight will not only mess up your budget, but after landing, can also mess up your relationship with your subject/pilot.
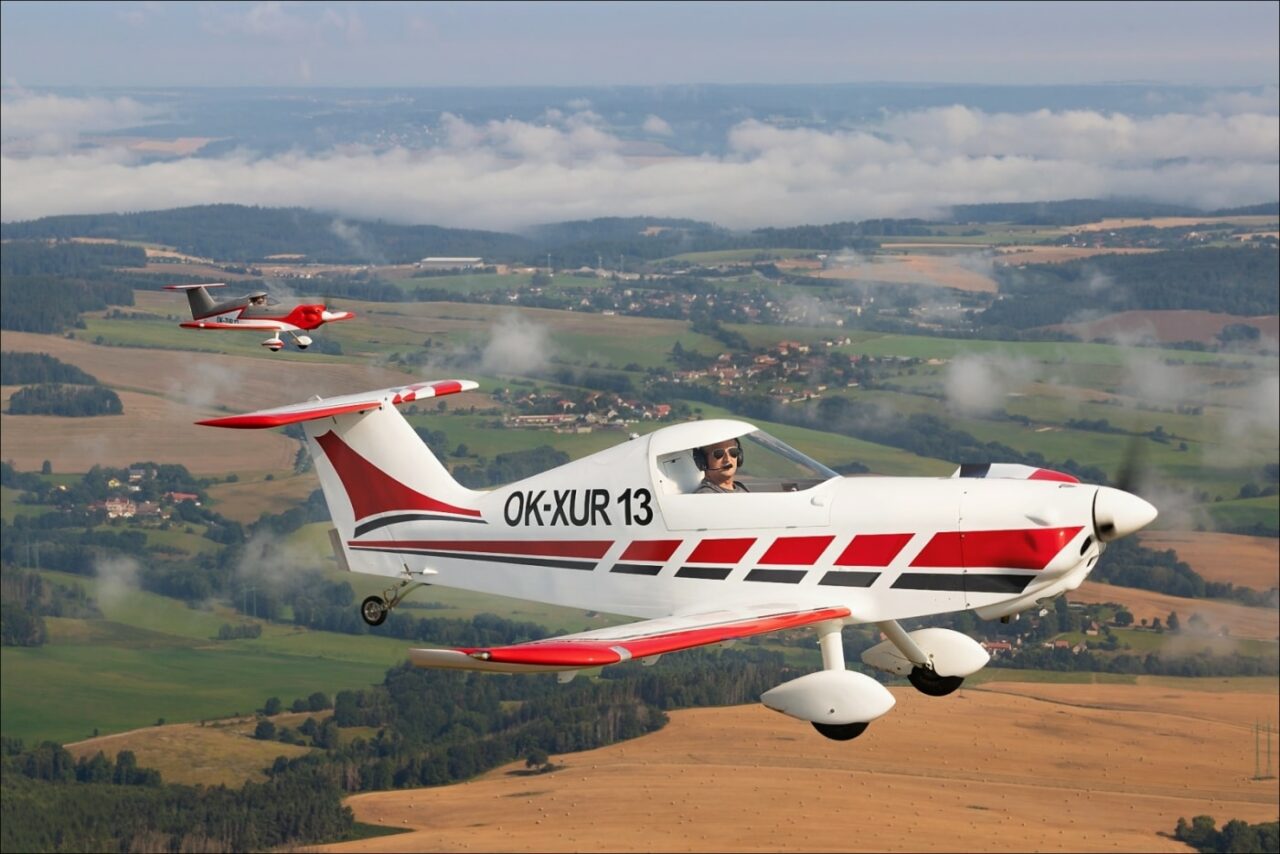
With dwarf airplanes at the Švihov Reservoir. These mini airplanes are called SD-1 and when you see the pilot’s head in it you wonder how they even got in.
What tools do you need for aviation photography?
For an aviation photoshoot, you can use whatever you find on hand. I am more of a Canonist and when I was starting, I used a Canon EOS 400D with a 17-70mm Sigma lens. Over the years, I have gradually worked my way up to the newest Canon EOS R. It’s still waiting for its aviation debut. I used to have the Canon 6D Mark II, but I can’t exactly sing its praises.
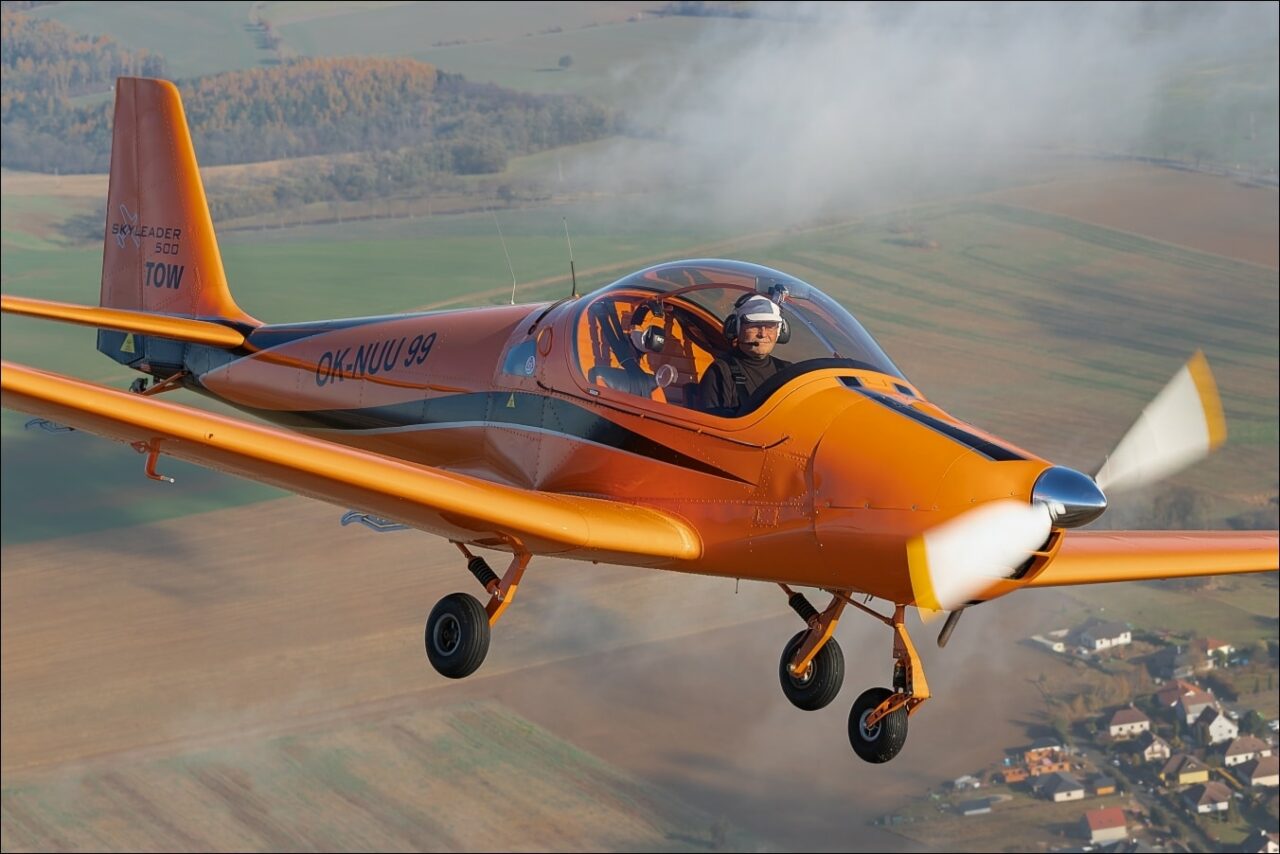
A close-up of the Rakovnik Skyleader 500 from a fall shoot. Small clouds were chasing us at lower altitudes and the bigger clouds were an important part of the background. The propeller gave me a lot of trouble. The shutter speed was too fast to make it blurred, even when we were close. Unfortunately, we were flying at slower speeds which also affected the blur.
For lenses, I use the Canon 24-70mm, f4, LIS USM and the Canon 70-200mm, f4, LIS II USM. A UV filter is a must. Not so much for the UV light, but for lens protection. In an open-cockpit aircraft, strong prop wash and airborne particles can act like an abrasive paste. Even with the utmost care, this will destroy your lens over time.
For shooting castles, landscapes, dams, etc. I use shutter speeds between 1/500 and 1/1000. I sometimes add image stabilization. I used landscape f-numbers of 8–13, and if I need to increase the focal length, I shoot with an even more closed aperture. Depending on the altitude of the flight, 30-70mm is enough.
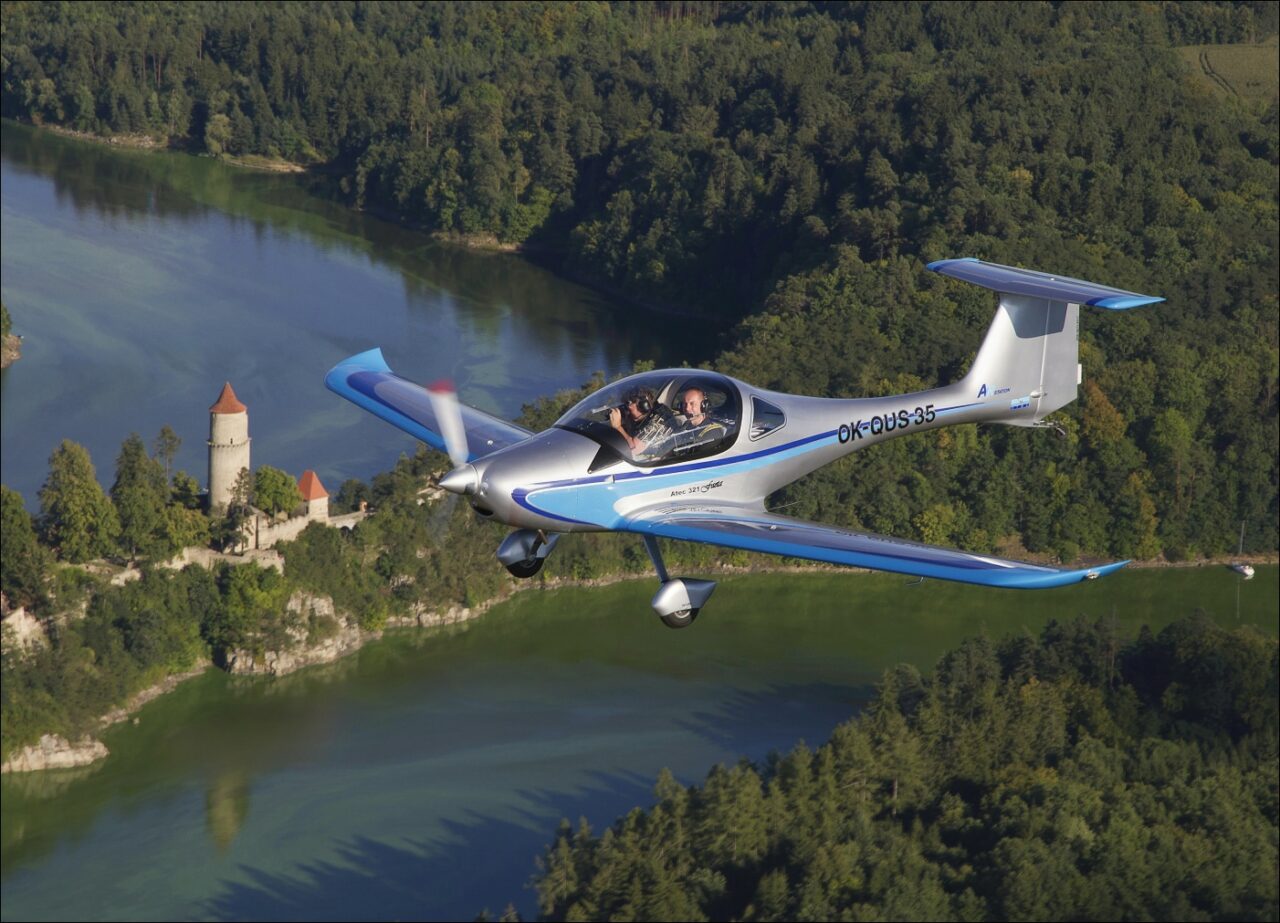
The Faeta aircraft over the Zvíkov Castle. My colleague Luboš was nervous before his first experience of this kind, but as we took off he succumbed to the beauty and couldn’t stop taking pictures. He was lucky to be able to shoot through the plexiglass cockpit and even through a small sliding window. Unfortunately, windows suitable for shooting landscapes are rarely used in aircraft.
Editing aviation photos is a relatively simple process. I usually fine-tune exposure so it is equal to one-third to two-thirds of an f-stop lower. Bright buildings or leading edges of aircraft wings tend to be overexposed. Some basic adjustments with a bit of playing around with the effects brush are usually enough.
When you want more than just landscapes
Over the last few years, I’ve started intensively doing the most adrenaline-filled type of aviation photography, air-to-air (A2A). A2A photography falls under sports photography.
I would categorize it as sport, and sometimes extreme sports photography. Despite its challenges, it constantly beckons me. Not only me, but even my wallet which would blink red in warning.
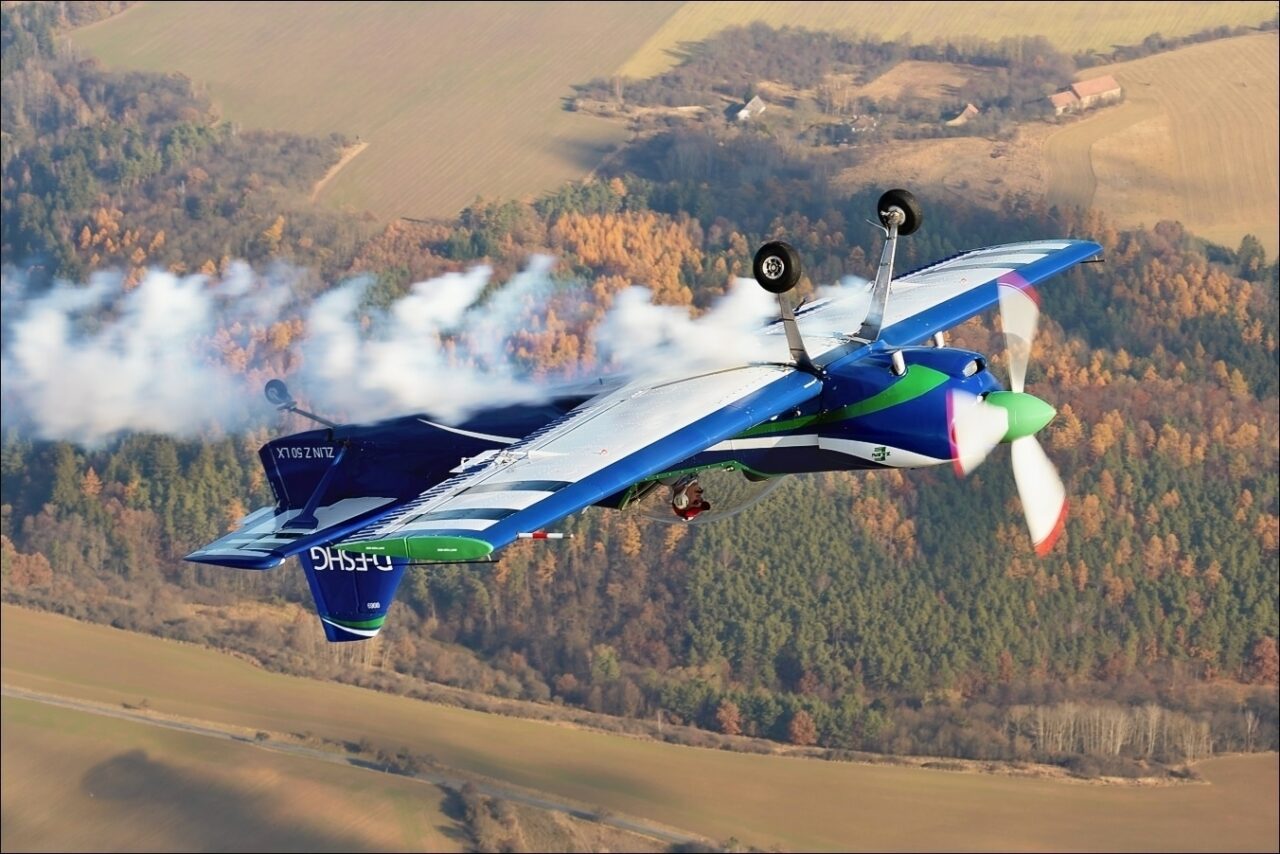
A legend in the clouds. The Zlín Z–50L is the Czech aerobatic legend from the late 1970s and the pilot is the legendary Jiří Pospíšil. He flew with the former Czechoslovak air team and celebrated success together with other famous aerobatic pilots, including Ivan Tuček. Getting a legendary aircraft with high operating costs and a legendary pilot in front of the lens at the same time was incredibly lucky.
Solid ground is way down below, you’re bouncing around in a tiny aircraft, and the harsh prop wash makes your cheeks flap. The cheerful pilot does a sharp maneuver that pushes you back in your seat, almost pushing your brain through your ears, and then tries to go back using the opposite maneuver. You just hope you can keep your lunch down.
These types of landscapes are hard to come by. In my case, it only happened twice over my 14 years as a photographer. Once, during a parachute jump, where the pilot was intentionally doing these types of aerobatics. The second time was when the German skies and thermal air currents were playing a rough two-hour game of basketball with us and our little plane on the way to Peenemünde over the Baltic Sea. At halftime at Finow Airport, some were talking with air traffic control, and some were hunched over the toilet.
Undeterred by these two turbulent events, I continue to choose to fly in an open cockpit, while normal people are used to having planes with doors. I enjoy the view of the open space, focus on the biplane flying next to us, and yell instructions to the pilot to straighten the shot I want.
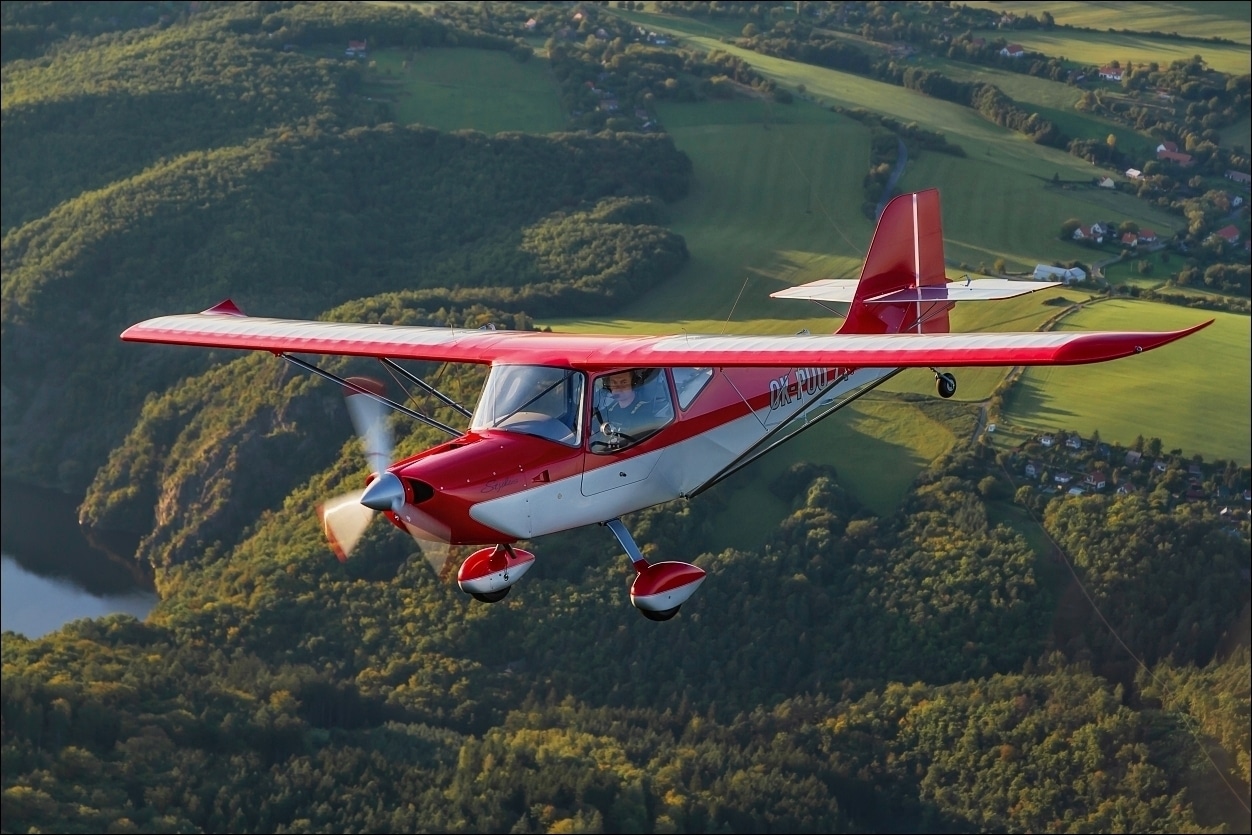
With the Stylus over the Slapy dam. This high-wing aircraft was one of my first five models for air-to-air (A2A) photography.
For the past 14 years, I have been mainly flying with my pilot, Tomáš Doležal. He is already an experienced matador not only in terms of aviation, but also photography. He knows exactly what I want to see in the camera viewfinder and how to fly to get it. Due to thermals and wind, his airplane is always going in all directions. Getting into the best position and holding it is a feat worthy of a true professional. The quality of the photography, not only in terms of composition, is thanks to him.
Propellers should be spinning
When shooting aircraft with propellers, you need a longer shutter speed than with gliders. This is for the propeller to form a perfect circle even when everything else is in constant motion. The propeller speed, distance from the subject, and camera angle all affect exposure. I frequently use full lens stabilization.
Gliders are great for getting the propeller just right. Everything is moving and shaking, but a fast shutter speed is not a problem. The f-number in both cases depends on how sharp you want the background and what focal length you use. The sharpness of the background is often a gamble. Just a tiny sway or movement and your focus and composition have changed, and the background is more distant due to the change in camera angle. Everything is different than it was just a second ago.
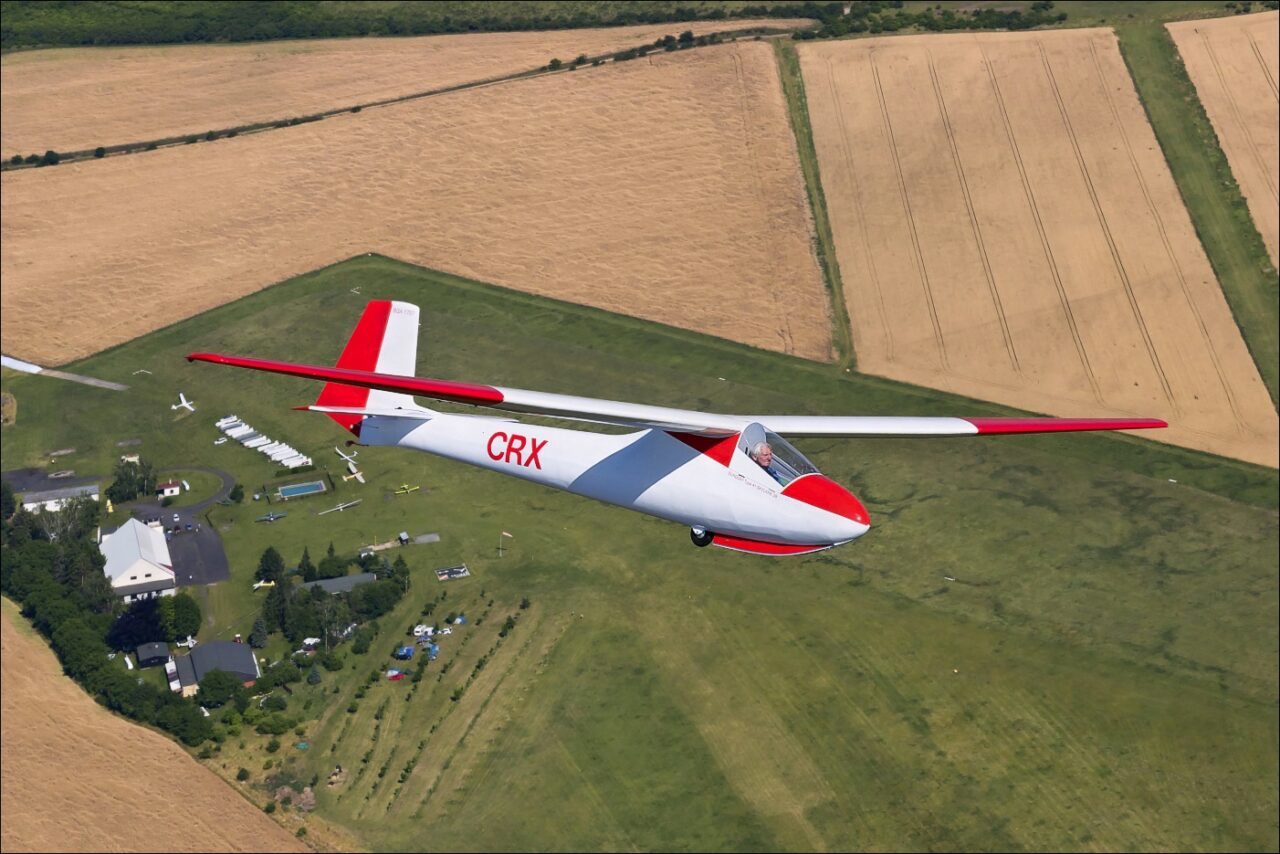
Two legends at once. The restored Slingsby 41 Skylark 2B English glider and restoration legend, Jiří Leník. His crafty Czech hands have brought many dilapidated gliders back to life. It’s incredible how lively and hardworking he is at his age. The airport below us is also famous. It’s the birthplace of Czech sailing, Raná u Loun.
I use a Canon 70–200mm f4 lens. Longer lenses in tight places don’t hold the shot as well and shutter speeds of 1/250–1/400 in shadowy conditions are challenging even with an image stabilizer. It’s a good idea to do photo flight excursions in the late afternoon, when thermals are calmer, and the aircraft doesn’t move as much. The best time to fly is when the ground below you is the only thing moving. Unfortunately, the time of the shoot often depends on different circumstances that have to coordinate. The result you get may not be the best, but hopefully something you can still work with.
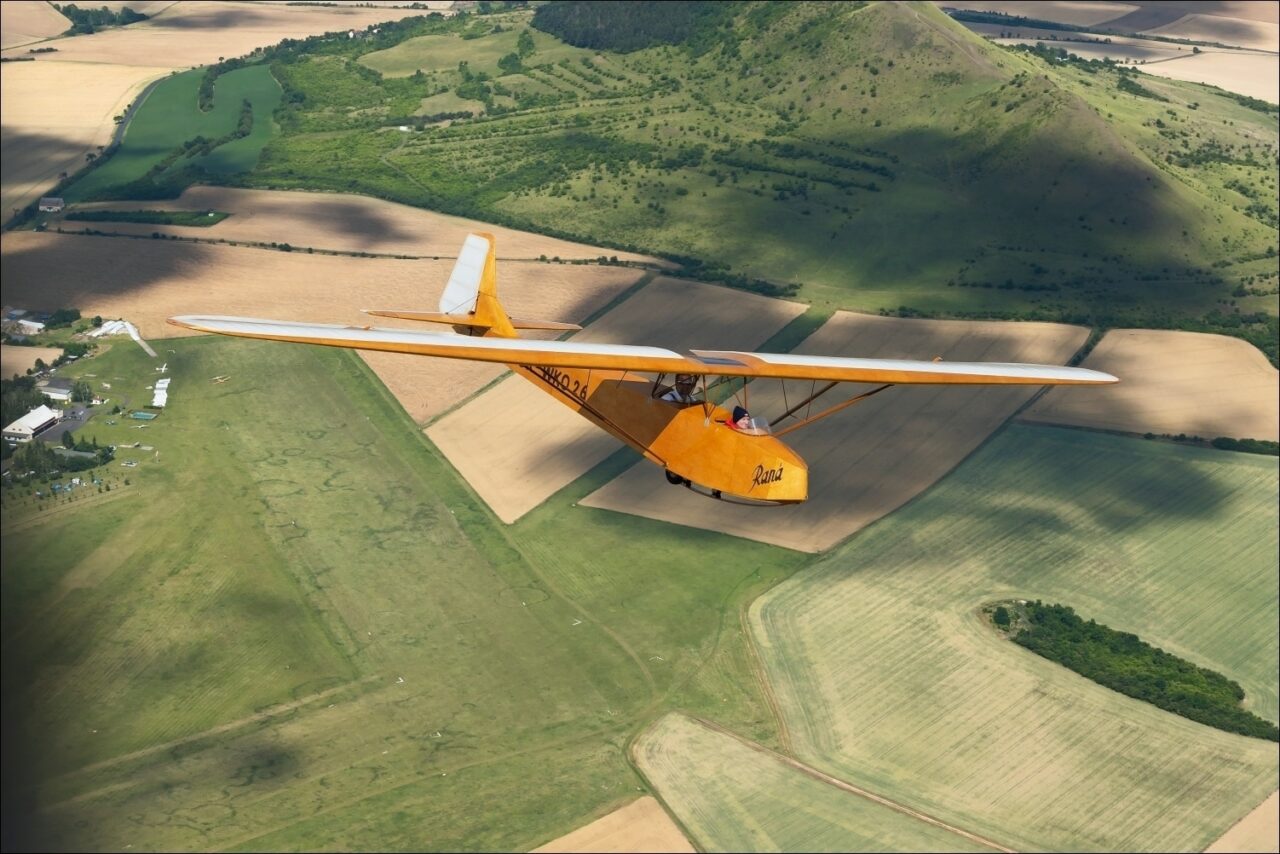
A replica of the historical Gray Wolf glider.
Aviation pros are comfortable shooting from the open rear cockpit of a cargo plane or a big Cessna, with subjects flying just a few meters in front of their cameras. It’s a lot of fun at a high price and maintaining a shutter speed of 1/125 is much easier. The propeller forms a nice circle, and the photo is born. But I wouldn’t trade it. The aircraft I photograph in is among the smaller and slower aircraft out there, but I like them all the more for it. Overcoming the harsh conditions of “more affordable” photography is also a challenge. One that I’m not going to pull out the emergency parachute on (if there even was one).
Over the last two years, I focused on photography of vintage aircraft and replicas. If you’ve ever had the chance to sit in an airplane that has no doors and in this beautiful wide-open space, another aircraft or two appear, you’re filled with adrenaline and excitement at the beauty. If the aircraft also happens to be vintage, you’re in for an adrenaline rush that can make you boil over in excitement. I’ve had the privilege of having a couple of vintage planes piloted by aviation legends. Words cannot describe the feelings of joy, excitement, and fear.
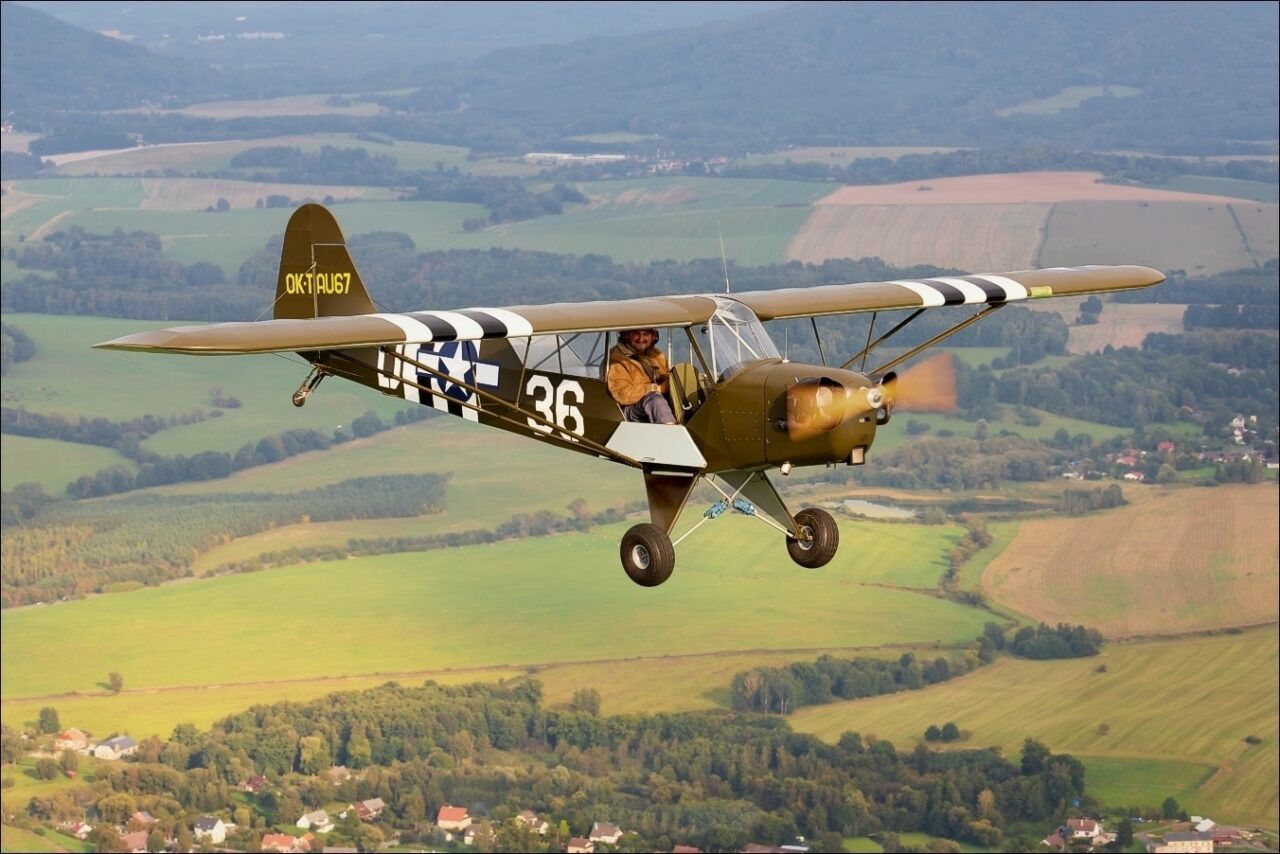
A Piper replica with the invasion stripes of Normandy flew with us around the former military airport, Hradčany u Ralska. The sun was frustrating. We were literally chasing every hole in the clouds to get at least a bit of decent light.
I believe many of you have experienced these types of moments in your photography on the ground, whether it is during sports photography or a stunning sunrise in the mountains.
When I was a kid, I always wished these types of moments would last forever. It is with great regret on each flight that I announce the end of the shoot and try to enjoy the last seconds of our flight together before the subject separates and the planes head in for landing.
We’ve also come to the final landing of my article about aviation photography. There are a great number of more stories to tell like with any photography genre. But we’ll have to save those for another time.
Did you enjoy reading about aviation photography? Let us know in the comments.
There are no comments yet.